Irresistible Creamy Cowboy Butter Chicken Pasta Recipe

irresistible, creamy, cowboy butter, chicken pasta, savory, flavorful, indulgent, satisfying

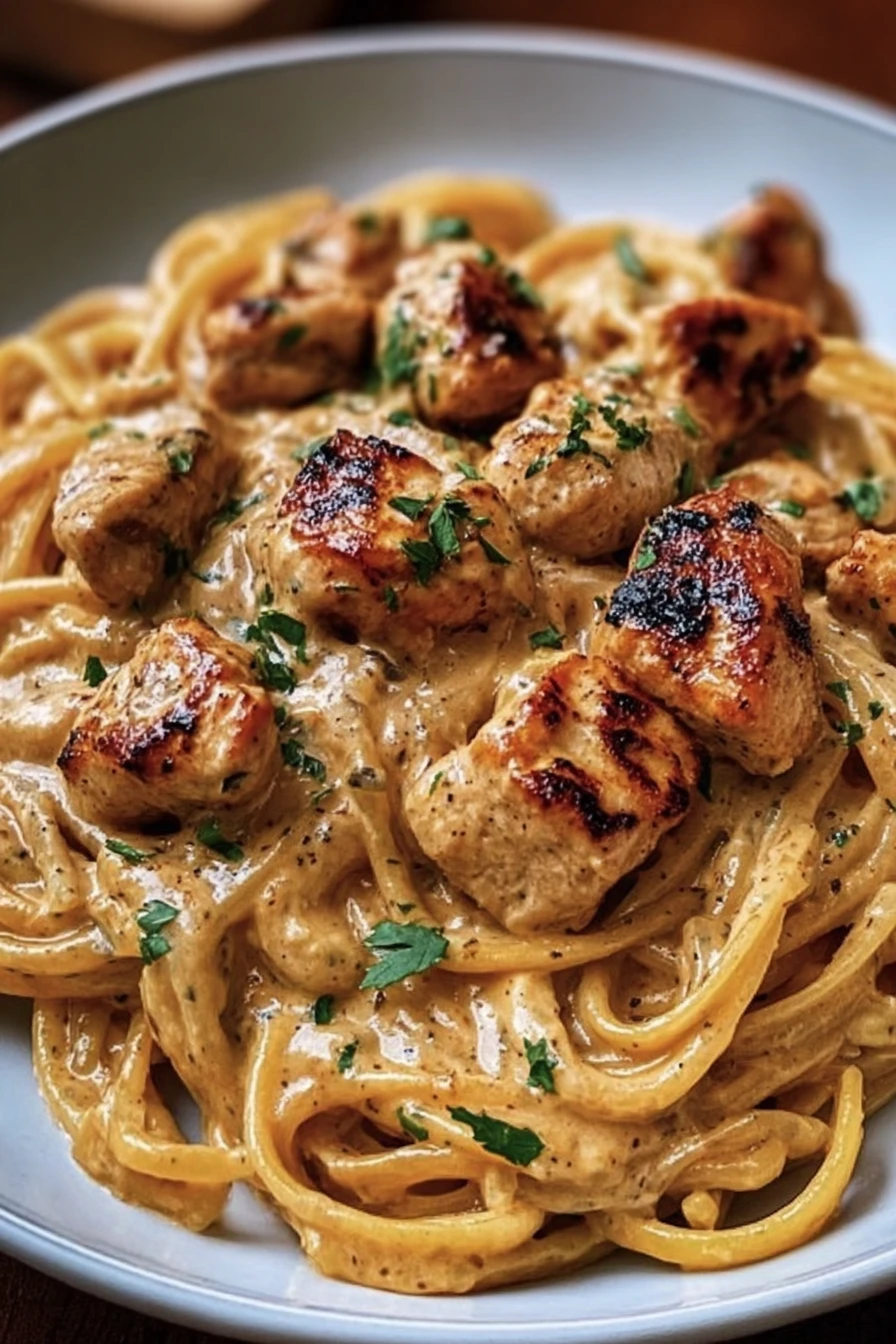
Hey there, friends! I’ve got a real treat for you today with my go-to Irresistible Creamy Cowboy Butter Chicken Pasta Recipe. A few years back, I stumbled upon this dish while experimenting in the kitchen on a rainy Saturday, desperate to whip up something comforting yet exciting for my family. Let me tell you, the rich, garlicky cowboy butter sauce paired with tender chicken and perfectly cooked pasta had everyone begging for seconds!

I’ve made this Irresistible Creamy Cowboy Butter Chicken Pasta Recipe more times than I can count now, tweaking it here and there to get that just-right balance of creamy decadence and bold flavor. Honestly, it’s become a household staple, especially on busy weeknights when I need a guaranteed crowd-pleaser.

So, if you’re ready to dive into a meal that’s equal parts cozy and downright addictive, stick with me. I’m sharing all my secrets to nailing this Irresistible Creamy Cowboy Butter Chicken Pasta Recipe at home!

Why You’ll Love This Recipe

I’ve found that this Irresistible Creamy Cowboy Butter Chicken Pasta Recipe is a total game-changer for anyone craving a hearty, flavorful meal without spending hours in the kitchen. The cowboy butter—a magical mix of garlic, herbs, and a kick of spice—melts into a creamy sauce that clings to every bite of pasta. And don’t even get me started on how the juicy chicken soaks up all that goodness!

In my kitchen, this dish is a surefire way to bring smiles to the table, whether it’s a casual family dinner or a last-minute gathering with friends. It’s got that “wow” factor, but it’s secretly so easy to pull off. Trust me, you’ll love how this Irresistible Creamy Cowboy Butter Chicken Pasta Recipe makes you look like a pro chef!

Ingredients List

Let’s talk about what you’ll need to make this Irresistible Creamy Cowboy Butter Chicken Pasta Recipe come to life. I’m all about using ingredients that pack a punch, and I usually grab high-quality stuff to elevate the flavors (though, honestly, even pantry staples work in a pinch). Here’s the breakdown for a dish that serves about 4-6 hungry folks.

For the Chicken and Pasta

  • 1 lb (450g) boneless, skinless chicken breasts, cut into bite-sized pieces
  • 12 oz (340g) penne pasta, or any short pasta you’ve got on hand (I prefer penne for how it grabs the sauce)
  • 2 tablespoons olive oil, for searing the chicken to golden perfection
  • 1 teaspoon salt, to season the chicken
  • 1/2 teaspoon black pepper, for a little bite

For the Cowboy Butter Sauce

  • 1/2 cup (1 stick, 113g) unsalted butter, softened (I usually buy European-style for extra richness)
  • 3 cloves garlic, minced fine for that bold kick
  • 1 tablespoon fresh parsley, chopped (dried works too, but fresh is my go-to)
  • 1 teaspoon smoked paprika, for a smoky depth
  • 1/2 teaspoon red pepper flakes, adjustable if you’re spice-shy
  • 1 cup (240ml) heavy cream, for that luscious, creamy texture
  • 1/2 cup (50g) grated Parmesan cheese, for a nutty, salty finish

I’ve played around with this Irresistible Creamy Cowboy Butter Chicken Pasta Recipe enough to know these amounts are spot-on for a balanced dish. If you’re missing something, don’t sweat it—substitutions can work (more on that later). This lineup is what makes the magic happen, so let’s get cooking with this Irresistible Creamy Cowboy Butter Chicken Pasta Recipe!

Variations

One thing I adore about this Irresistible Creamy Cowboy Butter Chicken Pasta Recipe is how versatile it is. Over the years, I’ve switched things up depending on what’s in my fridge or who I’m feeding, and it always turns out delish. Here are some twists I’ve tried (and loved) to keep this dish fresh every time.

  • Spicy Kick: Toss in an extra 1/2 teaspoon of red pepper flakes or a splash of hot sauce to the cowboy butter sauce for some serious heat. My husband loves this version, though I warn ya, it’s not for the faint of heart!
  • Veggie-Packed: Add sautéed bell peppers, spinach, or mushrooms when you cook the chicken. I tried this once when I was low on meat, and it bulked up the meal beautifully.
  • Cheesy Overload: Mix in an extra 1/2 cup of shredded cheddar or mozzarella for an even gooier sauce. My kids always ask for this spin on the Irresistible Creamy Cowboy Butter Chicken Pasta Recipe.
  • Herby Twist: Swap parsley for fresh basil or thyme in the cowboy butter for a different flavor vibe. I did this by accident once and ended up loving the change.
  • Seafood Swap: Ditch the chicken for shrimp or scallops—cook ‘em quick in the same sauce. I made this for a fancy date night, and wow, was it a hit!
  • Low-Carb Option: Use zucchini noodles or spaghetti squash instead of pasta. I’ve done this when I’m trying to lighten up, and it still satisfies with this Irresistible Creamy Cowboy Butter Chicken Pasta Recipe.
  • Gluten-Free: Grab gluten-free pasta if you’ve got dietary needs. I’ve used it for friends with allergies, and they couldn’t tell the difference.

Honestly, playing with this Irresistible Creamy Cowboy Butter Chicken Pasta Recipe keeps it exciting in my kitchen. Got a funky idea? Go for it—I’m all ears for new spins!

Servings and Timing

When it comes to planning this Irresistible Creamy Cowboy Butter Chicken Pasta Recipe, I’ve got the timing down pat from making it so often. In my experience, it’s a pretty quick dish for how fancy it feels, perfect for weeknights or impromptu dinners. Here’s the breakdown so you can schedule your kitchen time.

  • Prep Time: 15 minutes
  • Cook Time: 25 minutes
  • Total Time: 40 minutes
  • Servings: 4-6 portions

I usually whip up this Irresistible Creamy Cowboy Butter Chicken Pasta Recipe for my family of four, and there’s often enough for leftovers the next day (if my teens don’t devour it all). Adjust the portions if you’re feeding a bigger crowd, but this timing’s been solid for me!

Step-by-Step Instructions

Alright, let’s get down to business with making this Irresistible Creamy Cowboy Butter Chicken Pasta Recipe. I’m breaking it into simple steps with my own little tricks to make sure you nail it on the first try. Follow along, and you’ll have a drool-worthy dish in no time.

Irresistible Creamy Cowboy Butter Chicken Pasta Recipe recipe step-by-step guide
Delicious Irresistible Creamy Cowboy Butter Chicken Pasta Recipe prepared with love – follow this detailed recipe guide

Step 1: Cook the Pasta

Start by boiling a big pot of salted water and cook your penne pasta according to the package—usually about 10-12 minutes for al dente. I always taste-test a noodle a minute before the box says it’s done ‘cause I hate mushy pasta. Drain it and set aside, but don’t rinse; that starch helps the sauce stick!

Step 2: Prep and Sear the Chicken

While the pasta’s going, season your chicken pieces with salt and pepper. Heat 2 tablespoons of olive oil in a large skillet over medium-high heat, then toss in the chicken. Sear it for about 5-7 minutes until golden and cooked through—I like to get a nice crust on it for extra flavor. Pull the chicken out and let it rest on a plate.

Step 3: Make the Cowboy Butter Sauce

In the same skillet, lower the heat to medium and melt that stick of butter. Add minced garlic, smoked paprika, red pepper flakes, and parsley—stir it around for a minute ‘til it smells like heaven (seriously, this is the best part). Pour in the heavy cream and Parmesan, whisking until it’s smooth as silk. This is the heart of the Irresistible Creamy Cowboy Butter Chicken Pasta Recipe, so take your time here.

Step 4: Combine It All

Add the cooked chicken back to the sauce, letting it soak up all that creamy goodness for a couple of minutes. Then, toss in the drained pasta and mix until every piece is coated. I usually give it a quick taste here to adjust salt or spice—sometimes I sneak in a pinch more paprika for this Irresistible Creamy Cowboy Butter Chicken Pasta Recipe.

Step 5: Serve It Up Hot

Plate it right away while it’s nice and steamy. I’ve learned that letting it sit too long can make the sauce thicken more than you’d like, so serve pronto. This step always gets me excited to dig into the Irresistible Creamy Cowboy Butter Chicken Pasta Recipe with my family!

Trust me, these steps make the process a breeze. I’ve burned chicken before by rushing, so just keep an eye on the heat, and you’ll be golden with this Irresistible Creamy Cowboy Butter Chicken Pasta Recipe.

Nutritional Information

I’m not gonna lie, this Irresistible Creamy Cowboy Butter Chicken Pasta Recipe isn’t exactly a diet food, but it’s worth every indulgent bite in my book. I’ve crunched the numbers for a rough idea per serving (based on 6 portions), so you know what you’re getting into. Here’s the breakdown:

  • Calories: 620 per serving
  • Fat: 38g
  • Protein: 28g
  • Carbohydrates: 42g
  • Sodium: 680mg

I think enjoying this Irresistible Creamy Cowboy Butter Chicken Pasta Recipe is all about balance—pair it with a light salad if you’re worried about the calories. It’s comfort food at its finest, so I say, savor it!

Healthier Alternatives

If you’re looking to lighten up this Irresistible Creamy Cowboy Butter Chicken Pasta Recipe, I’ve got some swaps I’ve tried that still keep the flavor poppin’. I’m not always in diet mode, but when I am, these tweaks help me enjoy this dish guilt-free. Check out these options for a healthier take.

  • Lower Fat Cream: Swap heavy cream for half-and-half or even a mix of milk and Greek yogurt. I’ve done this when I’m watching calories, and it’s still pretty creamy.
  • Less Butter: Cut the butter down to 1/4 cup and add a splash of chicken broth to stretch the sauce. I tried this once, and while it’s not as rich, it works.
  • Whole Grain Pasta: Use whole wheat or chickpea pasta for extra fiber and protein. I’ve swapped this in for the kids, and they didn’t even notice with this Irresistible Creamy Cowboy Butter Chicken Pasta Recipe.
  • Leaner Protein: Go for turkey breast instead of chicken if you want to trim some fat. I’ve done it, and it still tastes great in this Irresistible Creamy Cowboy Butter Chicken Pasta Recipe.

These tweaks let you enjoy the vibe of the dish without overdoing it. Play around and see what fits your style!

Serving Suggestions

I love getting creative when I plate up this Irresistible Creamy Cowboy Butter Chicken Pasta Recipe, ‘cause a good side or garnish can take it to the next level. Here are a few ways I’ve served it that always get rave reviews at my table. Try ‘em out!

  • With Garlic Bread: Pair it with a crusty slice to mop up every drop of that cowboy butter sauce. It’s a must in my house!
  • Alongside a Salad: A simple green salad with a tangy vinaigrette cuts through the richness. I whip this up when I want balance with the Irresistible Creamy Cowboy Butter Chicken Pasta Recipe.
  • Topped with Extra Parm: Sprinkle on more grated Parmesan or even some fresh herbs for a pretty finish. I did this at a dinner party, and it looked so fancy.
  • With Steamed Veggies: Serve with broccoli or green beans on the side for a pop of color. My family loves this combo with the Irresistible Creamy Cowboy Butter Chicken Pasta Recipe.

These ideas make the meal feel complete. What’s your go-to side? I’m curious!

Common Mistakes to Avoid

I’ve flubbed this Irresistible Creamy Cowboy Butter Chicken Pasta Recipe a few times over the years, so let me save you some headaches with mistakes I’ve made. Trust me on this one, a little attention goes a long way. Here are pitfalls to dodge.

  • Overcooking the Pasta: I’ve done this and ended up with a gloopy mess—cook it just to al dente since it’ll soak up sauce later.
  • Burning the Garlic: I learned the hard way that garlic turns bitter if overcooked in the butter. Keep the heat medium and stir constantly for this Irresistible Creamy Cowboy Butter Chicken Pasta Recipe.
  • Skimping on Seasoning: I forgot to taste-test once, and the dish was blah. Season the chicken well and adjust the sauce as you go.
  • Letting It Sit Too Long: I’ve left it on the stove too long, and the sauce got too thick. Serve this Irresistible Creamy Cowboy Butter Chicken Pasta Recipe hot off the pan!

Avoid these slip-ups, and you’re in for a treat. We’ve all been there, right?

Storing Tips

Got leftovers of this Irresistible Creamy Cowboy Butter Chicken Pasta Recipe? No problem—I’ve figured out the best ways to keep it tasting great for round two. In my experience, proper storage is key with creamy dishes like this.

  • Refrigerator: Store in an airtight container for 3-4 days. I’ve found it reheats decently with a splash of milk to loosen the sauce.
  • Freezer: Freeze portions in freezer-safe bags for up to 2 months. I’ve done this, but heads-up, the texture of the Irresistible Creamy Cowboy Butter Chicken Pasta Recipe might change a bit.

Reheat gently on the stove or microwave, and you’re good to go. It’s a lifesaver for busy days!

Irresistible Creamy Cowboy Butter Chicken Pasta Recipe recipe step-by-step guide
Delicious Irresistible Creamy Cowboy Butter Chicken Pasta Recipe prepared with love – follow this detailed recipe guide

Frequently Asked Questions

I get a lot of questions about this Irresistible Creamy Cowboy Butter Chicken Pasta Recipe, so I’m answering the most common ones here. Let’s clear up any doubts so you can cook with confidence. Hit me up if you’ve got more!

Can I make this ahead of time?

Yup, you can prep the components like cooking the chicken and pasta a few hours ahead. Just don’t mix in the sauce until you’re ready to serve ‘cause it thickens up. I’ve done this for parties and it works like a charm.

Is there a substitute for heavy cream?

Absolutely, half-and-half or a mix of milk and a bit of cornstarch can work in a pinch. I’ve used these when I’m out of cream, though the texture isn’t quite as lush for the Irresistible Creamy Cowboy Butter Chicken Pasta Recipe.

Can I use pre-cooked chicken?

Sure thing! Rotisserie chicken or leftovers cut into pieces save time. Just toss ‘em in the sauce to warm through—I’ve done it and it’s super handy.

How spicy is this dish?

It’s got a mild kick from the red pepper flakes, but you can dial it up or down. I usually keep it tame for my kids, but feel free to spice it up!

What pasta shape works best?

I love penne ‘cause it grabs the sauce, but rigatoni or farfalle are great too. Honestly, use whatever’s in your pantry for this Irresistible Creamy Cowboy Butter Chicken Pasta Recipe.

Can I make it dairy-free?

You can try coconut cream for the heavy cream and a vegan butter substitute. I haven’t done it myself, but I’ve heard it works okay. Let me know if you try!

How do I reheat leftovers?

Pop it in a skillet over low heat with a splash of milk or water to loosen the sauce. I’ve microwaved it too, but the stove keeps the texture better.

Does the cowboy butter freeze well?

Yeah, you can freeze the butter mixture on its own for a month or so. I’ve made a big batch before and used it later for this Irresistible Creamy Cowboy Butter Chicken Pasta Recipe—just thaw and mix into fresh cream.

Conclusion

Well, there ya have it, my friends—everything you need to whip up this Irresistible Creamy Cowboy Butter Chicken Pasta Recipe at home. I’m so excited for you to try it and see why my family can’t get enough of this dish. If you’ve got questions or wanna share how it turned out, drop me a note—I love hearing from y’all about this Irresistible Creamy Cowboy Butter Chicken Pasta Recipe!

Conclusion

I hope you enjoyed this recipe for Irresistible Creamy Cowboy Butter Chicken Pasta Recipe! It’s truly one of my favorites, and I’m confident you’ll love it too. Remember to follow the steps carefully for the best results.

Don’t hesitate to experiment with your own variations and make this recipe your own. Happy cooking!

Honey Mustard Chicken, Beans and Potatoes

honey mustard chicken, beans, potatoes, savory, flavorful, delicious

Hey there, I’m so excited to share one of my go-to weeknight dinners with y’all today: Honey Mustard Chicken, Beans and Potatoes. I stumbled upon this combo a few years back when I was rifling through my pantry, desperate for a meal that didn’t require a grocery run. Let me tell ya, it was a game-changer!

This dish, with its sweet-tangy glaze and hearty sides, has become a staple in my house, and I’m betting it’ll win over your family too.

I remember the first time I whipped up Honey Mustard Chicken, Beans and Potatoes—my husband took one bite and gave me that “you’ve outdone yourself” look. It’s one of those meals that feels fancy but is honestly so simple to throw together. Whether you’re a kitchen newbie or a seasoned home cook, I’ve got some tips and tricks to make this dish shine.

Speaking of shining, let’s dive into why Honey Mustard Chicken, Beans and Potatoes deserves a spot on your dinner table. Stick with me, and I’ll walk you through every step to make this as tasty as it is in my kitchen!

Why You’ll Love This Recipe

I’ve found that Honey Mustard Chicken, Beans and Potatoes is a crowd-pleaser no matter who’s at the table. There’s something magical about that sticky, sweet mustard glaze over juicy chicken paired with tender beans and crispy potatoes—it’s comfort food with a little zing! In my kitchen, this meal always sparks compliments, even from my pickiest eater (yes, I’m looking at you, kiddo).

And honestly, it’s not just about the flavor. This recipe for Honey Mustard Chicken, Beans and Potatoes is a one-pan wonder, which means less cleanup for me—and for you! Plus, it’s budget-friendly and flexible enough to tweak based on what you’ve got on hand.

Ingredients List

Alright, let’s chat about what you’ll need to make Honey Mustard Chicken, Beans and Potatoes. I’m all about keeping things practical, so I’ve stuck to ingredients I usually have lying around or can grab easily at the store. Here’s my lineup, with a few notes on my personal faves.

I prefer using fresh ingredients when I can, but canned or frozen work just fine for Honey Mustard Chicken, Beans and Potatoes if you’re in a pinch. Let’s break this down into the main components for clarity.

For the Chicken

  • 4 boneless, skinless chicken thighs (about 1.5 lbs or 680g), trimmed of excess fat—I love thighs for their juiciness, but breasts work too
  • 3 tablespoons (45ml) honey, for that sweet stickiness—local honey is my go-to
  • 2 tablespoons (30ml) Dijon mustard, for a sharp kick
  • 1 tablespoon (15ml) whole grain mustard, because I’m obsessed with the texture
  • 2 cloves garlic, minced, for depth of flavor
  • 1 tablespoon (15ml) olive oil, for searing

For the Beans and Potatoes

  • 1 lb (450g) baby potatoes, halved—red or yellow, whatever looks good at the market
  • 12 oz (340g) fresh green beans, trimmed—I usually buy the pre-trimmed ones to save time
  • 1 tablespoon (15ml) olive oil, to coat and crisp ‘em up
  • 1/2 teaspoon salt, or to taste
  • 1/4 teaspoon black pepper, freshly ground if you’ve got it

These portions make a hearty Honey Mustard Chicken, Beans and Potatoes meal for my family of four, with maybe a little leftover for lunch (if we’re lucky)!

Variations

One thing I adore about Honey Mustard Chicken, Beans and Potatoes is how easy it is to switch things up. I’ve played around with this recipe more times than I can count, tweaking it based on cravings or whatever’s in my fridge. Here are some variations that have worked wonders for me over the years.

  • Spicy Twist: Toss in 1/2 teaspoon of red pepper flakes or a drizzle of hot sauce to the honey mustard mix. I tried this once during a game night, and my friends couldn’t stop raving about the heat!
  • Herby Vibes: Add 1 teaspoon of dried thyme or rosemary to the potatoes before roasting. It’s a simple tweak, but it makes the dish feel so cozy.
  • Garlicky Overload: Double the garlic in the honey mustard sauce. My garlic-loving sister always begs for this version.
  • Sweet Potato Swap: Use sweet potatoes instead of regular ones for a sweeter, earthier bite with your Honey Mustard Chicken, Beans and Potatoes.
  • Bean Switch-Up: Swap green beans for snap peas or even canned chickpeas if you’re low on fresh veggies. I’ve done this in a pinch, and it’s still delish.
  • Citrus Zing: Squeeze in the juice of half a lemon to the sauce for a bright, tangy lift. My kids always ask for this one on summer nights.
  • Maple Magic: Sub maple syrup for honey if you want a deeper, autumnal flavor. I stumbled on this by accident last fall and loved it.
  • Cheesy Finish: Sprinkle some shredded cheddar over the potatoes in the last 5 minutes of baking. Trust me, it’s next-level comfort for Honey Mustard Chicken, Beans and Potatoes!

Servings and Timing

Let’s talk logistics for making Honey Mustard Chicken, Beans and Potatoes. In my experience, this recipe comes together pretty quickly, even on a busy weeknight. Here’s how the timing usually shakes out for me in the kitchen.

  • Prep Time: 15 minutes
  • Cook Time: 40 minutes
  • Total Time: 55 minutes
  • Servings: 4 hearty portions

I’ve found these estimates work well if you’re making Honey Mustard Chicken, Beans and Potatoes as is, though it might take a tad longer if you’re multitasking (or wrangling kids like I often am)!

Step-by-Step Instructions

Now, let’s get into the nitty-gritty of cooking Honey Mustard Chicken, Beans and Potatoes. I’ve made this so many times that I’ve got a few little tricks up my sleeve to make it foolproof. Follow along, and I’ll share everything I’ve learned!

Honey Mustard Chicken, Beans and Potatoes
 recipe step-by-step guide
Delicious Honey Mustard Chicken, Beans and Potatoes prepared with love – follow this detailed recipe guide

Step 1: Preheat and Prep

First things first, preheat your oven to 400°F (200°C). While it’s heating, mix up that honey mustard sauce by whisking honey, both mustards, minced garlic, and a pinch of salt in a small bowl. I usually do this right on the counter—nothing fancy needed.

Step 2: Season the Chicken

Pat your chicken thighs dry with paper towels (this helps ‘em crisp up, trust me). Brush half of the honey mustard sauce over the chicken, making sure it’s nice and coated. I’ve learned to save the other half for basting later—it’s a game-changer for flavor.

Step 3: Prep the Veggies

On a large baking sheet, toss the halved potatoes and green beans with olive oil, salt, and pepper. Spread ‘em out evenly so they roast, not steam. I like to give the potatoes a head start by popping them in the oven for 15 minutes before adding the rest.

Step 4: Assemble and Bake

Nestle the chicken thighs among the veggies on the tray. If you’ve pre-roasted the potatoes, add the beans now too. Bake everything together for 25-30 minutes, basting the chicken with the remaining sauce halfway through—oh boy, that’s when the magic happens with Honey Mustard Chicken, Beans and Potatoes!

Step 5: Check and Serve

Make sure the chicken hits 165°F (74°C) internally—safety first! If the potatoes aren’t crispy enough for your liking, I sometimes broil the whole tray for 2-3 minutes at the end. Then, dish up your Honey Mustard Chicken, Beans and Potatoes, and watch everyone dig in.

Nutritional Information

I’m not gonna lie, I don’t obsess over calories, but I know some of y’all like to keep track. Here’s the rough breakdown for a serving of Honey Mustard Chicken, Beans and Potatoes, based on my recipe. It’s hearty but not too heavy, in my opinion.

  • Calories: 450 per serving
  • Fat: 22g
  • Protein: 28g
  • Carbohydrates: 35g
  • Sodium: 520mg

These numbers are approximate, but they give you a sense of what you’re working with for Honey Mustard Chicken, Beans and Potatoes. If you’re tweaking portions or ingredients, it’ll shift a bit.

Healthier Alternatives

If you’re looking to lighten up Honey Mustard Chicken, Beans and Potatoes, I’ve got some swaps that I’ve tried and loved. I’m all about balance, so these keep the flavor without making me feel like I’m missing out. Here’s what’s worked for me.

  • Lower Fat Chicken: Use chicken breasts instead of thighs to cut down on fat. I’ve done this when I’m watching my intake, and it’s still juicy if you don’t overcook it.
  • Less Honey: Reduce the honey to 2 tablespoons and add a splash of apple cider vinegar for tang. I think it still tastes awesome.
  • Oil Cut: Spray the veggies with cooking spray instead of drizzling olive oil. It’s a small change I’ve made for Honey Mustard Chicken, Beans and Potatoes on lighter days.
  • More Veggies: Double the green beans and halve the potatoes to boost fiber and lower carbs. I do this often ‘cause I’m a veggie nut!

Serving Suggestions

I love getting creative with how I plate Honey Mustard Chicken, Beans and Potatoes. It’s such a versatile dish that you can dress it up or keep it super casual. Here are a few ways I’ve served it that always hit the spot.

  • With a Side Salad: Pair it with a simple arugula and tomato salad for a fresh contrast. I toss this together all the time.
  • Over Rice: Serve Honey Mustard Chicken, Beans and Potatoes atop fluffy white rice to soak up the sauce. My family goes nuts for this!
  • With Crusty Bread: Grab a loaf to mop up every last drop of that glaze. It’s my guilty pleasure.
  • For a Picnic: Let it cool and pack it up for an outdoor meal—it holds up surprisingly well. I’ve done this for summer outings with Honey Mustard Chicken, Beans and Potatoes.

Common Mistakes to Avoid

Alright, I’ve gotta be real with ya—I’ve flubbed Honey Mustard Chicken, Beans and Potatoes a few times before nailing it. Here are some pitfalls I’ve learned to dodge the hard way. Save yourself the headache and keep these in mind.

  • Overcooking Chicken: Don’t let it go past 165°F (74°C), or it’ll dry out. I ruined a batch once, and it was like chewing cardboard.
  • Skipping the Baste: Forgetting to brush on more sauce halfway through means less flavor. I skipped it early on, and the Honey Mustard Chicken, Beans and Potatoes just wasn’t the same.
  • Crowding the Pan: Give those veggies space, or they’ll steam instead of roast. Trust me, I’ve made this mistake.
  • Undercooking Potatoes: Make sure they’re fork-tender before serving. I’ve pulled ‘em out too soon before, and it’s no fun biting into a raw spud with Honey Mustard Chicken, Beans and Potatoes!

Storing Tips

Leftovers of Honey Mustard Chicken, Beans and Potatoes are a lifesaver in my house, and I’ve figured out the best ways to keep ‘em tasting fresh. Here’s how I store this dish for maximum yum later on.

  • Refrigerator: Store in an airtight container for up to 3 days. I’ve found it reheats nicely in the microwave.
  • Freezer: Freeze portions for up to 2 months, though the potatoes might get a bit soft. I usually just freeze the chicken part of Honey Mustard Chicken, Beans and Potatoes if I’m planning ahead.
  • Reheating: Warm it up in the oven at 350°F (175°C) to keep that crispy texture. It’s my preferred method!

Honey Mustard Chicken, Beans and Potatoes
 recipe step-by-step guide
Delicious Honey Mustard Chicken, Beans and Potatoes prepared with love – follow this detailed recipe guide

Frequently Asked Questions

I get a bunch of questions about Honey Mustard Chicken, Beans and Potatoes, so let’s tackle the most common ones. I’m happy to help clear up any confusion!

Can I use chicken breasts instead of thighs?

Absolutely, you can! I’ve used breasts plenty of times for Honey Mustard Chicken, Beans and Potatoes. Just keep an eye on ‘em since they cook a bit faster and can dry out if overdone.

Can I make this ahead of time?

Yup, prep the components the day before and store ‘em in the fridge. Assemble and bake when you’re ready. I’ve done this for dinner parties, and it’s a stress-saver.

Can I use frozen veggies?

Sure thing! Frozen green beans and pre-cut potatoes work fine for Honey Mustard Chicken, Beans and Potatoes. Just add a few extra minutes to the cooking time, and you’re good.

Is there a substitute for mustard?

If you’re not a mustard fan, try mixing honey with a bit of soy sauce and vinegar for a different vibe. I haven’t done this myself, but a friend swore by it.

Can I grill instead of bake?

You bet! Grill the chicken and roast the veggies separately if you’re feeling that BBQ vibe. I’ve grilled it in summer, and it’s awesome.

How do I make the sauce thicker?

Simmer the honey mustard mix on the stove for a couple of minutes before using. I’ve done this when I want a stickier glaze.

Can I add other veggies?

Go for it—carrots or broccoli work great. I’ve tossed in whatever’s in my fridge, and it usually turns out tasty.

Is this recipe kid-friendly?

In my house, yes! My kids love the sweet sauce on Honey Mustard Chicken, Beans and Potatoes, though I sometimes tone down the mustard for them.

Conclusion

So there ya have it, my tried-and-true take on Honey Mustard Chicken, Beans and Potatoes. I hope you’re as pumped as I am to whip this up for your next meal—it’s honestly one of those dishes that just feels like a hug on a plate. Give Honey Mustard Chicken, Beans and Potatoes a try, tweak it to your liking, and let me know how it goes; I’d love to hear!

Conclusion

I hope you enjoyed this recipe for Honey Mustard Chicken, Beans and Potatoes
! It’s truly one of my favorites, and I’m confident you’ll love it too. Remember to follow the steps carefully for the best results. Don’t hesitate to experiment with your own variations and make this recipe your own.

Happy cooking!

Creamy Sun-Dried Tomato Chicken

creamy, sun-dried tomato chicken, savory, delicious, tender, flavorful, mouthwatering

Man, I still remember the first time I whipped up a batch of Creamy Sun-Dried Tomato Chicken. It was one of those rainy Tuesdays where I just wanted something comforting but didn’t have the energy for a big production. I rummaged through my pantry, spotted a jar of sun-dried tomatoes, and thought, “Why not?” That first plate of Creamy Sun-Dried Tomato Chicken was a game-changer, with my husband stealing seconds before I could even sit down!

Ever since, this dish has been a staple in my kitchen. My family loves how the tangy tomatoes mix with that rich, velvety sauce. Honestly, it’s become my go-to for impressing guests or just treating ourselves on a weeknight.

If you’re looking for a meal that’s equal parts cozy and fancy, stick with me. I’ve tweaked this Creamy Sun-Dried Tomato Chicken recipe over the years to make it foolproof, and I can’t wait to share all my little tricks with you. Let’s dive in and get cooking!

Why You’ll Love This Recipe

I’ve found that Creamy Sun-Dried Tomato Chicken hits all the right notes when you want something flavorful without spending hours in the kitchen. It’s got this perfect balance of creamy, tangy, and savory that just wraps you in a warm hug. Plus, it looks way fancier than it actually is to make!

In my kitchen, this dish always gets rave reviews, whether I’m serving it to picky kids or foodie friends. I mean, who can resist that luscious sauce paired with tender chicken? Trust me, once you try this Creamy Sun-Dried Tomato Chicken, it’ll be on your regular rotation too.

Ingredients List

Alright, let’s talk about what you’ll need to make Creamy Sun-Dried Tomato Chicken. I’m pretty picky about my ingredients because I’ve learned that quality makes a huge difference in a dish like this. I usually buy fresh, local chicken when I can, and I’m a sucker for sun-dried tomatoes packed in oil for extra flavor.

Here’s everything you’ll need to bring this Creamy Sun-Dried Tomato Chicken to life. I’ve included exact measurements because, in my experience, precision helps nail that perfect sauce consistency. Don’t skimp on the cream—it’s the heart of this dish!

  • 4 boneless, skinless chicken breasts, about 6 oz each
  • 1/2 cup sun-dried tomatoes packed in oil, drained and roughly chopped for that punchy bite
  • 1 cup heavy cream, full-fat for ultimate richness
  • 1/2 cup chicken broth, low-sodium if you’re watching salt
  • 1/3 cup grated Parmesan cheese, fresh if possible for better melt
  • 2 cloves garlic, minced for a subtle kick
  • 1 tablespoon olive oil, for searing the chicken
  • 1 teaspoon dried Italian seasoning, for that herby depth
  • Salt and pepper, to taste (I go light on salt because of the Parmesan)
  • Fresh basil, optional, for garnish and a pop of color

I’ve made Creamy Sun-Dried Tomato Chicken with cheaper ingredients before, and it just doesn’t sing the same way. So, if you can, grab good-quality sun-dried tomatoes—it’s worth it!

Variations

One thing I adore about Creamy Sun-Dried Tomato Chicken is how versatile it is. I’ve played around with this recipe so many times, tweaking it based on what I’ve got in the fridge or who I’m cooking for. Here are some of my favorite twists that keep this dish exciting.

  • Spicy Kick: Toss in a pinch of red pepper flakes or a dash of hot sauce to the sauce. I tried this once when my brother-in-law was over, and he couldn’t stop raving about the heat.
  • Mushroom Magic: Add 1 cup of sliced cremini mushrooms when you sauté the garlic. It gives the Creamy Sun-Dried Tomato Chicken an earthy depth I’m obsessed with.
  • Spinach Boost: Stir in a handful of fresh spinach at the end for color and nutrition. My kids don’t even notice the greens!
  • Cheesy Overload: Sprinkle extra mozzarella on top and broil for a minute. I did this for a date night, and it felt like restaurant-level stuff.
  • Low-Carb Swap: Skip the pasta and serve over zucchini noodles. It’s still just as satisfying with Creamy Sun-Dried Tomato Chicken.
  • Bacon Bliss: Crumble in some cooked bacon for a smoky twist. My husband always asks for this version!
  • Herb Switch-Up: Use fresh thyme instead of Italian seasoning for a different vibe. I think it pairs beautifully with the tomatoes.

Honestly, half the fun of making Creamy Sun-Dried Tomato Chicken is experimenting. Got an idea? Go for it and let me know how it turns out!

Servings and Timing

Let’s break down the logistics of Creamy Sun-Dried Tomato Chicken because timing is everything when you’re juggling dinner prep. In my experience, this recipe comes together pretty quickly, which is why I love it for busy nights. Here’s what you’re looking at.

  • Prep Time: 10 minutes
  • Cook Time: 25 minutes
  • Total Time: 35 minutes
  • Servings: 4 portions

I usually double the recipe when I’ve got company because Creamy Sun-Dried Tomato Chicken disappears fast. It’s also great for leftovers if you’re cooking just for yourself. Thirty-five minutes from start to finish? That’s a win in my book!

Step-by-Step Instructions

Alright, let’s get into the nitty-gritty of making Creamy Sun-Dried Tomato Chicken. I’ve made this so many times I could probably do it blindfolded (okay, maybe not, but you get the idea). Follow along with me, and I’ll share my little shortcuts to make it a breeze.

Creamy Sun-Dried Tomato Chicken recipe step-by-step guide
Delicious Creamy Sun-Dried Tomato Chicken prepared with love – follow this detailed recipe guide

Step 1: Prep the Chicken

First up, pat your chicken breasts dry with paper towels. I’ve learned this helps them sear better and get that golden crust. Season both sides with salt, pepper, and a sprinkle of Italian seasoning for extra flavor right from the start.

Step 2: Sear the Chicken

Heat olive oil in a large skillet over medium-high heat. Pop the chicken in and cook for about 5-6 minutes per side until golden. Don’t worry if it’s not fully cooked—it’ll finish in the sauce. I always use a cast-iron skillet for this step because it gives the best sear on Creamy Sun-Dried Tomato Chicken.

Step 3: Sauté Garlic and Tomatoes

Take the chicken out and set it aside. In the same skillet, toss in the minced garlic and chopped sun-dried tomatoes. Cook for a minute or two until it smells amazing. This step is key for building flavor in Creamy Sun-Dried Tomato Chicken, so don’t rush it!

Step 4: Make the Creamy Sauce

Pour in the chicken broth and heavy cream, stirring to scrape up those yummy browned bits from the pan. Add the Parmesan and let it melt into a silky sauce. I sometimes sneak a taste here because it’s just that good when making Creamy Sun-Dried Tomato Chicken.

Step 5: Simmer with Chicken

Nestle the chicken back into the skillet, spooning some sauce over the top. Lower the heat and let it simmer for 10-12 minutes until the chicken is cooked through. I usually check with a thermometer (165°F is the magic number) to ensure my Creamy Sun-Dried Tomato Chicken is perfect.

Step 6: Garnish and Serve

If you’re feeling fancy, sprinkle some fresh basil on top before serving. I love how it adds a burst of color to Creamy Sun-Dried Tomato Chicken. Serve it hot, and watch everyone dig in!

Nutritional Information

I’m not gonna lie, Creamy Sun-Dried Tomato Chicken isn’t exactly diet food, but it’s worth every bite in my opinion. I’ve calculated the basics here based on a standard serving. Keep in mind, this can vary depending on your ingredients.

  • Calories: 480 per serving
  • Fat: 32g
  • Protein: 38g
  • Carbohydrates: 8g
  • Sodium: 620mg

If you’re counting calories, you can tweak this Creamy Sun-Dried Tomato Chicken recipe with some swaps I’ll mention next. But honestly, sometimes you just gotta enjoy the indulgence!

Healthier Alternatives

I get it—sometimes you wanna lighten up a dish like Creamy Sun-Dried Tomato Chicken without losing that amazing flavor. I’ve swapped things out plenty of times when I’m watching my waistline or cooking for health-conscious friends. Here are a few ideas that still keep this dish delicious.

  • Light Cream: Use half-and-half instead of heavy cream to cut some fat. It’s not quite as rich, but still tasty.
  • Turkey Swap: Replace chicken breasts with turkey cutlets for a leaner protein. I’ve done this and barely noticed a difference in my Creamy Sun-Dried Tomato Chicken.
  • Less Cheese: Cut the Parmesan to 1/4 cup and boost flavor with extra herbs. It still feels indulgent!
  • Veggie Boost: Add more low-cal veggies like spinach or zucchini to bulk up Creamy Sun-Dried Tomato Chicken without extra calories.

These tweaks work great when I’m trying to balance things out. Give ’em a shot!

Serving Suggestions

I love serving Creamy Sun-Dried Tomato Chicken in different ways depending on the vibe I’m going for. It’s such a versatile dish that pairs beautifully with so many sides. Here are my go-to ideas for making it a full meal.

  • Over Pasta: Spoon it over fettuccine or penne to soak up that sauce. It’s my family’s favorite way to enjoy Creamy Sun-Dried Tomato Chicken.
  • With Rice: Serve alongside fluffy basmati for a simple, hearty option. I do this on lazy nights!
  • Low-Carb Option: Pair with cauliflower rice or mashed cauliflower. It still feels like a treat with Creamy Sun-Dried Tomato Chicken.
  • Bread on the Side: A crusty baguette is perfect for dipping into that creamy goodness. I can’t resist!

At my last dinner party, I served it with pasta and garlic bread, and everyone was scraping their plates. How do you like to enjoy yours?

Common Mistakes to Avoid

I’ve messed up Creamy Sun-Dried Tomato Chicken a few times over the years, so let me save you the headache with some pitfalls to dodge. Trust me on this one—I learned the hard way! These are mistakes that can turn a great dish into a bummer.

  • Overcooking Chicken: Don’t let it go too long in the pan before the sauce step. I’ve ended up with rubbery chicken, and it’s such a letdown for Creamy Sun-Dried Tomato Chicken.
  • Skimping on Cream: Using low-fat milk instead of cream makes the sauce watery. I tried it once, and it just didn’t work.
  • Burning Garlic: Cook it too long, and it gets bitter. Keep an eye out when making Creamy Sun-Dried Tomato Chicken!
  • Not Seasoning Enough: Taste as you go—I forgot to adjust salt once, and the dish felt flat.

Avoid these, and you’re golden. I’ve got your back!

Storing Tips

Leftovers of Creamy Sun-Dried Tomato Chicken are a lifesaver for busy days, and I’ve figured out the best ways to keep it tasting fresh. In my experience, it holds up pretty well if you store it right. Here’s how I do it.

  • Refrigerator: Keeps for 3-4 days in an airtight container. Just reheat gently to avoid separating the sauce.
  • Freezer: Freeze for up to 2 months, though the cream might split a bit. I usually freeze Creamy Sun-Dried Tomato Chicken in single portions for quick meals.
  • Reheating: Warm on low heat with a splash of broth to revive the sauce for Creamy Sun-Dried Tomato Chicken.

I’ve found these tips keep the flavor intact. No sad, soggy leftovers here!

Creamy Sun-Dried Tomato Chicken recipe step-by-step guide
Delicious Creamy Sun-Dried Tomato Chicken prepared with love – follow this detailed recipe guide

Frequently Asked Questions

I’ve gotten a bunch of questions about Creamy Sun-Dried Tomato Chicken over the years, so let’s tackle the most common ones. I’m happy to help clear things up!

Can I make this ahead of time?

Totally! Prep the chicken and sauce a day ahead, store it in the fridge, and reheat gently. I do this for dinner parties with Creamy Sun-Dried Tomato Chicken all the time.

Can I use dried sun-dried tomatoes?

Yeah, but soak them in warm water for 10 minutes first to soften. I’ve used them in a pinch, and it works okay.

Is there a dairy-free option?

You bet. Swap heavy cream for coconut cream. I’ve tried it, and it adds a fun twist to Creamy Sun-Dried Tomato Chicken.

Can I use chicken thighs instead?

Absolutely, they’re juicier! Just adjust cooking time a bit. I love thighs for this dish.

What if my sauce is too thin?

Simmer it longer to reduce, or add a bit more Parmesan. I’ve had to fix this before.

Can I skip the Parmesan?

Sure, though it adds depth. Try nutritional yeast for a cheesy vibe if you’re avoiding dairy.

Does this freeze well?

It does, but the sauce might separate a little. Reheat slowly, and it’s still tasty in my experience.

What’s the best pasta to pair with it?

I’m partial to fettuccine—it holds the sauce so well with Creamy Sun-Dried Tomato Chicken. But honestly, anything works!

Conclusion

I hope you’re as excited as I am to whip up this Creamy Sun-Dried Tomato Chicken. It’s one of those recipes that’s become a true favorite in my house, and I bet it’ll win over your crew too. Got questions or fun variations? Drop ’em below—I’d love to chat about Creamy Sun-Dried Tomato Chicken with you.

Now, go get cooking and enjoy every bite!

Conclusion

I hope you enjoyed this recipe for Creamy Sun-Dried Tomato Chicken! It’s truly one of my favorites, and I’m confident you’ll love it too. Remember to follow the steps carefully for the best results.

Don’t hesitate to experiment with your own variations and make this recipe your own. Happy cooking!

Chicken Piccata with Lemon Sauce Recipe

chicken piccata, lemon sauce, savory, zesty, flavorful, delicious

I’ll never forget the first time I stumbled upon a Chicken Piccata with Lemon Sauce Recipe. It was a rainy Tuesday, and I was desperate to whip up something fancy yet doable for a last-minute dinner with friends.

I’d heard of this classic Italian dish—juicy chicken cutlets draped in a tangy, buttery lemon sauce—but I was nervous I’d mess it up. Spoiler alert: my pals couldn’t stop raving, and now this Chicken Piccata with Lemon Sauce Recipe is my go-to for impressing without stressing.

Honestly, there’s something magical about how simple ingredients transform into a restaurant-worthy meal. I’ve tweaked this Chicken Piccata with Lemon Sauce Recipe over the years, and I’m pumped to share my kitchen-tested tips with you. Whether you’re a newbie or a seasoned home cook, let’s dive into making this zesty dish together!

And trust me, once you nail this Chicken Piccata with Lemon Sauce Recipe, you’ll be hooked just like I am.

Why You’ll Love This Recipe

I’ve found that this Chicken Piccata with Lemon Sauce Recipe is a total crowd-pleaser, and I’m not just saying that because I’m biased. The bright, citrusy sauce paired with tender chicken is like a little burst of sunshine on your plate, especially on dreary days. Plus, it’s surprisingly quick to pull together—perfect for those nights when you want something special without spending hours in the kitchen.

In my kitchen, this Chicken Piccata with Lemon Sauce Recipe always sparks compliments, even from picky eaters (looking at you, Uncle Joe). It’s versatile enough to pair with pasta, rice, or just a big ol’ salad. Honestly, every bite reminds me why I keep coming back to this dish!

Ingredients List

When I’m making my Chicken Piccata with Lemon Sauce Recipe, I’m all about using fresh, quality ingredients because they make such a difference in that zesty sauce. I usually buy my chicken from a local butcher if I can, but grocery store cutlets work just fine too. Here’s what you’ll need to bring this Chicken Piccata with Lemon Sauce Recipe to life.

I’ve broken it down so it’s super clear, and I’ve added my personal spin on why I choose certain brands or types. If you’ve got questions about substitutions, I’ll cover those in the variations section for this Chicken Piccata with Lemon Sauce Recipe.

For the Chicken

  • 4 boneless, skinless chicken breasts (about 1.5 lbs), pounded thin for even cooking
  • 1/2 cup (60g) all-purpose flour, for dredging—I prefer unbleached for a cleaner taste
  • 1/2 teaspoon kosher salt, to season the chicken
  • 1/4 teaspoon black pepper, freshly ground if possible for extra zip

For the Lemon Sauce

  • 3 tablespoons (45g) unsalted butter, divided—European-style butter is my splurge for richness
  • 2 tablespoons (30ml) olive oil, extra virgin for that fruity undertone
  • 1/3 cup (80ml) fresh lemon juice, about 2 medium lemons—squeeze ‘em fresh, trust me!
  • 1/2 cup (120ml) chicken broth, low-sodium so you control the saltiness
  • 1/4 cup (60ml) dry white wine, like Pinot Grigio—optional, but it adds depth
  • 2 tablespoons (30g) capers, rinsed and drained for that briny punch
  • 2 tablespoons fresh parsley, chopped for garnish—I grow my own, but store-bought works

These are the building blocks of a stellar Chicken Piccata with Lemon Sauce Recipe, and I can’t wait for you to try it out.

Variations

I love that this Chicken Piccata with Lemon Sauce Recipe is like a blank canvas—you can tweak it to fit your mood or what’s in your pantry. Over the years, I’ve played around with different twists, and some have become family favorites. Here are a few variations for this Chicken Piccata with Lemon Sauce Recipe that I’ve tried and loved.

Don’t be afraid to experiment with your own spin on this Chicken Piccata with Lemon Sauce Recipe; half the fun is making it yours! Whether you’re catering to dietary needs or just craving something different, these ideas should spark some inspiration.

  • Garlic Lover’s Dream: Add 3 minced garlic cloves to the sauce while it simmers for an extra savory kick. I tried this once and my husband couldn’t stop dipping bread in it!
  • Creamy Twist: Stir in 1/4 cup of heavy cream at the end for a richer sauce.
  • Herb Explosion: Toss in 1 teaspoon of fresh thyme or rosemary with the parsley for an earthy vibe.
  • Spicy Kick: Sprinkle in 1/4 teaspoon red pepper flakes for a subtle heat—I do this when I’m feeling feisty.
  • Artichoke Add-In: Mix in 1/2 cup of chopped marinated artichoke hearts with the capers for a Mediterranean flair. My kids always ask for this one!
  • Low-Carb Option: Skip the flour dredging and just sear the chicken for a keto-friendly take.
  • Seafood Swap: Use thin white fish fillets like tilapia instead of chicken for a lighter dish.
  • Extra Citrusy: Zest one of the lemons into the sauce for a brighter flavor—probably my favorite tweak to this Chicken Piccata with Lemon Sauce Recipe.

Servings and Timing

One thing I adore about this Chicken Piccata with Lemon Sauce Recipe is how it fits into busy schedules without sacrificing flavor. In my experience, it doesn’t take long to whip up, even if I’m juggling a million things. Here’s the breakdown for this Chicken Piccata with Lemon Sauce Recipe so you can plan your meal prep.

  • Prep Time: 15 minutes
  • Cook Time: 20 minutes
  • Total Time: 35 minutes
  • Servings: 4 hearty portions

I usually double the batch of this Chicken Piccata with Lemon Sauce Recipe when I’ve got extra mouths to feed—it scales up beautifully!

Step-by-Step Instructions

Alright, let’s get cooking with this Chicken Piccata with Lemon Sauce Recipe! I’m gonna walk you through each step like I’m right there in your kitchen. These are the exact moves I’ve perfected after making this Chicken Piccata with Lemon Sauce Recipe dozens of times.

Chicken Piccata with Lemon Sauce Recipe recipe step-by-step guide
Delicious Chicken Piccata with Lemon Sauce Recipe prepared with love – follow this detailed recipe guide

Step 1: Prep the Chicken

Start by pounding your chicken breasts to about 1/4-inch thickness between two sheets of plastic wrap. I use a rolling pin if I can’t find my meat mallet (happens more than I’d like to admit). Season with salt and pepper, then dredge in flour, shaking off the excess—this gives that golden crust I crave in a Chicken Piccata with Lemon Sauce Recipe.

Step 2: Sear the Chicken

Heat 2 tablespoons of butter and the olive oil in a large skillet over medium-high heat. Cook the chicken for 3-4 minutes per side until golden and cooked through—don’t overcrowd the pan or it’ll steam instead of sear. Set the chicken aside on a plate while you work on the star of this Chicken Piccata with Lemon Sauce Recipe: the sauce!

Step 3: Make the Lemon Sauce

In the same skillet, add the lemon juice, chicken broth, and white wine if using, scraping up those yummy browned bits. Let it simmer for 2-3 minutes, then stir in the capers and remaining butter until it’s silky smooth. I’ve learned to taste-test here—sometimes I’ll add a splash more lemon for that extra zing in my Chicken Piccata with Lemon Sauce Recipe.

Step 4: Combine and Serve

Return the chicken to the skillet, spooning the sauce over it to warm through for about a minute. Garnish with fresh parsley, and you’re done! I can’t help but sneak a bite straight from the pan when I make this Chicken Piccata with Lemon Sauce Recipe—it’s that good.

Nutritional Information

I’m not gonna lie—I don’t always obsess over the numbers when I’m enjoying this Chicken Piccata with Lemon Sauce Recipe. But I know it’s helpful to have a rough idea, especially if you’re tracking your intake. Here’s the breakdown per serving for this Chicken Piccata with Lemon Sauce Recipe, based on my usual portions.

  • Calories: 320 per serving
  • Fat: 18g
  • Protein: 26g
  • Carbohydrates: 10g
  • Sodium: 480mg

These are approximate, of course, but it’s a nice balance of indulgence and nutrition for a dish like this Chicken Piccata with Lemon Sauce Recipe!

Healthier Alternatives

If I’m watching my calories or just wanna switch things up, I’ve got a few go-to swaps for this Chicken Piccata with Lemon Sauce Recipe. These tweaks still keep the flavor poppin’ without derailing my goals. Check out these healthier takes on a Chicken Piccata with Lemon Sauce Recipe that I’ve tried.

  • Less Butter: Cut the butter in half and use more olive oil for a lighter sauce.
  • Gluten-Free: Swap the all-purpose flour for almond flour or a gluten-free blend when dredging.
  • Low-Sodium: Use unsalted broth and skip the capers if sodium’s a concern—I’ve done this and still loved it.
  • Baked Option: Instead of pan-frying, bake the dredged chicken at 400°F for 15 minutes, then drizzle with sauce. This cuts down on oil for my Chicken Piccata with Lemon Sauce Recipe.

Serving Suggestions

I love getting creative with how I plate this Chicken Piccata with Lemon Sauce Recipe—it’s such a versatile dish! At my last dinner party, I got so many “oohs” and “aahs” just from the sides I paired it with. Here are my favorite ways to serve up this Chicken Piccata with Lemon Sauce Recipe.

  • With Pasta: Toss some angel hair pasta in the leftover sauce for a classic combo.
  • Over Rice: Serve with fluffy white or brown rice to soak up every drop.
  • With Veggies: Pair with steamed asparagus or green beans for a fresh, light meal.
  • Bread on the Side: A crusty baguette is non-negotiable in my house for dipping into the sauce of this Chicken Piccata with Lemon Sauce Recipe!

Common Mistakes to Avoid

I’ve botched this Chicken Piccata with Lemon Sauce Recipe a few times over the years, so let me save you the headache with some hard-earned wisdom. Trust me on this one—I’ve learned the hard way! Here are pitfalls to dodge when making your Chicken Piccata with Lemon Sauce Recipe.

  • Overcooking Chicken: Don’t let it go past 165°F internally, or it’ll turn into rubber. I’ve ruined a batch or two like this.
  • Too Much Flour: Only lightly dredge, or the coating gets gummy—yuck!
  • Burning the Sauce: Keep the heat on medium when simmering, or the lemon can turn bitter.
  • Skipping Fresh Lemon: Bottled juice just ain’t the same for this Chicken Piccata with Lemon Sauce Recipe—fresh is worth the squeeze.

Storing Tips

I’ve found that leftovers of this Chicken Piccata with Lemon Sauce Recipe keep surprisingly well if you store ‘em right. In my experience, it’s a lifesaver for quick meals later in the week. Here’s how I handle storing this Chicken Piccata with Lemon Sauce Recipe.

  • Refrigerator: Store in an airtight container for up to 3 days.
  • Freezer: Freeze the chicken and sauce separately for up to 2 months—reheat gently.
  • Reheating: Warm on the stovetop with a splash of broth to revive the sauce for this Chicken Piccata with Lemon Sauce Recipe.

Chicken Piccata with Lemon Sauce Recipe recipe step-by-step guide
Delicious Chicken Piccata with Lemon Sauce Recipe prepared with love – follow this detailed recipe guide

Frequently Asked Questions

I get a bunch of questions about this Chicken Piccata with Lemon Sauce Recipe, so I’ve rounded up the most common ones. Let’s tackle ‘em!

Can I make this ahead of time?

Absolutely! Cook the chicken and sauce for this Chicken Piccata with Lemon Sauce Recipe, then store separately in the fridge for up to a day. Reheat together on low heat to keep it juicy.

Can I skip the wine?

Yep, no problem. Just add extra chicken broth or a splash of lemon juice to balance the flavors.

What if I don’t have capers?

No stress—try chopped green olives or even a few pickle bits for that briny vibe.

Is this recipe kid-friendly?

In my house, yes! My kids love the lemony taste of this Chicken Piccata with Lemon Sauce Recipe, but you can cut back on capers if they’re too tangy for your little ones.

Can I use chicken thighs?

Sure thing, though they’ll take a bit longer to cook. Adjust the time and check for doneness.

How do I know the chicken is cooked?

Use a meat thermometer—165°F at the thickest part is the magic number.

Can I double the sauce?

Heck yeah! I often do for extra to drizzle over sides with this Chicken Piccata with Lemon Sauce Recipe.

What’s the best pan to use?

I swear by a large stainless steel skillet—great for searing and building the sauce.

Conclusion

I hope you’re as excited as I am to try this Chicken Piccata with Lemon Sauce Recipe—it’s truly a game-changer for weeknight dinners or special occasions. Drop a comment if you’ve got questions or wanna share how yours turned out; I love hearing from y’all! Grab those lemons and get cooking with this Chicken Piccata with Lemon Sauce Recipe—you won’t regret it.

Conclusion

I hope you enjoyed this recipe for Chicken Piccata with Lemon Sauce Recipe! It’s truly one of my favorites, and I’m confident you’ll love it too.

Remember to follow the steps carefully for the best results. Don’t hesitate to experiment with your own variations and make this recipe your own. Happy cooking!

Chicken Ramen

chicken ramen, savory broth, tender noodles, flavorful seasoning, comfort food

I’ll never forget the first time I made Chicken Ramen at home. It was a rainy Saturday, and I was craving something warm and soul-soothing, but I didn’t want to order takeout (again).

So, I rummaged through my pantry, threw together some ingredients, and ended up with a bowl of Chicken Ramen that was, honestly, better than anything I’d had at a restaurant. My husband couldn’t stop slurping it up, and now it’s a go-to in our house whenever we need a cozy meal.

There’s something magical about a steaming bowl of Chicken Ramen, don’t you think? It’s not just food; it’s comfort in a bowl, with those rich, savory flavors and tender noodles. I’ve tweaked my recipe over the years, and I’m thrilled to share it with you today so you can whip up your own version of Chicken Ramen right at home.

I promise this isn’t one of those fussy recipes that’ll have you in the kitchen for hours. Let’s dive into why this Chicken Ramen is gonna become your new favorite, and I’ll walk you through every step to make it just right.

Why You’ll Love This Recipe

I’ve found that this Chicken Ramen recipe hits all the right notes, and I’m betting you’ll agree. It’s got that perfect balance of umami from the broth, a little kick if you want it, and it’s super customizable depending on what you’ve got in your fridge. Plus, in my kitchen, it’s become a surefire way to impress guests without breaking a sweat.

Honestly, nothing beats the smell of Chicken Ramen simmering on the stove; it just draws everyone in. It’s also pretty quick to pull together, especially once you get the hang of it. Trust me, once you try this, you’ll be hooked on making Chicken Ramen from scratch.

Ingredients List

Alright, let’s talk about what you’ll need to make this Chicken Ramen. I prefer using fresh ingredients where I can, but I’ve got no shame in shortcuts like pre-made broth if I’m in a pinch. Here’s my go-to list for a pot of Chicken Ramen that serves four hungry folks (or two with leftovers).

I usually buy my noodles at the local Asian market because they’ve got the good, chewy kind, but grocery store ramen packs work too—just ditch the seasoning packet. Let’s break it down into the main components for clarity.

For the Broth

  • 6 cups (1.5L) chicken broth, low-sodium so I can control the saltiness
  • 2 tablespoons (30ml) soy sauce, for that deep umami punch
  • 1 tablespoon (15ml) mirin, adds a subtle sweetness
  • 1 teaspoon (5g) grated ginger, fresh is best for brightness
  • 2 cloves garlic, minced fine for flavor

For the Chicken and Toppings

  • 2 boneless, skinless chicken breasts (about 1 lb or 450g), cooked and shredded
  • 4 packs (about 12 oz or 340g) ramen noodles, fresh or instant
  • 2 green onions, sliced thin for a pop of color
  • 2 soft-boiled eggs, halved for that jammy yolk goodness
  • 1 cup (100g) shiitake mushrooms, sliced and sautéed
  • 1 tablespoon (15ml) sesame oil, for a nutty finish to the Chicken Ramen

Variations

One thing I adore about Chicken Ramen is how easy it is to switch things up based on mood or what’s in the pantry. I’ve tried a bunch of twists over the years, and my family always has opinions on their faves. Here are some variations for your Chicken Ramen that I’ve played with—some are hits, some were… learning experiences.

  • Spicy Kick: Toss in a teaspoon of gochujang or red chili flakes to the broth for some heat that’ll wake up your taste buds.
  • Veggie-Packed: Add shredded carrots, spinach, or bok choy for extra nutrition; I do this when I’m feeling guilty about not eating greens.
  • Creamy Twist: Stir in a splash of coconut milk for a richer Chicken Ramen—I tried this once and my kids went nuts for it.
  • Miso Magic: Mix in a tablespoon of miso paste to deepen the broth flavor; it’s a game-changer in my book.
  • Teriyaki Glaze: Marinate the chicken in teriyaki sauce before cooking for a sticky-sweet vibe that pairs awesome with Chicken Ramen.
  • Garlic Overload: Double the garlic and add some roasted garlic on top if you’re a garlic fiend like me.
  • Seafood Swap: Skip the chicken and toss in some shrimp or crab for a surf-style Chicken Ramen (well, sorta).
  • Extra Crunch: Sprinkle crushed nori or toasted sesame seeds on top for texture; my husband always asks for this with his Chicken Ramen.

Servings and Timing

Let’s chat about how much this Chicken Ramen recipe makes and how long it’ll take. In my experience, timing can vary a bit depending on how fast you chop or if you’ve got pre-cooked chicken ready to go. But here’s what I usually clock for a batch of Chicken Ramen.

  • Prep Time: 15 minutes
  • Cook Time: 25 minutes
  • Total Time: 40 minutes
  • Servings: 4 hearty bowls

Step-by-Step Instructions

Making Chicken Ramen isn’t rocket science, but a few little tricks can elevate it from “meh” to “whoa!” I’ve burned a pot or two figuring this out, so let me save you the hassle. Here’s how I do it, step by step, straight from my kitchen to yours.

Chicken Ramen recipe step-by-step guide
Delicious Chicken Ramen prepared with love – follow this detailed recipe guide

Step 1: Prep the Broth Base

Start by pouring the chicken broth into a big pot over medium heat. Add the soy sauce, mirin, ginger, and garlic, and let it simmer for about 10 minutes. I like to give it a taste here—if it’s missing that “oomph,” I’ll splash in a bit more soy. This is the heart of your Chicken Ramen, so don’t rush it.

Step 2: Cook the Chicken

If your chicken isn’t cooked yet, season it lightly with salt and pepper, then sear it in a hot pan with a drizzle of oil for about 6 minutes per side. Once it’s done, let it rest a few minutes before shredding. I’ve learned that shredding while it’s still warm makes it easier to toss into the Chicken Ramen later.

Step 3: Boil the Noodles

Cook your ramen noodles according to the package—usually just 2-3 minutes in boiling water. Don’t overdo it; soggy noodles are the worst in Chicken Ramen (trust me, I’ve been there). Drain ‘em and rinse with cold water to stop the cooking, then set aside.

Step 4: Sauté the Mushrooms

In a small pan, heat up a bit of sesame oil and toss in the shiitake mushrooms. Cook ‘em for 5 minutes until they’re soft and golden. I sometimes sneak a few for myself straight from the pan—chef’s perk when making Chicken Ramen!

Step 5: Assemble the Bowls

Divide the noodles into four bowls, then ladle the hot broth over them. Top each with shredded chicken, a soft-boiled egg half, mushrooms, and a sprinkle of green onions. Drizzle a tiny bit of sesame oil on top for that nutty finish to your Chicken Ramen.

Step 6: Serve and Slurp

Hand out the bowls and watch everyone dig into this Chicken Ramen with glee. I always keep chopsticks and spoons nearby—there’s no polite way to eat this, and that’s half the fun. Enjoy the mess and the flavor!

Nutritional Information

I’m not gonna lie, Chicken Ramen isn’t always the lightest meal, but it’s worth every calorie in my opinion. I’ve crunched the numbers for a typical serving of my Chicken Ramen recipe, and here’s what you’re looking at. Keep in mind, this can shift based on toppings or broth tweaks.

  • Calories: 480 per serving
  • Fat: 14g
  • Protein: 28g
  • Carbohydrates: 58g
  • Sodium: 1200mg

Healthier Alternatives

If I’m watching my waistline or just want a lighter bowl of Chicken Ramen, I’ve got some swaps that still keep the flavor on point. I’ve tried these myself, and they don’t skimp on satisfaction. Here are a few ways to make Chicken Ramen a bit healthier without losing that comfort-food vibe.

  • Low-Sodium Broth: Use a reduced-sodium chicken broth and add flavor with extra ginger or herbs instead of salt.
  • Whole Grain Noodles: Swap regular ramen for whole wheat or buckwheat soba noodles for more fiber in your Chicken Ramen.
  • Less Oil: Cut back on sesame oil and use a non-stick pan to sauté mushrooms with just a spritz of cooking spray.
  • Load Up Veggies: Double the greens like spinach or bok choy to bulk up your Chicken Ramen without extra calories.

Serving Suggestions

I love serving Chicken Ramen in ways that make it feel like a full-on event, not just dinner. Whether it’s a quiet night in or a casual get-together, these ideas have worked wonders in my house. Try ‘em out with your Chicken Ramen and see what sticks!

  • With a Sidekick: Pair it with a small side of edamame or seaweed salad for a Japanese-inspired spread.
  • Spice Station: Set out sriracha or chili oil on the table so everyone can customize their Chicken Ramen heat level.
  • Big Bowls: Serve in oversized bowls with plenty of broth for that authentic ramen shop feel.
  • Drinks Pairing: I often pour green tea or a crisp beer alongside Chicken Ramen—it just feels right.

Common Mistakes to Avoid

I’ve flubbed Chicken Ramen more times than I’d like to admit, especially in the early days. Let me save you some grief with a few pitfalls I’ve stumbled into. Avoid these when making your Chicken Ramen, and you’ll be golden.

  • Overcooking Noodles: I learned the hard way that mushy noodles ruin the texture—boil them just until al dente.
  • Skimping on Broth: Don’t rush the simmer; a weak broth makes sad Chicken Ramen.
  • Ignoring Seasoning: Taste as you go, or you might end up with a bland bowl like I did once.
  • Cold Toppings: Make sure your chicken and eggs are at least room temp, or they’ll cool down your hot Chicken Ramen.

Storing Tips

Leftovers? No problem. I’ve found that Chicken Ramen keeps pretty well if you store it right. Here’s how I handle extras to keep that flavor intact for round two of Chicken Ramen.

  • Refrigerator: Store broth and toppings separately from noodles in airtight containers for up to 3 days.
  • Reheating: Warm the broth on the stove and add fresh-cooked noodles to avoid sogginess in your Chicken Ramen.
  • Freezer: Freeze just the broth for up to 2 months; noodles don’t freeze well in my experience.

Chicken Ramen recipe step-by-step guide
Delicious Chicken Ramen prepared with love – follow this detailed recipe guide

Frequently Asked Questions

I get a lot of questions about making Chicken Ramen, so I’ve rounded up the most common ones. Here are my answers, straight from my kitchen trials. Let’s tackle these head-on!

Can I use instant ramen for Chicken Ramen?

Absolutely, and I do it all the time when I’m short on time. Just toss the seasoning packet and cook the noodles as usual. It’s not quite as chewy as fresh, but it works for a quick Chicken Ramen fix.

How do I make the broth richer?

Simmer it longer with a few extras like a splash of fish sauce or some dried shiitake mushrooms. I’ve done this on lazy Sundays, and it really amps up the depth.

Can I make this vegetarian?

Sure can! Skip the chicken, use veggie broth, and load up on tofu or extra mushrooms for a hearty bowl.

What if I don’t have mirin?

No worries—mix a teaspoon of sugar with two tablespoons of rice vinegar as a sub. It’s not perfect, but it’s close enough in a pinch.

How do I get jammy eggs?

Boil ‘em for 6-7 minutes, then plunge into ice water. Peel carefully, and you’ve got that perfect yolk.

Can I freeze Chicken Ramen?

I wouldn’t freeze the whole dish—noodles get weird. Just freeze the broth, then make fresh noodles when you’re ready.

Is this recipe kid-friendly?

Mine love it, though I cut back on spicy stuff for them. Add mild toppings they like, and you’re good.

How do I store leftovers?

Keep broth and dry stuff separate in the fridge. Reheat the broth and toss in fresh noodles to keep it from getting gloopy.

Conclusion

There you have it, my tried-and-true way to make Chicken Ramen that’ll warm you from the inside out. I hope you’ll give this a shot and tweak it to your taste—cooking is all about making it yours. Drop a comment if you try this Chicken Ramen; I’d love to hear how it went or what fun twists you added!

Conclusion

I hope you enjoyed this recipe for Chicken Ramen! It’s truly one of my favorites, and I’m confident you’ll love it too. Remember to follow the steps carefully for the best results.

Don’t hesitate to experiment with your own variations and make this recipe your own. Happy cooking!

Zesty Southwest Chicken Salad

zesty southwest chicken salad, flavorful, colorful, fresh veggies, tangy dressing

I’ll never forget the first time I whipped up a batch of Zesty Southwest Chicken Salad for a summer barbecue at my house a few years back. I was scrambling to find something quick, flavorful, and crowd-pleasing, and boy, did this dish deliver! My family couldn’t stop raving about the bold flavors, and honestly, I felt like a kitchen rockstar that day.

Since then, this Zesty Southwest Chicken Salad has become a go-to in my recipe rotation. It’s one of those meals that just hits all the right notes with its smoky spices and fresh crunch. Whether I’m meal-prepping for the week or feeding a hungry crew, this Zesty Southwest Chicken Salad never lets me down.

So, let’s dive into why this dish is a must-try, and I’ll walk you through how to make your own Zesty Southwest Chicken Salad right at home.

Why You’ll Love This Recipe

I’ve found that this Zesty Southwest Chicken Salad is a total game-changer for anyone craving something hearty yet fresh. The mix of juicy chicken, crisp veggies, and that punchy dressing just sings in your mouth, and I’m not exaggerating when I say it’s addicting. In my kitchen, it’s the kind of recipe that disappears fast, no matter how much I make!

Plus, it’s incredibly versatile, which I adore. You can tweak it to your taste or whatever’s in your pantry, and it still turns out amazing. Trust me, once you try this Zesty Southwest Chicken Salad, you’ll be hooked just like I am!

Ingredients List

Let’s talk about what goes into making a killer Zesty Southwest Chicken Salad. I’m all about keeping things simple but packed with flavor, and I usually buy fresh, quality ingredients for this one because they shine through. Here’s the lineup for a batch that serves about 4-6 folks (depending on how hungry they are!).

For the Salad

  • 2 pounds boneless, skinless chicken breasts, cooked and shredded (I prefer grilling for that smoky vibe)
  • 1 can (15 oz) black beans, rinsed and drained for a hearty bite
  • 1 cup corn kernels, fresh, frozen, or canned (I love grilling fresh corn when it’s in season)
  • 1 red bell pepper, diced for a sweet crunch
  • 1/2 red onion, finely chopped (soak in cold water if it’s too strong for you)
  • 1 avocado, diced (add right before serving to keep it pretty)
  • 1/4 cup fresh cilantro, chopped (skip if you’re not a fan, I know it’s divisive!)

For the Dressing

  • 1/3 cup lime juice, freshly squeezed for that zing (about 2-3 limes)
  • 1/4 cup olive oil, extra virgin for smoothness
  • 1 teaspoon ground cumin, for that warm, earthy kick
  • 1/2 teaspoon chili powder, adjust if you’re spice-shy
  • 1 teaspoon honey, to balance the tartness (maple syrup works too)
  • Salt and pepper, to taste

I’ve gotta say, the dressing is what makes this Zesty Southwest Chicken Salad pop, so don’t skimp on the lime! And if you’ve got a few extra minutes, let the flavors meld together before tossing it all in. This Zesty Southwest Chicken Salad truly comes alive with these ingredients.

Variations

One of the things I love most about this Zesty Southwest Chicken Salad is how easy it is to switch things up. I’ve played around with it a ton over the years, and every tweak feels like a brand-new dish. Here are some variations I’ve tried (and loved) that might spark your creativity.

  • Spicy Kick: Toss in a diced jalapeño or a dash of hot sauce to the dressing if you’re craving heat. I tried this once for a game night, and my friends couldn’t get enough!
  • Cheesy Twist: Add 1/2 cup of shredded cheddar or crumbled cotija for a creamy, tangy layer. My kids always ask for this version.
  • Grain Power: Mix in 1 cup of cooked quinoa or brown rice to make your Zesty Southwest Chicken Salad a bit more filling. It’s great for lunch prep.
  • Vegetarian Vibes: Swap the chicken for chickpeas or tofu—still super tasty and protein-packed.
  • Tropical Touch: Throw in some diced mango or pineapple for a sweet contrast. I did this for a summer potluck, and it was a surprise hit.
  • Smoky Edge: Use chipotle powder instead of chili powder in the dressing for a deeper, smokier flavor.
  • Leafy Base: Serve your Zesty Southwest Chicken Salad over a bed of romaine or spinach if you want extra greens. I do this when I’m feeling virtuous (rare, but it happens!).

Honestly, there’s no wrong way to make this dish your own. I’ve had fun experimenting with this Zesty Southwest Chicken Salad, and I bet you will too.

Servings and Timing

Let’s break down the nitty-gritty of making this Zesty Southwest Chicken Salad so you can plan ahead. In my experience, it doesn’t take long to throw together, especially if you’ve got cooked chicken on hand. Here’s the timing I usually work with in my kitchen.

  • Prep Time: 20 minutes
  • Cook Time: 0 minutes (if chicken is pre-cooked; add 20 minutes if grilling)
  • Total Time: 20-40 minutes
  • Servings: 4-6 portions

I find this Zesty Southwest Chicken Salad is perfect for a quick weeknight meal or a make-ahead lunch. You’ll have plenty to share, or just keep it all to yourself—I won’t judge!

Step-by-Step Instructions

Alright, let’s get down to business and make this Zesty Southwest Chicken Salad. I’m gonna walk you through it like I’m right there in the kitchen with you, sharing my little tips and tricks. I’ve made this a million times, so trust me, it’s easier than it looks!

Zesty Southwest Chicken Salad recipe step-by-step guide
Delicious Zesty Southwest Chicken Salad prepared with love – follow this detailed recipe guide

Step 1: Prep the Chicken

If your chicken isn’t already cooked, grill or poach 2 pounds of boneless, skinless breasts. I’m a sucker for grilling because it adds a smoky depth to the Zesty Southwest Chicken Salad. Let it cool a bit, then shred it with two forks or your hands (way faster, if you ask me).

Step 2: Chop the Veggies

Dice up the red bell pepper, red onion, and avocado, and toss them into a big ol’ bowl. I like to soak the onion in cold water for 5 minutes to mellow it out—learned that trick after one too many teary chopping sessions. Add the corn and black beans too; it’s all starting to look like a party!

Step 3: Whip Up the Dressing

In a small bowl or jar, whisk together the lime juice, olive oil, cumin, chili powder, honey, salt, and pepper. I usually give it a good shake in a mason jar—less mess, more fun. Taste it and tweak as needed; this dressing is the soul of your Zesty Southwest Chicken Salad.

Step 4: Toss It All Together

Dump the shredded chicken into the veggie mix, pour over that zingy dressing, and give it a good toss. Sprinkle in the chopped cilantro last for a fresh pop (if you’re using it). I’ve learned to hold off on the avocado until right before serving so it doesn’t turn to mush in my Zesty Southwest Chicken Salad.

Step 5: Chill and Serve

If you’ve got time, let the Zesty Southwest Chicken Salad sit in the fridge for 30 minutes to let the flavors marry. I swear, it tastes even better after a quick chill. Serve it up as is, or with tortilla chips for some extra crunch—my personal fave!

There you have it, a no-fuss way to get this Zesty Southwest Chicken Salad on the table. Play around with the steps if you’ve got your own shortcuts—I’m all ears!

Nutritional Information

I’m not gonna lie, I don’t always obsess over the numbers, but I know it’s helpful to have a rough idea of what’s in this Zesty Southwest Chicken Salad. Here’s the breakdown per serving (based on 6 portions), and I think it’s pretty darn balanced for such a tasty dish.

  • Calories: 350 per serving
  • Fat: 18g
  • Protein: 28g
  • Carbohydrates: 22g
  • Sodium: 320mg

This Zesty Southwest Chicken Salad fills you up without feeling heavy, which is a win in my book. Of course, portions and add-ins can shift these stats, so adjust as you see fit!

Healthier Alternatives

If you’re looking to lighten up this Zesty Southwest Chicken Salad, I’ve got some swaps I’ve tried that work like a charm. I’m all about balance, so when I’m watching my intake, these tweaks keep the flavor without the guilt. Give ‘em a shot!

  • Lower Fat Dressing: Swap half the olive oil for Greek yogurt in the dressing. It’s creamy and cuts the fat without losing that zesty punch.
  • Less Avocado: Use just half an avocado or skip it for a lighter Zesty Southwest Chicken Salad. I do this sometimes when I’m out (sad day!).
  • Leaner Protein: Opt for turkey breast instead of chicken if you want fewer calories. I’ve swapped it before, and it’s still delish.
  • Cut the Corn: If carbs are a concern, reduce the corn or skip it altogether. Your Zesty Southwest Chicken Salad will still rock with the other goodies.

Serving Suggestions

I love getting creative with how I dish out this Zesty Southwest Chicken Salad because it’s so dang versatile. Here are a few ways I’ve served it at my table that always get a thumbs-up. Mix and match to suit your crew!

  • As a Main Dish: Serve a big bowl of Zesty Southwest Chicken Salad with some crusty bread on the side for a full meal.
  • In a Wrap: Stuff it into a whole-wheat tortilla for a quick, handheld lunch. My go-to on busy days!
  • With Chips: Pair your Zesty Southwest Chicken Salad with tortilla chips for a fun, scoopable appetizer.
  • Over Greens: Spoon it over mixed greens for a lighter, salad-on-salad vibe. I did this at my last dinner party, and it looked so fancy!

Common Mistakes to Avoid

I’ve had my fair share of kitchen flops with this Zesty Southwest Chicken Salad, so let me save you some grief with a few pitfalls to dodge. Trust me on this one, I’ve learned the hard way! Here’s what to watch out for.

  • Overdressing: Don’t drown your Zesty Southwest Chicken Salad—start with half the dressing and add more if needed. I’ve soaked a batch before, and it was a soggy mess.
  • Mushy Avocado: Adding avocado too early turns it brown and mushy. I’ve ruined the look of a dish doing this, so wait ‘til the end!
  • Undercooked Chicken: Make sure your chicken is fully cooked before shredding. I’ve rushed this step and regretted it.
  • Forgetting to Chill: Skipping the fridge time dulls the flavors of your Zesty Southwest Chicken Salad. Give it a rest if you can!

Storing Tips

I’ve found that this Zesty Southwest Chicken Salad holds up pretty well if you store it right, which is awesome for leftovers. Here’s how I keep mine fresh in my fridge or beyond. It’s saved me on busy weeks!

  • Refrigerator: Keeps for 3-4 days in an airtight container, but hold off on adding avocado until serving.
  • Freezer: I don’t recommend freezing Zesty Southwest Chicken Salad—the veggies get weird and watery.
  • Meal Prep: Store dressing separately to avoid sogginess if making your Zesty Southwest Chicken Salad ahead.

Zesty Southwest Chicken Salad recipe step-by-step guide
Delicious Zesty Southwest Chicken Salad prepared with love – follow this detailed recipe guide

Frequently Asked Questions

I’ve gotten a bunch of questions about this Zesty Southwest Chicken Salad over the years, so let’s tackle the most common ones. I’m happy to help clear things up!

Can I make this ahead of time?

Absolutely, you can prep Zesty Southwest Chicken Salad a day or two in advance. Just keep the dressing and avocado separate until you’re ready to eat. I’ve done this for parties, and it’s a lifesaver!

Is it spicy?

Not really, unless you want it to be. The chili powder in my Zesty Southwest Chicken Salad is mild, but feel free to add heat with jalapeños or hot sauce.

Can I use rotisserie chicken?

Heck yes! Rotisserie chicken is a huge time-saver for this recipe, and it tastes great. I’ve used it plenty of times.

What if I don’t like cilantro?

No worries, skip it or swap in parsley for a fresh vibe. I know cilantro’s not everyone’s jam.

Can I make it dairy-free?

It already is! There’s no dairy in my Zesty Southwest Chicken Salad unless you add cheese as a variation.

How do I keep the avocado from browning?

Add it last, or toss it with a bit of lime juice. I’ve found this helps a ton.

Is this gluten-free?

Yup, as long as you don’t serve it with bread or chips that contain gluten. It’s naturally good to go!

Can I double the recipe?

For sure, it scales up easily. I’ve doubled it for big gatherings, and it’s always a hit.

Conclusion

I hope you’re as excited as I am to whip up this Zesty Southwest Chicken Salad in your kitchen. It’s been a staple in my home for years, bringing bold flavors and happy faces to the table every time. Give this Zesty Southwest Chicken Salad a try, tweak it to your liking, and let me know how it turns out—I’d love to hear!

Conclusion

I hope you enjoyed this recipe for Zesty Southwest Chicken Salad! It’s truly one of my favorites, and I’m confident you’ll love it too.

Remember to follow the steps carefully for the best results. Don’t hesitate to experiment with your own variations and make this recipe your own. Happy cooking!

Irresistible Marry Me Chicken Delight

Irresistible, Marry Me Chicken Delight, savory, tender, flavorful, juicy

Hey there, friends! I’m still buzzing from the first time I whipped up this Irresistible Marry Me Chicken Delight in my little kitchen. It was one of those rainy evenings when I needed something comforting, and boy, did this dish deliver. My family couldn’t stop raving about it, and I swear my husband looked at me like he was ready to propose all over again (hence the name!).

I’ve made this recipe dozens of times since, tweaking it here and there until it became pure magic. If you’re craving a meal that’s creamy, savory, and just screams “love on a plate,” then this Irresistible Marry Me Chicken Delight is gonna steal your heart. Trust me, it’s become a staple in my house, and I can’t wait for you to try it.

And honestly, there’s something about the way the flavors meld together that feels like a warm hug. So, let’s dive into making your own batch of Irresistible Marry Me Chicken Delight and see why it’s earned its swoon-worthy name!

Why You’ll Love This Recipe

I’ve found that this Irresistible Marry Me Chicken Delight is one of those dishes that just wins everyone over, no matter their taste buds. It’s got this rich, creamy sauce that clings to every bite of tender chicken, with a hint of garlic and sundried tomatoes that’ll make your kitchen smell like an Italian bistro. Plus, it’s surprisingly easy to pull off, even on a busy weeknight.

In my kitchen, this recipe is a go-to when I want to impress without slaving over the stove for hours. I mean, who doesn’t love a meal that looks fancy but comes together in under an hour? I’m telling you, once you make this Irresistible Marry Me Chicken Delight, you’ll be hooked just like I am.

Ingredients List

Alright, let’s talk about what you’ll need to create this Irresistible Marry Me Chicken Delight. I’m a big believer in using quality ingredients because they really shine in a dish like this. I usually buy my chicken from a local butcher for that extra freshness, and I’m picky about my sundried tomatoes (gotta have that tangy punch!).

Here’s the lineup with exact measurements to make sure your Irresistible Marry Me Chicken Delight turns out perfect every time. I’ve added a few notes on my preferences, just to give you a nudge in the right direction. Let’s get these goodies ready for a flavor explosion!

  • 4 boneless, skinless chicken breasts, about 6 oz each, pounded to even thickness
  • 1/2 cup (60g) all-purpose flour, for dredging
  • 2 tablespoons (30ml) olive oil, I prefer extra virgin for richer flavor
  • 2 tablespoons (28g) unsalted butter, for that silky touch
  • 3 cloves garlic, minced finely for maximum aroma
  • 1 cup (240ml) chicken broth, low-sodium so you control the salt
  • 1 cup (240ml) heavy cream, don’t skimp here for the best texture
  • 1/2 cup (50g) grated Parmesan cheese, freshly grated if you can
  • 1/2 cup (100g) sundried tomatoes, chopped, packed in oil for extra zest
  • 1 teaspoon dried Italian seasoning, for that herbaceous kick
  • Salt and pepper, to taste, because seasoning is everything

This mix is the heart of the Irresistible Marry Me Chicken Delight, and I promise, it’s worth every bit of effort to gather these up.

Variations

I love how versatile this Irresistible Marry Me Chicken Delight can be, and over the years, I’ve played around with it to suit different moods or dietary needs. Sometimes, you just gotta switch things up, right? Here are some of my favorite tweaks that keep this dish exciting every time I make it.

  • Spicy Kick: Toss in a pinch of red pepper flakes or a dash of hot sauce to the sauce for a fiery twist. I tried this once during a game night, and my friends couldn’t get enough of the heat!
  • Mushroom Magic: Sauté 1 cup of sliced cremini mushrooms with the garlic for an earthy depth. This is a go-to when I’m feeling extra cozy.
  • Spinach Boost: Stir in a handful of fresh baby spinach at the end for a pop of color and nutrition. My kids always ask for this version, sneaky veggies and all.
  • Bacon Bliss: Add 4 strips of crispy, crumbled bacon to the sauce for a smoky vibe. I did this for a brunch, and let’s just say there were no leftovers.
  • Cheese Swap: Use Asiago or Pecorino Romano instead of Parmesan for a sharper bite. I stumbled on this by accident and loved the switch-up.
  • Lightened Up: Replace half the heavy cream with Greek yogurt for a tangy, lighter sauce. It’s my trick for cutting guilt without losing the yum in Irresistible Marry Me Chicken Delight.
  • Herb Fresh: Mix in 2 tablespoons of chopped fresh basil or parsley right before serving for a burst of freshness. It’s like spring on a plate.
  • Lemon Zest: Squeeze in the juice of half a lemon for a bright, citrusy note. I’ve done this for summer dinners, and it pairs so well with the creamy Irresistible Marry Me Chicken Delight.

Each of these variations keeps the spirit of the original while letting you put your own stamp on it. Experiment and see what sings to you!

Servings and Timing

Let’s break down the nitty-gritty for this Irresistible Marry Me Chicken Delight so you can plan your meal prep like a pro. In my experience, the timing works out just right for a family dinner or even a quick date night dish. Here’s how long it usually takes me to get this beauty on the table.

  • Prep Time: 15 minutes
  • Cook Time: 30 minutes
  • Total Time: 45 minutes
  • Servings: 4 hearty portions

I’ve found these estimates hold true as long as I’ve got everything prepped and ready to go. You’ll be amazed at how fast you can whip up something as stunning as Irresistible Marry Me Chicken Delight!

Step-by-Step Instructions

Let’s get cooking, folks! I’m walking you through my process for this Irresistible Marry Me Chicken Delight step by step, with a few of my personal tricks tossed in. I’ve burned a few pans learning this, so trust me to keep it simple and foolproof.

Irresistible Marry Me Chicken Delight recipe step-by-step guide
Delicious Irresistible Marry Me Chicken Delight prepared with love – follow this detailed recipe guide

Step 1: Prep the Chicken

Start by patting your chicken breasts dry with paper towels; this helps them crisp up nicely. Season both sides with salt and pepper, then dredge them lightly in flour, shaking off any excess. I’ve learned that too much flour can make the sauce gummy, so just a thin coat does the trick.

Step 2: Sear the Chicken

Heat olive oil and butter in a large skillet over medium-high heat until it’s sizzling (oh, that smell!). Add the chicken and sear for about 4-5 minutes per side until golden brown. Don’t worry about cooking it through yet; we’re just building that flavor crust for the Irresistible Marry Me Chicken Delight.

Step 3: Sauté the Garlic

Remove the chicken to a plate and lower the heat to medium. Toss in the minced garlic and sauté for about 30 seconds until fragrant—don’t let it burn, or it’ll taste bitter (been there, done that). This step is key for that irresistible aroma in your Irresistible Marry Me Chicken Delight.

Step 4: Build the Sauce

Pour in the chicken broth, scraping up those yummy browned bits from the pan. Stir in the heavy cream, Parmesan, sundried tomatoes, and Italian seasoning, whisking until it’s smooth as silk. I always taste-test here to adjust the salt—it’s gotta be just right for the Irresistible Marry Me Chicken Delight.

Step 5: Simmer with Chicken

Nestle the chicken back into the skillet, spooning some sauce over the top. Let it simmer for 15-20 minutes on low heat until the chicken is cooked through (internal temp of 165°F is my rule). This slow simmer lets the flavors marry—pun intended—for the perfect Irresistible Marry Me Chicken Delight.

Step 6: Final Touches

Once it’s done, give it a quick rest for a couple of minutes before serving. I like to sprinkle a little extra Parmesan on top for that cheesy wow factor. And there you have it, a drool-worthy plate of Irresistible Marry Me Chicken Delight ready to impress!

Nutritional Information

I’m no dietitian, but I like to keep tabs on what I’m serving, especially with a dish as indulgent as this Irresistible Marry Me Chicken Delight. Here’s a rough breakdown per serving, based on my usual portions. It’s a splurge, but so worth it for special nights!

  • Calories: 520 per serving
  • Fat: 36g
  • Protein: 34g
  • Carbohydrates: 12g
  • Sodium: 680mg

I think knowing these numbers helps balance your meal planning. Enjoy your Irresistible Marry Me Chicken Delight without any guilt by pairing it with lighter sides!

Healthier Alternatives

If you’re watching your waistline like I sometimes do, there are ways to lighten up this Irresistible Marry Me Chicken Delight without sacrificing that “marry me” charm. I’ve swapped out a few things over the years when I’m feeling health-conscious. Here are my go-to tweaks.

  • Cream Substitute: Use half-and-half or a mix of milk and Greek yogurt instead of heavy cream to cut some fat. It’s not quite as decadent, but still creamy.
  • Less Cheese: Halve the Parmesan and sprinkle just a bit on top for flavor. I do this when I’m cutting back.
  • Leaner Protein: Try turkey cutlets instead of chicken breasts for a lower-fat option. I’ve done this, and it still works with the sauce of Irresistible Marry Me Chicken Delight.
  • More Veggies: Bulk up the dish with extra spinach or zucchini to lower the calorie density. It’s a sneaky way I get more greens into my family’s plates while enjoying Irresistible Marry Me Chicken Delight.

Serving Suggestions

I love serving this Irresistible Marry Me Chicken Delight in ways that make it shine even brighter on the table. At my last dinner party, it was the star of the show, and these pairings got everyone asking for seconds. Here are my favorite ways to dish it up.

  • Over Pasta: Spoon it over fettuccine or spaghetti to soak up that creamy sauce. It’s my ultimate comfort combo.
  • With Crusty Bread: Serve alongside garlic bread for dipping into the sauce. Pure heaven!
  • Next to Veggies: Pair with steamed broccoli or roasted asparagus for a balanced plate. It’s how I sneak in greens with my Irresistible Marry Me Chicken Delight.
  • On Rice: Lay it over fluffy white or brown rice for a hearty, filling meal. This is my weeknight go-to for Irresistible Marry Me Chicken Delight.

Common Mistakes to Avoid

I’ve made my fair share of oopsies while perfecting this Irresistible Marry Me Chicken Delight, so let me save you some trouble. Trust me on this one, these pitfalls can turn your masterpiece into a mess. Here’s what to watch out for.

  • Overcooking Chicken: Don’t sear it too long initially, or it’ll dry out during simmering. I learned the hard way and ended up with rubbery meat.
  • Burning Garlic: Keep an eye on that garlic; a second too long, and it’s bitter. Been there, ruined the sauce once with this mistake in my Irresistible Marry Me Chicken Delight.
  • Too Much Flour: Don’t cake the chicken in flour, or your sauce will get gloppy. Just a light dusting is all you need.
  • Skipping Rest Time: Let the dish sit a minute before serving, or the flavors won’t settle. I rushed once, and my Irresistible Marry Me Chicken Delight just wasn’t as magical.

Storing Tips

Got leftovers of this Irresistible Marry Me Chicken Delight? No worries, I’ve figured out the best ways to keep it tasting fresh. In my experience, it holds up pretty well if you store it right.

  • Refrigerator: Store in an airtight container for up to 3 days. Reheat gently on the stove with a splash of broth.
  • Freezer: Freeze portions in freezer-safe bags for up to 2 months. Thaw overnight before reheating for best results with Irresistible Marry Me Chicken Delight.
  • Reheating Tip: Avoid the microwave if you can; it messes with the sauce texture. I always reheat my Irresistible Marry Me Chicken Delight on low heat.

Irresistible Marry Me Chicken Delight recipe step-by-step guide
Delicious Irresistible Marry Me Chicken Delight prepared with love – follow this detailed recipe guide

Frequently Asked Questions

I’ve gotten tons of questions about this Irresistible Marry Me Chicken Delight over the years, so let’s tackle the most common ones. I’m happy to help clear up any confusion!

Can I make this ahead of time?

Absolutely, you can prep the Irresistible Marry Me Chicken Delight up to the simmering step and refrigerate it for a day. Just reheat and finish cooking when you’re ready. I’ve done this for parties, and it saves so much stress!

Can I use chicken thighs instead?

Yep, thighs work great and stay juicier, honestly. Just adjust the cooking time a bit since they take longer. I’ve switched to thighs when I want a richer flavor.

What if I don’t have sundried tomatoes?

No biggie! You can use roasted red peppers or even fresh cherry tomatoes for a different vibe. I’ve subbed in peppers before, and it still tasted awesome.

Is this dish gluten-free?

It can be if you skip the flour dredge or use a gluten-free alternative. I’ve made it this way for a friend, and it didn’t lose its charm.

Can I make it dairy-free?

Sure thing, try coconut cream instead of heavy cream and skip the Parmesan or use a vegan cheese. I haven’t tried this myself, but I’ve heard it works decently.

How do I thicken the sauce?

If it’s too thin, let it simmer a bit longer, or add a slurry of cornstarch and water. I’ve had to do this once when I added too much broth by mistake.

Can I double the recipe?

Go for it! Just use a bigger skillet or cook in batches so you don’t crowd the pan. I’ve doubled the Irresistible Marry Me Chicken Delight for potlucks with no issues.

What’s the best side dish?

I’m partial to pasta or crusty bread to soak up the sauce of Irresistible Marry Me Chicken Delight. But honestly, anything starchy or a crisp veggie works. What’s your favorite pairing?

Conclusion

Well, there you have it, my friends—everything you need to create your own Irresistible Marry Me Chicken Delight at home. I’m so excited for you to try this dish and see why it’s such a hit in my family. If it makes your loved ones swoon like mine, drop me a note; I’d love to hear about it!

So, grab those ingredients, roll up your sleeves, and let’s make some magic with this Irresistible Marry Me Chicken Delight. Happy cooking, y’all!

Conclusion

I hope you enjoyed this recipe for Irresistible Marry Me Chicken Delight! It’s truly one of my favorites, and I’m confident you’ll love it too.

Remember to follow the steps carefully for the best results. Don’t hesitate to experiment with your own variations and make this recipe your own. Happy cooking!

Sweet and Spicy Gochujang Chicken

spicy, gochujang chicken, sweet, flavorful, Korean, grilled, delicious

Hey there, friends! I’ve gotta tell ya, I stumbled upon a game-changer a few years back when I first whipped up a batch of Sweet and Spicy Gochujang Chicken for a family dinner. My husband, who usually plays it safe with flavors, couldn’t stop raving about the sticky, fiery glaze, and my kids? They licked their plates clean, which is no small feat!

I discovered this recipe while rummaging through a Korean cookbook at a local thrift store, and it’s been a staple in my kitchen ever since. There’s something magical about how the Sweet and Spicy Gochujang Chicken balances heat with a touch of sweetness. Trust me, once you try it, you’ll be hooked just like I was.

Now, I’m no professional chef, but I’ve cooked enough meals (and had my fair share of kitchen disasters) to know what works. So, let’s dive into making this Sweet and Spicy Gochujang Chicken together, and I’ll share all my little tips to help you nail it on the first go!

Why You’ll Love This Recipe

I’ve found that Sweet and Spicy Gochujang Chicken is one of those dishes that just hits all the right notes. It’s got that perfect combo of bold, punchy flavors, and honestly, in my kitchen, it’s a crowd-pleaser every single time. Whether you’re cooking for picky eaters or adventurous foodies, this dish somehow wins everyone over.

Plus, it’s surprisingly easy to pull off, even on a busy weeknight. I mean, who doesn’t love a recipe that looks fancy but doesn’t have you slaving over the stove for hours? I’m all about that kind of cooking, and I think you’ll adore this Sweet and Spicy Gochujang Chicken as much as I do.

Ingredients List

Alright, let’s talk about what you’ll need to make Sweet and Spicy Gochujang Chicken. I’m pretty picky about getting the right balance of flavors here, so I’ve got some preferences for brands and types of ingredients. Don’t worry, though; I’ll keep it flexible in case you’ve got something different in your pantry.

I usually buy gochujang from my local Asian market because the flavor is more authentic than some supermarket versions, but any will do in a pinch. Here’s the full rundown for your Sweet and Spicy Gochujang Chicken, with exact measurements to keep things foolproof.

For the Chicken

  • 2 pounds (900g) boneless, skinless chicken thighs, trimmed of excess fat
  • 2 tablespoons (30ml) vegetable oil, for cooking
  • 1 teaspoon (5g) salt, to season

For the Gochujang Sauce

  • 3 tablespoons (45g) gochujang paste, for that signature kick
  • 2 tablespoons (30ml) soy sauce, low-sodium if you’re watching salt
  • 2 tablespoons (25g) brown sugar, for sweetness to balance the heat
  • 1 tablespoon (15ml) rice vinegar, for a tangy edge
  • 1 tablespoon (15ml) sesame oil, for depth of flavor
  • 2 cloves garlic, minced finely
  • 1 teaspoon (2g) grated fresh ginger, for a little zing

I also like to have some green onions or sesame seeds on hand for garnish because they make the Sweet and Spicy Gochujang Chicken look as good as it tastes. If you’ve got a fave hot sauce, feel free to sneak a dash in for an extra punch. Heck, I’ve been known to tweak this recipe depending on what’s in my fridge!

Variations

One thing I love about Sweet and Spicy Gochujang Chicken is how versatile it can be. I’ve played around with this recipe more times than I can count, and I’ve got a handful of variations that my family begs for. Whether you’re looking to switch up the protein or crank the heat, there’s a version of Sweet and Spicy Gochujang Chicken for everyone.

Here are some twists I’ve tried over the years (and trust me, they’re all winners). I’m sharing these because I know sometimes you just wanna mix things up a bit.

  • Turkey Twist: Swap chicken for turkey thighs if you’re feeling festive or just wanna try something new.
  • Extra Fiery: Add a teaspoon of gochugaru (Korean chili flakes) to the sauce for a real tongue-tingler.
  • Tofu Take: Use firm tofu instead of chicken for a plant-based option; I tried this once and was shocked at how well it soaked up the flavors!
  • Honey Glaze: Replace brown sugar with honey for a smoother, floral sweetness in your Sweet and Spicy Gochujang Chicken.
  • Drumstick Delight: Use chicken drumsticks for a juicier bite; my kids always ask for this version.
  • Soy-Free Spin: Swap soy sauce for coconut aminos if you’ve got dietary restrictions.
  • Garlicky Goodness: Double the garlic if you’re a garlic fiend like me; it’s never too much in my book.
  • Mild Manners: Cut the gochujang in half and mix with a bit of ketchup for a kid-friendly take on Sweet and Spicy Gochujang Chicken.

Servings and Timing

In my experience, timing is everything when it comes to getting Sweet and Spicy Gochujang Chicken on the table without a meltdown (mine or the kids’). It usually takes me less than an hour from start to finish, which is a lifesaver on hectic days. Here’s the breakdown for planning your meal prep.

  • Prep Time: 15 minutes
  • Cook Time: 25 minutes
  • Total Time: 40 minutes
  • Servings: 4-6 portions

These timings are based on how I whip up Sweet and Spicy Gochujang Chicken in my own chaotic kitchen, so adjust if you’re a slower chopper or have a different setup!

Step-by-Step Instructions

Let’s get down to business and cook some Sweet and Spicy Gochujang Chicken! I’m breaking this into steps that are easy to follow, even if you’re a newbie in the kitchen. I’ve made this tons of times, so I’ve got a few tricks up my sleeve to share.

Sweet and Spicy Gochujang Chicken recipe step-by-step guide
Delicious Sweet and Spicy Gochujang Chicken prepared with love – follow this detailed recipe guide

Step 1: Prep the Chicken

First off, pat your chicken thighs dry with paper towels. I’ve learned that this little step helps them crisp up nicely when you cook ‘em. Season with a pinch of salt, and set aside while you mix up the sauce for your Sweet and Spicy Gochujang Chicken.

Step 2: Make the Gochujang Sauce

In a small bowl, whisk together the gochujang, soy sauce, brown sugar, rice vinegar, sesame oil, garlic, and ginger. I usually taste-test it here (yep, with a clean spoon!) to make sure the sweet and heat are balanced. Adjust if needed—this sauce is the heart of your Sweet and Spicy Gochujang Chicken.

Step 3: Cook the Chicken

Heat the vegetable oil in a large skillet over medium-high heat. Add the chicken thighs and sear for about 4-5 minutes per side until golden. Don’t crowd the pan, or you’ll end up steaming instead of browning—I’ve made that mistake before with Sweet and Spicy Gochujang Chicken!

Step 4: Glaze and Simmer

Once the chicken’s got some color, pour in that glorious gochujang sauce. Lower the heat to medium and let it simmer for 10-12 minutes, turning the chicken occasionally to coat it evenly. The sauce should thicken into a sticky glaze that screams Sweet and Spicy Gochujang Chicken perfection.

Step 5: Check and Rest

Make sure the chicken’s cooked through (internal temp of 165°F if you’ve got a thermometer). Then, let it rest for a couple of minutes before slicing. I always sneak a piece to “test” it—chef’s privilege, right?

Step 6: Garnish and Serve

Sprinkle some chopped green onions or sesame seeds on top for a little flair. I love how it makes my Sweet and Spicy Gochujang Chicken look like it came from a restaurant. Serve it hot, and watch your family dig in!

Nutritional Information

I’m not gonna lie, I don’t always obsess over the numbers, but I know some of you like to keep track. So here’s the nutritional lowdown for Sweet and Spicy Gochujang Chicken based on a standard serving. It’s a hearty dish, but not too heavy in my opinion.

  • Calories: 380 per serving
  • Fat: 22g
  • Protein: 28g
  • Carbohydrates: 18g
  • Sodium: 620mg

These are rough estimates, of course, since portions and tweaks can change things up. Still, it’s nice to know what you’re getting with Sweet and Spicy Gochujang Chicken!

Healthier Alternatives

If you’re looking to lighten up Sweet and Spicy Gochujang Chicken, I’ve got some swaps I’ve tried when I’m watching my intake. Honestly, I’m all about flavor over strict diets, but these tweaks still deliver the goods. Here are a few ideas to make your Sweet and Spicy Gochujang Chicken a bit healthier.

  • Lower Sugar: Use a natural sweetener like stevia or cut the brown sugar by half; it still works great.
  • Lean Protein: Swap thighs for chicken breast to reduce fat—I’ve done this and it’s still juicy if you don’t overcook it.
  • Less Oil: Use a non-stick pan and cut the oil to just a teaspoon; I do this sometimes for Sweet and Spicy Gochujang Chicken.
  • Baked Option: Bake the chicken at 400°F instead of frying to save on calories; it’s a method I turn to often.

Serving Suggestions

I love serving Sweet and Spicy Gochujang Chicken in ways that make it feel like a full-on feast. At my last dinner party, everyone was asking for seconds, and I think it’s all about the pairings. Here are my go-to ideas for enjoying Sweet and Spicy Gochujang Chicken.

  • With Rice: Serve over steamed jasmine rice to soak up that incredible sauce.
  • Veggie Side: Pair with stir-fried bok choy or broccoli for a balanced meal.
  • In a Wrap: Stuff it into lettuce cups for a low-carb, Korean-inspired taco night.
  • With Noodles: Toss with some rice noodles for a fun twist on Sweet and Spicy Gochujang Chicken.

Common Mistakes to Avoid

I’ve had my fair share of oops moments while making Sweet and Spicy Gochujang Chicken, so let me save you the hassle. Trust me on this one, I learned the hard way with a few of these slip-ups. Here are common pitfalls to dodge when cooking Sweet and Spicy Gochujang Chicken.

  • Overcooking Chicken: Don’t let it go past 165°F, or it’ll turn dry as cardboard—I’ve ruined a batch this way.
  • Too Much Heat: Start with less gochujang if you’re spice-shy; you can always add more.
  • Burning the Sauce: Keep the heat low when simmering, or the sugar will scorch—yep, been there.
  • Skipping the Rest: Let the chicken rest before slicing for juicier results with Sweet and Spicy Gochujang Chicken.

Storing Tips

I’ve found that Sweet and Spicy Gochujang Chicken keeps pretty well if you store it right. In my experience, leftovers are just as tasty the next day. Here’s how I handle storage to keep that flavor locked in.

  • Refrigerator: Store in an airtight container for up to 3-4 days.
  • Freezer: Freeze in portioned containers for up to 2 months; just thaw overnight.
  • Reheating: Warm gently on the stove with a splash of water to revive the sauce for Sweet and Spicy Gochujang Chicken.

Sweet and Spicy Gochujang Chicken recipe step-by-step guide
Delicious Sweet and Spicy Gochujang Chicken prepared with love – follow this detailed recipe guide

Frequently Asked Questions

I get a lot of questions about Sweet and Spicy Gochujang Chicken, so I’m answering the most common ones here. Let’s tackle these so you’ve got all the info you need!

Can I make Sweet and Spicy Gochujang Chicken ahead of time?

Absolutely! I often prep the sauce a day ahead and store it in the fridge. Cook the chicken fresh if you can, but reheated leftovers still slap.

Is gochujang very spicy?

It’s got a kick, but it’s more of a deep, fermented heat than a sharp burn. I think it’s manageable, especially when balanced with sugar.

Can I use chicken breast instead?

Yep, I’ve done it plenty. Just don’t overcook it, or it’ll get tough.

What if I can’t find gochujang?

No worries—mix sriracha with a bit of miso paste for a decent sub. It’s not perfect, but it works in a pinch for Sweet and Spicy Gochujang Chicken.

Is this recipe kid-friendly?

My kids love it, but I tone down the gochujang sometimes. Start small and see what they can handle.

Can I grill the chicken?

For sure! Grill it first, then brush on the sauce at the end to avoid burning.

How do I make it less sweet?

Cut back on the brown sugar or add a splash more vinegar. I’ve tweaked it this way when I’m in a savory mood.

Does it pair well with beer?

Heck yeah, a crisp lager cuts through the heat of Sweet and Spicy Gochujang Chicken like a dream. That’s my Saturday night vibe!

Conclusion

So there ya have it, my take on Sweet and Spicy Gochujang Chicken that’s sure to spice up your dinner routine. I’ve poured all my kitchen know-how into this guide, and I can’t wait for you to give it a whirl. Let me know how your batch of Sweet and Spicy Gochujang Chicken turns out—I’m all ears for your tweaks and stories!

Conclusion

I hope you enjoyed this recipe for Sweet and Spicy Gochujang Chicken! It’s truly one of my favorites, and I’m confident you’ll love it too. Remember to follow the steps carefully for the best results.

Don’t hesitate to experiment with your own variations and make this recipe your own. Happy cooking!

Spiced Coconut Basil Chicken

spiced coconut basil chicken, flavorful, aromatic, tender, succulent, exotic spices, fragrant herbs

I’ll never forget the first time I stumbled upon the idea of making Spiced Coconut Basil Chicken. It was one of those rainy evenings when I was rummaging through my pantry, desperate for something comforting yet exciting, and I had a bunch of fresh basil just begging to be used. I thought, why not toss it together with some coconut milk and a handful of spices I had lying around?

The result was pure magic, and now this Spiced Coconut Basil Chicken is a staple in my house.

My family can’t get enough of it, honestly. Every time I whip up a batch of Spiced Coconut Basil Chicken, the kitchen smells like a tropical getaway, and I’m instantly transported. I’m thrilled to share this recipe with you because I know you’ll fall in love with it just like we did.

And trust me, even if you’re not a pro in the kitchen, this Spiced Coconut Basil Chicken is totally doable. So, let’s dive in and get cooking!

Why You’ll Love This Recipe

I’ve gotta say, there’s something special about Spiced Coconut Basil Chicken that just hooks you from the first bite. In my kitchen, it’s become the go-to dish when I want something flavorful without spending hours slaving over the stove. The creamy coconut, zesty spices, and fresh basil come together in a way that feels like a warm hug on a plate.

What I love most is how versatile this Spiced Coconut Basil Chicken can be. You can dial up the heat, tone it down for picky eaters, or even swap ingredients based on what you’ve got. I’ve found it’s a crowd-pleaser no matter who’s at the table, and that’s a win in my book!

Ingredients List

Alright, let’s talk about what you’ll need to make this Spiced Coconut Basil Chicken. I’m pretty picky about getting fresh, quality stuff for this dish because it really shines through in the flavor. Here’s my go-to list, with a few personal notes on what I prefer to use.

For the Chicken Marinade

  • 1.5 pounds (680g) boneless, skinless chicken thighs, cut into bite-sized pieces (I prefer thighs over breasts for juiciness)
  • 2 tablespoons (30ml) soy sauce, for that umami punch
  • 1 tablespoon (15g) brown sugar, to balance the heat
  • 1 teaspoon (5g) ground cumin, for earthy depth

For the Sauce and Cooking

  • 1 tablespoon (15ml) vegetable oil, or coconut oil if you’ve got it
  • 1 medium onion (about 150g), finely chopped for sweetness
  • 3 garlic cloves (about 15g), minced (I always add an extra because, why not?)
  • 1 tablespoon (15g) fresh ginger, grated for a zingy kick
  • 1-2 teaspoons (5-10g) red chili flakes, adjust based on your spice tolerance
  • 1 can (13.5 oz or 400ml) full-fat coconut milk, for that luscious creaminess
  • 1 cup (25g) fresh basil leaves, roughly torn (Thai basil is my fave if you can find it)
  • 1 teaspoon (5g) turmeric powder, for color and warmth
  • Juice of 1 lime (about 30ml), to brighten everything up
  • Salt and pepper, to taste (I usually start with a pinch and adjust)

I usually buy my coconut milk from a local Asian market because the canned stuff there is thicker and richer. When you’re gathering ingredients for Spiced Coconut Basil Chicken, don’t skimp on the basil—it’s the star! And if you’ve got a favorite spice blend, feel free to sneak it in for your own twist on Spiced Coconut Basil Chicken.

Variations

One of the reasons I keep coming back to Spiced Coconut Basil Chicken is how easy it is to switch things up. I’ve played around with this recipe more times than I can count, and every variation brings something new to the table. Here are some of my favorite tweaks that you might wanna try for your own Spiced Coconut Basil Chicken adventure.

  • Spicy Kick: Toss in an extra teaspoon of chili flakes or a sliced fresh Thai chili if you’re craving heat. I did this once for a game night, and my friends couldn’t stop raving (or reaching for water)!
  • Veggie-Packed: Add a handful of sliced bell peppers or zucchini during the last few minutes of cooking for extra color and crunch.
  • Thai-Inspired: Swap regular basil for Thai basil and add a splash of fish sauce for an authentic vibe. This is my go-to when I’m feeling fancy.
  • Mild and Creamy: Cut back on the chili flakes and stir in an extra half-cup of coconut milk for a gentler flavor—perfect for kids.
  • Protein Swap: Use tofu or shrimp instead of chicken for a different spin. I tried tofu once, and it soaked up the Spiced Coconut Basil Chicken flavors like a dream.
  • Nutty Twist: Sprinkle in some crushed peanuts or cashews right before serving for a bit of texture. My kids always ask for this version!
  • Low-Carb Option: Skip the rice and serve over cauliflower rice for a lighter meal. I’ve done this when I’m watching carbs, and it still hits the spot.
  • Citrus Burst: Add some orange zest along with the lime juice for a surprising pop. I stumbled on this by accident, and now it’s a regular riff.

These variations keep Spiced Coconut Basil Chicken fresh every time I make it. Don’t be afraid to experiment—half the fun is making it your own!

Servings and Timing

Let’s break down the nitty-gritty of making Spiced Coconut Basil Chicken so you can plan accordingly. In my experience, this recipe comes together pretty quickly, even on a busy weeknight. Here’s how it shakes out when I’m cooking up a batch of Spiced Coconut Basil Chicken.

  • Prep Time: 15 minutes
  • Cook Time: 25 minutes
  • Total Time: 40 minutes
  • Servings: 4-6 portions

I’ve found that prepping everything ahead of time (like chopping the onion and garlic) can shave off a few minutes if you’re in a rush. This Spiced Coconut Basil Chicken serves a small crowd, but it’s easy to double if you’ve got extra mouths to feed!

Step-by-Step Instructions

Now, let’s get into the good stuff—how to actually make Spiced Coconut Basil Chicken. I’ve made this so many times that I’ve got a few tricks up my sleeve to make it foolproof. Follow along, and I’ll walk you through it like we’re cooking side by side.

Spiced Coconut Basil Chicken  recipe step-by-step guide
Delicious Spiced Coconut Basil Chicken prepared with love – follow this detailed recipe guide

Step 1: Marinate the Chicken

Start by mixing the chicken pieces with soy sauce, brown sugar, and cumin in a bowl. Let it sit for at least 10 minutes—or up to an hour if you’ve got time. I usually do this first thing while I chop everything else; it gives the Spiced Coconut Basil Chicken that deep, savory base.

Step 2: Sauté the Aromatics

Heat the vegetable oil in a large skillet over medium heat. Toss in the chopped onion, garlic, and ginger, and cook until they’re soft and fragrant—about 3-4 minutes. I love this part because the kitchen starts smelling amazing, like the start of something incredible with Spiced Coconut Basil Chicken.

Step 3: Cook the Chicken

Add the marinated chicken to the skillet, stirring to coat it with the aromatics. Cook for about 5-7 minutes until it’s browned on the outside. Don’t worry if it’s not fully cooked yet—it’ll finish in the sauce for that perfect Spiced Coconut Basil Chicken texture.

Step 4: Build the Sauce

Pour in the coconut milk, then stir in the chili flakes, turmeric, and a pinch of salt. Bring it to a gentle simmer and let it bubble for 10-12 minutes, stirring occasionally. I usually taste-test here to tweak the spices—sometimes I’ll add a smidge more heat for my Spiced Coconut Basil Chicken.

Step 5: Finish with Freshness

Once the chicken is cooked through, turn off the heat and stir in the fresh basil and lime juice. The basil wilts just enough to release its aroma, and the lime cuts through the richness. This final step is what makes Spiced Coconut Basil Chicken sing, trust me!

Step 6: Serve It Up

Scoop this Spiced Coconut Basil Chicken over some steamed rice or noodles, and you’re good to go. I like to garnish with a few extra basil leaves just for looks. It’s a simple dish, but man, it packs a flavorful punch every time.

Nutritional Information

I’m not gonna lie, I don’t always obsess over the numbers, but I know some of you like to keep track when enjoying Spiced Coconut Basil Chicken. So, here’s the breakdown per serving (based on 6 portions). It’s a hearty dish, but not too heavy if you balance it with light sides.

  • Calories: 380 per serving
  • Fat: 24g
  • Protein: 28g
  • Carbohydrates: 12g
  • Sodium: 620mg

I think this Spiced Coconut Basil Chicken is pretty well-rounded, especially with all that protein. If you’re watching fat intake, there are ways to lighten it up without losing the vibe of Spiced Coconut Basil Chicken.

Healthier Alternatives

Speaking of lightening things up, I’ve swapped out a few things over the years when I’m trying to keep Spiced Coconut Basil Chicken on the healthier side. These tweaks don’t mess with the flavor too much, which is key for me. Here are some ideas that have worked in my kitchen.

  • Low-Fat Coconut Milk: Use lite coconut milk instead of full-fat to cut down on calories. It’s not as creamy, but it still works.
  • Less Oil: Halve the oil or use a non-stick pan with just a spritz of cooking spray. I’ve done this when I’m counting calories.
  • More Veggies: Bulk up the dish with spinach or broccoli to add nutrients and stretch the Spiced Coconut Basil Chicken further.
  • Lean Protein: Swap chicken thighs for breasts if you’re looking to reduce fat. I’ve tried it, and while it’s a bit drier, it’s still tasty in Spiced Coconut Basil Chicken.

Serving Suggestions

I’ve got a few favorite ways to dish out Spiced Coconut Basil Chicken that always get thumbs-ups at my table. Whether it’s a casual weeknight or a small get-together, these ideas make it feel special. Let’s talk about how I like to serve up Spiced Coconut Basil Chicken.

  • Over Rice: Spoon it over fluffy jasmine rice to soak up all that creamy sauce. It’s my default, honestly.
  • With Noodles: Pair it with rice noodles for a different texture—I did this at my last dinner party, and it was a hit.
  • Low-Carb Style: Serve over cauliflower rice if you’re cutting carbs. I love how it still feels indulgent with Spiced Coconut Basil Chicken.
  • With Bread: Grab some naan or flatbread to scoop up the sauce. It’s a fun twist when I’m out of rice!

Common Mistakes to Avoid

Alright, let’s chat about a few pitfalls I’ve fallen into while perfecting Spiced Coconut Basil Chicken. I’ve learned the hard way on some of these, so trust me when I say avoiding them will save you a headache. Here are the biggies to watch out for with Spiced Coconut Basil Chicken.

  • Overcooking the Chicken: Don’t cook the chicken too long before adding the sauce—it’ll dry out. I’ve ruined a batch or two this way.
  • Adding Basil Too Early: Toss in the basil at the end, or it’ll turn mushy and lose its punch. Learned this after a sad, wilted mess!
  • Skipping the Lime: Don’t forget that lime juice—it balances the richness of Spiced Coconut Basil Chicken. I skipped it once, and it just wasn’t the same.
  • Using Low-Quality Coconut Milk: Cheap coconut milk can be watery and ruin the texture. I’ve had to toss a batch because of this, ugh.

Storing Tips

If you’ve got leftovers of Spiced Coconut Basil Chicken (which is rare in my house!), storing it right is key to keeping those flavors intact. I’ve found a couple of methods that work best. Here’s how I handle Spiced Coconut Basil Chicken after dinner.

  • Refrigerator: Store in an airtight container for up to 3 days. It often tastes even better the next day!
  • Freezer: Freeze portions in freezer-safe bags for up to 2 months. Just thaw overnight before reheating Spiced Coconut Basil Chicken.
  • Reheating: Warm it on the stove with a splash of water or coconut milk to loosen the sauce.

Spiced Coconut Basil Chicken  recipe step-by-step guide
Delicious Spiced Coconut Basil Chicken prepared with love – follow this detailed recipe guide

Frequently Asked Questions

I’ve gotten a bunch of questions over the years about making Spiced Coconut Basil Chicken, so I figured I’d answer the most common ones here. Let’s dive into these so you’ve got all the info you need for Spiced Coconut Basil Chicken success.

Can I make Spiced Coconut Basil Chicken ahead of time?

Absolutely, you can! I often cook it a day ahead, and the flavors meld beautifully overnight. Just reheat gently on the stove, and you’re golden.

Can I use dried basil instead of fresh?

I wouldn’t recommend it, honestly. Fresh basil is the heart of Spiced Coconut Basil Chicken, and dried just doesn’t have the same pop.

Is this recipe gluten-free?

Yup, as long as your soy sauce is gluten-free, you’re good to go. I always double-check labels just to be safe.

Can I make it less spicy?

Of course! Just cut back on the chili flakes or skip them altogether. It’ll still be delish.

What if I don’t have coconut milk?

Hmm, you could use heavy cream in a pinch, but it won’t have that tropical vibe. Coconut milk is pretty key here.

Can I grill the chicken instead?

Sure thing! Grill it lightly before adding to the sauce for a smoky twist. I’ve tried it, and it’s awesome.

How do I know when the chicken is done?

Cut into a piece—it should be white inside, no pink. Or use a thermometer; 165°F (74°C) is the sweet spot.

Can I double the recipe?

Definitely, I’ve done it for parties. Just use a bigger pot so everything cooks evenly.

Conclusion

Well, there you have it—my tried-and-true recipe for Spiced Coconut Basil Chicken that never fails to impress. I hope you’ll give this Spiced Coconut Basil Chicken a whirl in your kitchen and tweak it to make it your own. Drop a comment if you try it or if you’ve got questions—I’d love to hear how it turns out for you with Spiced Coconut Basil Chicken!

Conclusion

I hope you enjoyed this recipe for Spiced Coconut Basil Chicken ! It’s truly one of my favorites, and I’m confident you’ll love it too. Remember to follow the steps carefully for the best results.

Don’t hesitate to experiment with your own variations and make this recipe your own. Happy cooking!

Spicy Buffalo Chicken Wraps for Two

Spicy Buffalo Chicken Wraps, flavorful, zesty, mouthwatering, delicious, savory

Hey there, kitchen pals! I’ve gotta confess, I stumbled upon my recipe for Spicy Buffalo Chicken Wraps for Two during a frantic weeknight when I was scrounging through my fridge for something quick yet punchy to whip up. My husband and I were craving something with a kick, and with just a few leftover chicken breasts and some hot sauce, I threw together these Spicy Buffalo Chicken Wraps for Two that became an instant hit. Honestly, they’ve been a go-to ever since!

Now, if you’re like me, you love a meal that’s fast, flavorful, and doesn’t leave you with a sink full of dishes. That’s exactly why I’m obsessed with Spicy Buffalo Chicken Wraps for Two, they pack all the zesty, fiery goodness of Buffalo wings into a handheld package that’s perfect for a cozy dinner date. So, let’s dive into how you can make this lip-smacking dish right at home.

I’ll never forget the first time I made Spicy Buffalo Chicken Wraps for Two; I accidentally went overboard with the hot sauce, and we were both chugging milk to cool off! But hey, trial and error is how you perfect a recipe, right? Stick with me, and I’ll share all my tips to get that balance of heat and flavor just right.

Why You’ll Love This Recipe

I’ve found that Spicy Buffalo Chicken Wraps for Two are a total game-changer when you want something hearty without spending hours in the kitchen. They’re bursting with that tangy, spicy Buffalo vibe I crave, plus they’re super customizable, whether you dial up the heat or keep it mellow for sensitive taste buds. Honestly, in my kitchen, these wraps are a staple for date nights or lazy weekends.

What gets me every time is how quick these Spicy Buffalo Chicken Wraps for Two come together, usually under 30 minutes! And trust me, the way the creamy dressing cuts through the spice? It’s pure magic, folks, and I’m betting you’ll be as hooked as I am after one bite.

Ingredients List

Alright, let’s talk about what you’ll need to make Spicy Buffalo Chicken Wraps for Two. I’m all about keeping things simple, so I stick to ingredients I usually have on hand or can grab at my local grocery store. Here’s the breakdown for crafting these delicious Spicy Buffalo Chicken Wraps for Two with that perfect zing.

I prefer using fresh, quality stuff when I can, but don’t sweat it if you’ve gotta sub in what’s in your pantry. These Spicy Buffalo Chicken Wraps for Two are forgiving, and I’ve made ‘em with everything from rotisserie chicken to frozen strips. So, here’s the list with exact measurements to nail it every time.

For the Chicken Filling

  • 2 medium chicken breasts (about 12 oz total), cooked and shredded (I usually poach mine for juiciness)
  • 1/3 cup (80ml) hot sauce, Frank’s RedHot is my go-to for classic Buffalo flavor
  • 2 tablespoons (30g) unsalted butter, melted to mix with the hot sauce
  • 1 teaspoon garlic powder, for a little extra oomph

For the Wraps

  • 2 large flour tortillas (10-inch), soft and pliable for easy rolling
  • 1 cup (50g) shredded lettuce, I like romaine for crunch
  • 1/2 cup (60g) shredded cheddar cheese, or whatever you’ve got in the fridge
  • 1/4 cup (60ml) ranch dressing, store-bought or homemade if you’re feeling fancy
  • 1 small carrot (about 50g), julienned for some sweet crispness
  • 1 stalk celery (about 40g), thinly sliced for that authentic Buffalo wing vibe

Variations

One thing I adore about Spicy Buffalo Chicken Wraps for Two is how easy they are to tweak depending on my mood or what’s in the fridge. I’ve played around with this recipe more times than I can count, and each twist brings something new to the table.

Whether you’re feeding a crowd or just switching up the vibe, here are some fun spins on Spicy Buffalo Chicken Wraps for Two that I’ve tried and loved.

  • Extra Fiery: Toss in a teaspoon of cayenne or a few dashes of habanero sauce if you’re a heat junkie like me.
  • Blue Cheese Bliss: Swap the ranch for blue cheese dressing; I tried this once and my husband couldn’t stop raving!
  • Grilled Goodness: Use grilled chicken instead of poached for a smoky edge to your Spicy Buffalo Chicken Wraps for Two.
  • Veggie-Packed: Add diced bell peppers or avocado slices for extra freshness and bulk.
  • Low-Carb Twist: Ditch the tortilla and wrap everything in large lettuce leaves for a guilt-free version.
  • BBQ Fusion: Mix a little barbecue sauce with the hot sauce for a sweet-spicy combo that my kids always ask for.
  • Cheesy Overload: Sprinkle in some crumbled feta or mozzarella along with the cheddar for ooey-gooey bites.
  • Protein Swap: I’ve subbed in shredded turkey or even tofu for a different take on Spicy Buffalo Chicken Wraps for Two, and it still slaps!

Servings and Timing

Let’s chat about how much time you’ll need to whip up these Spicy Buffalo Chicken Wraps for Two and how many they’ll feed. In my experience, this recipe is spot-on for a quick meal, especially when I’ve already got cooked chicken ready to go. Here’s the breakdown for planning your Spicy Buffalo Chicken Wraps for Two.

  • Prep Time: 10 minutes
  • Cook Time: 15 minutes (if cooking chicken fresh)
  • Total Time: 25 minutes
  • Servings: 2 hearty wraps

Step-by-Step Instructions

Alright, let’s roll up our sleeves and make some Spicy Buffalo Chicken Wraps for Two! I’m gonna walk you through this like I’m right there in your kitchen, sharing all my little tricks to get that perfect balance of spice and comfort. I’ve made these wraps dozens of times, so trust me, I’ve got the kinks worked out.

Spicy Buffalo Chicken Wraps for Two recipe step-by-step guide
Delicious Spicy Buffalo Chicken Wraps for Two prepared with love – follow this detailed recipe guide

Step 1: Cook and Shred the Chicken

If you don’t have cooked chicken, start by poaching or grilling your chicken breasts. I usually simmer mine in salted water for about 12 minutes until they’re just done, then let ‘em cool a bit before shredding with two forks. (Pro tip: Use a hand mixer if you’re feeling lazy, it shreds in seconds!)

Step 2: Mix the Buffalo Sauce

In a medium bowl, melt the butter and whisk it with the hot sauce and garlic powder until smooth. Toss in your shredded chicken and stir until every piece is coated in that fiery goodness for your Spicy Buffalo Chicken Wraps for Two. I like to let it sit for a minute to soak up the flavor.

Step 3: Prep Your Veggies and Wraps

While the chicken marinates in that spicy sauce, chop up your lettuce, celery, and carrots. Lay out your tortillas on a clean counter, and if they’re not super soft, warm ‘em up for 10 seconds in the microwave. It makes rolling your Spicy Buffalo Chicken Wraps for Two way easier, I’ve learned!

Step 4: Assemble the Wraps

Spread a couple of tablespoons of ranch dressing down the center of each tortilla. Layer on half the chicken mixture, then top with lettuce, carrots, celery, and a sprinkle of cheddar cheese. Don’t overstuff, or you’ll have a mess on your hands when making Spicy Buffalo Chicken Wraps for Two.

Step 5: Roll and Serve

Fold the bottom of the tortilla up over the filling, then fold in the sides and roll tightly to close. I usually cut mine in half diagonally for easier eating, and sometimes I’ll toast the seam side down in a hot skillet for a crispy finish to my Spicy Buffalo Chicken Wraps for Two. Serve ‘em up hot and enjoy!

Nutritional Information

I’m no dietitian, but I like to keep an eye on what I’m eating, especially with something as indulgent as Spicy Buffalo Chicken Wraps for Two. Here’s the rough breakdown per wrap, based on how I make my Spicy Buffalo Chicken Wraps for Two. It’s a treat, for sure, but not a total guilt trip!

  • Calories: 550 per wrap
  • Fat: 28g
  • Protein: 30g
  • Carbohydrates: 40g
  • Sodium: 980mg

Healthier Alternatives

If you’re looking to lighten up your Spicy Buffalo Chicken Wraps for Two, I’ve got some swaps that I’ve tried and still keep the flavor poppin’. When I’m watching my calories, I tweak a few things without sacrificing that Buffalo punch. Here are some ideas for healthier Spicy Buffalo Chicken Wraps for Two.

  • Lower Fat Dressing: Use Greek yogurt instead of ranch for a creamy, protein-packed alternative.
  • Leaner Protein: I’ve swapped chicken breast for turkey breast to cut down on fat.
  • Whole Grain Tortillas: Grab whole wheat tortillas for more fiber in your Spicy Buffalo Chicken Wraps for Two.
  • Less Butter: Cut the butter in half and mix with extra hot sauce to keep the zing without the richness.

Serving Suggestions

I love getting creative with how I serve my Spicy Buffalo Chicken Wraps for Two, depending on the occasion. Whether it’s a quick lunch or a casual dinner, here are some of my favorite ways to plate these bad boys. Trust me, these pairings make Spicy Buffalo Chicken Wraps for Two even more irresistible!

  • With a Side Salad: Toss some mixed greens with a light vinaigrette to balance the heat.
  • Game Day Snack: Slice into smaller pinwheels and serve with extra ranch for dipping.
  • Cool Down Drink: Pair with a tall glass of iced tea or lemonade to tame the spice in Spicy Buffalo Chicken Wraps for Two.
  • Crunchy Companion: Add a handful of kettle chips on the side for that satisfying crunch.

Common Mistakes to Avoid

I’ve had my share of kitchen blunders making Spicy Buffalo Chicken Wraps for Two, so let me save you some headaches with a few pitfalls I’ve stumbled into. Trust me on this one, avoiding these slip-ups will keep your wraps tasting top-notch. Here’s what to watch out for with Spicy Buffalo Chicken Wraps for Two.

  • Overloading the Tortilla: I learned the hard way that too much filling equals a torn wrap and a sad mess.
  • Skipping the Warm-Up: Cold tortillas crack when rolled; I’ve ruined a few by not warming them first.
  • Too Much Hot Sauce: Easy does it, or you’ll overpower everything in your Spicy Buffalo Chicken Wraps for Two.
  • Ignoring Rest Time: Let the chicken sit in the sauce a bit, or the flavor won’t fully sink in.

Storing Tips

I’ve found that Spicy Buffalo Chicken Wraps for Two don’t always store perfectly, but with a few tricks, you can enjoy leftovers without a soggy mess. Here’s how I keep mine fresh for later munching. These tips work great for Spicy Buffalo Chicken Wraps for Two!

  • Refrigerator: Wrap tightly in plastic wrap and store for up to 1 day to avoid sogginess.
  • Reheating: Warm in a skillet over low heat to crisp up the tortilla.
  • Separate Components: Store fillings separately if possible to keep your wraps from getting mushy.

Frequently Asked Questions

I get a bunch of questions about making Spicy Buffalo Chicken Wraps for Two, so I’ve rounded up the most common ones. Here’s the scoop on what folks wanna know. Let’s tackle these queries about Spicy Buffalo Chicken Wraps for Two!

Can I use rotisserie chicken?

Absolutely! I’ve used store-bought rotisserie chicken plenty of times, and it works like a charm. Just shred it up and toss it in the Buffalo sauce for quick Spicy Buffalo Chicken Wraps for Two.

How spicy are these wraps?

Well, that depends on your hot sauce and how much you use. I think Frank’s gives a solid medium heat, but feel free to adjust to your taste.

Can I make these ahead of time?

You can prep the chicken mixture ahead, but I’d assemble the wraps just before eating to avoid soggy tortillas. I’ve tried making them early, and they just don’t hold up well.

What if I don’t have ranch dressing?

No worries! Blue cheese dressing works great, or mix some plain yogurt with a pinch of garlic powder for a quick sub.

Can I grill the wraps?

For sure, I’ve thrown mine on a grill pan for a nice char. Just watch they don’t burn, it adds a killer smoky touch!

Are these wraps kid-friendly?

My kids like ‘em if I cut back on the hot sauce. Use a mild version or mix in some BBQ sauce for a sweeter kick.

Can I freeze the chicken filling?

Yep, I’ve frozen the sauced chicken for up to a month. Thaw it overnight in the fridge before assembling your wraps.

What’s the best tortilla to use?

I’m partial to large flour tortillas for their flexibility, but whole wheat or even spinach ones work if you’re switching it up for health reasons.

Conclusion

So there you have it, my tried-and-true recipe for Spicy Buffalo Chicken Wraps for Two that never fails to impress. I hope you’re as pumped as I am to whip up these fiery, flavorful wraps for your next meal. Give Spicy Buffalo Chicken Wraps for Two a shot, tweak ‘em to your liking, and let me know how it goes, I’d love to hear your twists!

Conclusion

I hope you enjoyed this recipe for Spicy Buffalo Chicken Wraps for Two! It’s truly one of my favorites, and I’m confident you’ll love it too. Remember to follow the steps carefully for the best results.

Don’t hesitate to experiment with your own variations and make this recipe your own. Happy cooking!