

I still remember the first time I tried making baked chicken burritos at home. It was a chilly Sunday afternoon and I was craving something warm, filling, and packed with flavor.
After scouring the internet for recipes (and getting thoroughly overwhelmed), I finally cobbled together a version that seemed doable for my limited cooking skills. Let’s just say the results were…less than stellar. The tortillas were soggy, the filling was bland, and I’m pretty sure I used way too much cheese (is that even possible?).
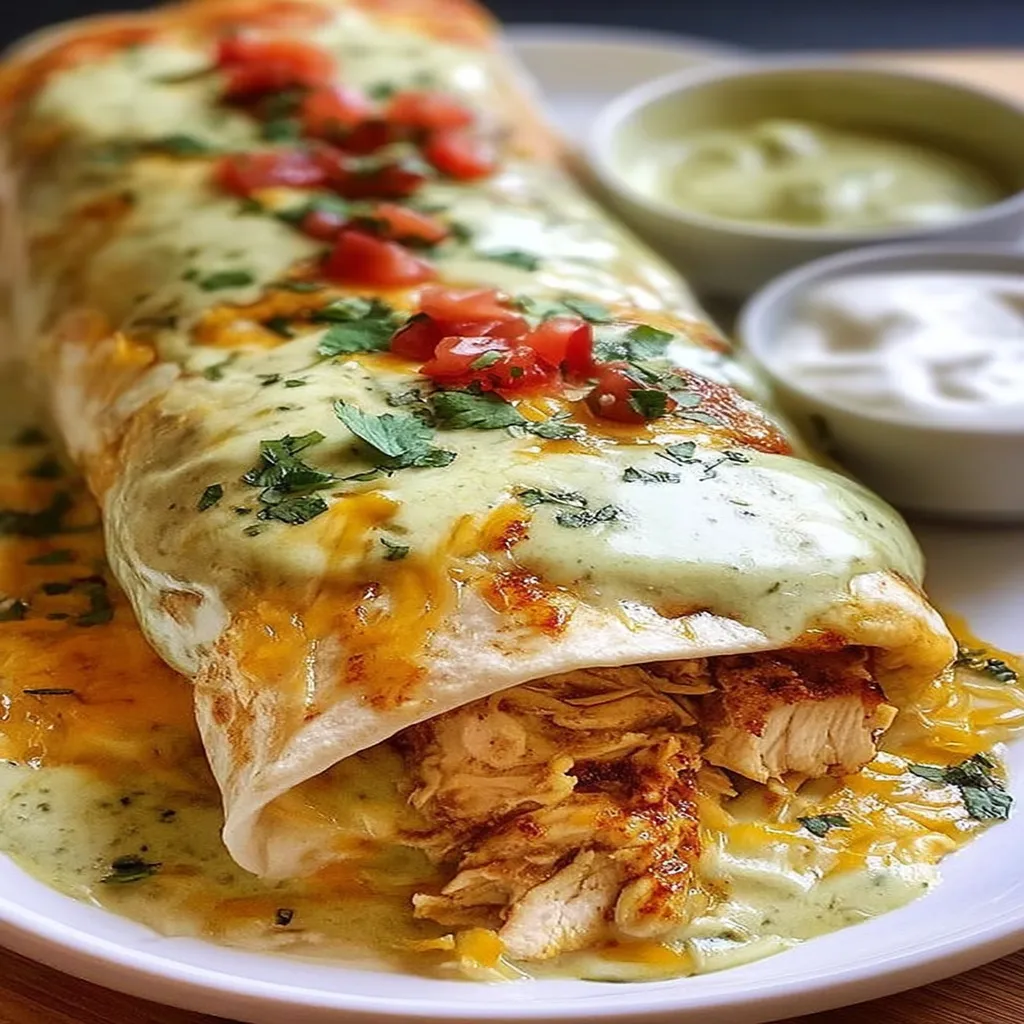
But here’s the thing – that first attempt sparked a full-on obsession. Over the years, I’ve tweaked and tested and perfected my baked chicken burritos recipe until finally landing on the ultimate version that I’m excited to share with you today. It’s got all the comforting goodness you crave, but with a few special tricks to take it over the top. Think juicy seasoned chicken, hearty beans, fluffy rice, and gooey melted cheese all hugged together in a crispy golden tortilla.
Drooling yet? Same.
What’s Inside
Why You’ll Love This Recipe
I’ve made these baked chicken burritos for countless family dinners, potlucks, and even a Super Bowl party or two. And I can say with confidence that they’re always a total crowd-pleaser. Seriously, I’ve had friends beg me for the recipe and my kids request them on a weekly basis.
I think what makes this recipe so special is the perfect balance of flavors and textures. You’ve got the savory spiced chicken, the creamy beans, the fluffy rice, the kick of salsa, and the crunch of the baked tortilla. It’s like a fiesta in your mouth!
Plus, they’re totally customizable based on your preferences. More on that later though…
Ingredients List
Alright, let’s talk ingredients. I’m a big believer in using high-quality basics for maximum flavor. Here’s what you’ll need to make approximately 8 hearty baked chicken burritos:
- 2 cups cooked shredded chicken (I usually use rotisserie for convenience)
- 1 packet taco seasoning mix
- 1 can (15oz) black beans, drained and rinsed
- 1 cup cooked rice (I prefer Spanish-style rice for extra oomph)
- 1 cup salsa (use your favorite – I like a chunky medium heat version)
- 2 cups shredded cheese (Monterey Jack is my go-to)
- 8 large burrito-sized flour tortillas
- Optional toppings: sour cream, guacamole, chopped cilantro, hot sauce
A note on the chicken: while I love the ease of grabbing a rotisserie chicken from the store, you can definitely cook your own chicken at home. I’ve found that baking a couple of chicken breasts seasoned with salt, pepper, and garlic powder at 375°F for about 25 minutes does the trick. Once they’re cooked through, just let them cool slightly before shredding with two forks. Easy peasy!
Recipe Variations
One of the beautiful things about baked chicken burritos is how dang versatile they are. You can easily swap ingredients in or out based on your taste preferences or dietary needs. Here are a few tried-and-true variations to mix things up:
- Vegetarian: Omit the chicken and add an extra can of beans or some sautéed veggies like bell peppers and onions. You could even try subbing in plant-based “chicken” strips or crumbled tofu for a protein boost.
- Low-Carb: Ditch the rice and beans and add some extra chicken and veggies instead. You can also use low-carb tortillas or even lettuce wraps for the outer layer.
- Gluten-Free: Swap the flour tortillas for your favorite gluten-free version, or just serve the filling over a bed of lettuce or rice.
- Breakfast-Style: Scramble some eggs with the chicken, beans, and salsa for a morning-friendly twist. My kids go nuts for these!
- Spicy: Kick up the heat by using a spicy salsa or adding some chopped jalapeños to the mix. You could even drizzle on some sriracha before baking for an extra fiery kick.
- Cheesy: I mean, is there really such a thing as too much cheese? For an extra indulgent version, sprinkle some queso dip over the burritos before baking. Ooey gooey goodness.
- Tropical: Give your burritos a taste of the islands by adding some chopped pineapple or mango to the filling. The pop of sweetness is surprisingly delicious with the savory flavors.
The possibilities are endless! Don’t be afraid to play around and find your perfect combo. I personally love adding a dollop of sour cream and a sprinkle of cilantro to mine before chowing down.
Servings and Timing
This recipe yields about 8 generously stuffed burritos, which I’ve found is more than enough to feed my family of four with a bit of leftovers for lunch the next day. But if you’ve got extra hungry mouths to feed (or just want to ensure some extra reserves), you can easily double the recipe.
As for timing, I usually budget about:
- Prep Time: 15-20 minutes to mix up the filling
- Cook Time: 20-25 minutes in the oven
- Total Time: 35-45 minutes from start to finish
Not too shabby for a satisfying, crowd-pleasing meal!
Step-by-Step Instructions
Okay, let’s get cooking! Here’s how to make the best dang baked chicken burritos you’ve ever tasted:

Step 1: Preheat and Prep
First things first, preheat your oven to 375°F and lightly grease a 9×13″ baking dish. I usually give it a quick spray with cooking oil to prevent any sticking.
Step 2: Make the Filling
In a large bowl, mix together the shredded chicken, taco seasoning, black beans, rice, and salsa until everything is well combined. Give it a taste and adjust the seasoning as needed. I usually add a pinch more salt and a dash of hot sauce at this point, but I’m a bit of a spice fiend.
Step 3: Assemble the Burritos
Lay out a tortilla on a flat surface and spoon about 1/2 cup of the chicken mixture into the center. Sprinkle with a generous handful of shredded cheese (about 1/4 cup). Then, fold in the sides of the tortilla and roll it up tightly to form a burrito.
Place the burrito seam side down in the prepared baking dish. Repeat with the remaining tortillas and filling.
Pro Tip: If your tortillas are a bit stiff and hard to roll, try microwaving them for 10-15 seconds to soften them up. Game changer!
Step 4: Bake and Serve
Once all of your burritos are snuggled into the baking dish, pop them in the oven for 20-25 minutes until the tortillas are lightly golden and crispy. If you want an extra cheesy kick, sprinkle some additional shredded cheese over the top for the last 5 minutes of baking.
Let the baked chicken burritos cool for a few minutes before serving (trust me, that filling is molten hot). Then, dish them out and let everyone add their favorite toppings. In my house, that means a dollop of sour cream, a scoop of guac, and a rain of cilantro confetti. Dig in and enjoy!
Nutritional Information
Now, I’ll be honest – baked chicken burritos aren’t exactly health food. But hey, everything in moderation, right? Here’s the approximate nutritional breakdown per burrito:
- Calories: 475
- Fat: 19g
- Saturated Fat: 9g
- Carbohydrates: 49g
- Fiber: 6g
- Sugar: 4g
- Protein: 28g
So yeah, they’re a bit of a splurge. But dang are they worth it. And if you’re looking to lighten things up, I’ve got some tips coming up next…
Healthier Alternatives
If you’re trying to keep things on the healthier side, fear not – there are plenty of ways to make these baked chicken burritos a bit more virtuous without sacrificing flavor. Here are a few of my favorite tweaks:
- Use Whole Wheat Tortillas: Swapping in whole grain tortillas adds some extra fiber and nutrients. You can even find varieties with added veggies or herbs for a flavor boost.
- Cut Back on Cheese: I know, I know – blasphemy. But using a bit less cheese can significantly cut down on the calorie and fat content. You could also try a reduced-fat version or sprinkle on some nutritional yeast for a cheesy flavor with less guilt.
- Amp Up the Veggies: Adding some extra veggies to the filling is an easy way to boost the nutrition and stretch the servings further. I love throwing in some sautéed bell peppers, onions, or even chopped spinach.
- Choose Lean Proteins: While rotisserie chicken is convenient, it can be a bit higher in fat and sodium. Opting for skinless, boneless chicken breast or even ground turkey can be a leaner choice.
- Make Your Own Sides: Skip the store-bought rice and beans and make your own! Cooking up a batch of brown rice and black beans from scratch gives you more control over the ingredients and sodium levels.
At the end of the day though, I’m a firm believer in enjoying your food and not stressing too much about the occasional indulgence. So if you want to go all out on the full-fat cheese and sour cream, I say live your best life.
Serving Suggestions
Half the fun of baked chicken burritos is all the tasty extras you can pile on top. It’s like a choose-your-own-adventure for your taste buds. Here are a few of my favorite serving ideas:
- Classic Toppings Bar: Set out small bowls of sour cream, guacamole, salsa, chopped cilantro, sliced jalapeños, hot sauce, and any other toppings you like. Let everyone customize their own burrito creation!
- Side Salad: A simple green salad tossed with a zesty lime vinaigrette pairs perfectly with the rich flavors of the burritos.
- Mexican Street Corn: Grill up some corn on the cob and slather it with mayo, cotija cheese, chili powder, and a squeeze of lime for a fun and flavorful side dish.
- Homemade Margaritas: Wash it all down with an ice-cold margarita! Blend up some tequila, lime juice, triple sec, and ice for a refreshing tipple that complements the spices beautifully.
At our house, we usually keep it pretty simple with just some chips and guac on the side. But when we’re feeling fancy (or having friends over), I love going all out with the fixings.
Common Mistakes to Avoid
Learn from my many (many) burrito blunders! Here are a few common mistakes to steer clear of when making baked chicken burritos:
- Overstuffing: It can be tempting to cram as much filling as possible into each tortilla, but trust me – less is more. Overstuffed burritos are harder to roll and more likely to burst open in the oven. Aim for about 1/2 cup of filling per burrito.
- Soggy Bottoms: Nobody likes a soggy burrito bottom. To avoid this, make sure your filling isn’t too wet. If your salsa is really watery, try draining off some of the liquid before adding it to the mix. You can also try placing the burritos seam side down on a baking sheet instead of in a dish to allow any excess moisture to evaporate.
- Cold Tortillas: If your tortillas are straight from the fridge, they can be prone to cracking and splitting when you try to roll them. Let them come to room temperature before assembling, or give them a quick zap in the microwave to soften them up.
- Bland Seasoning: There’s nothing sadder than a bland burrito. Be sure to taste your filling mixture and adjust the seasoning to your liking. I usually end up adding an extra pinch of salt and some additional spices like cumin or smoked paprika.
- Impatience: I get it, the smell of those burritos baking is enough to drive anyone to the brink of hangry madness. But trust me, letting them cool for a few minutes before digging in is crucial. Unless you want a scorched tongue and a lapful of molten filling, patience is key.
Moral of the story? Keep your filling flavorful but not too wet, your tortillas pliable, and your expectations realistic. Oh, and always let them cool before diving face-first into your burrito bliss.
Storing Tips
These baked chicken burritos are an awesome make-ahead meal. I love batch cooking a double recipe and stashing the extras in the fridge or freezer for busy weeknights. Here’s what I’ve found works best for storage:
- Refrigerator: Leftovers will keep in an airtight container in the fridge for 3-4 days. To reheat, place a burrito on a microwave-safe plate and zap it for 1-2 minutes until warmed through. For a crispier exterior, you can also pop it in a 350°F oven for about 10 minutes.
- Freezer: For longer storage, wrap each burrito tightly in foil or plastic wrap, then place them in a freezer-safe container or bag. They should keep for up to 3 months. To reheat, unwrap the burrito and place it on a microwave-safe plate. Microwave on high for 2-3 minutes, flipping halfway through, until heated through. You can also thaw the burrito in the fridge overnight before microwaving.
Pro Tip: If you’re planning to freeze your burritos, leave off any toppings like sour cream or guacamole. They don’t tend to hold up well in the freezer and can make the tortilla soggy. Just add them fresh when you’re ready to eat!
Frequently Asked Questions
Can I make these baked chicken burritos ahead of time?
Absolutely! You can assemble the burritos up to a day in advance and store them in the fridge until you’re ready to bake. Just cover the baking dish tightly with foil or plastic wrap to keep them fresh. You may need to add a few extra minutes to the baking time if you’re starting with chilled burritos.