
There’s something undeniably special about a chocolate cake that makes you pause. It’s not just a dessert; it’s a centerpiece, a promise of celebration, and a guaranteed mood-lifter. This double chocolate cake with black velvet icing is that cake.
Born from countless tests in my professional kitchen, it combines the deep, fudgy richness of a perfect chocolate layer cake with an icing so smooth, dark, and luxurious it truly earns the name “velvet.” Whether it’s for a birthday, a holiday, or just because it’s Tuesday, this recipe delivers professional results with clear, home-cook-friendly guidance. Let’s bake a showstopper.
- Intense Chocolate Flavor: Using both cocoa powder in the batter and hot coffee (or water) “blooms” the cocoa, unlocking its deepest, most complex notes for a cake that tastes profoundly of chocolate.
- Unforgettable Texture: The combination of oil and buttermilk guarantees an exceptionally moist and tender crumb that stays soft for days, while the icing is whipped to a silky, spreadable perfection.
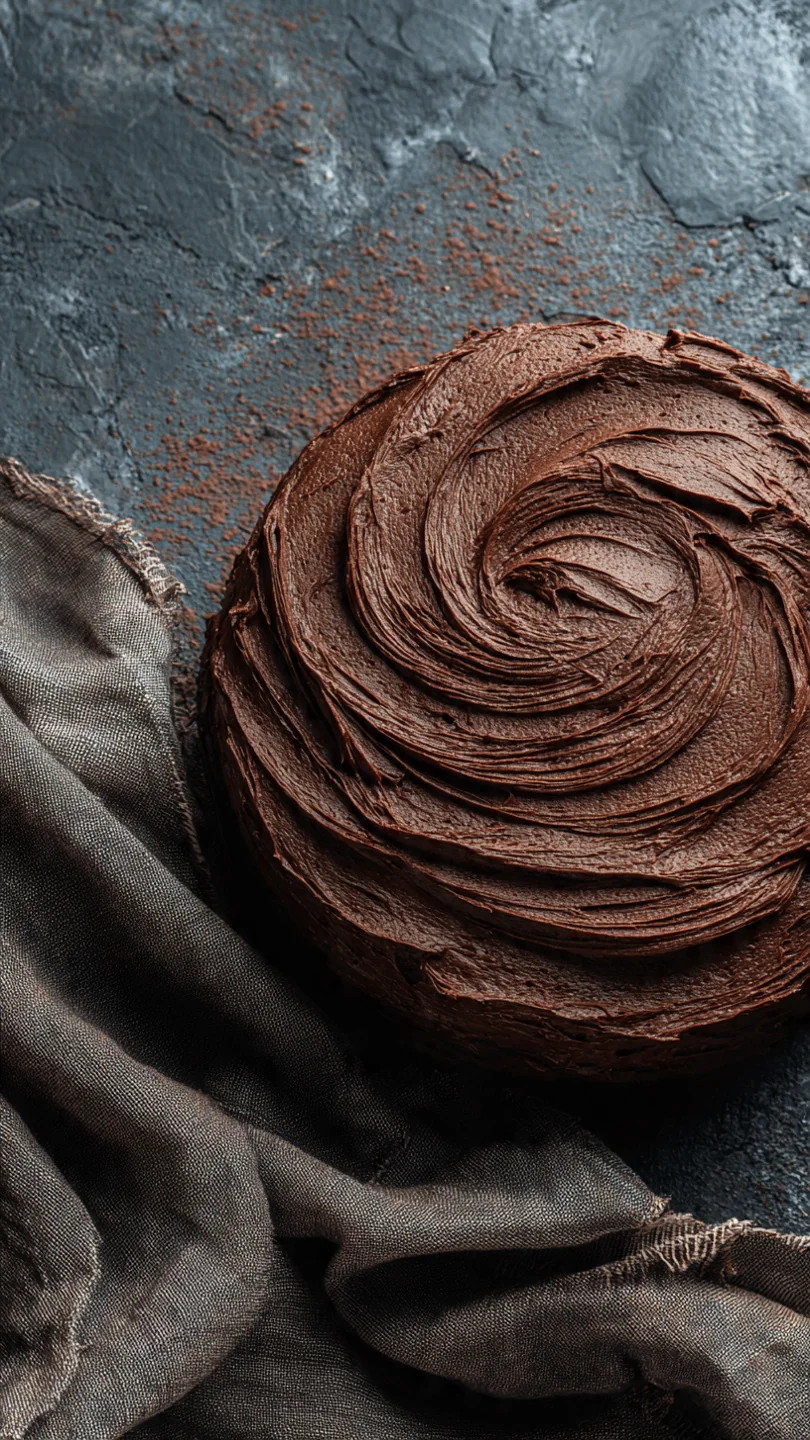
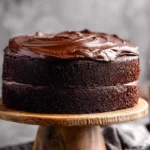
- Stunning Visual Impact: The dramatic contrast between the dark brown cake layers and the sleek, nearly black frosting creates a dessert that looks as sophisticated as it tastes.
- Make-Ahead Friendly: Both the cake layers and the frosting can be prepared a day in advance, making assembly stress-free for your special occasion.
- Crowd-Pleasing Versatility: This is a universally beloved classic. With the simple variations provided, you can easily customize it to suit different tastes or dietary needs.
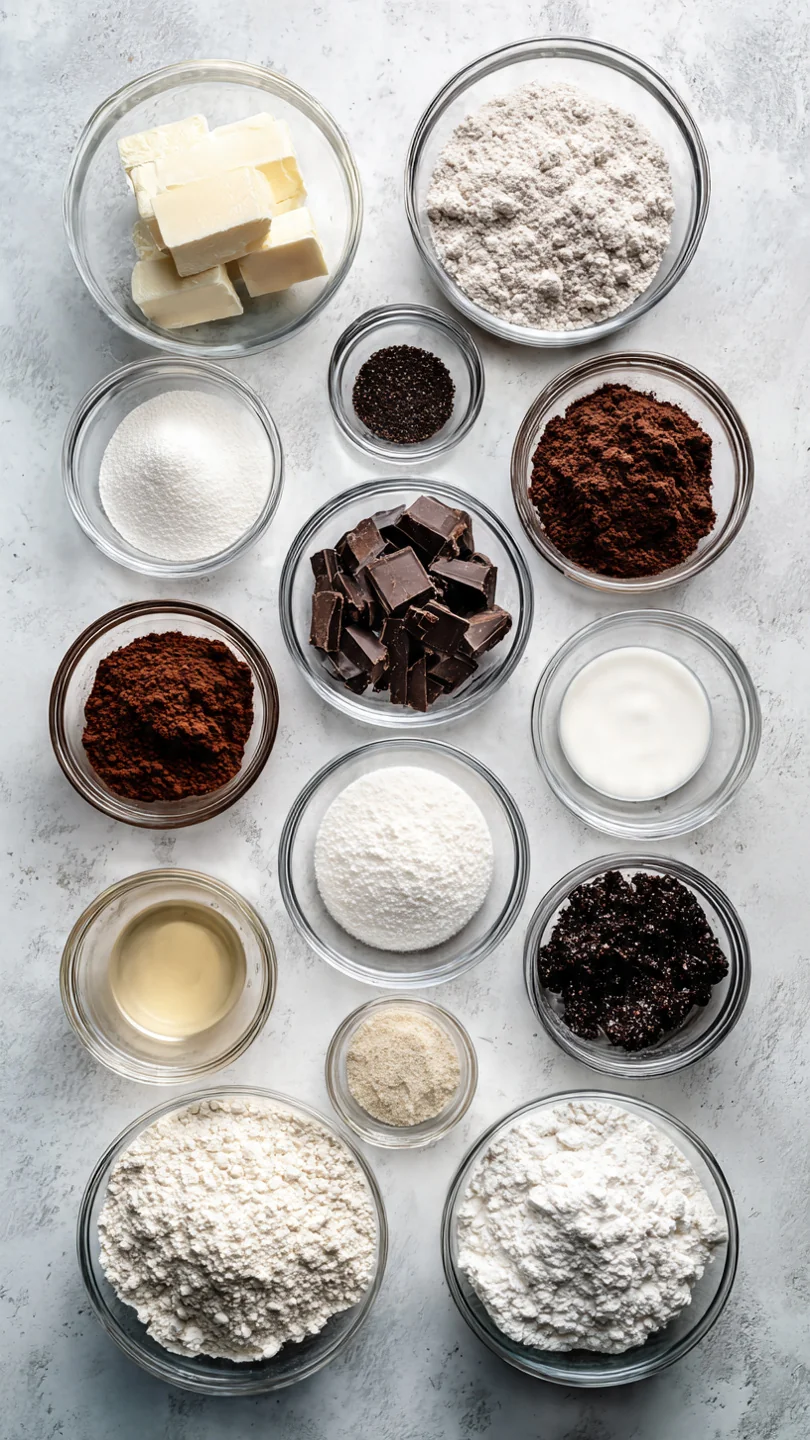
Ingredients You’ll Need
Let’s gather our ingredients—this is where the magic starts. Using quality components and paying attention to their state (like room-temperature eggs and buttermilk) is the secret to this cake’s flawless texture. For the chocolate, I recommend a Dutch-process cocoa powder for its mellower, darker flavor, but natural cocoa works perfectly too.
The “black” in the velvet icing comes from special black cocoa powder (used in Oreo® cookies), which is available online or in specialty stores. If you can’t find it, don’t worry; I’ll give you an easy workaround with regular cocoa and a touch of black food coloring gel.
For the Double Chocolate Cake:- All-purpose flour: Spooned and leveled for accuracy.
- Granulated sugar: For sweetness and structure.
- Unsweetened cocoa powder: The star of the show. Sift it to avoid lumps.
- Baking soda & baking powder: Our leavening team for a perfect rise.
- Fine sea salt: Balances and enhances all the chocolate flavors.
- Eggs: Room temperature eggs incorporate more evenly, creating a uniform crumb.
- Buttermilk: Also room temperature. Its acidity tenderizes the gluten and reacts with the baking soda for lift.
- Strong brewed coffee: Hot. It intensifies the chocolate flavor without adding a coffee taste. Hot water works if you prefer.
- Vegetable oil: Creates a moister cake than butter would.
- Pure vanilla extract: For aromatic depth.
- Unsalted butter: Softened to the point where your finger leaves a clear indent. This is crucial for a smooth icing.
- Powdered sugar: Sifted, sifted, sifted. This prevents a gritty frosting.
- Unsweetened cocoa powder: Sifted again, for that double chocolate punch.
- Whole milk: For thinning the icing to the perfect spreading consistency.
- Pure vanilla extract & fine sea salt: The flavor enhancers.
- Black cocoa powder: This is the key for the deep black color and a slight Oreo-like flavor. If unavailable, use an extra 1-2 tbsp of regular cocoa powder plus a small amount of black food coloring gel (not liquid, as it can thin the icing).
Note: You’ll find the complete list of ingredients, along with their exact measurements, in the printable recipe card at the bottom of this post.
Kitchen Equipment Needed
You don’t need overly specialized tools, but a few key items will make the process smoother. A stand mixer or a sturdy hand mixer is essential for properly creaming the butter for the icing and for mixing the thin cake batter thoroughly. Two 9-inch round cake pans are a must, and lining the bottoms with parchment paper is my non-negotiable tip for guaranteed clean release.
You’ll also want wire cooling racks, an offset spatula for beautiful frosting application, a serrated knife for leveling the cake layers, and a fine-mesh sieve for sifting your dry ingredients and powdered sugar.
How to Make Double Chocolate Cake With Black Velvet Icing Recipe
Step 1: Prep and Combine Dry Ingredients
Begin by preheating your oven to 350°F (175°C) and preparing your pans. Grease, flour, and line them with parchment circles. In the bowl of your stand mixer, whisk together the flour, sugar, both cocoa powders, baking soda, baking powder, and salt.
Doing this on low speed for about 30 seconds does more than just mix; it aerates the dry ingredients, ensuring they are evenly distributed. This simple step is the foundation for a cake that rises uniformly and has a consistent chocolate flavor in every bite.
Step 2: Create the Liquid Batter
Now, add all your wet ingredients—eggs, buttermilk, hot coffee, oil, and vanilla—directly to the dry mixture. Mix on medium speed for a full two minutes. The batter will be quite thin and liquid.
Believe me, this is exactly what you want. This high-hydration batter is the secret to an ultra-moist cake. Resist the urge to add more flour.
Carefully divide the batter evenly between your two prepared pans; a kitchen scale is helpful here for precision.
Step 3: Bake and Cool the Layers
Place the pans in the center of your preheated oven and bake for 30-35 minutes. You’re looking for the tops to be set and a toothpick inserted into the center to come out with a few moist crumbs attached, not completely clean. Overbaking is the enemy of moisture.
Let the cakes cool in their pans on a rack for 15 minutes—this allows them to firm up slightly. Then, run a knife around the edges, invert them onto the rack, peel off the parchment, and let them cool completely. Once cool, use a serrated knife to level the tops if they have domed slightly.
Step 4: Whip the Black Velvet Icing
While the cakes cool, make the icing. In a clean mixer bowl, beat the softened butter on medium-high speed for 3-4 minutes. Trust me, don’t skimp on this time.
You want it very pale, fluffy, and almost whipped. This incorporates air, which gives the icing its namesake “velvet” texture. Gradually add the sifted powdered sugar and cocoa powders, alternating with the milk and vanilla, beating on low after each addition to avoid a sugar cloud.
Finally, add the salt and your black cocoa (or substitute). Beat on medium-high for another 3 minutes until the frosting is supremely smooth, dark, and holds a soft peak.
Step 5: Assemble, Frost, and Serve
Place your first cake layer on a serving plate or cake board. Spread about 3/4 cup of icing evenly over the top. Carefully add the second layer.
Now, apply a very thin layer of icing over the entire cake—this is the “crumb coat.” It doesn’t need to be pretty; its job is to trap any loose crumbs. Chill the cake for 15 minutes to set this coat. Finally, use the remaining frosting to create your final, beautiful layer.
Use an offset spatula to smooth the sides and create decorative swirls on top. Step back and admire your masterpiece before slicing.
- Ingredient Temperature is Key: Using room-temperature eggs, buttermilk, and softened butter isn’t just a suggestion—it’s science. Cold ingredients don’t emulsify or incorporate air as well, leading to a dense cake or grainy frosting. Plan ahead and take these items out of the fridge at least an hour before you start.
- The Power of Sifting: Always sift your cocoa powder and powdered sugar. Cocoa powder is notoriously clumpy, and those clumps will bake into bitter pockets in your cake. Sifted powdered sugar is the only way to achieve a perfectly smooth, non-gritty icing texture.
- Don’t Overmix the Batter: Once you add the wet ingredients to the dry, mix for the specified two minutes and then stop. Overmixing past this point can develop the gluten in the flour, resulting in a tough, chewy cake instead of a tender one.
- The Crumb Coat is Your Friend: Skipping the initial thin crumb coat is the most common mistake I see. That 15-minute chill seals in all the crumbs, ensuring your final layer of gorgeous black icing is flawless and crumb-free. It’s a professional trick that makes a huge difference.
Recipe Variations
- Mocha Twist: Add 1-2 teaspoons of instant espresso powder to the cake’s dry ingredients and use cold brew coffee instead of regular brewed coffee for a pronounced mocha flavor that complements the chocolate beautifully.
- Mint Chocolate Delight: Add 1/2 teaspoon of pure peppermint extract to the black velvet icing. Frost the cake as usual and garnish with chopped chocolate mint candies or a drizzle of dark chocolate for a refreshing twist.
- Raspberry Filling: Before assembling, spread a thin layer of seedless raspberry jam over the bottom cake layer, then add a dam of frosting before placing the second layer. The tart raspberry cuts through the richness wonderfully.
- Gluten-Free Adaptation: Substitute the all-purpose flour with a high-quality 1:1 gluten-free flour blend. The batter may be slightly thicker, but the result will still be deliciously moist.
- Dairy-Free Version: Use a plant-based milk and vinegar mix (1 cup milk + 1 tbsp vinegar, let sit 5 mins) for the buttermilk, and a high-fat vegan butter for the icing. The color may be slightly lighter.
- Cupcake Format: This batter makes about 24 cupcakes. Bake at 350°F for 18-22 minutes. You’ll have enough frosting to generously pipe swirls on each one.
What to Serve With This Recipe
This cake is a rich, celebratory dessert that stands proudly on its own. For serving, a simple garnish of fresh berries (like raspberries or strawberries), a dusting of edible gold glitter, or a few chocolate curls elevates its presentation. In terms of pairings, a glass of cold milk is a classic and perfect choice.
For adults, a glass of port, a rich stout beer, or a cup of strong black coffee makes for a sophisticated pairing that can stand up to the deep chocolate flavors. If you’re incorporating it into a larger menu, balance its richness with lighter courses—think a fresh green salad to start and a simple grilled protein as a main.
Storage & Make-Ahead Instructions
- Storage: Once frosted, store the cake in an airtight container or cake carrier in the refrigerator for up to 5 days. The icing may firm up when cold, so let slices sit at room temperature for 20-30 minutes before serving for the best texture and flavor.
- Make-Ahead: You can bake the cake layers up to 2 days in advance. Let them cool completely, then wrap each layer tightly in plastic wrap and store at room temperature. The frosting can be made 1 day ahead, stored in an airtight container in the fridge. Before using, let it come to room temperature and re-whip it in the mixer for a minute to restore its smooth, spreadable consistency.
- Freezing: Unfrosted cake layers freeze exceptionally well. Wrap the cooled layers individually in plastic wrap and then in foil. Freeze for up to 2 months. Thaw overnight in the refrigerator before frosting and serving.
Frequently Asked Questions
Q: Can I use water instead of coffee in the cake?
Absolutely. The hot coffee serves to enhance the chocolate flavor, not to make the cake taste like coffee. If you prefer or are serving to those sensitive to caffeine, an equal amount of hot water works perfectly fine.
Q: My icing isn’t getting very dark. What can I do?
If you’re not using black cocoa, achieving a true black can be tricky with regular cocoa alone. I highly recommend using a black food coloring gel. Start with a very small amount (a toothpick dip) and mix it in thoroughly.
Gel color is concentrated and won’t thin your icing like liquid dye can.
Q: Can I make this in a 9×13 inch pan?
Yes. Grease and line the pan, pour in all the batter, and bake at 350°F. Start checking for doneness at 40 minutes.
You will only need about 2/3 of the frosting recipe to cover the single-layer sheet cake.
Q: Why did my cake layers sink in the middle?
This is typically caused by underbaking, opening the oven door too early (before the structure has set, around the 25-minute mark), or an issue with leavening (old baking soda/powder). Ensure your oven is properly preheated and use a toothpick test for doneness.
Q: The icing is too thick/thin. How do I fix it?
If it’s too thick to spread easily, beat in additional milk, 1 teaspoon at a time. If it’s too thin and runny, beat in more sifted powdered sugar, 2 tablespoons at a time, until it reaches the desired consistency.
Q: What’s the best way to get clean slices?
For picture-perfect slices, dip a sharp knife in hot water and wipe it dry between each cut. The heat helps the knife glide smoothly through the frosting and cake without dragging.
Final Thoughts
This double chocolate cake with black velvet icing is more than just a recipe; it’s a reliable blueprint for creating a truly spectacular dessert. It brings together professional techniques—like blooming cocoa, proper creaming, and crumb coating—in a way that’s completely achievable in a home kitchen. The result is a cake with deep, satisfying flavor, a melt-in-your-mouth texture, and a stunning appearance that will have everyone asking for the recipe.
I’ve tested and refined every step to ensure your success. So, gather your ingredients, trust the process, and get ready to bake a cake that will become a requested favorite for years to come. I’d love to hear how it turns out for you—share your creations and any questions in the comments below!
Best Double Chocolate Cake With Black Velvet Icing
Equipment
- Two 9-inch round cake pans
- Stand mixer or hand mixer
- Parchment paper
- Wire cooling racks
- Offset spatula
- Serrated knife (for leveling cakes)
- Fine mesh sieve for sifting
Ingredients
- 2 cups all-purpose flour spooned and leveled
- 2 cups granulated sugar
- 3/4 cup unsweetened cocoa powder Dutch-process or natural, sifted
- 2 tsp baking soda
- 1 tsp baking powder
- 1 tsp fine sea salt
- 2 large eggs room temperature
- 1 cup buttermilk room temperature
- 1 cup strong brewed coffee hot, or use hot water
- 1/2 cup vegetable oil or canola oil
- 2 tsp pure vanilla extract
- 1 cup unsalted butter softened
- 4 cups powdered sugar sifted
- 1/2 cup unsweetened cocoa powder sifted
- 1/3 cup whole milk plus more as needed
- 2 tsp pure vanilla extract
- 1/4 tsp fine sea salt
- 1 tbsp black cocoa powder or additional 1-2 tbsp regular cocoa + black food gel
Instructions
- Preheat oven to 350°F (175°C). Grease and flour two 9-inch round cake pans and line the bottoms with parchment paper. In the bowl of a stand mixer fitted with the paddle attachment, whisk together the flour, sugar, cocoa powders, baking soda, baking powder, and salt on low speed for 30 seconds to combine and aerate.
- Add the eggs, buttermilk, hot coffee, oil, and vanilla to the dry ingredients. Mix on medium speed for exactly 2 minutes. The batter will be thin—this is correct and ensures a moist cake. Trust me, don’t be tempted to add more flour. Divide the batter evenly between the prepared pans.
- Bake for 30-35 minutes, or until a toothpick inserted into the center comes out with a few moist crumbs. Do not overbake. Let the cakes cool in the pans for 15 minutes, then turn them out onto a wire rack to cool completely. Level the tops with a serrated knife if they have domed.
- For the icing, beat the softened butter in a clean stand mixer bowl with the paddle attachment on medium-high speed for 3-4 minutes until very pale and fluffy. Tip from me: This step is non-negotiable for a smooth, velvety texture. Gradually add the sifted powdered sugar and cocoa powders, alternating with the milk and vanilla, beating on low speed after each addition.
- Once all ingredients are incorporated, add the salt and black cocoa (or black food gel). Beat on medium-high speed for a full 3 minutes until the icing is incredibly smooth, dark, and spreadable. If it’s too thick, add milk 1 tsp at a time. If it’s too thin, add a bit more powdered sugar.
- Place one cake layer on a serving plate. Spread with about 3/4 cup of icing. Top with the second layer. Apply a thin ‘crumb coat’ of icing over the entire cake and chill for 15 minutes. This seals in crumbs. Finally, frost the cake with the remaining icing, using an offset spatula to create smooth sides and a swirled top. Slice, serve, and enjoy!