

There’s a specific kind of quiet satisfaction that comes from pulling a tray of perfectly puffed, golden-brown egg muffin cups from the oven. The aroma of toasted cheese and savory egg fills the kitchen, promising a breakfast that is both nourishing and effortless. In my years working the breakfast shift in professional kitchens and now feeding a busy family, I’ve found this recipe to be the ultimate solution to the morning rush.
These aren’t just baked eggs; they’re a customizable, make-ahead masterpiece that delivers a protein-packed, flavorful start to the day with minimal fuss. You get the comfort of a hearty breakfast with the convenience of a grab-and-go item, all in one neat, handheld package.
This recipe earns a permanent spot in your breakfast rotation for several key reasons that go beyond simple taste.
- Meal Prep Champion: Bake a batch on Sunday and enjoy a high-quality breakfast all week long. They reheat beautifully from the fridge or freezer.
- Endlessly Customizable: Use this recipe as a blueprint. Clean out the veggie drawer, swap the cheese, or choose your favorite protein. I’ll guide you through the best combinations.
- Perfect Texture: The technique of sautéing vegetables first is a game-changer. It removes excess water, preventing soggy muffins and ensuring a fluffy, firm bite every time.
- Kid-Friendly & Portable: Their uniform size and handheld nature make them a hit with all ages. Toss one in a lunchbox or eat it on the commute.
- Protein-Packed Start: With a solid 8 grams of protein per muffin, these will keep you full and focused far longer than a sugary cereal or pastry.
- Diet Flexible: Naturally gluten-free and easily adapted for low-carb, keto, or dairy-free diets with simple swaps.
Ingredients You’ll Need
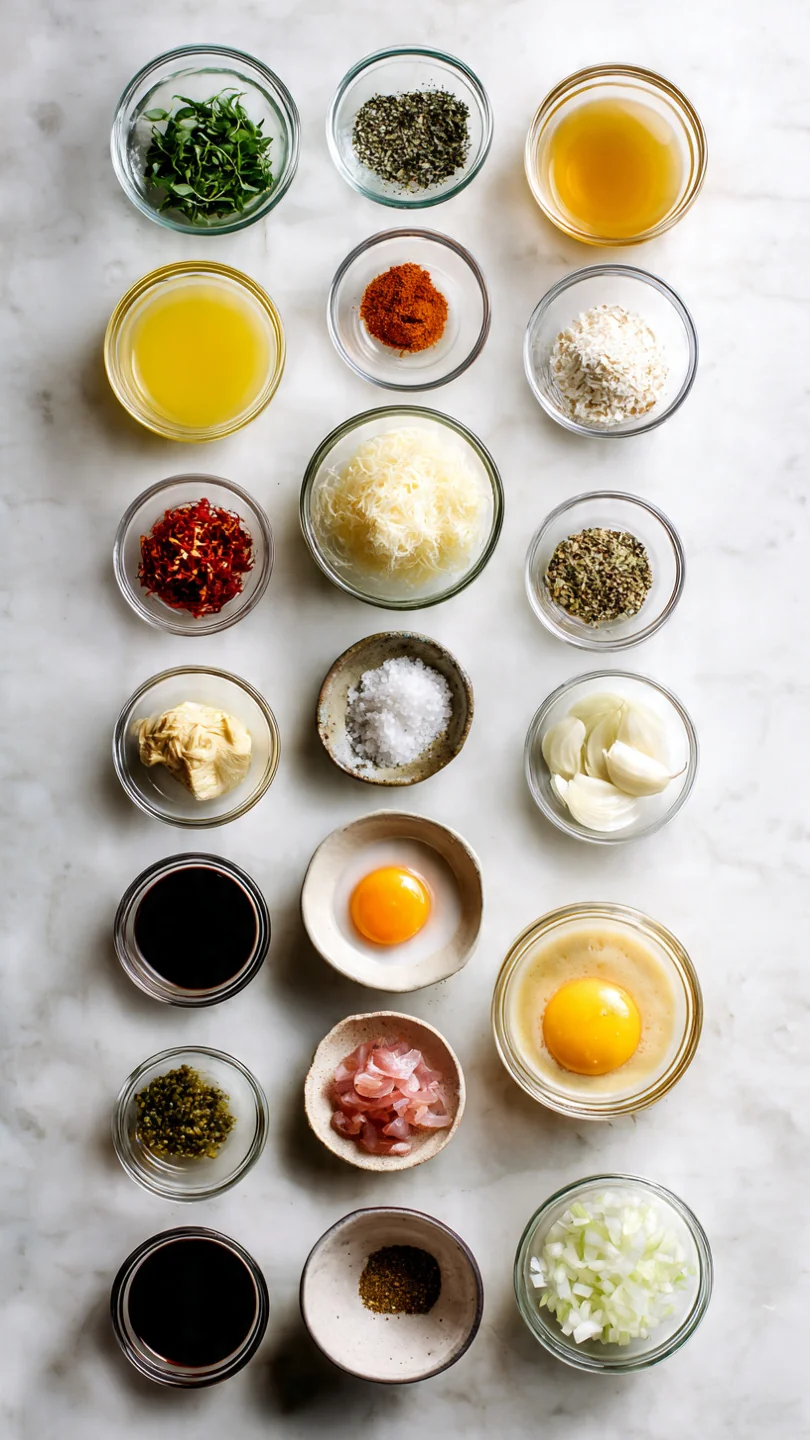
- Let’s gather our ingredients—this is where simple, wholesome components come together to create something greater than the sum of its parts. You likely have most of these in your kitchen right now. The beauty lies in the balance: eggs for structure and protein, a touch of dairy for richness, vegetables for freshness and nutrients, and cheese for that irresistible savory flavor and golden top.
- Eggs: The star. Use large eggs, and for the fluffiest results, try to have them at room temperature. Cold eggs can make the final texture slightly denser.
- Milk or Cream: This adds richness and helps create a tender custard. Whole milk or half-and-half is ideal, but unsweetened almond milk works perfectly for a dairy-free version.
- Shredded Cheese: I prefer a sharp cheddar for its flavor, but Monterey Jack, gouda, or a Mexican blend are fantastic. Pre-shredded cheese works, but block cheese you shred yourself melts more smoothly.
- Bell Pepper & Onion: This classic duo adds sweetness, color, and texture. Sautéing them is non-negotiable in my tested method—it concentrates their flavor and banishes sogginess.
- Fresh Spinach: It wilts down dramatically, packing in nutrients without overwhelming the cups. You can substitute with kale (remove tough stems) or chopped broccoli florets.
- Bacon or Ham: Optional but recommended for a heartier version. Use cooked, crumbled bacon or diced ham. For a vegetarian option, simply omit it.
- Seasonings: Kosher salt, black pepper, and a hint of garlic powder build a savory foundation. The salt level is crucial; don’t be shy, as it seasons the entire batch.
Note: You’ll find the complete list of ingredients, along with their exact measurements, in the printable recipe card at the bottom of this post.
Kitchen Equipment Needed
You don’t need any specialty gear for this recipe, just reliable basics. A good standard 12-cup muffin tin is essential—non-stick is helpful, but I still recommend greasing it well. A large mixing bowl and a balloon whisk are perfect for aerating the eggs.
You’ll also need a medium skillet for sautéing the veggies and the usual suspects: a cutting board, chef’s knife, and measuring tools. If you have a 1/4-cup measuring cup or a large liquid measuring cup with a spout, it makes pouring the egg mixture into the cups clean and easy.
How to Make Breakfast Egg Muffin Cups Recipe
Step 1: Prep and Whisk
Preheat your oven to 350°F (175°C). Generously grease all 12 cups of a standard muffin tin with olive oil or butter. Trust me, this is non-negotiable for easy release.
In a large bowl, whisk together the eggs, milk, salt, pepper, and garlic powder until completely combined and slightly frothy, about 1 minute. You’re not just mixing; you’re incorporating air, which contributes to a lighter final texture. The mixture should be a uniform pale yellow.
Step 2: Cook the Vegetables
Heat a medium skillet over medium heat. Add a drizzle of oil and sauté the diced onion and bell pepper until softened, about 4-5 minutes. Add the chopped spinach and cook just until wilted, about 1 minute more.
Remove from heat and let cool slightly. This step cooks out excess moisture for a better texture. Believe me, skipping this and using raw veggies is the most common mistake—it leads to watery egg cups that steam instead of bake.
Step 3: Layer the Fillings
Divide the cooked vegetable mixture evenly among the 12 prepared muffin cups. Add the chopped bacon or ham, if using, and a generous pinch of shredded cheese to each cup. Tip from me: The cheese on the bottom helps create a delicious, slightly crispy base as it melts directly against the hot tin.
This layering method ensures every bite is packed with flavor, not just the top.
Step 4: Pour and Top
Slowly pour the whisked egg mixture over the fillings in each cup, filling them about 3/4 of the way full. Do not overfill, as they will puff up during baking. Use a spoon to gently stir the contents of each cup once to ensure the egg mixture seeps down.
Top each cup with a little more shredded cheese. This final layer will brown beautifully in the oven.
Step 5: Bake, Cool, and Serve
Bake for 18-22 minutes, or until the egg muffins are puffed, the tops are set, and a toothpick inserted into the center comes out clean. The edges will be lightly golden. Let them cool in the pan for 5 minutes before gently running a knife around the edges to loosen and remove.
This resting time is crucial—it allows them to firm up, making them much easier to handle. Step back and admire your perfect, portable breakfast creations!
A few insights from the pro kitchen can elevate your results from good to exceptional.
- Grease Generously: Even with a non-stick pan, use butter or oil in every cup. It guarantees a clean release and adds flavor.
- The Whisking Rule: Whisk your eggs vigorously for a full minute. You’re incorporating air, which acts as a leavening agent, giving you a lighter, less rubbery texture.
- Vegetable Moisture is the Enemy: Always sauté or wilt vegetables like mushrooms, zucchini, or spinach before adding. Raw veggies release too much water during baking.
- The Doneness Test: Look for fully set tops that spring back lightly when touched. A toothpick test is foolproof—it should come out clean, not wet.
- Cool in the Pan: Letting them sit for 5 minutes allows the proteins to set fully. They’ll shrink away from the sides slightly, making removal effortless.
Recipe Variations
- This recipe is a perfect canvas. Once you master the base ratio (8 eggs + 1/4 cup dairy), the world is your oyster. Here are my favorite tested variations.
- Mediterranean: Use crumbled feta cheese, chopped sun-dried tomatoes, kalamata olives, and fresh oregano.
- Southwest Style: Swap cheddar for pepper jack, add diced green chiles, corn, and black beans. Top with a sprinkle of chili powder.
- Everything Bagel: Mix 1 tbsp of everything bagel seasoning into the egg batter and use cream cheese pieces instead of shredded cheese.
- Keto Supreme: Use heavy cream, full-fat cheese, and fillings like sausage, mushrooms, and avocado (add avocado after baking).
- Caprese: Use mozzarella pearls, halved cherry tomatoes, and fresh basil ribbons. Drizzle with balsamic glaze after baking.
- Broccoli Cheddar: Use steamed, finely chopped broccoli florets and extra sharp cheddar cheese.
- Dairy-Free: Use unsweetened almond milk and a dairy-free cheese alternative that melts well.
What to Serve With This Recipe
These egg muffin cups are a complete meal on their own, but they pair wonderfully to create a balanced breakfast or brunch spread. For a lighter meal, serve them with a simple mixed green salad with a bright vinaigrette or a bowl of fresh seasonal fruit. If you’re feeding a crowd for brunch, they’re excellent alongside crispy roasted potatoes or sautéed breakfast potatoes.
For a comforting weekend breakfast, add a slice of toasted whole-grain bread or a flaky biscuit. Beverage-wise, they pair perfectly with a freshly brewed coffee, orange juice, or a green smoothie for an extra nutrient boost.
Storage & Make-Ahead Instructions
- This is where the recipe truly shines for busy lifestyles.
- Refrigerator: Store cooled egg muffin cups in an airtight container in the refrigerator for up to 4 days.
- Freezer: Place cooled cups in a single layer on a baking sheet to freeze solid (about 2 hours), then transfer to a freezer bag or container. They will keep for up to 3 months. This prevents them from sticking together.
- Reheating: For best results, reheat from the fridge in the microwave for 30-45 seconds. From frozen, microwave for 60-90 seconds, or thaw overnight in the fridge first. You can also reheat them in a 350°F oven or toaster oven for 10 minutes to restore a crisp edge.
- Make-Ahead: The vegetable filling can be sautéed and stored in the fridge up to 2 days in advance. The entire batch can be baked, cooled, and stored as above for the ultimate grab-and-go breakfast.
Frequently Asked Questions
Q: Can I use egg whites only?
A: Absolutely. Substitute the 8 whole eggs with 1 cup of liquid egg whites. The texture will be slightly less rich and more spongy, but they will set perfectly.
You may need to reduce the salt slightly.
Q: Why did my egg muffins deflate?
A: Some deflation is normal as they cool, similar to a soufflé. Significant collapse usually means underbaking. Ensure they are fully set in the center.
Overwhisking after adding the dairy can also incorporate too many unstable air bubbles.
Q: Can I make these without a muffin tin?
A: Yes, you can bake the mixture in a greased 8×8 or 9×9 baking dish for a “breakfast bake.” Increase the baking time to 25-30 minutes and cut into squares.
Q: My egg cups are watery. What happened?
A: This is almost always due to excess moisture from vegetables. Always sauté or wilt veggies like spinach, mushrooms, or tomatoes before adding. Also, ensure your cheese isn’t a high-moisture fresh variety like mozzarella balls unless they’re well-drained.
Q: How do I know when they are done baking?
A: The tops should be completely set and not jiggle when you gently shake the pan. The edges will be lightly golden brown. The internal temperature should reach 160°F on an instant-read thermometer.
Q: Can I double this recipe?
A: Yes, simply double all ingredients. You may need to bake in two separate muffin tins or in batches. Rotate the pans halfway through baking for even cooking.
Q: Are these good for meal prep?
A: They are one of the best meal prep breakfasts! They reheat wonderfully and stay tasty for days. I recommend making a double batch to freeze.
Q: Can I add potatoes?
A: Yes, but they must be cooked first. Add about 1/2 cup of finely diced, par-cooked hash browns or roasted potato cubes to the filling.
Final Thoughts
After testing this formula countless times in both home and professional settings, I can confidently say these breakfast egg muffin cups are a true kitchen workhorse. They solve the perennial problem of wanting a hot, satisfying breakfast without the morning scramble. By mastering the simple techniques—proper greasing, sautéing veggies, and not overfilling the cups—you’ll achieve perfect results every single time.
The real magic is in their adaptability. This recipe is a framework for your creativity and a tool for nourishing your week. I encourage you to make a batch this weekend.
Tuck some away in the freezer for that inevitable busy morning, and experience the profound difference a great breakfast can make. I’d love to hear how you customize them—share your favorite flavor combinations with me. Now, go preheat that oven and get ready for the easiest, most rewarding breakfast of your week.

Easy Breakfast Egg Muffin Cups
Equipment
- Standard 12-cup muffin tin
- Large mixing bowl and whisk
- Medium skillet
- Measuring cups and spoons
- Knife and cutting board
Ingredients
- 8 large eggs Use room temperature for best volume
- 1/4 cup milk or cream Whole milk, half-and-half, or unsweetened almond milk
- 1 cup shredded cheese Cheddar, Monterey Jack, or a blend
- 1/2 cup diced bell pepper Any color, about 1 small pepper
- 1/2 cup diced onion Yellow or red onion
- 1 cup chopped fresh spinach Pack it lightly into the cup
- 6 slices cooked bacon or ham Chopped (optional, omit for vegetarian)
- 1 tbsp olive oil or butter For greasing the pan
- 1/2 tsp kosher salt
- 1/4 tsp black pepper Freshly ground
- 1/4 tsp garlic powder Optional, for extra flavor
Instructions
- Preheat your oven to 350°F (175°C). Generously grease all 12 cups of a standard muffin tin with olive oil or butter. Trust me, this is non-negotiable for easy release. In a large bowl, whisk together the eggs, milk, salt, pepper, and garlic powder until completely combined and slightly frothy, about 1 minute.
- Heat a medium skillet over medium heat. Add a drizzle of oil and sauté the diced onion and bell pepper until softened, about 4-5 minutes. Add the chopped spinach and cook just until wilted, about 1 minute more. Remove from heat and let cool slightly. This step cooks out excess moisture for a better texture.
- Divide the cooked vegetable mixture evenly among the 12 prepared muffin cups. Add the chopped bacon or ham, if using, and a generous pinch of shredded cheese to each cup. Tip from me: The cheese on the bottom helps create a delicious, slightly crispy base.
- Slowly pour the whisked egg mixture over the fillings in each cup, filling them about 3/4 of the way full. Do not overfill. Top each cup with a little more shredded cheese. Carefully transfer the muffin tin to the preheated oven.
- Bake for 18-22 minutes, or until the egg muffins are puffed, the tops are set, and a toothpick inserted into the center comes out clean. The edges will be lightly golden. Let them cool in the pan for 5 minutes before gently running a knife around the edges to loosen and remove.