

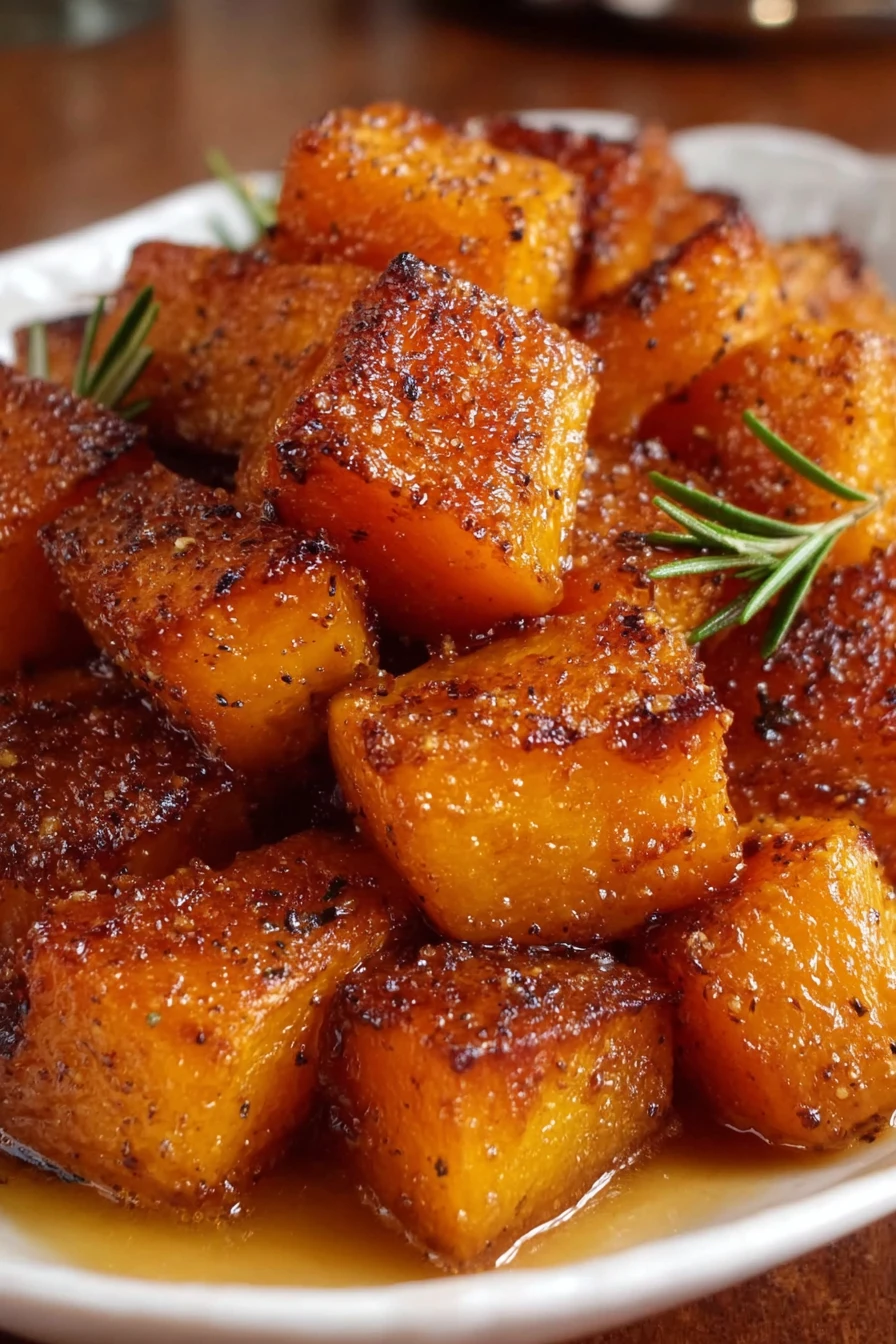
I’ll never forget the first time I stumbled upon the magic of Brown Sugar Roasted Butternut Squash. It was a chilly fall evening, and I was desperate to whip up something cozy for my family after a long day. I had a butternut squash sitting on my counter, looking all lonely, and figured I’d toss it in the oven with a bit of brown sugar and butter.
Let me tell you, the sweet, caramelized aroma that filled my kitchen was pure heaven, and my kids couldn’t stop sneaking bites before dinner!
Since that happy accident, Brown Sugar Roasted Butternut Squash has become a staple in my house. I’ve tweaked and tinkered with the recipe over the years, and I’m thrilled to share my go-to version with you. Whether you’re a newbie in the kitchen or a seasoned home cook, I promise this dish will win hearts.
And honestly, there’s something so satisfying about turning a humble veggie into a showstopper like Brown Sugar Roasted Butternut Squash. So, let’s dive in and get roasting!
Why You’ll Love This Recipe
I’ve found that Brown Sugar Roasted Butternut Squash is one of those recipes that just clicks with everyone. The natural sweetness of the squash paired with that sticky, molasses-y brown sugar glaze is straight-up irresistible. Plus, it’s so darn easy to make, even on a hectic weeknight.
In my kitchen, this dish is a lifesaver for holiday meals or when I’ve got guests coming over. It looks fancy without requiring me to fuss for hours, and the warm, autumnal flavors scream comfort food. Trust me, once you try this Brown Sugar Roasted Butternut Squash, you’ll be hooked!
Ingredients List
I’m a big believer in keeping things simple with Brown Sugar Roasted Butternut Squash, but I’ve got a few ingredient quirks I swear by. For instance, I always hunt down the freshest squash I can find at my local market; it makes a world of difference in flavor. I also prefer using dark brown sugar over light for that deeper, richer taste.
Here’s exactly what you’ll need to make this dish pop in your own kitchen.
- 1 medium butternut squash (about 2-3 lbs), peeled, seeded, and cut into 1-inch cubes
- 3 tablespoons unsalted butter, melted, for that silky richness
- 1/4 cup packed dark brown sugar, for the perfect caramelized sweetness
- 1/2 teaspoon ground cinnamon, to add a warm spice note
- 1/4 teaspoon ground nutmeg, for a subtle depth (don’t skip this!)
- 1/2 teaspoon kosher salt, to balance the sweetness
- 1/4 teaspoon black pepper, for a tiny kick
- 1 tablespoon olive oil, to help with roasting and prevent sticking
I usually buy my spices in small batches to keep ‘em fresh, especially for something like Brown Sugar Roasted Butternut Squash where the flavors really shine. If you’ve got a favorite brand of butter or brown sugar, use it! Personal touches make all the difference.
Variations
One thing I adore about Brown Sugar Roasted Butternut Squash is how easy it is to switch things up based on my mood or what’s in my pantry. I’ve played around with this recipe more times than I can count, and my family’s always game to try something new. Here are some of my favorite twists on this classic dish that’ll keep your taste buds guessing.
- Maple Magic: Swap out the brown sugar for 3 tablespoons of pure maple syrup for a woodsy, sticky glaze. I tried this once for a Thanksgiving dinner, and my guests couldn’t get enough!
- Spicy Twist: Add a pinch (or more!) of cayenne pepper to the mix for a sweet-heat combo. This version of Brown Sugar Roasted Butternut Squash is my go-to when I want to shake things up.
- Herby Vibes: Toss in 1 teaspoon of dried rosemary or thyme before roasting. It gives a savory edge that pairs beautifully with the sweetness.
- Nutty Crunch: Sprinkle on 1/4 cup of chopped pecans or walnuts in the last 10 minutes of roasting for some texture. My kids always ask for this one!
- Citrus Zest: Grate a bit of orange zest over the Brown Sugar Roasted Butternut Squash right after it comes out of the oven. It’s a bright, fresh touch I stumbled upon by accident.
- Vanilla Dreams: Add a splash of vanilla extract (about 1/2 teaspoon) to the butter mixture. It sounds odd, but it elevates the sweetness in a crazy-good way.
- Garlic Lover’s: Toss in a couple of minced garlic cloves for a savory punch. I wasn’t sure about this at first, but it works!
Honestly, Brown Sugar Roasted Butternut Squash is like a blank canvas. Don’t be afraid to get creative and make it your own!
Servings and Timing
In my experience, planning ahead with Brown Sugar Roasted Butternut Squash makes life so much easier, especially if I’m juggling a million things on a busy day. I’ve got the timing down to a science now, and I’m happy to break it down for you. Here’s how long this dish takes from start to finish, plus how many folks it’ll feed.
- Prep Time: 15 minutes
- Cook Time: 35-40 minutes
- Total Time: About 50-55 minutes
- Servings: 4-6 portions
This is perfect for a family dinner or a small gathering. If I’m cooking Brown Sugar Roasted Butternut Squash for a crowd, I just double the recipe and use two baking sheets!
Step-by-Step Instructions
I’ve made Brown Sugar Roasted Butternut Squash so many times I could probably do it blindfolded (okay, maybe not, but you get the idea). I’m gonna walk you through each step like I’m right there in the kitchen with you. Let’s make this as easy as pie… or, well, roasted squash!
Step 1: Preheat and Prep
First things first, crank your oven to 400°F (200°C). While it’s heating up, grab that butternut squash and peel it with a sturdy vegetable peeler—trust me, don’t skimp on a good peeler or you’ll be wrestling with it forever. Cut it in half, scoop out the seeds with a spoon, and chop it into roughly 1-inch cubes. I aim for even sizes so my Brown Sugar Roasted Butternut Squash cooks evenly.
Step 2: Mix the Magic
In a small bowl, melt your butter (I just zap it in the microwave for 20 seconds) and stir in the brown sugar, cinnamon, nutmeg, salt, and pepper. Whisk in the olive oil too. This gooey mixture is what turns plain ol’ squash into Brown Sugar Roasted Butternut Squash perfection. Make sure it’s well combined before moving on.
Step 3: Coat and Arrange
Toss your squash cubes in a large bowl with that sweet, buttery mix until every piece is nicely coated. Spread them out in a single layer on a lined baking sheet—don’t crowd ‘em or they’ll steam instead of roast. I’ve learned this the hard way with some soggy Brown Sugar Roasted Butternut Squash batches!
Step 4: Roast to Glory
Pop the tray in the oven and roast for 35-40 minutes, flipping the pieces halfway through with a spatula. You’re looking for golden, caramelized edges and a fork-tender texture. The smell of Brown Sugar Roasted Butternut Squash wafting through your house will be torture, but hang in there—it’s worth the wait!
Step 5: Serve Hot
Once it’s done, let your Brown Sugar Roasted Butternut Squash cool for just a couple of minutes before serving. I like to give it one last sprinkle of salt sometimes, just to make the flavors pop. And that’s it—you’ve got a killer side dish ready to steal the show.
Nutritional Information
I’m not gonna lie, I don’t always obsess over calories, but I do like to know what’s in my food, especially with something as tasty as Brown Sugar Roasted Butternut Squash. Here’s the rough breakdown per serving (based on 6 portions). Keep in mind, I’m no dietitian, but this is what I’ve calculated with some trusty online tools for my Brown Sugar Roasted Butternut Squash recipe.
- Calories: 180 per serving
- Fat: 7g
- Protein: 1g
- Carbohydrates: 30g
- Sodium: 200mg
It’s not the lightest dish out there, but it’s packed with vitamins from the squash, which makes me feel a little better about indulging!
Healthier Alternatives
Sometimes I’m in the mood to lighten things up a bit with my Brown Sugar Roasted Butternut Squash, especially after a big holiday feast. I’ve swapped ingredients here and there over the years to cut back on sugar or fat without losing that drool-worthy flavor. Here are a few tricks I’ve tried that work like a charm for a healthier Brown Sugar Roasted Butternut Squash.
- Lower Sugar: Use just 2 tablespoons of brown sugar instead of 1/4 cup, or try a natural sweetener like honey for a lighter touch.
- Less Fat: Cut the butter down to 1 tablespoon and increase the olive oil to 2 tablespoons. It’s still tasty, just not as rich.
- Coconut Oil Swap: Replace the butter with coconut oil for a dairy-free option. I’ve done this for friends with dietary restrictions, and they loved this version of Brown Sugar Roasted Butternut Squash!
These tweaks make me feel a bit more virtuous without sacrificing the cozy vibes of the dish. Play around and see what works for you!
Serving Suggestions
I love serving Brown Sugar Roasted Butternut Squash in all sorts of ways, depending on the occasion or what I’m craving. It’s super versatile, which is why it’s such a regular on my table. Here are a few ideas I’ve come up with over the years to pair with Brown Sugar Roasted Butternut Squash that’ll make your meal extra special.
- With Protein: Serve alongside roasted chicken or turkey for a hearty, comforting dinner.
- As a Salad Topper: Toss it over a bed of arugula with some goat cheese and walnuts for a fancy fall salad.
- Holiday Side: Pair it with mashed potatoes and gravy at Thanksgiving. It’s a crowd-pleaser every time I make Brown Sugar Roasted Butternut Squash for the holidays!
- Grain Bowl Base: Add it to a bowl with quinoa, kale, and a drizzle of tahini for a veggie-packed lunch.
Seriously, you can’t go wrong with how you serve this dish. It’s like the little black dress of side dishes—goes with everything!
Common Mistakes to Avoid
I’ve had my fair share of kitchen flops with Brown Sugar Roasted Butternut Squash, especially when I was just starting out. I’m sharing these hard-learned lessons so you don’t have to go through the same headaches. Trust me on this one—avoiding these pitfalls will save your Brown Sugar Roasted Butternut Squash from disaster.
- Cutting Uneven Pieces: If your cubes aren’t roughly the same size, some will be mushy while others are still hard. I’ve ruined batches this way!
- Overcrowding the Pan: Give those pieces space to roast, or they’ll steam and turn soggy. Learned this the hard way with a sad, mushy Brown Sugar Roasted Butternut Squash.
- Skipping the Flip: Don’t forget to turn the squash halfway through roasting, or you’ll end up with uneven caramelization.
- Too Much Sugar: I once dumped in extra brown sugar thinking it’d be better, but it just burned. Stick to the recipe for perfect Brown Sugar Roasted Butternut Squash!
Take it from me, a little patience and attention go a long way with this dish.
Storing Tips
I’ve found that Brown Sugar Roasted Butternut Squash keeps surprisingly well if you store it right, which is awesome for meal prep or leftovers. In my experience, it’s best to plan ahead so the texture doesn’t suffer. Here’s how I store my Brown Sugar Roasted Butternut Squash to keep it tasting fresh.
- Refrigerator: Store in an airtight container for up to 4 days. Reheat in the oven or microwave.
- Freezer: Freeze in a freezer-safe bag for up to 2 months. Thaw overnight in the fridge before reheating.
I usually make a big batch and save some for quick meals later in the week. It’s a total time-saver!
Frequently Asked Questions
I get a lot of questions about Brown Sugar Roasted Butternut Squash from friends and readers, so I’ve rounded up the most common ones here. I’m happy to help clear up any confusion so you can nail this recipe on the first try. Let’s tackle these FAQs!
Can I make Brown Sugar Roasted Butternut Squash ahead of time?
Absolutely, you can! I often prep the squash and mix the glaze a day ahead, then store it in the fridge until I’m ready to roast. Just don’t toss it together until baking time so it doesn’t get soggy.
Do I have to peel the butternut squash?
Yup, I recommend peeling it for the best texture. The skin is tough, even after roasting. I’ve tried leaving it on once, and it just wasn’t pleasant to eat.
Can I use a different type of squash?
Sure thing! Acorn or kabocha squash work well, though the cooking time might vary slightly. I’ve used acorn squash before, and it turned out great with the Brown Sugar Roasted Butternut Squash glaze.
Is there a vegan version of this recipe?
You bet! Swap the butter for vegan butter or coconut oil. I’ve made it this way for vegan friends, and they loved it just as much.
How do I know when the squash is done?
Poke it with a fork—if it slides in easily and the edges are caramelized, it’s ready. It usually takes me about 35 minutes at 400°F.
Can I add other veggies to the tray?
Definitely, carrots or sweet potatoes roast nicely alongside. Just make sure they’re cut to similar sizes for even cooking. I’ve mixed in carrots with my Brown Sugar Roasted Butternut Squash, and it’s delish!
What if my squash burns on the bottom?
That’s usually from too much sugar pooling underneath. Use parchment paper and flip halfway through to avoid sticking and burning. I’ve had this happen, and it’s a bummer.
Can I use light brown sugar instead of dark?
Yep, it’ll work fine, though the flavor won’t be as intense. Dark brown sugar has more molasses, which I think pairs better with Brown Sugar Roasted Butternut Squash.
Conclusion
I hope you’re as excited as I am to whip up some Brown Sugar Roasted Butternut Squash in your kitchen! It’s honestly one of those recipes that makes me feel like a pro chef with minimal effort, and I’m betting it’ll become a fave for you too. So grab that squash, preheat your oven, and let the sweet, cozy vibes of Brown Sugar Roasted Butternut Squash fill your home.
Let me know how it turns out—I’d love to hear!
Conclusion
I hope you enjoyed this recipe for Brown Sugar Roasted Butternut Squash! It’s truly one of my favorites, and I’m confident you’ll love it too. Remember to follow the steps carefully for the best results. Don’t hesitate to experiment with your own variations and make this recipe your own.
Happy cooking!