
Hey there, fellow dessert lovers! I’ve gotta confess, I stumbled upon the idea of Cookie Monster Cake Jars a few years back while trying to impress my niece at her birthday party. I mean, who doesn’t love a dessert that’s cute, blue, and packed with cookie goodness? These little jars became an instant hit, and now they’re a go-to in my kitchen whenever I need a fun, no-fuss treat.
Honestly, I wasn’t sure at first if I could pull off the Cookie Monster vibe, but after a few messy (and hilarious) attempts, I got the hang of it. My family can’t get enough of these quirky, layered desserts, and I’m thrilled to share how you can whip up your own Cookie Monster Cake Jars at home.
Trust me, if I can do it, so can you! Let’s dive into why these sweet treats are worth every crumb.
Why You’ll Love This Recipe
I’ve found that Cookie Monster Cake Jars aren’t just adorable; they’re ridiculously easy to customize. Whether you’re a baking newbie or a seasoned pro, the layers of cake, frosting, and cookies come together faster than you’d think. Plus, they’re perfect for portion control (if you can resist eating two!).
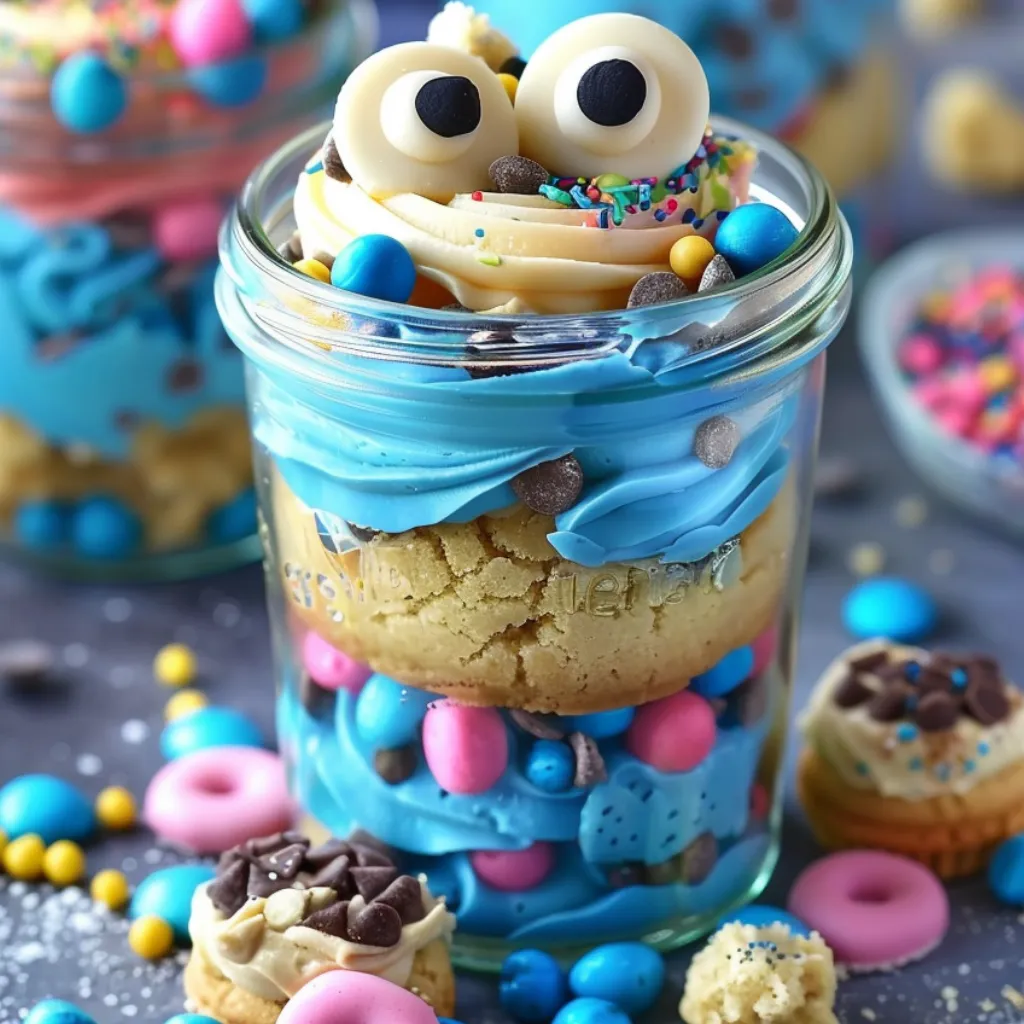
In my kitchen, these jars are a lifesaver for parties or even just a random Tuesday pick-me-up. Kids and adults alike go nuts over the bright blue frosting and googly eyes. Honestly, what’s not to love about a dessert that brings out your inner child?
Ingredients List
Tip: You’ll find the full list of ingredients and measurements in the recipe card below.
Alright, let’s talk ingredients for these Cookie Monster Cake Jars. I’m pretty picky about what I use, especially when it comes to the cookies and frosting, because that’s where the magic happens. I usually buy Oreos for that classic crunch, but feel free to grab whatever chocolate sandwich cookies you like best.
Here’s what you’ll need to make about 6 jars (adjust as needed):
- Chocolate Cake Base:
- 1 box (15.25 oz) chocolate cake mix, any brand you trust for moistness
- 3 large eggs, at room temperature for better mixing
- 1/2 cup (120ml) vegetable oil, for a tender crumb
- 1 cup (240ml) water, as per box instructions
- Blue Frosting:
- 1 cup (230g) unsalted butter, softened to room temperature
- 4 cups (480g) powdered sugar, sifted for smoothness
- 2 tablespoons (30ml) heavy cream, for that creamy texture
- 1 teaspoon (5ml) vanilla extract, for flavor depth
- Blue gel food coloring, enough to get that Cookie Monster hue
- Cookie Layer & Decor:
- 12 Oreo cookies, roughly crushed for texture (I leave some big chunks!)
- 6 Oreo cookies, halved for “eating” decoration on top
- 12 edible candy eyes, for that goofy Cookie Monster look
- Equipment:
- 6 (8 oz) mason jars or clear dessert cups, for easy layering and serving
I prefer using a boxed cake mix here because, let’s be real, it saves time without sacrificing flavor. But if you’ve got a killer homemade chocolate cake recipe, go for it! Just make sure it’s cooled before you start assembling your Cookie Monster Cake Jars.
Variations
I’ve played around with these Cookie Monster Cake Jars quite a bit over the years, and let me tell ya, there are so many ways to switch things up! Whether you’re catering to dietary needs or just wanna experiment, here are some variations I’ve tried (and loved). My kids always ask for tweaks, so I’ve got a few tricks up my sleeve.
- Vanilla Twist: Swap the chocolate cake for vanilla or funfetti for a brighter, lighter base.
- Cookie Overload: Mix in crushed chocolate chip cookies alongside Oreos for extra cookie madness.
- Nutty Crunch: Add a sprinkle of chopped peanuts or almonds between layers for a surprising bite.
- Berry Blast: Toss in a few fresh blueberries or raspberries for a fruity contrast to the richness.
- Mint Monster: Use mint Oreos and add a drop of peppermint extract to the frosting for a cool twist.
- Gluten-Free Fix: Use a gluten-free cake mix and GF cookies; I tried this once for a friend and it was just as yummy.
- Vegan Vibes: Substitute with vegan cake mix, dairy-free butter, and plant-based milk for the frosting.
- White Chocolate Wonder: Drizzle melted white chocolate on top before adding the candy eyes for extra sweetness.
I’m telling you, experimenting with these Cookie Monster Cake Jars is half the fun! Got a wild idea? Give it a whirl and see what happens.
Servings and Timing
In my experience, this recipe for Cookie Monster Cake Jars makes about 6 servings, perfect for a small gathering or a family dessert night. If you’re feeding a bigger crowd, just double or triple the batch. It’s super easy to scale up!
Here’s the timing breakdown based on how it usually goes in my kitchen:
- Prep Time: 20 minutes (if using a boxed mix)
- Cook Time: 25-30 minutes for baking the cake
- Assembly Time: 15 minutes to layer and decorate
- Total Time: About 1 hour, plus cooling time
Step-by-Step Instructions
I’m gonna walk you through making these Cookie Monster Cake Jars like I’m right there with you in the kitchen. I’ve made these dozens of times, so I’ve got some little tricks to make it a breeze. Let’s get started!
Step 1: Bake the Cake
First things first, preheat your oven to 350°F (175°C) and prep your chocolate cake mix according to the box instructions. I like to add a splash of vanilla extract to the batter for a little extra oomph. Bake it in a 9×13-inch pan, let it cool completely, then crumble it into bite-sized pieces. (Pro tip: Pop it in the fridge to speed up cooling if you’re impatient like me!)
Step 2: Whip Up the Blue Frosting
While the cake cools, beat your softened butter in a large bowl until it’s creamy as heck. Gradually add the powdered sugar, heavy cream, and vanilla, mixing until fluffy. Then, add blue gel food coloring drop by drop until you’ve got that iconic Cookie Monster shade for your Cookie Monster Cake Jars. I usually go for a vibrant blue—don’t be shy!
Step 3: Crush the Cookies
Grab your Oreos and give ’em a good bash in a zip-top bag or with a rolling pin. I leave some bigger chunks for texture because, honestly, biting into a nice piece of cookie is the best part of these Cookie Monster Cake Jars. Set aside the halved Oreos for decoration later.
Step 4: Assemble the Jars
Now for the fun part—layering! Start with a layer of crumbled cake at the bottom of each jar, followed by a dollop of blue frosting, then a sprinkle of crushed Oreos. Repeat until the jar is full, ending with frosting on top. Pipe or spoon the frosting for that signature Cookie Monster “fur” look in your Cookie Monster Cake Jars, and don’t stress if it’s not perfect—it’s supposed to be playful!
Step 5: Add the Finishing Touches
Stick two candy eyes on top of the frosting, and pop a halved Oreo into the frosting like Cookie Monster’s munching on it. I can’t help but giggle every time I do this; it’s just too cute. And there you have it—adorable Cookie Monster Cake Jars ready to steal the show!
Nutritional Information
Let’s chat about the nutritional side of these Cookie Monster Cake Jars, shall we? I’m no dietitian, but I’ve crunched the numbers (pun intended) for a rough idea per serving. Keep in mind, this is a treat, so don’t expect kale-level health vibes!
- Calories: 450 per jar
- Fat: 22g
- Protein: 4g
- Carbohydrates: 60g
- Sugar: 42g
I usually balance these indulgent jars with a lighter meal earlier in the day. Hey, life’s about moderation, right?
Healthier Alternatives
If you’re looking to lighten up your Cookie Monster Cake Jars, I’ve got some swaps I’ve tried when I’m watching my sugar or fat intake. They still taste amazing, just with a little less guilt. Here’s what’s worked for me in my kitchen experiments.
- Lower Sugar: Use a sugar-free cake mix and cut the powdered sugar in the frosting by half, adding a sweetener like stevia.
- Reduced Fat: Swap half the butter in the frosting for Greek yogurt; it’s still creamy but cuts some calories.
- Whole Grain: I’ve used a whole wheat cake mix before, and while it’s denser, it adds a nutty flavor I kinda dig.
These tweaks let you enjoy Cookie Monster Cake Jars without totally derailing your health goals. Play around and see what suits your taste buds!
Serving Suggestions
I love getting creative with how I serve these Cookie Monster Cake Jars, and I’ve got a few ideas based on occasions at my house. They’re already a showstopper, but pairing them with something extra can elevate the experience. Here are my go-to ways to dish them up.
- Kids’ Party: Set out a tray of these with mini spoons and let the little ones dig in alongside some milk.
- Dessert Bar: Pair with other mini desserts like brownies or fruit cups for variety at gatherings; it’s a hit every time!
Honestly, these jars steal the spotlight no matter how you serve ’em. What would you pair them with?
Common Mistakes to Avoid
I’ve botched my fair share of desserts, and making Cookie Monster Cake Jars was no exception at first. Trust me on this one, I’ve learned the hard way so you don’t have to. Here are some slip-ups to watch out for.
- Overfilling the Jars: I used to stuff them too full, and the layers would squish out when adding the lid—such a mess!
- Undercooling the Cake: If the cake’s still warm, the frosting melts into a gooey disaster; been there, done that with these Cookie Monster Cake Jars.
Take it from me, a little patience and planning go a long way. Got any baking blunders to share? I’m all ears!
Storing Tips
I’ve found that Cookie Monster Cake Jars keep pretty well if you store ’em right, which is great for making ahead. In my experience, they’re best enjoyed within a few days. Here’s how I keep them fresh.
- Refrigerator: Store in the fridge with lids on for up to 4 days; the frosting holds up nicely.
- Room Temp: If eating the same day, leave them out for a couple of hours, but not too long.
I wouldn’t freeze these—the texture gets funky. Just pop ’em in the fridge and enjoy soon!
Frequently Asked Questions
I get a ton of questions about making Cookie Monster Cake Jars, so I’ve rounded up the most common ones I hear from friends and readers. Let’s tackle these with some quick, straight-up answers. I’ve got you covered!
Can I make Cookie Monster Cake Jars ahead of time?
Absolutely! I often assemble them a day or two in advance and store them in the fridge. Just add the Oreo halves and eyes right before serving so they don’t get soggy.
Can I use homemade cake instead of a mix?
For sure, go for it! If you’ve got a fave chocolate cake recipe, bake it up and crumble it just the same. I’ve done both, and homemade adds a personal touch.
What if I can’t find edible candy eyes?
No worries! I’ve made little eyes with white chocolate chips and a dot of black icing before. It’s not perfect, but it still screams Cookie Monster.
Can I use a different cookie?
Yup, any chocolate cookie works. I’ve swapped Oreos for chocolate chip cookies, and it’s just as delish.
How many jars does this recipe make?
Typically, I get 6 jars out of this batch, but it depends on the size of your containers. Adjust as needed!
Is there a way to make the frosting less sweet?
Totally. Cut back on the powdered sugar a bit and add a pinch of salt to balance it out—I do this sometimes.
Can kids help make these?
Oh, they’ll love it! Mine always help with crumbling the cake and layering; just supervise the frosting part.
Do these travel well?
Pretty well, actually. I’ve taken them to picnics in a cooler with lids on tight, and they held up great.
Conclusion
Well, there you have it, folks—everything you need to whip up some adorable Cookie Monster Cake Jars that’ll wow anyone who tries ’em! I’ve loved sharing this recipe with you, and I can’t wait to hear how yours turn out. Drop a comment with your pics or any fun twists you added; I’m always up for new ideas.
So, grab those jars and get layering—your inner Cookie Monster is waiting!