

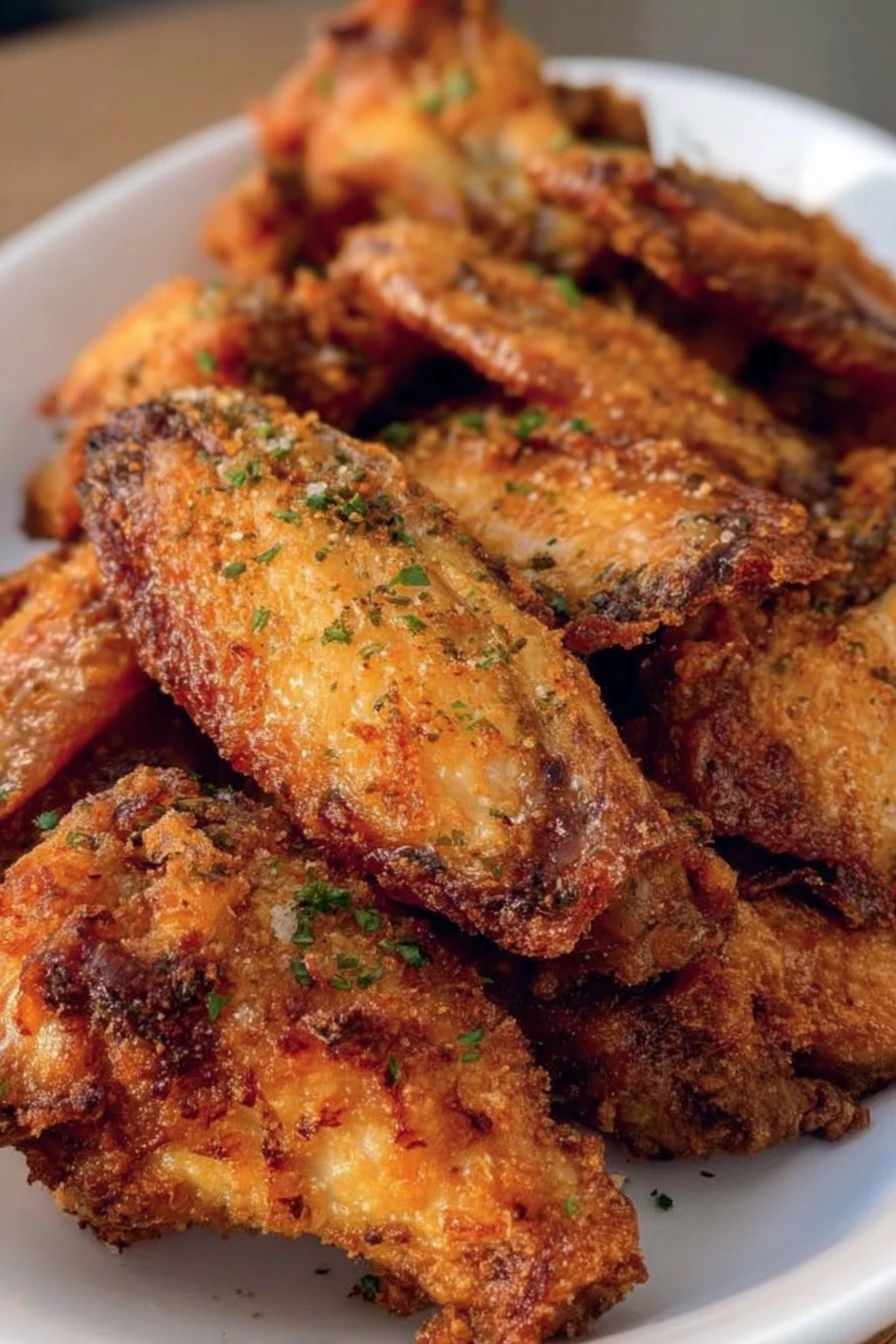
Hey there, friends! I’ve gotta tell ya, I stumbled upon the holy grail of game-night snacks a few years back when I first whipped up a batch of Crispy Baked Chicken Wings. My family? Oh, they went absolutely wild over ‘em, and now these bad boys are a non-negotiable at every gathering we host.
I remember the first time I nailed that perfect crunch without a drop of frying oil; it felt like I’d cracked some ancient culinary code!
Honestly, I’m thrilled to share this recipe with you today. Crispy Baked Chicken Wings are my go-to when I want something flavorful, crowd-pleasing, and—let’s be real—not a total pain to make. I’ve tweaked this over countless kitchen sessions to get that skin so shatteringly crisp you’d swear it came out of a deep fryer.
So, stick with me! Whether you’re a wing newbie or a seasoned pro, I’ve got all the tips and tricks to help you master Crispy Baked Chicken Wings at home. Let’s dive in and get those ovens fired up!
Why You’ll Love This Recipe
I’ve found that nothing beats the magic of Crispy Baked Chicken Wings when you’re craving something indulgent yet guilt-free. In my kitchen, these wings are a lifesaver—easy to prep, packed with flavor, and way healthier than their fried cousins. Plus, they’ve got that irresistible snap when you bite in, which, trust me, will have everyone asking for seconds (or thirds!).
What I adore most is how versatile they are. You can toss ‘em in any sauce or seasoning your heart desires, and they still come out as Crispy Baked Chicken Wings perfection. I’m telling ya, once you try this method, you’ll never look back!
Ingredients List
Alright, let’s chat about what you’ll need to make these Crispy Baked Chicken Wings. I’m super picky about getting the freshest wings possible—I usually buy mine from a local butcher because, in my experience, it makes a huge difference in flavor. But wherever you shop, just grab the good stuff, and you’re set for a batch of epic Crispy Baked Chicken Wings.
Here’s the rundown of ingredients to make about 4 servings of Crispy Baked Chicken Wings. I’ve added my little notes on preferences because, hey, I’ve been down this road many times!
- 2 pounds (about 20 pieces) chicken wings, split into drumettes and flats, tips removed if you’re not into ‘em
- 1 tablespoon baking powder, not baking soda (this is the secret to that crunch!)
- 1 teaspoon kosher salt, for that perfect savory base
- 1/2 teaspoon black pepper, freshly ground if you’ve got it
- 1 teaspoon garlic powder, for a subtle kick
- 1 teaspoon smoked paprika, because I love that smoky vibe
- 2 tablespoons olive oil, to help everything crisp up nice
- Optional: 1/2 cup hot sauce or BBQ sauce, for tossing after baking if you’re into saucy Crispy Baked Chicken Wings
Variations
One of the reasons I’m obsessed with Crispy Baked Chicken Wings is how easy it is to switch things up. I’ve experimented with a zillion flavors over the years, and honestly, there’s no wrong way to season these beauties. Whether you’re cooking for picky eaters or spice lovers, you can tweak Crispy Baked Chicken Wings to fit any vibe.
Here are some of my fave twists on Crispy Baked Chicken Wings. I’ve tried most of these at least once, and let me tell ya, they’ve all got a special place in my heart (and my family’s stomachs!).
- Buffalo Blast: Toss your Crispy Baked Chicken Wings in 1/2 cup hot sauce mixed with 2 tablespoons melted butter for that classic wing joint heat.
- Garlic Parmesan Goodness: After baking, sprinkle on 1/4 cup grated Parmesan and 1 teaspoon minced garlic mixed with a bit of butter—pure decadence.
- Honey Sriracha Sweetness: Drizzle with a mix of 2 tablespoons honey and 1 tablespoon Sriracha for a sticky, spicy-sweet combo my kids always beg for.
- Teriyaki Twist: Glaze with 1/4 cup store-bought teriyaki sauce and a sprinkle of sesame seeds for an Asian-inspired flair.
- Cajun Kick: Rub with 1 tablespoon Cajun seasoning before baking for a Southern punch that’s got some serious sass.
- Ranch Lover’s Dream: Mix 1 tablespoon ranch seasoning into the dry rub for that creamy, herby flavor without the dip.
- Lemon Pepper Zest: Add 1 teaspoon lemon pepper seasoning and a squeeze of fresh lemon juice post-bake for a bright, tangy bite.
- Smoky BBQ Bliss: Brush with your favorite BBQ sauce in the last 5 minutes of baking for a finger-lickin’ finish I can’t resist.
Servings and Timing
Let’s break down the nitty-gritty of making Crispy Baked Chicken Wings so you can plan your kitchen takeover. In my experience, these timings are pretty spot-on, though ovens can be sneaky little beasts sometimes. Here’s how long it usually takes me to whip up a batch of Crispy Baked Chicken Wings for a hungry crew.
- Prep Time: 10 minutes
- Cook Time: 45-50 minutes
- Total Time: About 60 minutes
- Servings: 4-5 people (or 2-3 if you’ve got wing fanatics like my husband!)
Step-by-Step Instructions
Alright, let’s get down to business with making Crispy Baked Chicken Wings. I’ve done this so many times I could probably do it blindfolded (okay, maybe not, but you get the idea). Follow along, and I’ll share my little tricks to get that perfect crunch every dang time.

Step 1: Preheat and Prep
First things first, crank your oven to 425°F (220°C). Line a baking sheet with foil and place a wire rack on top—this is my secret weapon for Crispy Baked Chicken Wings because it lets air circulate for all-over crispiness. Pat your wings super dry with paper towels; wet wings are the enemy of crunch!
Step 2: Season Like a Boss
In a big bowl, toss the wings with olive oil, baking powder, salt, pepper, garlic powder, and smoked paprika. I’ve learned that really massaging the mix into every nook and cranny makes a world of difference for Crispy Baked Chicken Wings. Don’t skimp on this step—it’s like giving your wings a flavor hug.
Step 3: Arrange for Success
Lay the wings out on the wire rack in a single layer, skin side up. Make sure they’re not touching too much, or they’ll steam instead of crisp. This is key for getting that golden, Crispy Baked Chicken Wings texture we’re after.
Step 4: Bake to Perfection
Pop ‘em in the oven for 25 minutes, then flip each wing and bake for another 20-25 minutes. I always peek around the 40-minute mark to make sure they’re getting that perfect snap. You’ll know your Crispy Baked Chicken Wings are done when the skin looks like it’s begging to be bitten into.
Step 5: Sauce It Up (Optional)
If you’re into saucy wings, toss your hot Crispy Baked Chicken Wings in your fave sauce right after they come out. I usually do half sauced and half plain since my picky eaters like variety. Serve ‘em up quick while they’re still sizzling!
Nutritional Information
I’m no dietitian, but I’ve looked into the numbers for Crispy Baked Chicken Wings because, well, I like to know what I’m chowing down on. These are way lighter than fried wings, which is a win in my book. Here’s the rough breakdown per serving of Crispy Baked Chicken Wings (about 4-5 wings, without sauce):
- Calories: 290 per serving
- Fat: 20g
- Protein: 24g
- Carbohydrates: 1g
- Sodium: 480mg
Healthier Alternatives
I’m all about balance, so I’ve tinkered with ways to make Crispy Baked Chicken Wings even lighter when I’m watching my intake. These swaps still deliver on flavor while cutting back a bit. Here are a few healthier spins on Crispy Baked Chicken Wings that I’ve tried and loved.
- Skip the Oil: I’ve swapped olive oil for a light cooking spray to reduce fat without losing that crisp on Crispy Baked Chicken Wings.
- Low-Sodium Seasoning: Use a salt-free spice blend if you’re cutting sodium; I’ve done this and still got raves.
- Skinless Option: Remove the skin before baking for less fat, though I’ll admit the crunch isn’t quite the same.
- Yogurt-Based Sauce: When I’m feeling fancy, I mix hot sauce with Greek yogurt instead of butter for a creamy, lighter dip.
Serving Suggestions
I love getting creative with how I plate up Crispy Baked Chicken Wings because presentation can make ‘em feel extra special. Whether it’s a casual night or a big party, these ideas have worked wonders for me. Try these serving twists for your batch of Crispy Baked Chicken Wings!
- Game Day Spread: Serve with celery sticks, carrot sticks, and a side of blue cheese dressing—classic and always a hit.
- Family Dinner Vibes: Pair Crispy Baked Chicken Wings with mashed potatoes and a green salad for a hearty meal.
- Party Platter: Arrange with a variety of dips like ranch, honey mustard, and BBQ for a crowd-pleaser.
- Snack Attack: Just pile ‘em high on a plate with some napkins—perfect for a no-fuss movie night snack.
Common Mistakes to Avoid
I’ve flubbed my fair share of Crispy Baked Chicken Wings over the years, so let me save you some headaches with mistakes I’ve learned the hard way. Trust me on this one—these pitfalls can turn your dream wings into a soggy mess. Here’s what to watch out for when making Crispy Baked Chicken Wings.
- Not Drying the Wings: If they’re wet, forget about crispiness; I’ve skipped this step before and regretted it big time.
- Overcrowding the Pan: Too many wings touching means steaming, not crisping—I’ve overcrowded and ended up with sad, limp wings.
- Wrong Rack Position: Don’t bake on the bottom oven rack; I did once, and they didn’t brown evenly.
- Skipping Baking Powder: I thought I could wing it (pun intended) without it, but nope, no crunch on those Crispy Baked Chicken Wings.
Storing Tips
I’ve found that Crispy Baked Chicken Wings can hang around for a bit if you store ‘em right, though they’re best fresh outta the oven. Here’s how I keep leftovers tasting decent when I make a big batch of Crispy Baked Chicken Wings.
- Refrigerator: Store in an airtight container for up to 3 days; reheat in the oven to revive some crunch.
- Freezer: Freeze cooked wings for up to 2 months in a freezer bag, though the texture might not be as snappy.
Frequently Asked Questions
Can I make Crispy Baked Chicken Wings ahead of time?
Totally! I often season and prep the wings a few hours ahead, then just pop ‘em in the oven when it’s go-time. They won’t be as Crispy Baked Chicken Wings fresh if fully cooked in advance, but reheating at 400°F works okay.
Do I have to use a wire rack?
I’d say yes if you want true crunch. Without it, the bottoms can get soggy from sitting in their own juices. I’ve skipped it before, and my Crispy Baked Chicken Wings were more “meh” than “wow.”
Can I use frozen wings?
You can, but thaw ‘em completely first and pat dry. Frozen wings hold too much water, and I’ve had batches turn out rubbery when I didn’t defrost properly.
What if my wings aren’t crispy enough?
Crank up the heat to 450°F for the last 5-10 minutes, or broil ‘em briefly. I’ve done this to save a batch, and it usually works like a charm.
Can I air fry instead of bake?
Absolutely, I’ve tried it at 400°F for about 25-30 minutes, flipping halfway. You’ll still get Crispy Baked Chicken Wings, just faster!
What sauces pair best?
I’m partial to classic Buffalo or honey BBQ, but ranch dip on the side is a must in my house. Experiment and see what you love!
Are these gluten-free?
Yup, as long as your spices and sauces are gluten-free. I’ve double-checked mine for friends with allergies, and they’re safe.
How do I reheat without losing crunch?
Reheat in a 375°F oven for 10-15 minutes. Microwaving kills the texture—I’ve learned that the hard way with Crispy Baked Chicken Wings.
Conclusion
And there ya have it, folks—everything you need to make the best Crispy Baked Chicken Wings ever! I’m so excited for you to try this recipe and see just how easy it is to get that drool-worthy crunch right at home. If you’ve got questions or fun flavor ideas for Crispy Baked Chicken Wings, drop ‘em below—I’d love to chat. Now go get cooking and enjoy every crispy bite!
Conclusion
I hope you enjoyed this recipe for Crispy Baked Chicken Wings! It’s truly one of my favorites, and I’m confident you’ll love it too.
Remember to follow the steps carefully for the best results. Don’t hesitate to experiment with your own variations and make this recipe your own. Happy cooking!