
There’s a moment of pure kitchen satisfaction when you pull a sheet pan of roasted vegetables from the oven. The sound of a satisfying sizzle, the aroma of caramelizing garlic filling the air, and the sight of crispy, golden-brown edges promise a side dish that might just steal the show. This garlic roasted broccolini recipe delivers on that promise every single time.
It transforms a simple bunch of greens into a deeply flavorful, texturally exciting component that pairs with virtually anything. As a chef, I’ve roasted countless trays of vegetables, and this method—with a few key techniques—consistently yields the best results: tender-crisp stems, crispy florets, and garlic that turns into sweet, crunchy chips.
This recipe is a weeknight hero for several compelling reasons that go beyond just great taste.
- One-pan convenience: Everything cooks together on a single sheet pan, meaning minimal cleanup and maximum efficiency.
- Big flavor, fast: In just 20 minutes, you develop deep, savory, and slightly sweet flavors that usually take much longer to achieve.
- Textural perfection: The method ensures you get the ideal contrast of crispy, caramelized florets and tender, juicy stems.
- Diet-flexible: It’s naturally vegan, gluten-free, and fits into numerous dietary plans without any modifications.
- Endlessly adaptable: The base recipe is a perfect canvas for your favorite herbs, spices, and garnishes.
- Crowd-pleasing side: It’s sophisticated enough for a dinner party yet simple enough for a casual family meal.
Ingredients You’ll Need
- Let’s gather our ingredients—this is where simple, quality components come together to create something truly special. You’ll notice there’s no long list of obscure items here, just a focus on technique and a few pantry staples.
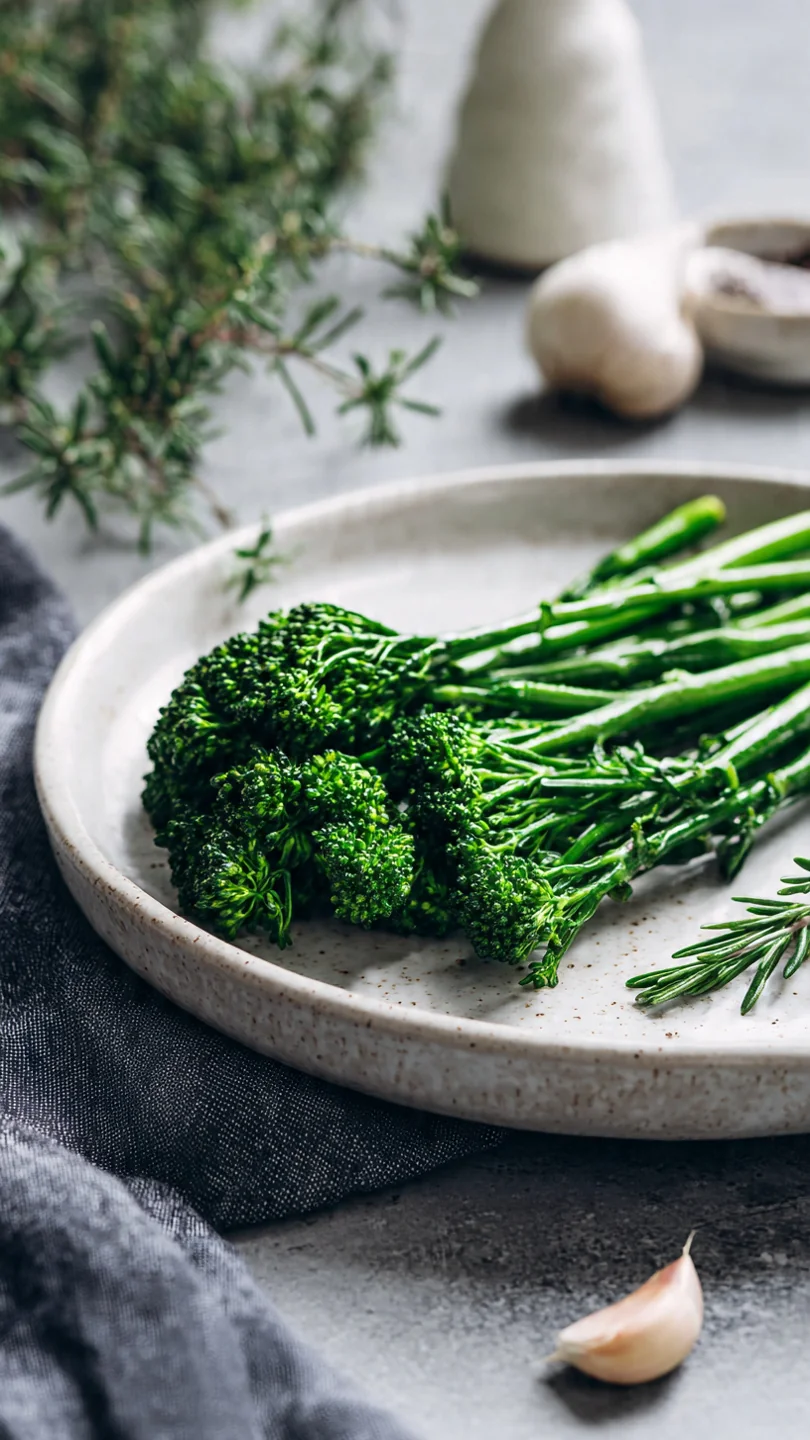
- Broccolini: Look for bright green bunches with firm stems and tightly closed florets. Avoid any with yellowing or wilted leaves. Broccolini, a hybrid of broccoli and Chinese kale, has longer, thinner stems and a slightly sweeter, more delicate flavor than standard broccoli.
- Extra virgin olive oil: A good, fruity olive oil is essential for flavor and for helping the broccolini crisp up beautifully. Don’t skimp here.
- Garlic: We’re using sliced cloves, not minced. This is a professional trick: slices brown into sweet, crispy chips without the risk of burning that minced garlic has.
- Kosher salt: Its coarse grains adhere well and season evenly. If using table salt, start with half the amount.
- Black pepper: Always freshly ground for the brightest aroma.
- Red pepper flakes: Just a pinch adds a subtle warmth that complements the garlic. It’s optional but highly recommended.
- Lemon: Both the zest and juice are non-negotiable for me. The zest adds fragrant citrus oils, while a squeeze of juice at the end brightens all the rich, roasted flavors.
Kitchen Equipment Needed
You likely have everything you need already. The right tools simply make the process smoother.
- A large, rimmed baking sheet (often called a half-sheet pan). The rim prevents oil from spilling, and the large surface area is critical for allowing space between the broccolini stalks.
- A large mixing bowl for tossing everything together.
- A sharp chef’s knife and cutting board for prepping the garlic and broccolini.
- A microplane or fine zester for getting the most fragrant lemon zest without the bitter white pith.
How to Make Garlic Roasted Broccolini Recipe
Step 1: Heat Your Oven and Pan
Preheat your oven to a solid 425°F (220°C) and place your empty baking sheet on the center rack. Trust me, this step is the secret weapon. A screaming-hot pan sears the broccolini the moment it hits the surface, instantly creating a caramelized crust and locking in moisture.
Starting on a cold pan leads to steaming and soggy results. Give the oven a full 15 minutes to come to temperature.
Step 2: Prep the Broccolini and Garlic
While the oven heats, prepare your produce. Wash the broccolini and then dry it thoroughly with a clean kitchen towel or salad spinner. Any residual water will create steam.
Trim just the very ends of the stalks. For any stalks thicker than your finger, slice them in half lengthwise so they cook at the same rate as the thinner ones. Next, thinly slice your garlic cloves.
Believe me, taking the time to slice, not mince, means the garlic will roast into golden, crispy bits instead of burning and turning bitter.
Step 3: Season and Coat
In your large bowl, combine the broccolini with 3 tablespoons of olive oil, all of the sliced garlic, kosher salt, black pepper, and red pepper flakes. Now, use your hands to toss and massage everything together. This isn’t a job for tongs or a spoon.
Using your hands ensures every nook and cranny of the broccolini gets coated with the flavorful oil and seasoning, which is essential for even browning and flavor in every bite.
Step 4: Roast to Crispy Perfection
Here comes the fun part. Carefully pull the hot baking sheet from the oven. Drizzle the remaining tablespoon of oil onto the pan—it should shimmer immediately—and swirl to coat.
Quickly arrange the broccolini in a single, uncrowded layer. If you pile it on, it will steam. Roast for 12 to 15 minutes.
You’re looking for tender stems (pierceable with a fork) and florets that are crispy and charred in beautiful spots.
Step 5: Finish and Serve
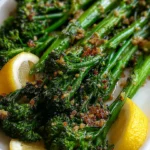
Once out of the oven, immediately transfer the broccolini to a serving platter. Waiting even a minute can cause it to overcook from the pan’s residual heat. Immediately sprinkle the fresh lemon zest over the top.
The heat will release the citrus oils in the zest, perfuming the entire dish. Serve with lemon wedges on the side for squeezing. Step back and admire your beautiful, restaurant-quality side dish.
A few chef-driven insights will guarantee your success every time you make this.
- Dry is key: I cannot stress this enough. Any moisture left on the broccolini will steam it on the pan. Take the extra minute to pat it completely dry.
- Preheat the pan: This is the single most important tip for achieving caramelization. It mimics the effect of a restaurant’s extremely hot flat-top grill.
- Don’t crowd the pan: Giving each piece space allows hot air to circulate, leading to all-over crispness. If necessary, use two pans.
- Slice, don’t mince, the garlic: Minced garlic has a much higher surface area and will burn in a hot oven before the broccolini is done. Sliced garlic caramelizes beautifully.
- Finish with acid: Adding the lemon zest and juice after roasting preserves their bright, fresh flavor. If added before, the acid can dull the green color and make the texture mushy.
Recipe Variations & Customizations
- This recipe is wonderfully adaptable. Here are some of my favorite tested variations.
- Parmesan-Herb: In the last 2 minutes of roasting, sprinkle with 1/4 cup of finely grated Parmesan cheese and 1 tablespoon of chopped fresh thyme.
- Sesame-Ginger: Replace the olive oil with toasted sesame oil. Add 1 tablespoon of grated fresh ginger to the oil mixture, and finish with a sprinkle of toasted sesame seeds.
- Balsamic Glaze: After roasting, drizzle with 1-2 tablespoons of high-quality balsamic glaze for a sweet-and-tangy finish.
- Anchovy & Chili: Add 3 minced anchovy fillets to the oil mixture—they’ll melt into a deep, savory umami base. Increase red pepper flakes to 1 teaspoon.
- Nutty Crunch: Toss 1/4 cup of pine nuts or slivered almonds onto the pan for the last 5 minutes of roasting to toast them alongside the broccolini.
- Vegan ‘Cheesy’: Before roasting, sprinkle the oiled broccolini with 2 tablespoons of nutritional yeast for a cheesy, savory flavor without dairy.
What to Serve With This Recipe
Garlic roasted broccolini is an incredibly versatile side that complements a wide range of main courses.
It’s a perfect match for simply prepared proteins. Think herb-roasted chicken, pan-seared salmon with a dill sauce, or a seared ribeye steak. The bright, garlicky vegetable cuts through the richness of the meat beautifully.
For a vegetarian feast, serve it atop a bowl of creamy polenta or alongside a hearty lentil loaf. It also makes a fantastic addition to a grain bowl with quinoa, chickpeas, and a tahini dressing. For a casual pasta night, toss it with olive oil and spaghetti for a quick vegetable pasta.
Storage & Make-Ahead Instructions
- While best served immediately for optimal crispness, you can manage leftovers effectively.
- Refrigeration: Store leftovers in an airtight container in the refrigerator for up to 3 days. The texture will soften.
- Reheating: To restore some crispness, reheat in a 400°F oven or a toaster oven for 5-7 minutes. Avoid the microwave, as it will make the broccolini very soggy.
- Make-Ahead Prep: You can wash, dry, and trim the broccolini up to a day in advance. Store it wrapped in a dry paper towel inside a resealable bag in the refrigerator. Combine the oil and seasonings in a separate container. Combine and roast just before serving.
- Freezing: I do not recommend freezing, as the texture becomes unpleasantly watery and mushy upon thawing.
Frequently Asked Questions
Q: Can I use regular broccoli instead of broccolini?
Absolutely. Cut the broccoli crowns into even-sized florets and peel and slice the stalks. The cooking time may need to be extended by 2-3 minutes.
The flavor profile will be very similar, though slightly more robust.
Q: My garlic burned. What did I do wrong?
You likely minced it instead of slicing it. Minced garlic is too fine for the high, dry heat of roasting and will burn quickly. Sliced garlic is much more forgiving and turns sweet and crispy.
Q: Is the broccolini supposed to be soft or crispy?
You want a contrast! The stems should be tender and easily pierced with a fork, while the florets and edges of the leaves should be crispy and lightly charred. This contrast in texture is what makes the dish so appealing.
Q: Can I make this without oil?
For proper roasting and caramelization, oil is necessary. It conducts heat, promotes browning, and carries flavor. For a lower-fat version, you can reduce the oil to 2 tablespoons and use a high-quality non-stick baking mat, but expect less browning.
Q: Why is my broccolini soggy?
The most common causes are not drying it thoroughly before roasting, crowding the pan (which creates steam), or using a pan that wasn’t preheated. Ensure you check all three of these factors next time.
Q: Can I add other vegetables to the pan?
Yes, but choose vegetables with similar cooking times. Asparagus, trimmed green beans, or sliced bell peppers work well. Denser vegetables like carrots or potatoes should be par-cooked first or roasted separately.
Q: How do I know when it’s done?
The stems should be tender when pierced with the tip of a knife or fork, and the florets should have dark brown, crispy edges. The garlic slices should be light golden brown.
Final Thoughts
This garlic roasted broccolini recipe embodies what I love about cooking: transforming a few humble ingredients into something extraordinary with just a bit of know-how. The techniques here—preheating the pan, slicing the garlic, not crowding—are small details that make a monumental difference in the final dish. It’s a recipe I rely on weekly because it’s unfailingly delicious, incredibly fast, and always receives compliments.
I encourage you to make it your own with the variations provided. Once you taste the crispy, garlicky, lemon-kissed results, I believe it will become a staple in your kitchen as well. Give it a try this week, and don’t forget to squeeze that lemon wedge over the top just before eating—it’s the perfect finishing touch.
I’d love to hear how it turns out for you!
Perfect Garlic Roasted Broccolini
Equipment
- Large rimmed baking sheet (half-sheet pan)
- Large mixing bowl
- Microplane or zester (for lemon)
- Sharp chef’s knife and cutting board
Ingredients
- 2 bunches broccolini about 1.5 lbs total, ends trimmed
- 4 tablespoons extra virgin olive oil divided
- 6 cloves garlic thinly sliced
- 1 teaspoon kosher salt plus more to taste
- 1/2 teaspoon black pepper freshly ground
- 1/4 teaspoon red pepper flakes optional, for heat
- 1 large lemon zested and cut into wedges for serving
Instructions
- Preheat your oven to 425°F (220°C) with a rack in the center position. Place a large, rimmed baking sheet in the oven to preheat as well. A hot pan is the secret to getting those beautifully crispy, caramelized edges without steaming the broccolini.
- While the oven heats, prepare the broccolini. Wash and thoroughly dry the bunches. Trim about 1/2 inch off the woody ends. If any stalks are very thick, you can slice them in half lengthwise to ensure even cooking. Place the dried broccolini in a large bowl.
- In a small bowl, combine 3 tablespoons of olive oil, the thinly sliced garlic, salt, black pepper, and red pepper flakes (if using). Pour this mixture over the broccolini and use your hands to toss everything together, ensuring every stalk is evenly coated. The hands-on method is best for distribution.
- Carefully remove the hot baking sheet from the oven. Drizzle the remaining 1 tablespoon of oil onto the pan and swirl to coat. Arrange the broccolini in a single, uncrowded layer. This space is crucial for proper roasting, not steaming. Roast for 12-15 minutes.
- After 12 minutes, check for doneness. The broccolini is ready when the stems are tender when pierced with a fork and the florets are crispy and deeply browned in spots. Remove from the oven and immediately transfer to a serving platter to prevent overcooking on the hot pan.
- Finish the dish by sprinkling the fresh lemon zest over the top. Serve immediately with lemon wedges on the side for squeezing. The hot broccolini will absorb the bright, fresh lemon juice perfectly.