
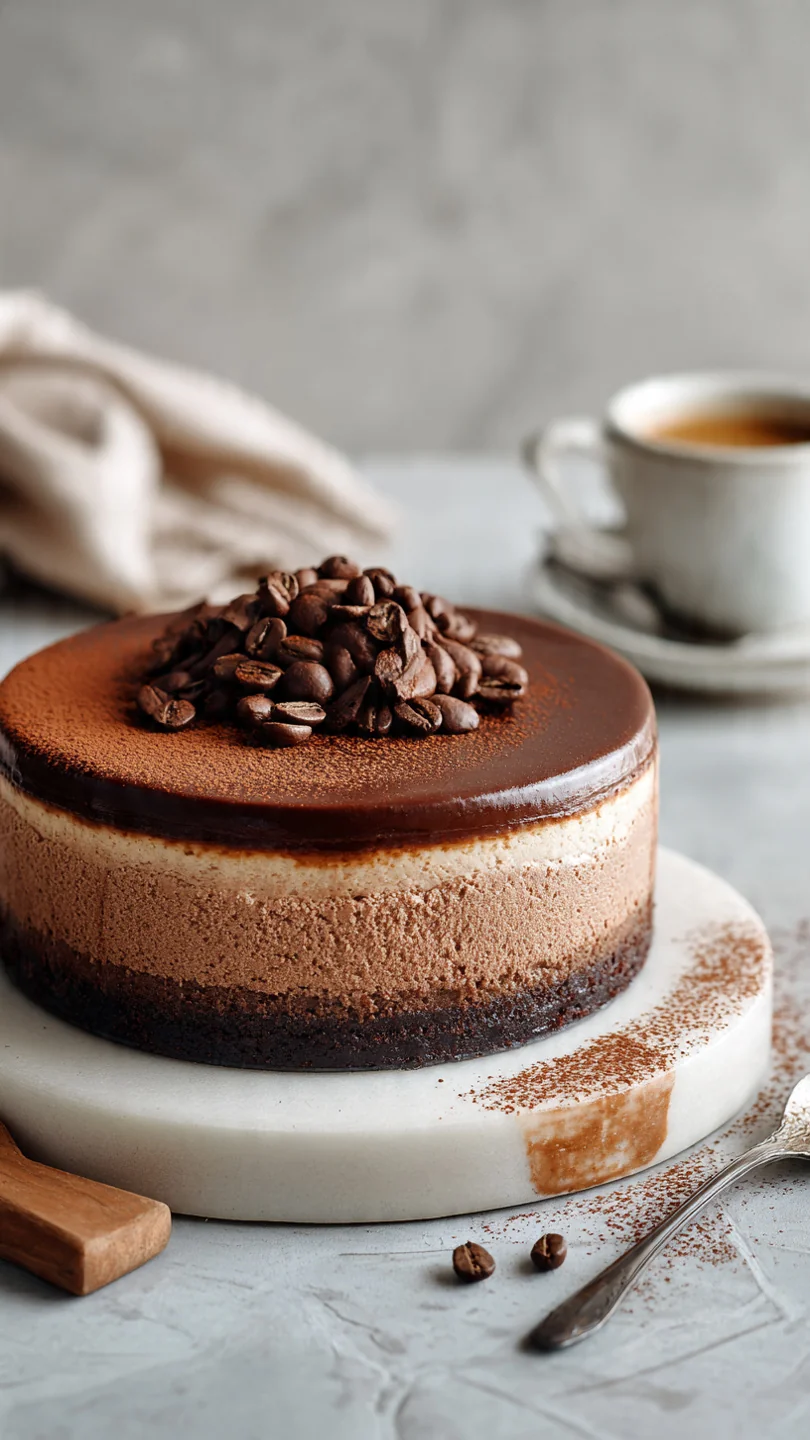
There are desserts that satisfy a craving, and then there are desserts that create a moment. This Triple Chocolate Cheesecake belongs firmly in the latter category. Imagine the deep, bittersweet notes of dark chocolate ganache giving way to a luxuriously smooth and rich chocolate cream cheese filling, all resting on a crisp, dark chocolate cookie crust.
It’s the kind of dessert that makes dinner guests pause, the one you’ll be asked to bring to every gathering. Having plated thousands of desserts in professional kitchens, I can tell you that the magic here isn’t just in the triple chocolate promise—it’s in the technique that ensures a silky, crack-free surface and a perfect, clean slice every time. Let’s make a showstopper.
This recipe is designed for success, blending professional methods with clear, home-cook-friendly instructions.
- Three Layers of Chocolate Bliss: Experience a perfect textural and flavor journey from the crunchy base through the creamy center to the glossy topping.
- Crack-Free, Professional Finish: The water bath and controlled cooling method I use guarantees a beautifully smooth surface without unsightly cracks.
- Make-Ahead Perfection: This cheesecake needs to chill overnight, making it the ultimate stress-free dessert for parties and holidays.
- Balanced Sweetness: Using three types of chocolate (dark, semi-sweet, and the cocoa in the Oreos) creates a sophisticated depth of flavor that’s rich but not cloying.
- Impressively Customizable: The base recipe is a masterpiece on its own, but it also serves as a fantastic canvas for your own additions like espresso, orange zest, or mint.
- Detailed, Tested Guidance: Every tip, from ingredient temperature to visual cues, comes from three rounds of testing to ensure your first attempt is a triumph.
Ingredients You’ll Need
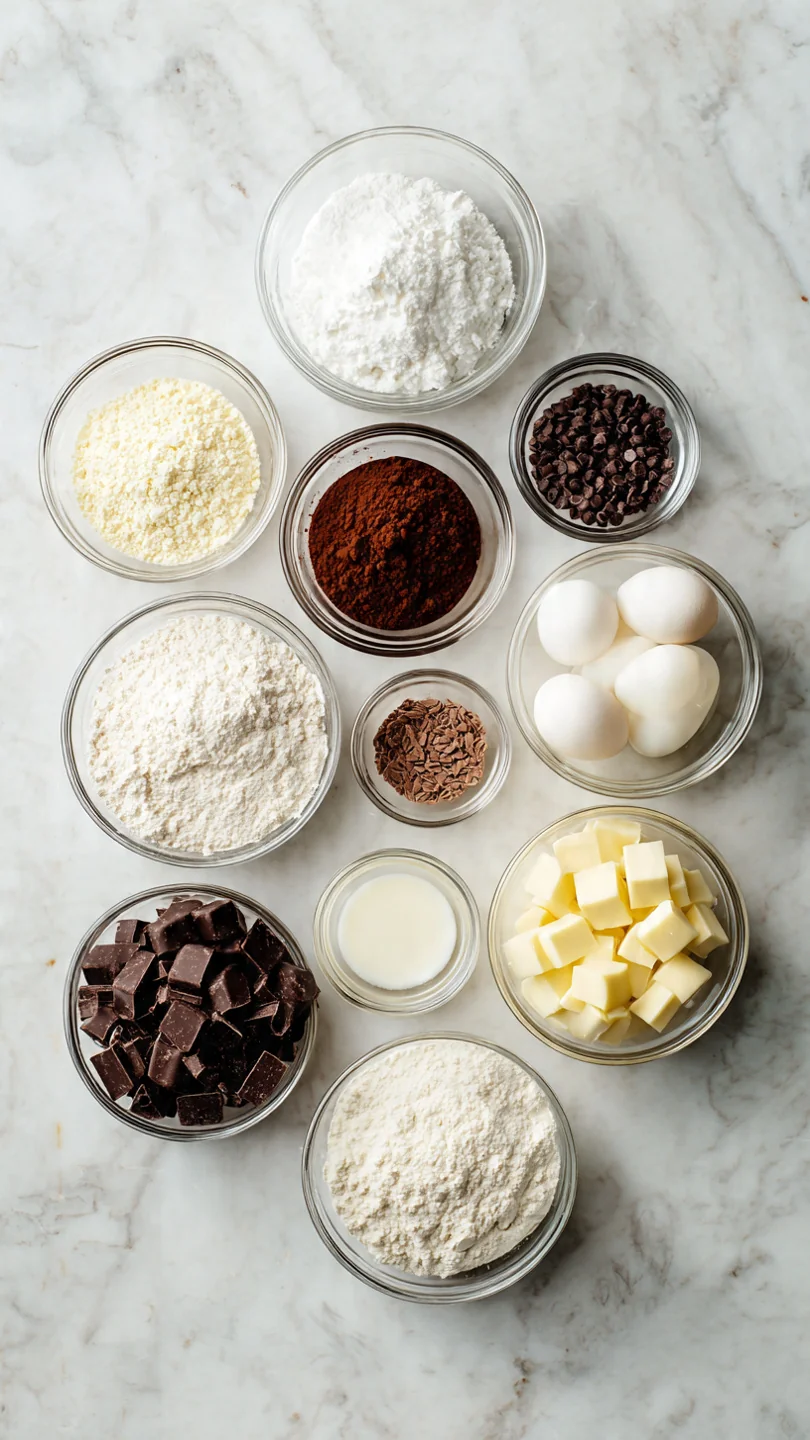
- Gathering quality ingredients is the first step to culinary success. For this cheesecake, using full-fat dairy is non-negotiable—it provides the structure and creamy mouthfeel that low-fat alternatives simply cannot. Room temperature ingredients are your secret weapon; they blend seamlessly into a smooth, lump-free batter. Let’s break it down.
For the crust, you’ll need classic Oreo cookies (filling included) and melted unsalted butter. The filling is built from a foundation of very soft, room-temperature cream cheese, granulated sugar, and full-fat sour cream for tang and moisture. Eggs provide structure, and pure vanilla extract rounds out the flavor.
The first chocolate layer comes from melted semi-sweet chocolate folded directly into the batter. Finally, the crowning glory is a simple dark chocolate ganache made from heavy cream and good-quality dark chocolate. The contrast between the semi-sweet filling and slightly bitter dark chocolate topping is what makes this dessert so special.
Note: You’ll find the complete list of ingredients, along with their exact measurements, in the printable recipe card at the bottom of this post.
Kitchen Equipment Needed
You don’t need specialized patisserie tools, but a few key items are essential. A 9-inch springform pan is mandatory for easy removal. You’ll need a food processor to make the fine Oreo crumb crust.
A stand mixer or a powerful hand mixer is crucial for achieving the perfectly smooth cream cheese base. The most important piece of “equipment” for the technique is a large roasting pan to act as a water bath, along with heavy-duty aluminum foil to securely waterproof your springform pan. A rubber spatula, a whisk, and a thin knife for releasing the edges round out the list.
How to Make Triple Chocolate Cheesecake Recipe
Step 1: Prepare the Pan and Crust
Trust me, taking the time to properly prepare your pan pays off in a stress-free release later. Wrap the outside of your springform pan tightly with two layers of heavy-duty foil—this is your insurance policy against a soggy crust from water bath leakage. Pulse the Oreos into fine crumbs, mix with melted butter, and press the mixture firmly into the pan bottom.
Pre-baking this for 10 minutes at 325°F sets the crust, preventing it from becoming soggy under the heavy filling. Let it cool slightly while you work.
Step 2: Build the Cream Cheese Base
Here’s where patience is key. Your cream cheese, sour cream, and eggs must be at room temperature. Start beating the cream cheese alone on medium-low speed until it’s completely smooth and creamy, about a full minute.
Scrape the bowl well. Believe me, this initial step eliminates lumps for good. Add the sugar and beat for another two minutes until it’s fully dissolved and the mixture is smooth.
Then, mix in the sour cream and vanilla just until combined.
Step 3: Incorporate Eggs and Chocolate
Now, switch to low speed. Add the eggs one at a time, mixing only until each yolk disappears into the batter. Overbeating at this stage incorporates too much air, which expands in the oven and leads to cracks.
Scrape the bowl once more. Meanwhile, melt your semi-sweet chocolate gently and let it cool for a couple of minutes so it doesn’t cook the eggs when added. Tip from me: fold the chocolate in with a spatula until no streaks remain for the most even, luxurious color and flavor.
Step 4: Bake in a Water Bath
This is the professional technique that makes all the difference. Pour your batter over the crust. Place the foil-wrapped springform pan into your roasting pan.
Now, carefully pour hot water from a kettle into the roasting pan until it comes about halfway up the side of the springform. The water bath creates a gentle, humid heat that cooks the cheesecake evenly and prevents the surface from drying out and cracking. Bake at 325°F for 55-70 minutes.
The center should still have a slight jiggle—it will set as it chills.
Step 5: The Crucial Cool Down and Finish
Resist the urge to take it out of the oven! Turn the oven off, crack the door open with a wooden spoon, and let the cheesecake cool inside for one hour. This gradual temperature change is your second defense against cracking.
After chilling completely, make the ganache: heat cream until simmering, pour over chopped dark chocolate, let sit, then whisk until glossy. Pour over the chilled cake, tilting to coat evenly. Let the ganache set in the fridge before slicing with a hot, clean knife for pristine pieces.
A few chef-level insights will elevate your results from good to exceptional.
- Temperature is Everything: Cold cream cheese will never become smooth. Let it sit out for at least 2-3 hours. Cold eggs can shock and harden the fat in the batter, leading to lumps.
- The Water Bath is Non-Negotiable: This gentle cooking method is the single most important factor for that classic, creamy New York-style texture and a crack-free top. Don’t skip it.
- Don’t Peek: Avoid opening the oven door during the first 50 minutes of baking. Sudden temperature drops can cause the surface to contract and split.
- The Jiggle Test: The cheesecake is done when the edges are set but the center (about a 3-inch circle) jiggles uniformly like Jell-O when you gently shake the pan. It will firm up while chilling.
- Clean Slices: For picture-perfect slices, dip a sharp knife in hot water and wipe it clean between each cut. This slices cleanly through the firm ganache and creamy filling.
Recipe Variations
- This fantastic base recipe welcomes creativity. Here are some tested variations that work beautifully.
- Mocha Swirl: Add 2 teaspoons of instant espresso powder to the cream cheese batter. After pouring into the pan, dollop with plain batter and swirl with a knife for a marbled effect.
- Chocolate-Orange: Add the zest of one large orange to the cream cheese batter along with the vanilla. A tablespoon of Grand Marnier in the ganache amplifies the flavor.
- Mint Chocolate Chip: Add 1 teaspoon of pure peppermint extract to the batter and fold in 1/2 cup of mini chocolate chips before pouring. Top with a mint-infused ganache.
- Salted Caramel Chocolate: Drizzle 1/2 cup of good-quality salted caramel sauce over the baked and cooled filling before adding the chocolate ganache topping.
- Gluten-Free Adaptation: Use gluten-free chocolate sandwich cookies for the crust. Ensure all other ingredients, like chocolate, are certified gluten-free.
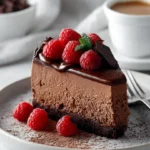
- Berry Compote Topping: Skip the ganache and top the chilled cheesecake with a fresh raspberry or strawberry compote for a fruity, tangy contrast.
- Turtle Cheesecake: Before adding the filling, sprinkle the baked crust with 1 cup of chopped pecans. After adding the ganache, drizzle with caramel sauce and more pecans.
What to Serve With This Recipe
This rich cheesecake is a complete dessert on its own, but a few simple accompaniments can enhance the experience. A dollop of freshly whipped cream or a scoop of vanilla bean ice cream provides a lovely temperature and flavor contrast. For a touch of brightness that cuts through the richness, serve with a side of mixed fresh berries like raspberries, strawberries, or blackberries.
In terms of beverages, this pairs wonderfully with a cup of strong black coffee, a dessert wine like a late-harvest Riesling, or a small glass of port. It’s the perfect grand finale for a holiday feast, a celebratory birthday dinner, or any occasion that calls for an indulgent, memorable dessert.
Storage & Make-Ahead Instructions
- This cheesecake’s make-ahead nature is one of its greatest assets.
- Refrigeration: Once fully set, cover the cheesecake tightly with plastic wrap or store in an airtight container. It will keep beautifully in the refrigerator for up to 5 days.
- Freezing: For longer storage, freeze the whole cheesecake or individual slices. Do not add ganache before freezing if possible. Wrap tightly in plastic wrap, then a layer of foil. Freeze for up to 2 months. Thaw overnight in the refrigerator.
- Make-Ahead Strategy: The entire cheesecake can be made 1-2 days in advance. In fact, the flavor improves and the texture becomes perfectly set after a full 24 hours of chilling. Add the ganache the day you plan to serve it for the best glossy appearance.
- Serving from Cold: Always serve this cheesecake chilled straight from the fridge. It slices cleanly and holds its shape perfectly.
Frequently Asked Questions
Q: Can I make this without a springform pan?
A: It’s not recommended. The delicate structure and creamy filling make it nearly impossible to remove cleanly from a regular cake pan. A springform pan is a crucial investment for cheesecake success.
Q: My cream cheese is still a bit lumpy. What should I do?
A: If you have small lumps after mixing, you can pass the entire batter through a fine-mesh sieve before pouring it into the crust. This ensures ultimate silkiness.
Q: How do I know if the water bath leaked?
A: After baking, if the crust is soggy or there is water in the bottom of the springform pan, the foil seal was insufficient. Next time, use wider, heavy-duty foil and wrap the pan three times, bringing the foil high up the sides.
Q: Can I use a different type of chocolate for the filling?
A: Yes, but be cautious. Milk chocolate will make the filling much sweeter. Using all dark chocolate may make it too dense and bitter.
I find semi-sweet offers the perfect balance.
Q: Why did my cheesecake crack?
A: The most common causes are overmixing the batter (adding too much air), overbaking, or cooling it too quickly. Following the water bath and slow cooling instructions precisely prevents this.
Q: Can I make this recipe gluten-free?
A: Absolutely. Simply use your favorite gluten-free chocolate sandwich cookies for the crust, and ensure all other packaged ingredients (like chocolate) are certified gluten-free.
Q: The ganache is too runny/thick. How can I fix it?
A: If too runny, let it sit at room temperature to thicken. If too thick to pour, gently reheat it in 5-second bursts in the microwave, stirring between each, until it reaches a pourable consistency.
Final Thoughts
This Triple Chocolate Cheesecake is more than just a recipe; it’s a lesson in patience and technique that yields incredibly rewarding results. The combination of a foolproof method with luxurious ingredients creates a dessert that feels both impressive and approachable. Remember, the keys are room-temperature ingredients, the protective water bath, and the slow, gradual cooling.
Don’t be intimidated—each step is clearly laid out to guide you to a flawless finish.
When you present this cheesecake, with its glossy dark chocolate top and perfect layers, take a moment to appreciate what you’ve created. It’s a testament to the fact that with clear instructions and a bit of care, home bakers can achieve professional-quality desserts. I hope this recipe becomes your go-to for celebrations, a project you enjoy making, and a dessert that earns you rave reviews.
Please share your baking experience and photos with me—I love seeing your creations. Happy baking
Triple Chocolate Cheesecake
Equipment
- 9-inch springform pan
- Stand mixer or hand mixer
- Food processor
- Large roasting pan for water bath
- Heavy-duty aluminum foil
Ingredients
- 24 pieces Oreo cookies creme filling included
- 5 tbsp unsalted butter melted
- 24 oz full-fat cream cheese room temperature, very soft
- 1 cup granulated sugar
- 1 cup full-fat sour cream room temperature
- 3 large eggs room temperature
- 2 tsp pure vanilla extract
- 8 oz semi-sweet chocolate finely chopped or high-quality chips
- 1/2 cup heavy cream for ganache
- 4 oz dark chocolate finely chopped, for ganache