
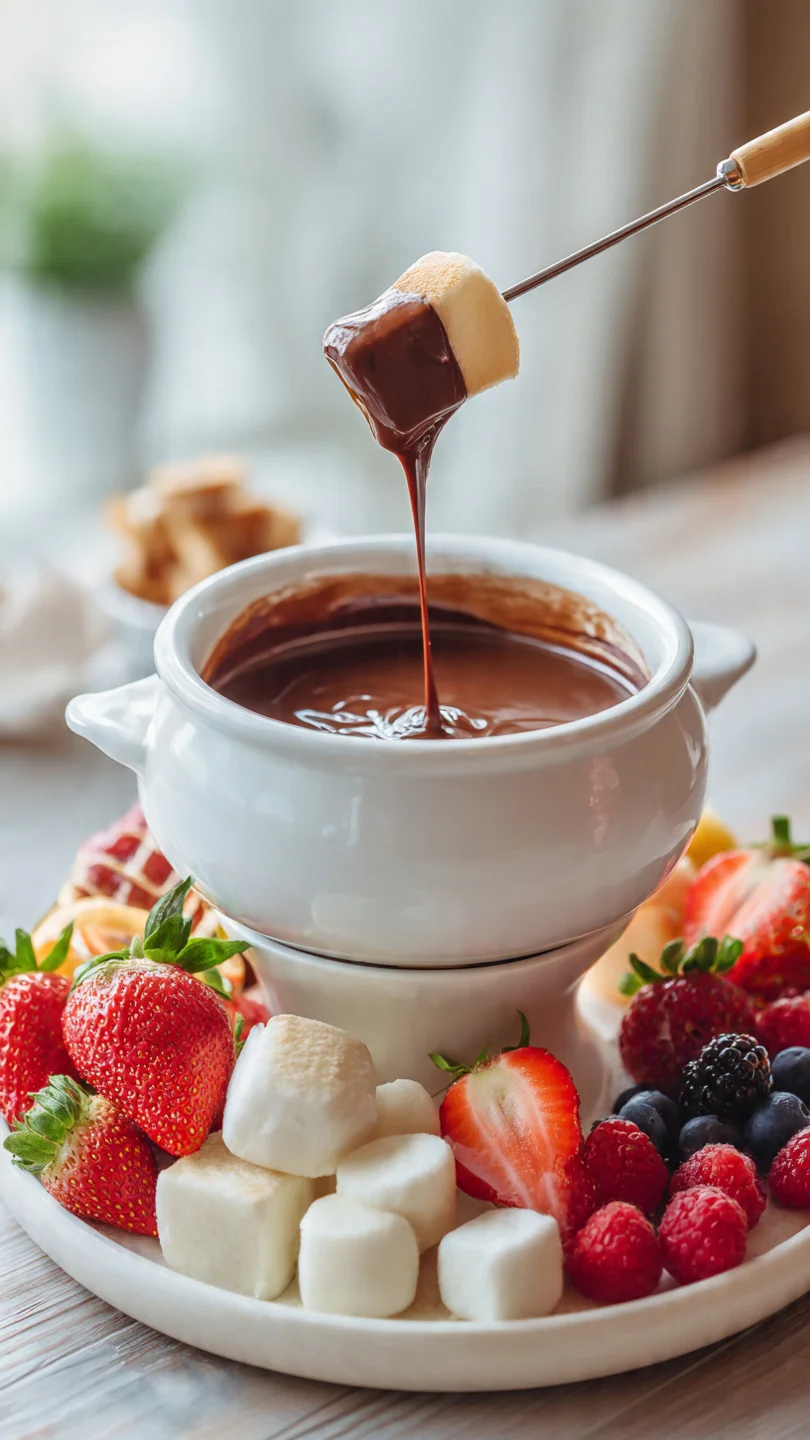
There’s something undeniably magical about a communal pot of warm, velvety chocolate. It transforms a simple weeknight into a special occasion and turns any party into an interactive celebration. As a chef, I love recipes that deliver maximum impact with minimal effort, and this creamy chocolate fondue is the perfect example.
Forget complicated techniques or finicky tempering—this recipe relies on one simple, foolproof method that guarantees a silky-smooth, luxuriously rich result every single time. In just about 10 minutes, you can create a dessert that feels decadent, looks impressive, and brings everyone together around the table. Let’s make some chocolate magic.
This recipe is designed for success, whether you’re a seasoned cook or a complete beginner. Here’s what makes it a keeper:
- 10-Minute Wonder: From pantry to party in the time it takes to arrange your dippers. It’s the ultimate last-minute dessert savior.
- Foolproof & Forgiving: The gentle heating method prevents the chocolate from seizing or scorching, which are the most common fondue pitfalls.
- Endlessly Customizable: The base recipe is a perfect canvas. A splash of liqueur, a dash of spice, or a different chocolate type can create a whole new experience.
- The Ultimate Crowd-Pleaser: It appeals to all ages and can be tailored to any dietary need with simple swaps for the dippers.
- Restaurant-Quality Results: Using the professional “hot pour and rest” technique ensures a glossy, stable emulsion that stays creamy for the entire serving time.
- Minimal Cleanup: You’ll only need a bowl, a saucepan, and a whisk. It’s practically a one-pot dessert.
Ingredients You’ll Need
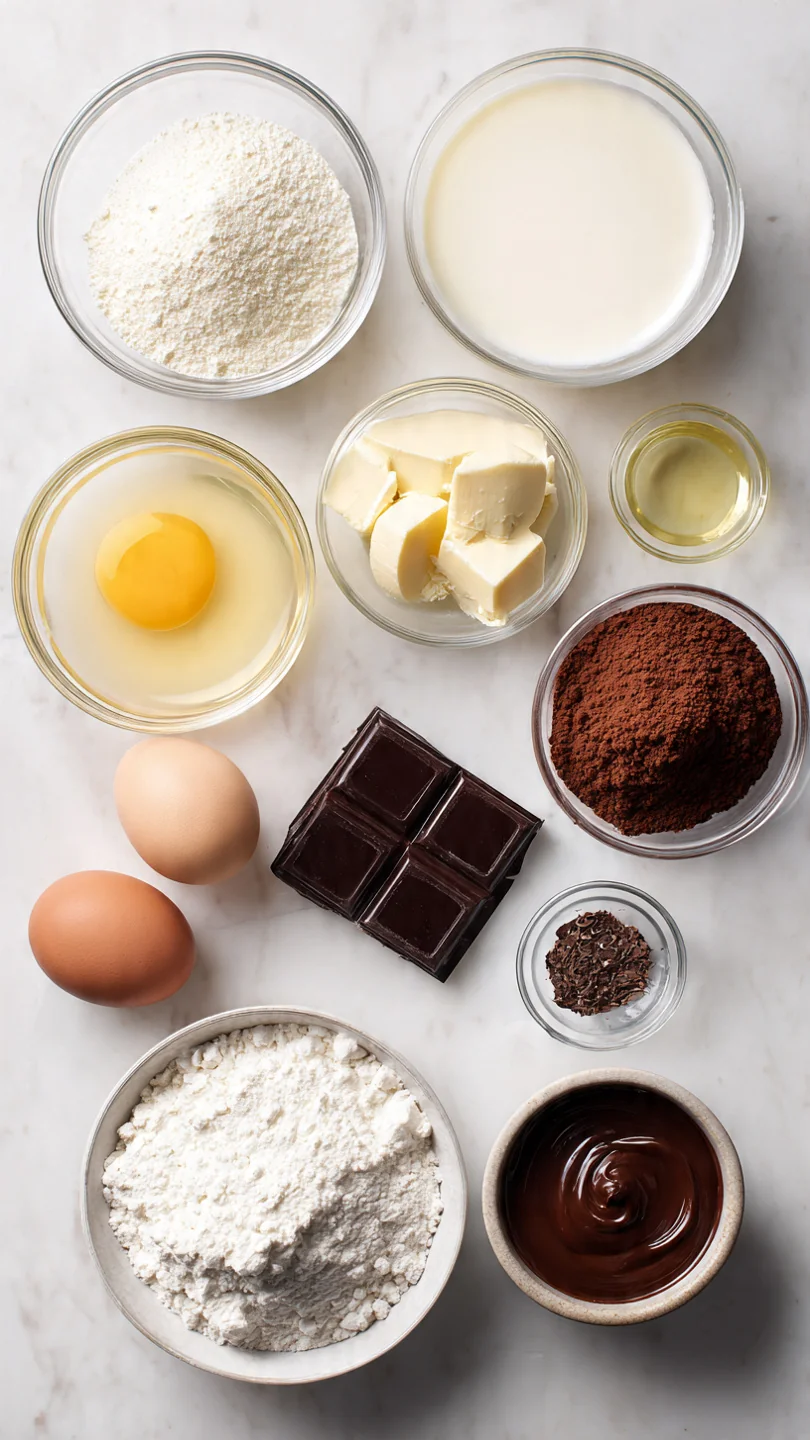
- Let’s gather our ingredients. This short list of pantry staples is all you need to create a dessert that feels anything but basic. The quality of your chocolate is paramount here—it’s the star of the show.
- Semi-sweet chocolate (8 oz): I highly recommend using a bar of good-quality baking chocolate (like Ghirardelli or Callebaut) chopped into even pieces. The cocoa butter content in bar chocolate creates a superior texture. In a pinch, high-quality chocolate chips (like Guittard) will work, but they contain stabilizers that can make the fondue slightly thicker.
- Heavy cream (1 cup): Also called whipping cream, with a fat content of 36% or higher. This provides the luxurious, creamy body. Do not substitute with half-and-half or milk, as the fondue will be too thin and may separate.
- Unsalted butter (1 tbsp): This adds a subtle richness and a beautiful sheen to the finished fondue.
- Pure vanilla extract (1 tsp): A flavor enhancer that rounds out the chocolate’s bitterness. Use the real stuff.
- Kosher salt (1 pinch): A tiny amount is essential. It doesn’t make the fondue taste salty; it amplifies the depth of the chocolate flavor, making it taste more chocolatey.
Note: You’ll find the complete list of ingredients, along with their exact measurements, in the printable recipe card at the bottom of this post.
Kitchen Equipment Needed
You don’t need a fancy fondue set to make this work. Here’s what will help you succeed:
- A medium heatproof bowl: Glass or stainless steel is perfect. This is where the chocolate will melt.
- A small saucepan: For heating the cream and butter.
- A whisk or flexible rubber spatula: For gentle stirring. A whisk incorporates a bit of air for lightness, while a spatula is great for scraping the bowl clean.
- A fondue pot or warming vessel: This is key for keeping the fondue dippable. A traditional fondue pot with a tea light or gel fuel works beautifully. A small slow cooker on the “warm” setting is an excellent alternative. In a pinch, you can use a pre-warmed ceramic bowl, but the fondue will cool and thicken more quickly.
How to Make Easy Creamy Chocolate Fondue Recipe
Step 1: Prepare Your Chocolate and Heat the Cream
Place your chopped chocolate in a clean, dry heatproof bowl. In your small saucepan, combine the heavy cream and butter. Trust me, using a saucepan gives you more control than the microwave.
Heat this over medium heat, stirring occasionally, until the mixture just begins to simmer. You’re looking for small bubbles forming around the edges of the pan and steam rising—this is crucial. A full, rolling boil can cause the fat to separate and may shock the chocolate later.
Step 2: The Hot Pour and Rest
Immediately pour the hot cream mixture over the chopped chocolate. Believe me, this is where the magic happens. Do not stir it yet.
Let it sit, completely undisturbed, for a full 3 minutes. This patience allows the gentle heat from the cream to slowly and evenly melt the chocolate from the bottom up, setting the stage for a perfectly smooth emulsion.
Step 3: Gently Stir to Emulsify
After the 3-minute rest, add the vanilla extract and that all-important pinch of salt to the bowl. Now, take your whisk or spatula. Tip from me: start stirring in the very center of the bowl with small, gentle circles.
Slowly work your way outward, gradually incorporating the cream into the melting chocolate. You’ll see it transform from a separated mess into a glossy, homogenous pool of velvet.
Step 4: Transfer and Keep Warm
Once your fondue is completely smooth and silky, transfer it to your fondue pot or pre-warmed serving vessel. If you’re using a traditional pot with a flame, keep the flame on the lowest possible setting. The goal is to maintain warmth, not apply more heat.
If the fondue gets too hot, it can separate or develop a grainy texture.
Step 5: Arrange, Dip, and Enjoy!
Now comes the fun part. Arrange your platter of dippers. Encourage your guests to swirl their item in the chocolate with a graceful motion.
Step back and admire your creation—a beautiful, communal, and utterly delicious dessert that’s ready in minutes.
A few chef secrets will take your fondue from good to absolutely impeccable.
- Chocolate Choice is Key: The fondue will only be as good as the chocolate you start with. Taste it first. If you don’t love eating it plain, you won’t love it in fondue. A bar with around 60% cacao is ideal for a balanced sweetness.
- The Science of the Rest: Letting the hot cream sit on the chocolate allows the cocoa butter and dairy fats to heat evenly. Stirring too soon introduces cooler chocolate chunks into the warm emulsion too quickly, which can cause it to “seize” or become grainy.
- Rescuing a Broken Fondue: If your fondue looks separated or oily, don’t panic. Remove it from the heat. Whisk in a tablespoon of room-temperature cream or even a splash of hot water, one teaspoon at a time, until it comes back together. It’s remarkably resilient.
- Perfect Dipping Technique: For optimal coverage, spear your dipper, give it one full, graceful swirl in the fondue, and lift it with a slight twist as you pull it out. This creates a beautiful, even coating and avoids drips.
Recipe Variations
- This basic recipe is a wonderful foundation. Here are some tested and delicious ways to customize it.
- Orange Dream: Add the zest of one orange and 1 tablespoon of Grand Marnier or Cointreau with the vanilla for a bright, citrusy twist.
- Salted Caramel Swirl: After transferring the fondue to the pot, drizzle 2-3 tablespoons of warm salted caramel sauce over the top and use a skewer to gently swirl it in.
- Mint Chocolate: Substitute the vanilla extract with ½ teaspoon of pure peppermint extract. Garnish with crushed candy canes for a holiday version.
- Spicy Mexican: Add ¼ teaspoon of ground cinnamon and a tiny pinch of cayenne pepper with the salt. The warmth builds slowly and is incredibly sophisticated.
- Nutty Delight: Stir in 2 tablespoons of a smooth nut butter (like hazelnut or almond) during the final stirring stage for a Nutella-like flavor.
- Dairy-Free/Vegan: Use full-fat canned coconut cream (not coconut milk) and a high-quality dairy-free dark chocolate bar. The result is rich and delicious.
- White Chocolate Fondue: Substitute the semi-sweet chocolate with 8 oz of chopped white chocolate. Omit the butter, as white chocolate already contains cocoa butter.
What to Serve With This Recipe
The dippers are half the fun! Offer a variety of textures and flavors for a dynamic dessert board.
- Fresh Fruit: Strawberries, banana chunks, pineapple, apple slices, and dried fruits like apricots or mango.
- Baked Goods: Cubes of pound cake, brownie bites, angel food cake, shortbread cookies, or pretzels (the sweet-salty combo is a must).
- Marshmallows & More: Toasted or plain marshmallows, rice cereal treats, and even chunks of cheesecake.
- Beverage Pairings: This fondue pairs beautifully with a glass of dessert wine like Port or Moscato, a cup of strong coffee, a glass of cold milk, or a rich stout beer. For a non-alcoholic option, sparkling cider or hot chocolate are perfect.
Storage & Make-Ahead Instructions
- While best served fresh, you can prepare this fondue with a bit of planning.
- Short-Term Storage: If you need to pause for up to an hour, press a piece of plastic wrap directly onto the surface of the fondue to prevent a skin from forming. Keep it at room temperature.
- Refrigerating Leftovers: Transfer cooled fondue to an airtight container. It will solidify. It can be refrigerated for up to 5 days.
- Reheating: Reheat gently to restore the creamy texture. The best method is in a heatproof bowl set over a pan of simmering water (double boiler), stirring frequently. You can also use the microwave in 15-second bursts at 50% power, stirring well between each.
- Make-Ahead Strategy: You can chop the chocolate and measure the cream a day ahead. For the fullest flavor, prepare the fondue just before serving, as it only takes 10 minutes.
Frequently Asked Questions
Q: Can I make chocolate fondue with just chocolate and cream?
A: Absolutely. The butter adds extra silkiness and the vanilla enhances flavor, but a combination of good chocolate and heavy cream will melt into a perfectly delicious fondue. The salt, however, is non-negotiable for boosting the chocolate taste.
Q: Why did my chocolate fondue get thick and clumpy?
A: This is called “seizing.” It usually happens if a small amount of moisture (like steam or a wet spoon) gets into the melting chocolate, or if the chocolate was stirred before it had fully melted. You can often rescue it by vigorously whisking in more warm cream, one tablespoon at a time.
Q: Can I use milk chocolate instead of semi-sweet?
A: Yes, but be cautious. Milk chocolate is sweeter and contains more dairy solids, which can make the fondue overly sweet and less stable. Reduce the heavy cream to ¾ cup if using milk chocolate.
Q: How do I keep fondue warm without a fondue pot?
A: A small slow cooker on the “warm” setting is ideal. Alternatively, you can place your serving bowl over a larger bowl filled with hot water (like a makeshift bain-marie). Just ensure no water splashes into the chocolate.
Q: What’s the best way to cut fruit for fondue?
A: Cut fruits into bite-sized pieces that are sturdy enough to be speared. Pat them completely dry with a paper towel before serving. Any surface moisture can cause the chocolate coating to slide off.
Q: Can I freeze leftover chocolate fondue?
A: I don’t recommend it. Freezing and thawing can cause the emulsion to break and the texture to become grainy. It’s best enjoyed fresh or refrigerated for a few days.
Q: My fondue is too thin. How can I thicken it?
A: Let it cool at room temperature for 5-10 minutes; it will naturally thicken as the cocoa butter sets. If it’s still too thin, you can whisk in a small amount of finely grated chocolate, which will melt and incorporate.
Final Thoughts
This easy creamy chocolate fondue recipe is more than just a dessert; it’s an experience. It embodies what I love most about cooking: creating something deeply satisfying and shareable with minimal fuss. The technique is simple enough for a weeknight treat yet elegant enough for your most festive table.
I’ve served this at countless gatherings, from casual game nights to formal dinner parties, and it never fails to delight.
The real joy is watching your guests lean in, laugh, and play with their food as they discover their favorite dipper combination. So gather your ingredients, put on a pot of coffee, and get ready to make some memories. I’d love to hear how it turns out for you—what creative dippers did you choose?
Did you try one of the fun variations? Share your creations with me, and if you loved this recipe, please consider leaving a rating. It helps other dessert lovers find this guide.
Now, go forth and dip!

Easy Creamy Chocolate Fondue
Equipment
- Medium heatproof bowl (glass or metal)
- Small saucepan
- Whisk or rubber spatula
- Fondue pot, small slow cooker, or pre-warmed serving bowl
Ingredients
- 8 oz semi-sweet chocolate chopped, or high-quality chocolate chips (see notes)
- 1 cup heavy cream
- 1 tbsp unsalted butter
- 1 tsp pure vanilla extract
- 1 pinch kosher salt
Instructions
- Place the chopped chocolate in a medium, heatproof bowl. In a small saucepan over medium heat, combine the heavy cream and butter. Heat the mixture, stirring occasionally, until it just begins to simmer—you’ll see small bubbles forming around the edges. Do not let it boil vigorously.
- Immediately pour the hot cream mixture over the chopped chocolate. Let it sit undisturbed for 3 full minutes. This allows the chocolate to soften and melt gently from the bottom up, which is the key to a smooth emulsion.
- After 3 minutes, add the vanilla extract and pinch of salt. Starting in the center of the bowl, use a whisk or rubber spatula to gently stir the mixture. Slowly incorporate the cream and chocolate, working your way outward in small circles until the fondue is completely smooth, glossy, and uniform.
- Transfer the warm fondue to your fondue pot, a small slow cooker on the ‘warm’ setting, or a pre-warmed serving bowl. If using a traditional fondue pot with a flame, keep the flame very low to prevent scorching. The fondue is now ready for dipping!
- Arrange your chosen dippers on a platter around the fondue pot. Serve immediately, encouraging guests to swirl and dip. Enjoy the rich, creamy, and perfectly balanced chocolate flavor.