

There’s a specific kind of quiet satisfaction that comes from opening your fridge on a hectic Wednesday morning and finding a ready-made, nutritious breakfast waiting for you. No scrambling, no mess, just a warm, protein-packed bite that actually tastes good. That’s the magic of a well-made egg muffin.
As someone who has prepped breakfast for hundreds in a restaurant kitchen and now for a busy family, I’ve refined this formula to be utterly reliable. These aren’t dense, rubbery egg pucks; they’re light, fluffy, and bursting with your favorite flavors, all baked into a perfectly portable package. Let’s make your mornings easier.
This recipe is designed for real life. It’s the workhorse of your meal-prep routine, transforming simple ingredients into a week of stress-free mornings.
- Meal-Prep Champion: Bake a batch on Sunday and enjoy a high-protein breakfast all week long. They reheat beautifully.
- Endlessly Customizable: This is a master formula. Use up leftover veggies, switch up the cheese, or keep it simple. I’ll give you all my favorite combinations below.
- Family-Friendly & Freezer-Friendly: Even picky eaters can have their version. They also freeze perfectly for up to 3 months—just grab and reheat.
- Diet-Flexible: Naturally low-carb, keto-friendly, and gluten-free. You can easily adjust the dairy or add more veggies to fit your nutritional goals.
- Professional Texture: The simple technique of whisking the eggs properly and not overbaking guarantees a tender, fluffy bite every time, not a tough scramble.
Ingredients You’ll Need
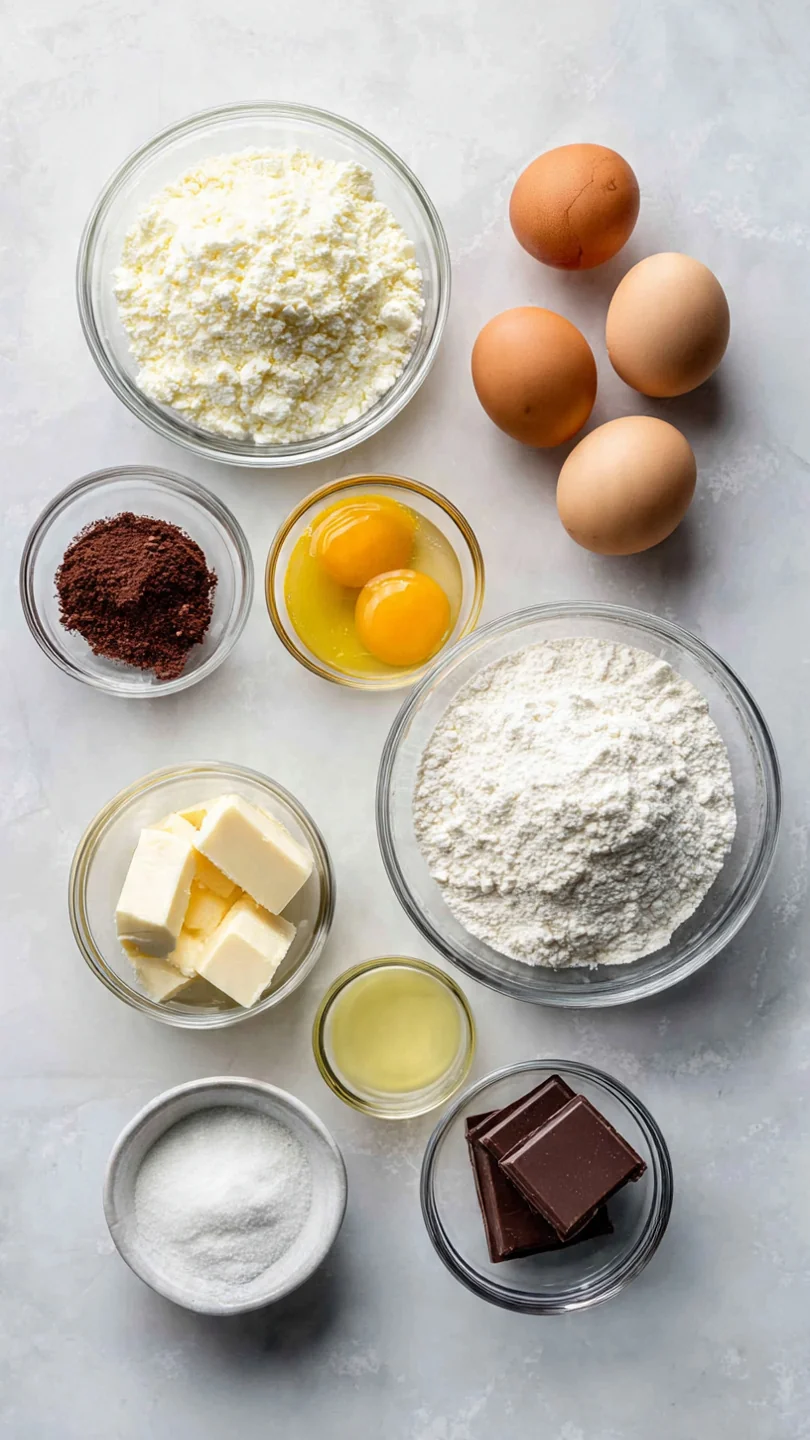
- Let’s gather our ingredients—this is where the customization begins. Think of this list as your blueprint; the specific veggies, cheese, and protein are up to you. Using room-temperature eggs and a bit of dairy fat (like cream) will give you the fluffiest, most luxurious texture, but any milk works.
- Eggs: The foundation. Large, room-temperature eggs incorporate more air for a better rise.
- Milk or Cream: Just a quarter cup. This adds moisture and richness. For the fluffiest result, use whole milk, half-and-half, or even a splash of heavy cream.
- Shredded Cheese: Cheddar is classic, but pepper Jack, feta, or Swiss are fantastic. Pre-shredded bags contain anti-caking agents that can sometimes inhibit melting; a block you shred yourself melts more smoothly.
- Diced Vegetables: Aim for about one cup total. Bell peppers, onions, and spinach are staples. Pro tip: If using watery veggies like mushrooms or zucchini, sauté them first to drive off excess moisture and prevent soggy muffins.
- Cooked Meat (Optional): Crumbled cooked bacon, diced ham, or breakfast sausage add heartiness. Ensure it’s fully cooked and patted dry before adding.
- Kosher Salt & Black Pepper: Seasoning is crucial. I prefer kosher salt for its clean taste and easier control.
- Cooking Spray: Generously coating the muffin tin is the single most important step for easy release. Don’t skip it.
Note: You’ll find the complete list of ingredients, along with their exact measurements, in the printable recipe card at the bottom of this post.
Kitchen Equipment Needed
You likely have everything you need already. The right tools just make the process smoother.
- Muffin Tin: A standard 12-cup non-stick tin is ideal. If yours is older or not non-stick, be extra generous with the grease or consider using parchment paper liners.
- Mixing Bowl & Whisk: A large bowl gives you room to whisk the eggs vigorously without splatter. A balloon whisk is perfect for incorporating air.
- Liquid Measuring Cup: Using a spouted cup to pour the egg mixture is far cleaner and more precise than trying to pour from a bowl.
- Knife & Cutting Board: For prepping your fillings. Uniform, small dice ensures every bite has a bit of everything.
How to Make Egg Muffins Recipe
Step 1: Prep and Preheat
Start by preheating your oven to 350°F (175°C). This steady, moderate heat cooks the eggs through gently without over-browning the edges. Now, take your muffin tin and spray every nook and cranny of each cup with cooking spray.
Believe me, after 15 years, I’ve learned this is the step that prevents frustration later. A well-greased tin means your beautiful muffins will pop right out.
Step 2: Whisk the Egg Base
In your large bowl, crack in the eight eggs. Add the milk, salt, and pepper. Here’s where technique matters: don’t just mix until combined.
Whisk vigorously for a good 30 seconds until the mixture is uniform, pale yellow, and slightly frothy on top. You’re incorporating air, which translates directly into a lighter, fluffier final texture. It makes all the difference.
Step 3: Load Up the Muffin Cups
Now for the fun part—customizing! Divide your chosen fillings evenly among the 12 greased cups. I like to start with a base of veggies, then cheese, then any meat.
Fill each cup about 2/3 of the way full with your mix-ins. This leaves the perfect amount of room for the egg mixture to seep in and bind everything together without overflowing.
Step 4: Pour and Bake
Slowly pour the whisked egg mixture over the fillings in each cup, filling them almost to the top. A spouted measuring cup gives you perfect control. Gently tap the filled tin on your countertop once or twice.
This releases any trapped air bubbles that could create uneven texture. Slide the tin into the center of your preheated oven.
Step 5: Cool and Serve
Bake for 18 to 22 minutes. You’ll know they’re done when the tops are set, lightly golden, and a toothpick inserted into the center of a muffin comes out clean. The most important step now?
Patience. Let the muffins cool in the tin for a full 5 minutes. This allows them to firm up and contract slightly, making them incredibly easy to remove with a small knife.
Then, step back and admire your week’s worth of breakfasts.
A few insights from the kitchen can elevate your results from good to consistently great.
- The Sauté Secret: For vegetables that release a lot of water (mushrooms, spinach, zucchini, tomatoes), take 5 minutes to sauté them in a pan first. This concentrates their flavor and, critically, drives off excess moisture that would steam inside the muffin and make it wet.
- Don’t Overbake: Egg proteins tighten and squeeze out moisture when overcooked, leading to a rubbery texture. Pull them as soon as the center is set. They will carryover cook as they cool in the tin.
- The Room-Temperature Advantage: Using eggs straight from the fridge is fine, but room-temperature eggs whip up to a greater volume, creating a more tender crumb. If you have time, let them sit out for 20-30 minutes before you start.
- Grease Thoroughly: Even with a “non-stick” pan, grease it well. For absolute insurance, you can use parchment paper muffin liners, though the muffins may not get quite as crispy on the sides.
Recipe Variations
- This master recipe is your canvas. Here are some of my favorite tested combinations that always get rave reviews.
- Spinach & Feta: Use 1 cup of chopped fresh spinach (sautéed and squeezed dry) and 3/4 cup of crumbled feta cheese. Add a pinch of dried oregano to the egg mix.
- Western Denver: A classic combo of diced ham, green bell pepper, and onion. Use a Colby Jack or cheddar cheese.
- Keto Everything Bagel: Mix 2 tablespoons of everything bagel seasoning into the egg base. Fill with a combination of cream cheese pieces and cooked breakfast sausage.
- Broccoli Cheddar: Use small florets of steamed broccoli (chopped small) and sharp cheddar cheese. Perfect for getting veggies in.
- Southwest Style: Add diced tomatoes (seeds removed), green chiles, pepper Jack cheese, and a spoonful of salsa to the egg mixture. Top with a slice of avocado after baking.
- Dairy-Free/Paleo: Omit the milk or use unsweetened almond milk. Skip the cheese and load up on more veggies and compliant meats like sugar-free bacon.
What to Serve With This Recipe
Egg muffins are a complete meal in a bite, but they pair wonderfully with other elements for a more substantial brunch or breakfast.
For a balanced plate, serve two muffins with a side of fresh fruit like berries or melon, or a simple green salad with a light vinaigrette. They’re also excellent alongside roasted potatoes or hash browns for a weekend treat. For a brunch spread, pair them with a platter of crispy bacon, sliced tomatoes, and some toasted whole-grain bread.
Beverage-wise, they go with everything from fresh orange juice and coffee to a spicy Bloody Mary.
Storage & Make-Ahead Instructions
- This is where the recipe truly shines for busy cooks.
- Refrigeration: Let the muffins cool completely, then store them in an airtight container in the refrigerator for up to 4 days.
- Freezing: Place cooled muffins in a single layer on a baking sheet to freeze solid (about 1-2 hours), then transfer to a freezer bag or container. They’ll keep for 2-3 months. This prevents them from sticking together in a clump.
- Reheating: For best results, reheat from the fridge in the microwave for 30-45 seconds. From frozen, microwave for 60-90 seconds, or thaw overnight in the fridge first. You can also reheat them in a toaster oven or conventional oven at 300°F until warm, which helps restore a slightly crisper exterior.
Frequently Asked Questions
Q: Can I use egg whites or liquid egg substitute?
A: Absolutely. You can use 2 cups of liquid egg whites or a carton of whole egg substitute. The texture will be slightly less rich but still very good.
You may need to reduce the salt slightly if your substitute is seasoned.
Q: Why did my egg muffins deflate or get soggy?
A: Sogginess usually comes from excess moisture in the fillings (like raw spinach or tomatoes). Sauté veggies first. Deflation can happen if they are underbaked (the structure isn’t set) or if you open the oven door too early.
Bake until fully set and let them cool in the tin.
Q: Can I make these without dairy?
A: Yes. Simply omit the milk or use a plain, unsweetened non-dairy milk like almond or oat milk. The muffins will be slightly less rich but still delicious.
Q: How do I know when they are done baking?
A: The tops should be set and no longer look wet or jiggly. The edges will be just starting to pull away from the sides of the tin, and a toothpick inserted in the center should come out clean or with just a few moist crumbs.
Q: Can I double this recipe?
A: Of course! Simply double all ingredients. You may need to bake them in two separate muffin tins or in batches.
Avoid overfilling the cups—it’s better to make a few extra muffins than to have them overflow.
Q: Are these good for baby-led weaning or toddlers?
A: They are excellent! Ensure fillings are diced very small, avoid added salt for babies, and use mild cheeses. They are easy for little hands to hold and packed with protein.
Q: My muffins stuck to the pan! How do I get them out?
A: Run a small, thin knife or an offset spatula around the edge of each muffin while the tin is still slightly warm. If they are truly stuck, let the tin sit for 10 more minutes; the steam will often help release them.
Final Thoughts
After testing this formula countless times, both in restaurant bulk prep and for my own family, I can confidently say these egg muffins are a game-changer for anyone who wants to eat well without morning stress. They embody what I love about cooking: flexibility, practicality, and a delicious result that makes life easier. This recipe is a template for success—use it to clean out your veggie drawer, fuel your workouts, or simply ensure your kids get a solid breakfast.
I encourage you to make your first batch this weekend. Play with the flavors, find your favorite combination, and relish the feeling of being prepared. When you try them, I’d love to hear what fillings you used!
Share your creations and tag me. And if you’re looking for more make-ahead breakfast inspiration, explore the other tested recipes on the site. Here’s to simpler, tastier mornings

Easy Customizable Egg Muffins
Equipment
- Standard 12-cup muffin tin
- Large mixing bowl
- Whisk
- Liquid measuring cup (for pouring)
- Knife and cutting board
Ingredients
- 8 large eggs Use room temperature for best volume
- 1/4 cup milk or cream Whole milk, half-and-half, or unsweetened almond milk
- 1 cup shredded cheese Cheddar, Monterey Jack, or a blend
- 1 cup diced vegetables Such as bell peppers, onions, spinach, or mushrooms
- 6 slices cooked bacon or breakfast sausage Optional, crumbled
- 1/2 tsp kosher salt
- 1/4 tsp black pepper Freshly ground
- 1 tsp cooking spray or oil For greasing the muffin tin
Instructions
- Preheat your oven to 350°F (175°C). Generously grease all 12 cups of a standard muffin tin with cooking spray or oil. This is non-negotiable for easy release—trust me, you don’t want to be scraping stuck egg out later.
- In a large bowl, whisk together the eggs, milk, salt, and pepper until the mixture is completely uniform and slightly frothy. This aeration is key for a light, fluffy texture. Don’t just stir; whisk vigorously for a good 30 seconds.
- Divide your chosen fillings—the diced vegetables, shredded cheese, and cooked meat—evenly among the 12 prepared muffin cups. Aim for each cup to be about 2/3 full with fillings to leave room for the egg mixture.
- Carefully pour the whisked egg mixture over the fillings in each cup, filling them almost to the top. A liquid measuring cup with a spout makes this clean and easy. Gently tap the tin on the counter to release any large air bubbles.
- Bake for 18-22 minutes, or until the egg muffins are completely set in the center and the tops are lightly golden. A toothpick inserted should come out clean. Let them cool in the tin for 5 minutes before running a knife around the edges to pop them out.