

Y’all, let me tell you about the first time I stumbled into making a fried apples recipe that actually worked. I was in my early 20s, messing around in my tiny apartment kitchen, trying to impress my then-boyfriend with something sweet after dinner.
I’d seen my grandma whip up a fried apples recipe countless times as a kid, but me? I nearly burned the place down with too much butter and a distracted phone scroll (oops). Thankfully, I got the hang of it, and now this fried apples recipe is a go-to in my house whenever I need a quick, cozy dessert or side dish.
I’ve tweaked this fried apples recipe over the years, pulling from those childhood memories of Grandma’s kitchen and a few kitchen disasters of my own. It’s not just about tossing apples in a pan; there’s a little magic in getting that perfect caramelized texture. So, if you’re looking for a dish that’s equal parts nostalgic and downright delicious, stick with me.
I’m gonna walk you through every step, from picking the right apples to avoiding my rookie mistakes. Let’s dive into why this fried apples recipe will steal a spot in your regular rotation.
Why You’ll Love This Recipe
I’ve found that this fried apples recipe hits all the right notes for pretty much anyone who tries it. It’s sweet but not cloying, warm and comforting like a hug on a chilly day, and stupidly easy to throw together even if you’re not a pro in the kitchen. Whether you’re pairing it with pork chops or sneaking a spoonful straight from the pan (guilty!), it just works.
In my kitchen, this fried apples recipe is a lifesaver when I need something fast for unexpected guests or a last-minute craving. It’s got that old-school, down-home vibe that makes everyone feel like family. Trust me, once you smell those apples sizzling with cinnamon, you’ll be hooked too.
Ingredients List
Alright, let’s chat about what you’ll need for this fried apples recipe. I’m pretty picky about my ingredients because I’ve learned the hard way that the right apples can make or break this dish. I usually buy Honeycrisp or Granny Smith for that sweet-tart balance, but I’ll get into that more in a sec. Here’s everything you’ll need to whip up a killer fried apples recipe at home.
- 4 medium apples, peeled, cored, and sliced into 1/4-inch wedges (I prefer Honeycrisp for sweetness or Granny Smith for a tart kick)
- 3 tablespoons (42g) unsalted butter, for that rich, golden flavor
- 1/4 cup (50g) granulated sugar, adjust if your apples are super sweet
- 2 tablespoons (25g) brown sugar, for a deeper, molasses-y note
- 1 teaspoon ground cinnamon, to bring that warm spice vibe
- 1/4 teaspoon ground nutmeg, optional but adds a cozy depth (I’m obsessed with it)
- 1 tablespoon (15ml) lemon juice, to keep the apples from browning and add a zing
- Pinch of salt, just a tiny bit to balance the sweetness
I’ve made this fried apples recipe with whatever apples I’ve got on hand, and honestly, it still turns out great. But if you want that perfect texture for your fried apples recipe, stick with firmer varieties that won’t turn to mush. And don’t skimp on the butter—it’s the secret to getting that glossy, caramelized finish!
Variations
One thing I love about this fried apples recipe is how easy it is to switch things up based on my mood or what’s in the pantry. I’ve played around with different flavors over the years, and my family always has opinions on their favorites. Here are some twists on the classic fried apples recipe that I’ve tried and loved—maybe you’ll find a new go-to in here.
- Maple Glaze: Swap the granulated sugar for 3 tablespoons of maple syrup for a woodsy sweetness. I tried this once for a fall brunch, and it was a total hit.
- Spiced Rum Kick: Add a splash (about 1 tablespoon) of spiced rum toward the end of cooking for a boozy warmth. It’s my secret weapon for adult-only gatherings!
- Vanilla Dream: Stir in 1/2 teaspoon of vanilla extract right before serving. My kids always ask for this version with ice cream.
- Nutty Crunch: Toss in a handful of chopped walnuts or pecans in the last minute of cooking. It adds a toasty bite I can’t resist.
- Cranberry Twist: Mix in 1/4 cup dried cranberries for a tart pop. I stumbled on this combo during the holidays, and now it’s a must.
- Ginger Snap: Add 1/4 teaspoon ground ginger with the cinnamon for a zesty edge. It’s a little unexpected but so good.
- Caramel Drizzle: Drizzle store-bought caramel sauce over the top after cooking. Honestly, this fried apples recipe variation feels like cheating, but it’s pure decadence.
These variations on the fried apples recipe keep things fresh, especially if you’re making it as often as I do. Got a combo you love? I’m all ears!
Servings and Timing
Let’s break down the nitty-gritty for this fried apples recipe so you’re not left guessing. In my experience, timing depends a bit on how thick you slice your apples, but I’ve got a pretty solid baseline after making this a million times. Here’s what you can expect when whipping up this fried apples recipe for your crew.
- Prep Time: 10 minutes
- Cook Time: 15 minutes
- Total Time: 25 minutes
- Servings: 4-6 portions
I’ve found this fits perfectly as a side for a family dinner or a dessert for a small gathering. If I’m cooking for more, I just double it up—takes barely any extra time!
Step-by-Step Instructions
Alright, let’s get into the meat of this fried apples recipe with a step-by-step guide that’ll have you cooking like a pro. I’ve made this so many times I could probably do it blindfolded (okay, maybe not, but you get the idea). I’m sharing all my little tricks to make sure your fried apples recipe turns out amazing on the first try. Let’s go!
Step 1: Prep Your Apples
Start by peeling, coring, and slicing your apples into 1/4-inch wedges. I use a cheap apple corer I’ve had forever—it’s a game-changer for speeding this up. Squeeze that lemon juice over the slices to keep ‘em from browning while you get the pan ready. Trust me, I’ve skipped this before and ended up with sad, brown apples.
Step 2: Melt the Butter
Grab a large skillet and melt your 3 tablespoons of butter over medium heat. I’m always tempted to crank the heat for speed, but don’t—medium is your friend for that perfect golden sizzle. You’ll know it’s ready when the butter starts to foam just a bit. That’s your cue for the next step of this fried apples recipe!
Step 3: Add Apples and Sugar
Toss your apple slices into the skillet, stirring to coat them in that buttery goodness. Sprinkle in both sugars and the pinch of salt, giving it a good mix. I like to spread the apples out in a single layer so they cook evenly—crowding the pan is a rookie move I’ve made too often.
Step 4: Spice It Up
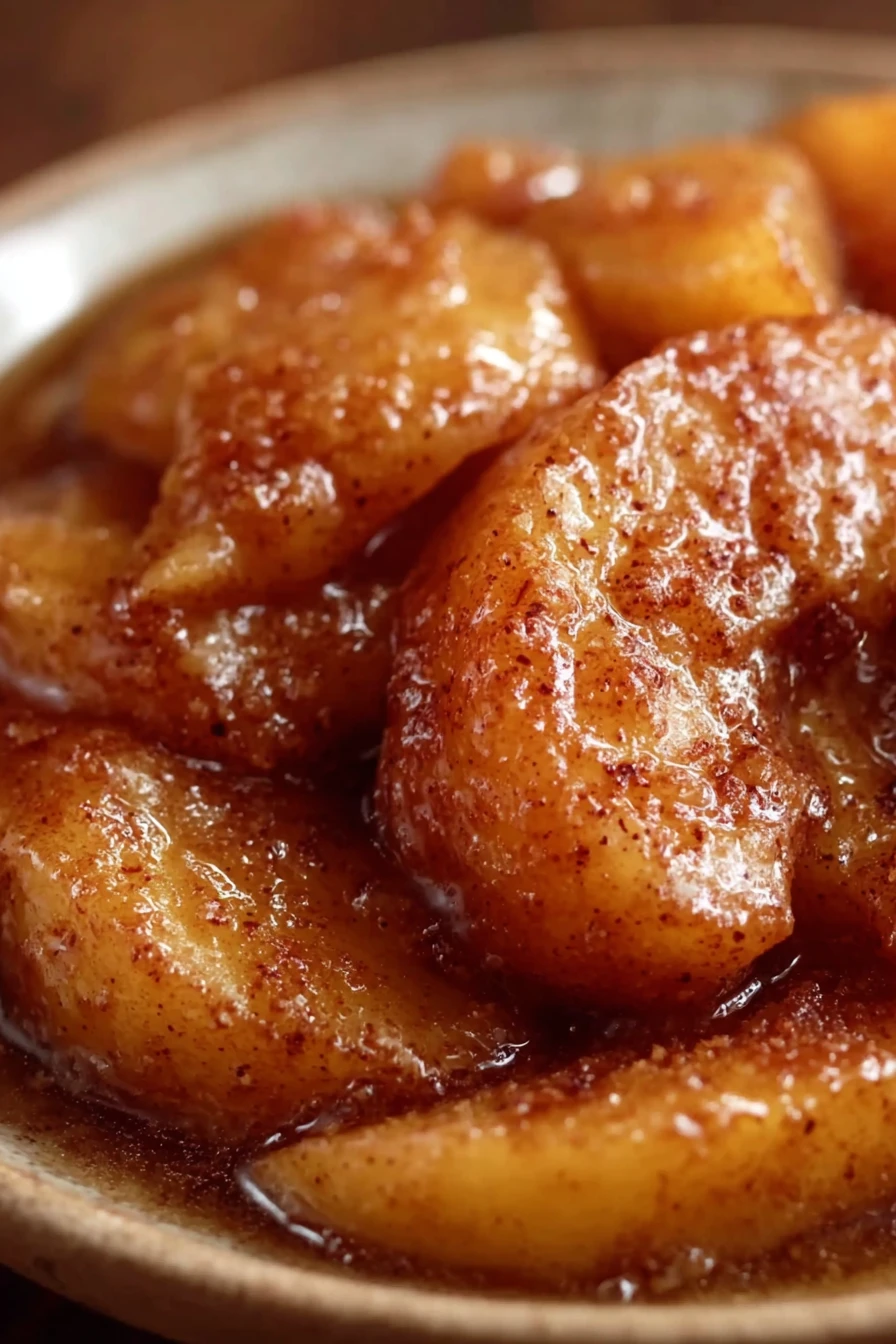
Add the cinnamon and nutmeg, stirring to get those spices all over the apples. This is when the kitchen starts smelling like heaven, y’all. Keep stirring occasionally for about 10-12 minutes until the apples are fork-tender and caramelized. If they’re not softening, lower the heat a tad and be patient with this fried apples recipe.
Step 5: Taste and Serve
Give it a quick taste—adjust the sweetness or spice if you need to. I’ve added an extra dash of cinnamon at this point more times than I can count. Once it’s just right, take it off the heat and let it cool for a minute. Your fried apples recipe is ready to rock!
Nutritional Information
I’m no dietitian, but I’ve looked into the basics of this fried apples recipe for those of y’all watching what you eat. It’s not exactly a health food, but it’s not the worst indulgence either. Here’s a rough breakdown per serving for my go-to fried apples recipe, based on 6 portions.
- Calories: 180 per serving
- Fat: 6g
- Protein: 0g
- Carbohydrates: 32g
- Sodium: 50mg
I don’t obsess over numbers, but it’s nice to know what I’m dishing up. If you’re looking to lighten it, I’ve got some ideas coming up next!
Healthier Alternatives
I’m all about indulging, but sometimes I tweak this fried apples recipe to make it a smidge less guilty. I’ve swapped things out when I’m watching my sugar or just wanna feel a bit virtuous. Here are a few healthier spins on the fried apples recipe that still taste awesome.
- Less Sugar: Cut the granulated sugar in half and rely on the apples’ natural sweetness. I do this often and barely notice the difference.
- Butter Swap: Use 1 tablespoon of coconut oil instead of butter for a lighter fat option. I’ve tried it, and it adds a subtle tropical vibe.
- Stevia Boost: Replace both sugars with a teaspoon of stevia or monk fruit sweetener. It’s not my fave, but it works for my diabetic uncle.
- No-Fry Method: Bake the apples at 350°F for 20 minutes with the same ingredients. I think it’s less flavorful, but it cuts the frying guilt from this fried apples recipe.
Serving Suggestions
Now, let’s talk about how to enjoy this fried apples recipe because I’ve got opinions on this! I love switching up how I serve it depending on the meal or mood. Here are my top ways to plate this fried apples recipe that’ll have everyone asking for seconds.
- Breakfast Treat: Spoon it over fluffy pancakes or waffles with a dollop of whipped cream. It’s my weekend go-to!
- Dinner Side: Pair it with roast pork or chicken for a sweet-savory balance. I’ve done this for family dinners, and it’s always a crowd-pleaser.
- Dessert Star: Serve warm with a scoop of vanilla ice cream. At my last get-together, this fried apples recipe stole the show.
- Snack Attack: Eat it straight from the pan with a sprinkle of granola. Don’t judge—I do this way too often!
Common Mistakes to Avoid
I’ve botched this fried apples recipe more times than I care to admit, so let me save you the trouble with some hard-learned lessons. Trust me on this one, these slip-ups can turn your dish from fab to drab. Here are the biggest pitfalls I’ve fallen into with my fried apples recipe.
- Wrong Apple Choice: Using soft apples like Red Delicious turns it into mush. I learned the hard way—stick with firm ones!
- Too Much Heat: Cranking the burner too high burns the sugar before the apples cook. Guilty as charged on my first few tries.
- Skipping the Stir: Not mixing enough leaves some apples raw and others overdone. I’ve served uneven batches before, ugh.
- Overloading the Pan: Crowding means steaming, not frying. My early fried apples recipe attempts were more like apple soup—don’t do it!
Storing Tips
If you’ve got leftovers from this fried apples recipe (rare in my house!), I’ve got you covered on keeping them tasty. In my experience, they hold up pretty well with a little care. Here’s how I store my fried apples recipe batch.
- Refrigerator: Keeps for 3-5 days in an airtight container. I just reheat in the microwave with a splash of water.
- Freezer: Store for up to 2 months in freezer bags. Thaw overnight in the fridge before warming up.
- Reheating Tip: Warm on low heat in a skillet to revive that caramelized vibe. I’ve found the microwave works in a pinch too.

Frequently Asked Questions
I get a lot of questions about this fried apples recipe, so I’m tackling the most common ones here. Let’s clear up any confusion so you can nail this dish!
Can I make this fried apples recipe ahead of time?
Absolutely, I do it all the time! Prep and cook it a day or two in advance, then store it in the fridge. Just reheat gently on the stove before serving to bring back that fresh flavor.
What apples are best for a fried apples recipe?
I swear by Honeycrisp or Granny Smith for their firmness and flavor balance. They hold up without getting mushy. But hey, Fuji or Braeburn work in a pinch too.
Can I skip the sugar in this recipe?
You can, though it won’t have that classic caramelized vibe. I’ve cut it down or used honey instead when I’m feeling health-conscious. Play around and see what you like!
Is this recipe vegan?
Not as written, due to the butter. Swap it for coconut oil or a vegan butter, and you’re good to go. I’ve done this for friends, and it’s just as tasty.
Can I add other fruits?
Sure thing! I’ve tossed in pears or peaches with great results. Just watch the cooking time—some fruits soften faster than apples.
How do I keep apples from browning?
That lemon juice in the recipe is key. Toss the slices in it right after cutting, and you’re set. I’ve skipped it before, and trust me, it’s not pretty.
Can I use canned apples?
I wouldn’t recommend it—they’re too soft and often pre-sweetened. Fresh is best for texture. I tried canned once, and it just wasn’t the same.
How do I make it less sweet?
Dial back the sugar or skip the brown sugar altogether. I sometimes add more lemon juice for tartness. Taste as you go—it’s the best way to balance it.
Conclusion
So, there you have it, my tried-and-true fried apples recipe that’s been a staple in my kitchen for years. I hope you’ll give this fried apples recipe a whirl and make some sweet memories of your own. Drop a comment if you’ve got questions or just wanna share how it turned out—I’d love to hear! Now, go get cooking with this fried apples recipe and enjoy every bite.
Conclusion
I hope you enjoyed this recipe for Fried apples recipe! It’s truly one of my favorites, and I’m confident you’ll love it too.
Remember to follow the steps carefully for the best results. Don’t hesitate to experiment with your own variations and make this recipe your own. Happy cooking!