
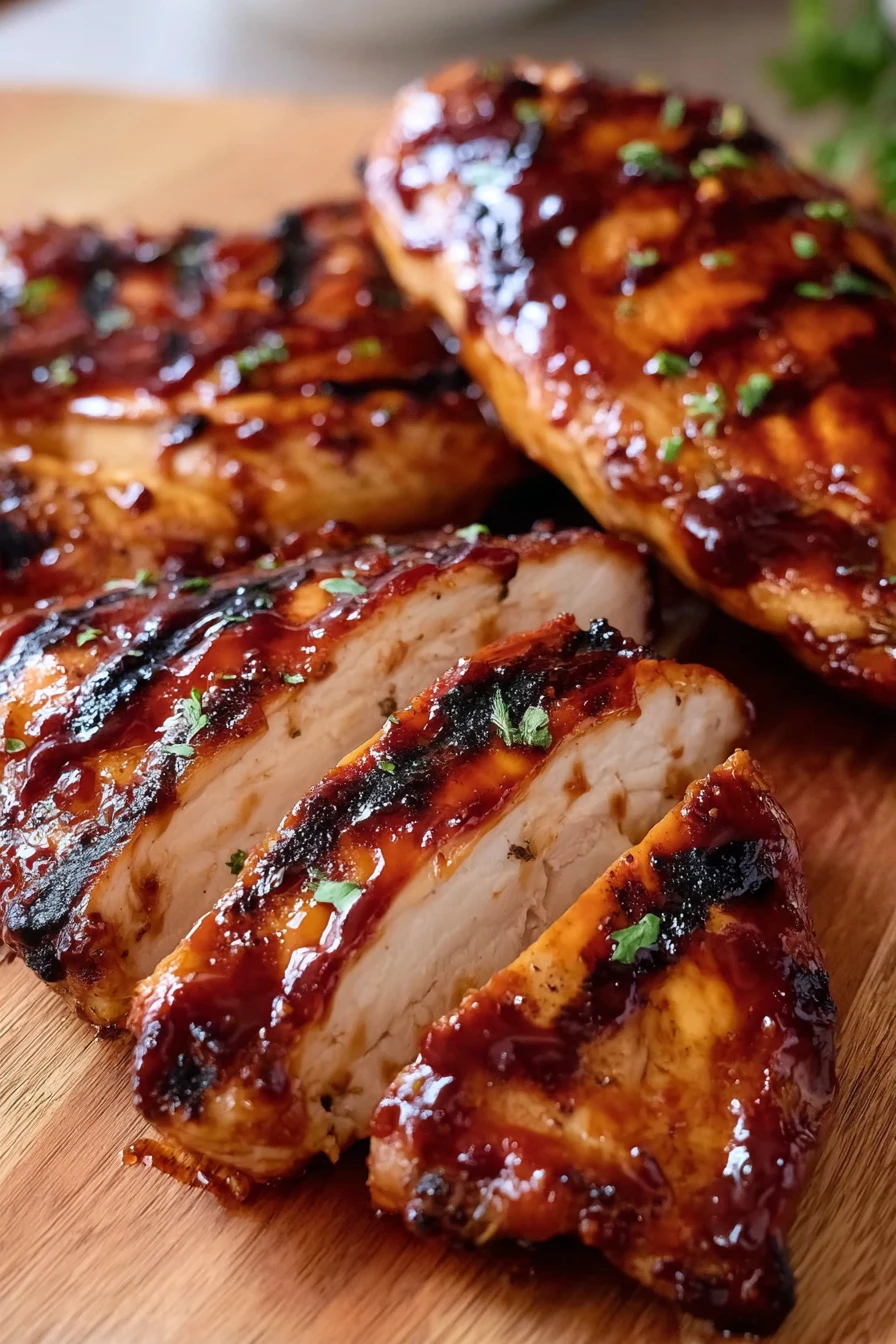
Summer evenings in my backyard always smell like smoky, caramelized goodness, and that’s all thanks to my go-to recipe for Grilled BBQ Chicken Breasts. I stumbled upon this obsession a few years back during a chaotic family cookout when I over-marinated some chicken and accidentally created the juiciest, most flavor-packed dish I’d ever tasted. My cousins still talk about it, begging me to whip up those Grilled BBQ Chicken Breasts every chance they get!
Honestly, there’s nothing like watching everyone’s eyes light up when I pull those sizzling beauties off the grill.
I’m not gonna lie, perfecting Grilled BBQ Chicken Breasts took some trial and error (more on my epic fails later), but now I’ve got it down to a science. Whether you’re a grilling newbie or a backyard pitmaster, I’m excited to share my tips and tricks to help you nail this dish. So, let’s fire up that grill and dive into making some seriously drool-worthy Grilled BBQ Chicken Breasts!
Why You’ll Love This Recipe
I’ve found that Grilled BBQ Chicken Breasts are a total crowd-pleaser, no matter who’s at the table. There’s something magical about that charred, sticky exterior paired with tender, juicy meat that just screams summer. Plus, in my kitchen, this recipe is a lifesaver when I need something quick yet impressive for last-minute guests.
And let’s talk versatility! I’ve tweaked my Grilled BBQ Chicken Breasts for everything from casual weeknight dinners to big backyard bashes, and they always steal the show. With a few simple ingredients and my trusty grill, you’ll be amazed at how easy it is to pull off a meal that feels like a celebration.
Ingredients List
When it comes to making killer Grilled BBQ Chicken Breasts, I’m picky about my ingredients because quality makes all the difference. I usually buy fresh, boneless chicken breasts from my local butcher because they’re consistently plump and tender. Here’s everything you’ll need to create this smoky masterpiece at home.
For the Chicken
- 4 boneless, skinless chicken breasts (about 6-8 oz each), pounded to even thickness for uniform cooking
- 2 tablespoons (30ml) olive oil, for a nice sear on those Grilled BBQ Chicken Breasts
- 1 teaspoon kosher salt, to enhance the natural flavors
- 1/2 teaspoon black pepper, freshly ground if you’ve got it
For the BBQ Marinade
- 1/2 cup (120ml) BBQ sauce, I prefer a sweet and tangy store-bought version like Sweet Baby Ray’s
- 2 tablespoons (30ml) apple cider vinegar, for a little zing
- 1 tablespoon (15ml) Worcestershire sauce, adds depth to your Grilled BBQ Chicken Breasts
- 1 teaspoon garlic powder, because fresh garlic can burn on the grill
- 1 teaspoon smoked paprika, for that extra smoky kick
- 1 tablespoon (12g) brown sugar, to balance the acidity and caramelize beautifully
I’ve played around with different BBQ sauces over the years, and I gotta say, finding one with the right sweet-spicy balance is key for Grilled BBQ Chicken Breasts. If you’ve got a homemade sauce recipe, even better—go for it! Just make sure there’s enough sugar to get that sticky, glossy finish we’re after.
Variations
One thing I love about Grilled BBQ Chicken Breasts is how easy they are to customize based on what I’m craving or who I’m feeding. I’ve experimented with tons of twists over the years, and my family always has a favorite they’re begging for. Here are some fun variations I’ve whipped up—feel free to mix and match!
- Spicy Kick: Add 1 teaspoon of cayenne pepper or a few dashes of hot sauce to the marinade for some serious heat. I tried this once for a game night, and let’s just say my spice-loving brother was in heaven!
- Honey Glaze: Swap the brown sugar for 2 tablespoons of honey in the marinade for a sweeter, stickier finish on your Grilled BBQ Chicken Breasts. My kids always ask for this version.
- Teriyaki Twist: Mix 1/4 cup soy sauce and 1 tablespoon sesame oil into the marinade instead of BBQ sauce for an Asian-inspired flair. This one’s a hit when I’m grilling for friends.
- Lemon Herb: Skip the BBQ sauce and use 1/4 cup lemon juice, 2 tablespoons olive oil, and a handful of fresh rosemary or thyme. It’s lighter but still packs a punch for Grilled BBQ Chicken Breasts.
- Smoky Chipotle: Add 1 tablespoon of chipotle powder or a chopped chipotle in adobo to the marinade for a deep, smoky heat. I made this for a potluck, and it disappeared in minutes!
- Jerk Style: Rub the chicken with 1 tablespoon of jerk seasoning before marinating for a Caribbean vibe. This one’s bold and perfect for Grilled BBQ Chicken Breasts on a tropical-themed night.
- Garlic Butter: After grilling, brush with a mix of 2 tablespoons melted butter and 1 minced garlic clove. Trust me, it’s next-level indulgent!
I’m always tinkering with new flavors for my Grilled BBQ Chicken Breasts, so don’t be afraid to get creative in your own kitchen. Got a favorite spice blend? Toss it in and see what happens!
Servings and Timing
In my experience, planning out Grilled BBQ Chicken Breasts for a crowd (or just my hungry family) is a breeze with the right timing. I’ve got this down to a pretty tight schedule after countless grill sessions. Here’s what you’re looking at for prepping and cooking these beauties.
- Prep Time: 15 minutes (plus 30 minutes to marinate if you’ve got the time)
- Cook Time: 12-15 minutes on the grill
- Total Time: About 30-60 minutes, depending on marinating
- Servings: 4 hearty portions of Grilled BBQ Chicken Breasts
I usually double this recipe if I’ve got extra mouths to feed since Grilled BBQ Chicken Breasts vanish fast at my house. Just make sure your grill can handle the load!
Step-by-Step Instructions
Let me walk you through how I make my Grilled BBQ Chicken Breasts, step by step. I’ve learned a few shortcuts and “grill hacks” over the years that’ll save you from the headaches I’ve had. Let’s get cooking!
Step 1: Marinate the Chicken
First up, mix your BBQ marinade in a big bowl or zip-top bag. I like using a bag because it’s less cleanup and gets the flavors all up in there. Add your chicken breasts, seal it up, and let those Grilled BBQ Chicken Breasts soak for at least 30 minutes in the fridge—longer if you can swing it (I’ve gone overnight with amazing results!).
Step 2: Prep the Grill
While the chicken’s marinating, get your grill fired up to medium-high heat, around 375-400°F. I always clean the grates and give ‘em a quick oil rub with a paper towel to prevent sticking. Trust me, there’s nothing worse than losing half your Grilled BBQ Chicken Breasts to a stuck-on mess!
Step 3: Grill the Chicken
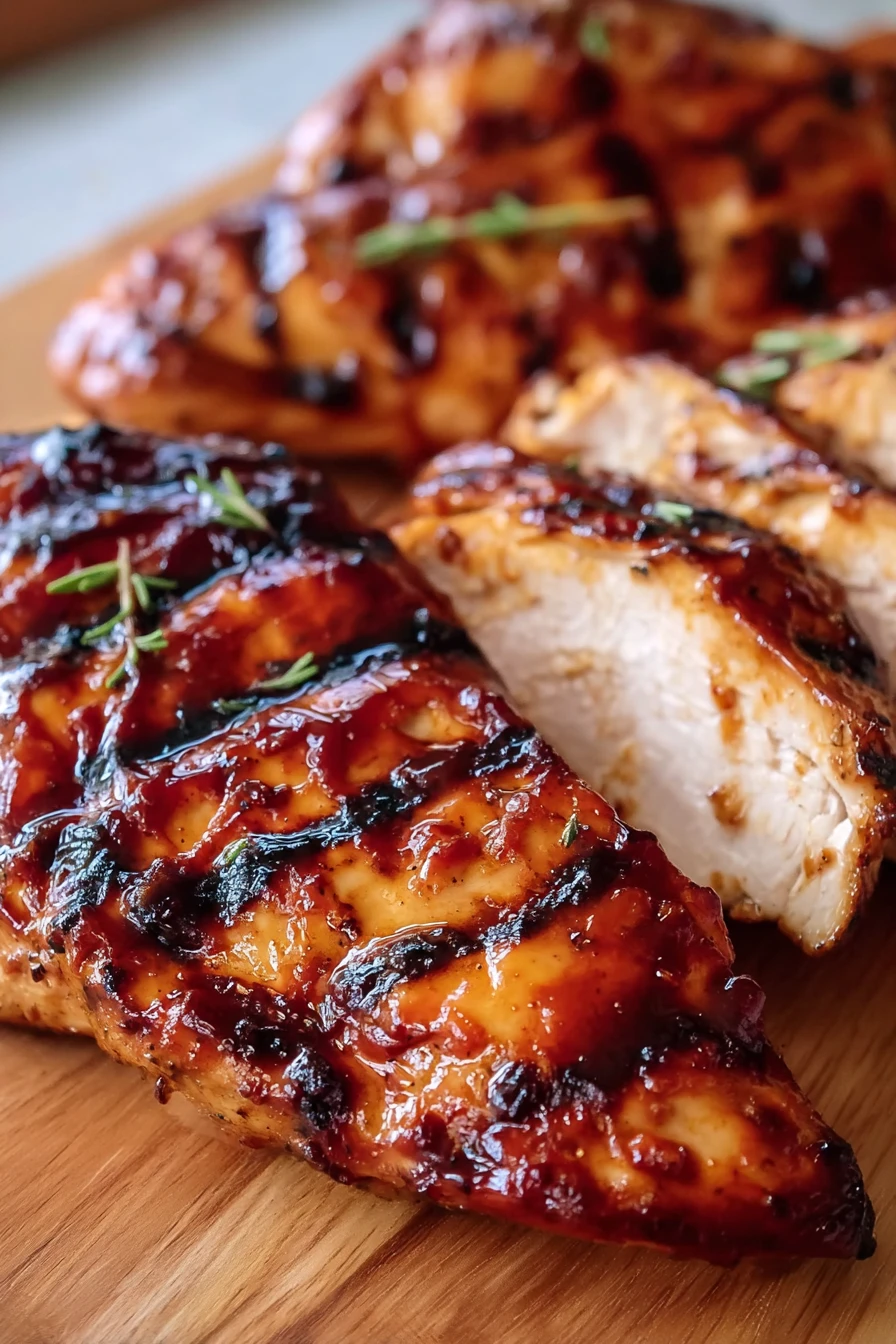
Pull the chicken out of the marinade, shake off the excess, and lay those babies on the grill. Cook for about 6-7 minutes per side, basting with extra marinade halfway through for that glossy finish on your Grilled BBQ Chicken Breasts. I’ve found flipping just once keeps the juices locked in.
Step 4: Check for Doneness
Grab a meat thermometer (total game-changer) and check if the internal temp hits 165°F at the thickest part. If you don’t have one, cut into the center—clear juices mean it’s good to go. Overcooking is the enemy of juicy Grilled BBQ Chicken Breasts, so don’t get distracted!
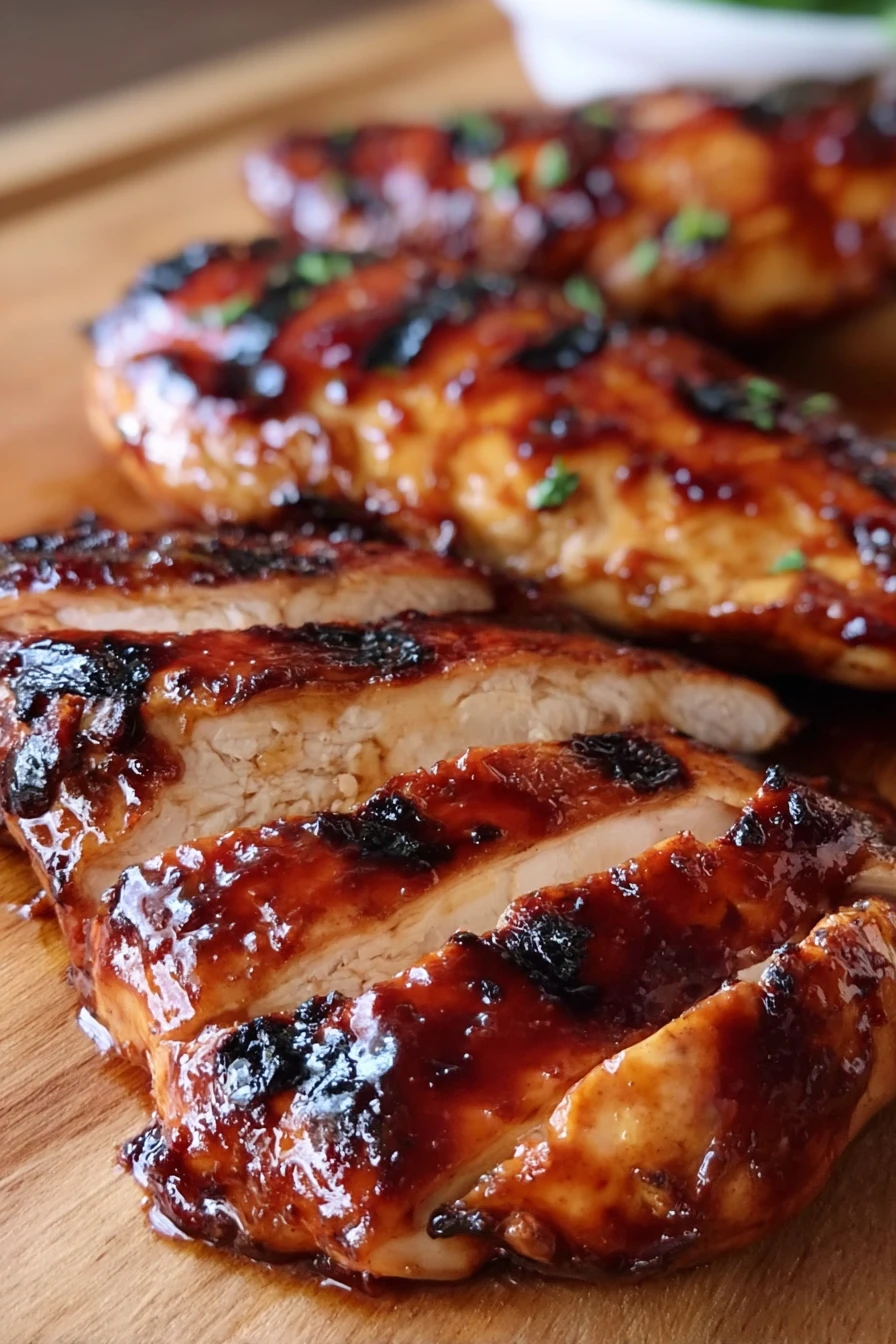
Step 5: Rest and Serve
Once off the grill, let your Grilled BBQ Chicken Breasts rest for 5 minutes under loose foil. This little trick (I swear by it) keeps ‘em tender as heck. Slice ‘em up or serve whole, and watch everyone dig in!
I’ve burned my fair share of chicken learning this process, so stick to these steps, and you’ll be golden. Got questions mid-grill? I’ve been there—just keep an eye on the heat!
Nutritional Information
I’m no dietitian, but I’ve crunched the numbers on my Grilled BBQ Chicken Breasts because I like knowing what I’m eating (especially when I’m sneaking seconds). Here’s the breakdown per serving, based on my recipe. Keep in mind, this can vary with different BBQ sauces or portion sizes.
- Calories: 320 per serving
- Fat: 10g
- Protein: 38g
- Carbohydrates: 15g (mostly from the BBQ sauce)
- Sodium: 680mg
I think Grilled BBQ Chicken Breasts are a solid protein-packed option for dinner, though that sodium can creep up with store-bought sauces. If you’re watching that, consider a low-sodium version for your next batch of Grilled BBQ Chicken Breasts!
Healthier Alternatives
If I’m trying to lighten up my Grilled BBQ Chicken Breasts, I’ve got a few swaps I lean on without sacrificing that smoky goodness. These tweaks still deliver on flavor, and I’ve tested ‘em plenty of times during my “health kick” phases. Give ‘em a shot if you’re watching calories or sugar.
- Low-Sugar Sauce: Use a sugar-free BBQ sauce or make your own with tomato paste, vinegar, and a touch of stevia. I’ve swapped this in for Grilled BBQ Chicken Breasts when I’m cutting back.
- Skin-On Option: Go for bone-in, skin-on breasts but remove the skin after grilling to cut fat. It keeps the meat juicier, in my experience.
- Less Oil: Skip the olive oil and use a non-stick spray on the grill grates instead. It works fine for Grilled BBQ Chicken Breasts without extra calories.
- Turkey Swap: Sub turkey breasts for chicken if you want leaner meat. I’ve done this for variety, and it still grills up great as Grilled BBQ Chicken Breasts (well, technically turkey, but you get it!).
Serving Suggestions
I love getting creative with how I serve my Grilled BBQ Chicken Breasts because a good side or pairing can elevate the whole meal. Here are a few of my go-to ideas, straight from my dinner table to yours. These combos always get thumbs up at my house!
- Classic BBQ Vibes: Pair with coleslaw and corn on the cob for that quintessential cookout feel. It’s my default for Grilled BBQ Chicken Breasts on lazy weekends.
- Salad Topper: Slice up the chicken and toss it over a crisp Caesar salad. I did this for lunch last week with Grilled BBQ Chicken Breasts, and it was perfection.
- Sandwich Style: Stuff it into a toasted bun with lettuce, tomato, and extra BBQ sauce. My husband swears by this for Grilled BBQ Chicken Breasts leftovers.
- Taco Night: Chop it up for tacos with avocado and cilantro. I served this at a party, and the Grilled BBQ Chicken Breasts were gone in a flash!
Common Mistakes to Avoid
I’ve botched my fair share of Grilled BBQ Chicken Breasts over the years, so let me save you from the same headaches. These are hard lessons from my own grill disasters. Trust me on this one, dodging these pitfalls makes all the difference!
- Skipping the Marinade Time: Don’t rush it—flavor needs time to sink in. I’ve served flat-tasting Grilled BBQ Chicken Breasts by cutting this corner, and it’s just sad.
- High Heat Overkill: Cranking the grill too hot burns the sauce before the chicken cooks. I learned the hard way with charred, raw-in-the-middle Grilled BBQ Chicken Breasts.
- Not Resting the Meat: Slice too soon, and all the juices run out. Guilty as charged on this with early batches of Grilled BBQ Chicken Breasts!
- Dirty Grates: Forgetting to clean the grill leads to sticking and torn chicken. I’ve lost half a breast to this rookie move more than once with Grilled BBQ Chicken Breasts.
Storing Tips
I’ve found that Grilled BBQ Chicken Breasts keep surprisingly well if you store ‘em right, which is awesome for meal prep or leftovers. Here’s how I handle mine to keep that smoky flavor intact. These tips have saved me tons of time!
- Refrigerator: Store in an airtight container for 3-4 days. I reheat Grilled BBQ Chicken Breasts with a splash of water to keep ‘em moist.
- Freezer: Freeze in zip-top bags for up to 2 months. I’ve thawed Grilled BBQ Chicken Breasts for quick tacos, and they’re still tasty!
- Reheating: Warm up slowly in the oven at 300°F to avoid drying out your Grilled BBQ Chicken Breasts. Microwaving works too, but it’s not my fave.
Frequently Asked Questions
I get a bunch of questions about making Grilled BBQ Chicken Breasts, so I’ve rounded up the most common ones I hear from friends and readers. Here are my honest answers, straight from my grill to your kitchen. Let’s clear up any doubts!
Can I use frozen chicken for Grilled BBQ Chicken Breasts?
Absolutely, just thaw it completely in the fridge overnight first. I’ve tried grilling half-frozen chicken, and it cooks unevenly. Not worth the hassle!
How long should I marinate the chicken?
I’d say at least 30 minutes, but 2-4 hours is ideal for max flavor in Grilled BBQ Chicken Breasts. Overnight works too if you’ve got time. I’ve noticed a huge difference with longer marinating.
Can I cook this in the oven instead of grilling?
Yep, bake at 400°F for 20-25 minutes, basting halfway. It won’t have that smoky grill char, but it’s still tasty. I’ve done this on rainy days for Grilled BBQ Chicken Breasts.
What if I don’t have a meat thermometer?
No worries, just cut into the thickest part—juices should run clear, not pink. I’ve winged it this way plenty of times with Grilled BBQ Chicken Breasts before I got my thermometer.
Can I use bone-in chicken?
Sure thing, just add 5-10 minutes to the cooking time and check the temp. I’ve grilled bone-in for deeper flavor. It’s a bit trickier but worth it sometimes.
How do I avoid flare-ups on the grill?
Keep a spray bottle of water handy to tame flames from dripping marinade. Also, don’t overcrowd the grill. I’ve had mini fires before—scary but manageable!
Is there a gluten-free BBQ sauce option?
Definitely, check labels for gluten-free versions—many brands offer ‘em now. I’ve used ‘em for friends with dietary needs, and they work great.
Can I grill veggies with the chicken?
For sure, toss some zucchini or peppers on a cooler part of the grill. I love doing this for a full meal vibe. Just keep an eye on ‘em so they don’t burn.
Conclusion
I hope you’re as pumped as I am to fire up the grill and make these Grilled BBQ Chicken Breasts for your next meal. They’ve been a staple in my kitchen for years, bringing smiles and full bellies every time. So grab your tongs, try out my recipe for Grilled BBQ Chicken Breasts, and let me know how it turns out—I’d love to hear about your grill adventures with Grilled BBQ Chicken Breasts!
Conclusion
I hope you enjoyed this recipe for Grilled BBQ Chicken Breasts! It’s truly one of my favorites, and I’m confident you’ll love it too.
Remember to follow the steps carefully for the best results. Don’t hesitate to experiment with your own variations and make this recipe your own. Happy cooking!