
Fall is hands-down my favorite season, mostly because it’s the perfect excuse to whip up a batch of Homemade Apple Cider. I discovered my love for this cozy drink years ago when my family went apple picking, and we came home with way more apples than we knew what to do with!
I figured, why not simmer them down into something warm and spiced? That first pot of Homemade Apple Cider was a game-changer, and now it’s a must-make every autumn in my house.
Seriously, there’s nothing like the smell of apples, cinnamon, and cloves bubbling away on the stove. My kids practically hover in the kitchen waiting for that first sip of Homemade Apple Cider, and I can’t blame ‘em. It’s pure comfort in a mug, and I’m thrilled to share my go-to recipe with you today.
If you’ve never made Homemade Apple Cider before, don’t worry, it’s easier than you think. Stick with me, and I’ll walk you through every step to get that perfect, soul-warming flavor right in your own kitchen.
Why You’ll Love This Recipe
I’ve found that Homemade Apple Cider is one of those recipes that just wins everyone over, no matter their taste. It’s naturally sweet, packed with fall spices, and feels like a hug on a chilly day. Plus, you can tweak it to your liking, whether you want it sweeter, spicier, or even a tad boozy (more on that later!).
In my kitchen, this drink is a staple for gatherings, and I love how it makes the whole house smell like a holiday. It’s also super forgiving, even if you’re not a pro in the kitchen. Trust me, once you try making Homemade Apple Cider, you’ll never go back to the store-bought stuff!
Ingredients List
Alright, let’s talk about what you’ll need to make a killer batch of Homemade Apple Cider. I’m all about keeping things simple, so these are ingredients you can grab at any grocery store or farmers’ market. I prefer a mix of apple varieties for the best flavor, but I’ll get into that below.
Here’s the rundown of what I use for a solid batch of Homemade Apple Cider (feel free to scale it up or down based on your crowd). I usually buy organic apples when I can, but honestly, use what’s in your budget. This makes about 8-10 servings of delicious Homemade Apple Cider, perfect for a cozy night or a small get-together.
- 10-12 medium apples (about 4-5 lbs), a mix of sweet (like Honeycrisp or Fuji) and tart (like Granny Smith) for balance
- 1 medium orange, sliced with peel on for a citrusy zing
- 3 cinnamon sticks, whole for that warm, woody vibe
- 1 teaspoon whole cloves, for a punch of spice (don’t overdo it!)
- 1/2 teaspoon ground nutmeg, optional but adds depth
- 1/2 cup (100g) brown sugar, or to taste, depending on your apples’ sweetness
- 10 cups (2.5 liters) water, enough to cover the apples in your pot
I’ve learned over the years that the apple mix is key to nailing Homemade Apple Cider. If I’m stuck with just one type, I’ll go for Gala, but honestly, experimenting is half the fun. Got some bruised apples? Toss ‘em in; they’ll still work their magic!
Variations
One of the best things about Homemade Apple Cider is how easy it is to make it your own. I’ve played around with this recipe more times than I can count, and I’m always surprised by how a little tweak can totally change the vibe. Here are some variations I’ve tried over the years for Homemade Apple Cider that might spark some ideas for you.
- Spiced-Up Kick: Add a pinch of cayenne or a sliced jalapeño for a subtle heat that sneaks up on you. I tried this once for a fall party, and it was a hit with the adults!
- Ginger Zest: Toss in a 1-inch piece of fresh ginger, sliced, for a bright, peppery note. My husband loves this version with Homemade Apple Cider.
- Maple Twist: Swap the brown sugar for 1/3 cup of pure maple syrup. It’s a little fancy, and I save it for special occasions.
- Boozy Boost: Stir in a splash of bourbon or rum after simmering (about 1 oz per serving). I’ve done this for game nights, and let’s just say it warms you up quick!
- Berry Blast: Add a handful of fresh cranberries during simmering for a tart, festive touch. My kids always ask for this around the holidays with their Homemade Apple Cider.
- Vanilla Vibes: Drop in a split vanilla bean or 1 teaspoon vanilla extract at the end. It’s subtle but makes your Homemade Apple Cider feel extra gourmet.
- Herbal Edge: Throw in a sprig of fresh rosemary or thyme for an earthy twist. I wasn’t sure about this at first, but it grew on me!
Don’t be afraid to mix and match these ideas. Some of my best batches of Homemade Apple Cider came from just tossing in whatever I had on hand. What’s your go-to twist? Let me know!
Servings and Timing
Let’s break down the nitty-gritty of making Homemade Apple Cider so you can plan accordingly. In my experience, this recipe doesn’t take all day, but it does need some patience while it simmers. Here’s how long it usually takes me to whip up a batch of Homemade Apple Cider for my crew.
- Prep Time: 10 minutes
- Cook Time: 2-3 hours (simmering)
- Total Time: About 2.5-3 hours
- Servings: 8-10 cups
I usually double this for bigger gatherings, but this amount is just right for a family night. You’ll have plenty of Homemade Apple Cider to go around, and trust me, there won’t be leftovers!
Step-by-Step Instructions
Making Homemade Apple Cider is pretty straightforward, but I’ve got some tricks up my sleeve to make it even easier. I’ll walk you through each step as if we’re chatting over a cup of coffee. Let’s get started!
Step 1: Prep Your Ingredients
First things first, wash those apples and cut ‘em into quarters. No need to peel or core ‘em; the skins and seeds add flavor to your Homemade Apple Cider. I just toss everything into my biggest pot (a 6-quart Dutch oven works like a charm for me). Slice up that orange, throw it in, and add your spices.
Step 2: Add Water and Simmer
Pour in the water until the apples are just covered, usually about 10 cups for me. Crank the heat to high until it boils, then drop it down to a low simmer. Let it bubble away for 2-3 hours, stirring every now and then. This is when the magic happens, and your kitchen smells like a dang apple orchard!
Step 3: Mash and Strain
Once the apples are super soft (like, falling-apart soft), I use a potato masher to squish ‘em right in the pot. Then, strain the mix through a fine-mesh sieve or cheesecloth into another pot or big bowl. I’ve botched this step before by rushing, so take your time to get all the liquid out for the best Homemade Apple Cider.
Step 4: Sweeten and Serve
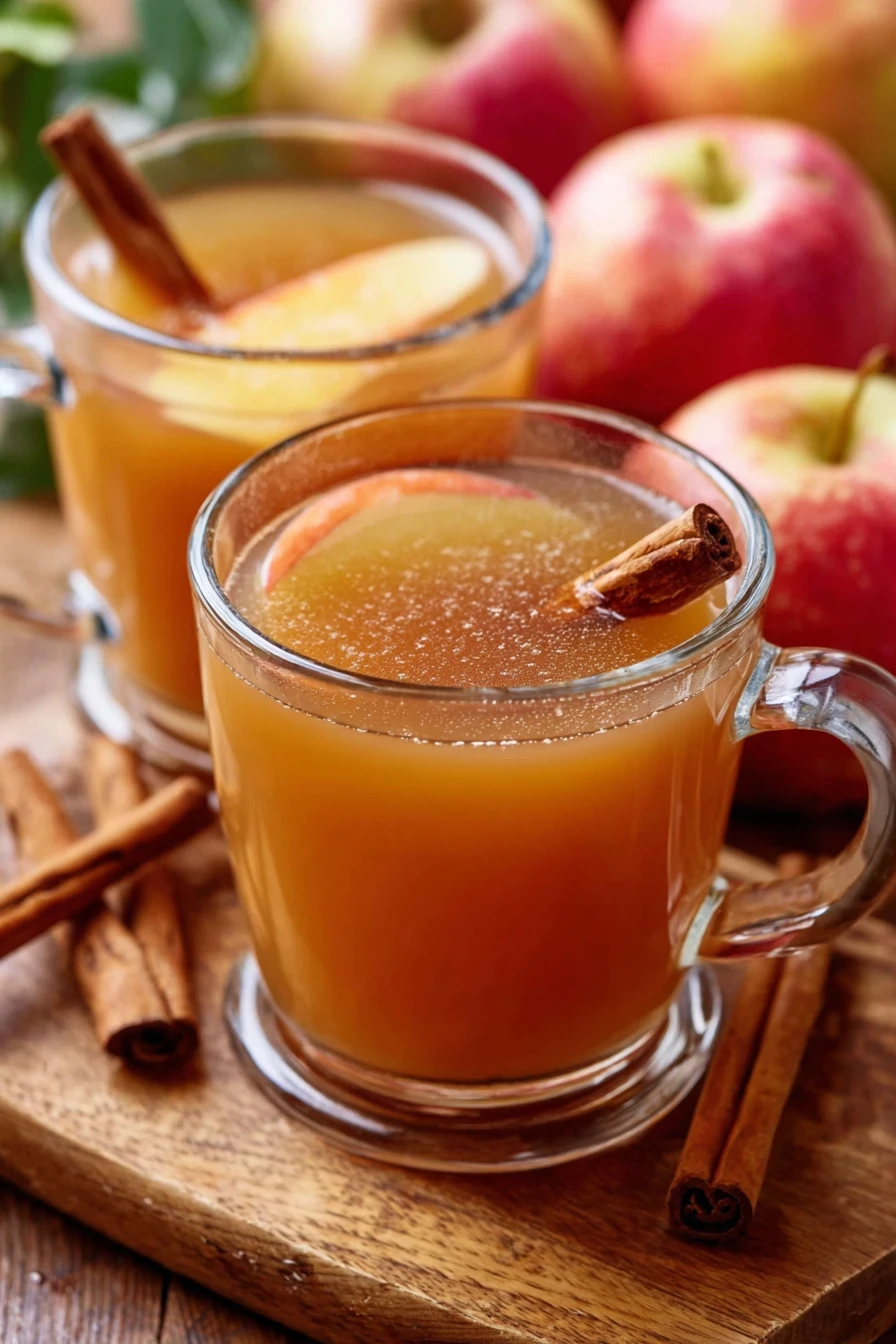
Stir in the brown sugar while it’s still warm, tasting as you go. Sometimes I skip the sugar if the apples are sweet enough. Serve your Homemade Apple Cider hot with a cinnamon stick if you’re feeling fancy. Honestly, I’ve burned my tongue more than once because I couldn’t wait to sip it!
Step 5: Store Any Leftovers
If you’ve got extras (rare in my house), let the Homemade Apple Cider cool completely before pouring it into jars or pitchers. I’ll pop it in the fridge, and it’s just as good reheated the next day. Nothing beats that second-day flavor, in my opinion!
Nutritional Information
I’m no dietitian, but I like to keep an eye on what’s in my Homemade Apple Cider, especially since my family downs it like water. Here’s the rough breakdown per 8-oz serving, based on my recipe with a moderate amount of sugar. Keep in mind, this can vary depending on your apples and tweaks.
- Calories: 120 per serving
- Fat: 0g
- Protein: 0g
- Carbohydrates: 30g
- Sodium: 10mg
It’s not exactly a health food, but Homemade Apple Cider feels lighter than sugary sodas, and I love knowing exactly what’s in it. Plus, it’s a treat worth savoring!
Healthier Alternatives
If you’re looking to lighten up your Homemade Apple Cider, I’ve got some swaps that I’ve tried and loved. These keep the cozy factor while cutting back a bit on the sweet stuff. Here’s what works for me when I’m watching my intake.
- No Sugar Needed: Skip the brown sugar entirely if your apples are sweet. I do this often with Honeycrisps, and it’s still delish.
- Honey Swap: Use 1/4 cup honey instead of sugar for a natural sweetener. I’ve swapped this in for Homemade Apple Cider when I’m feeling a bit earthy.
- Less Sweetness: Halve the sugar amount and add a splash of lemon juice for balance. It’s a trick I use for my Homemade Apple Cider on lighter days.
- Low-Cal Spices: Lean on extra cinnamon or nutmeg for flavor without calories. Trust me, it still feels indulgent!
These tweaks make Homemade Apple Cider a little friendlier for everyday sipping. What’s your favorite way to cut back?
Serving Suggestions
I’ve got some go-to ways to enjoy Homemade Apple Cider that I think you’ll love. Whether it’s a quiet night or a big holiday bash, these ideas make it extra special. Here are my faves from years of serving this stuff!
- Classic Cozy: Serve hot in mugs with a cinnamon stick for stirring. It’s how I always start with Homemade Apple Cider on chilly nights.
- With Treats: Pair it with fresh apple slices or gingerbread cookies. My kids go nuts for this combo with Homemade Apple Cider!
- Fall Brunch: Offer it alongside pumpkin muffins or pancakes. I did this for a brunch, and it stole the show.
- After Dinner: Sip it as a dessert drink with a dollop of whipped cream. Honestly, it’s my guilty pleasure with Homemade Apple Cider.
How do you like yours? I’m always up for new pairing ideas!
Common Mistakes to Avoid
I’ve made my fair share of blunders while perfecting Homemade Apple Cider, so let me save you some hassle. Trust me on this one, these slip-ups can turn your cozy drink into a hot mess. Here’s what I’ve learned the hard way.
- Over-Spicing: Too many cloves or cinnamon can make it bitter. I overdid it once, and it was like drinking potpourri!
- Not Simmering Long Enough: Don’t rush the process; short simmering means weak flavor in your Homemade Apple Cider.
- Skipping the Strain: Leaving pulp in makes it gritty. I skipped this step early on, and it was a nope.
- Wrong Apple Mix: All sweet or all tart apples throw off the balance. I’ve messed up my Homemade Apple Cider this way, and it just wasn’t right.
Take it slow, and you’ll dodge these pitfalls for perfect Homemade Apple Cider every time.
Storing Tips
I’ve found that Homemade Apple Cider keeps pretty well if you store it right, which is great for making ahead. In my experience, it tastes even better the next day as the flavors meld. Here’s how I keep mine fresh.
- Refrigerator: Store in an airtight jar or pitcher for up to 5 days. I reheat just what I need.
- Freezer: Freeze in portions for up to 3 months. I use freezer bags for easy thawing.
- Reheating: Warm on the stove over low heat to keep that Homemade Apple Cider magic alive.
Frequently Asked Questions
I get a lot of questions about making Homemade Apple Cider, so I’ve rounded up the most common ones. Let’s dive in with some quick answers based on my trial and error. I’ve got ya covered!
Can I use a slow cooker?
Totally! Toss everything in on low for 6-8 hours, then strain. I’ve done this for Homemade Apple Cider when I’m busy, and it works like a dream.
Do I have to peel the apples?
Nope, the skins add flavor and color. I never peel mine for Homemade Apple Cider, and it’s always awesome.
Can I make it less sweet?
For sure, just cut back on sugar or skip it. Taste as you go with your Homemade Apple Cider; that’s my trick.
What if I don’t have whole spices?
Ground spices work in a pinch, but use half the amount since they’re stronger. I’ve subbed them before with no issues.
Can I use apple juice instead?
You can, but it won’t be true Homemade Apple Cider. It’s quicker, though, if you’re in a rush. Just simmer with spices for 30 minutes.
How do I make it for a crowd?
Double or triple the recipe and use a big stockpot. I’ve done this for parties, and it’s a breeze.
Is it safe for kids?
Yup, as long as there’s no booze added. My little ones love it, especially when it’s not too hot.
Can I can it for later?
Yes, but follow proper canning guidelines for safety. I’ve canned Homemade Apple Cider before, and it’s great for gifting.
Conclusion
There you have it, my tried-and-true guide to making Homemade Apple Cider that’ll warm your soul. I hope you’re as excited as I am to fill your kitchen with those amazing fall aromas. Give this Homemade Apple Cider recipe a shot, tweak it to your taste, and let me know how it turns out; I’d love to hear! Here’s to cozy sipping with a mug of Homemade Apple Cider in hand.
Cheers!
Conclusion
I hope you enjoyed this recipe for Homemade Apple Cider! It’s truly one of my favorites, and I’m confident you’ll love it too. Remember to follow the steps carefully for the best results. Don’t hesitate to experiment with your own variations and make this recipe your own.
Happy cooking!