
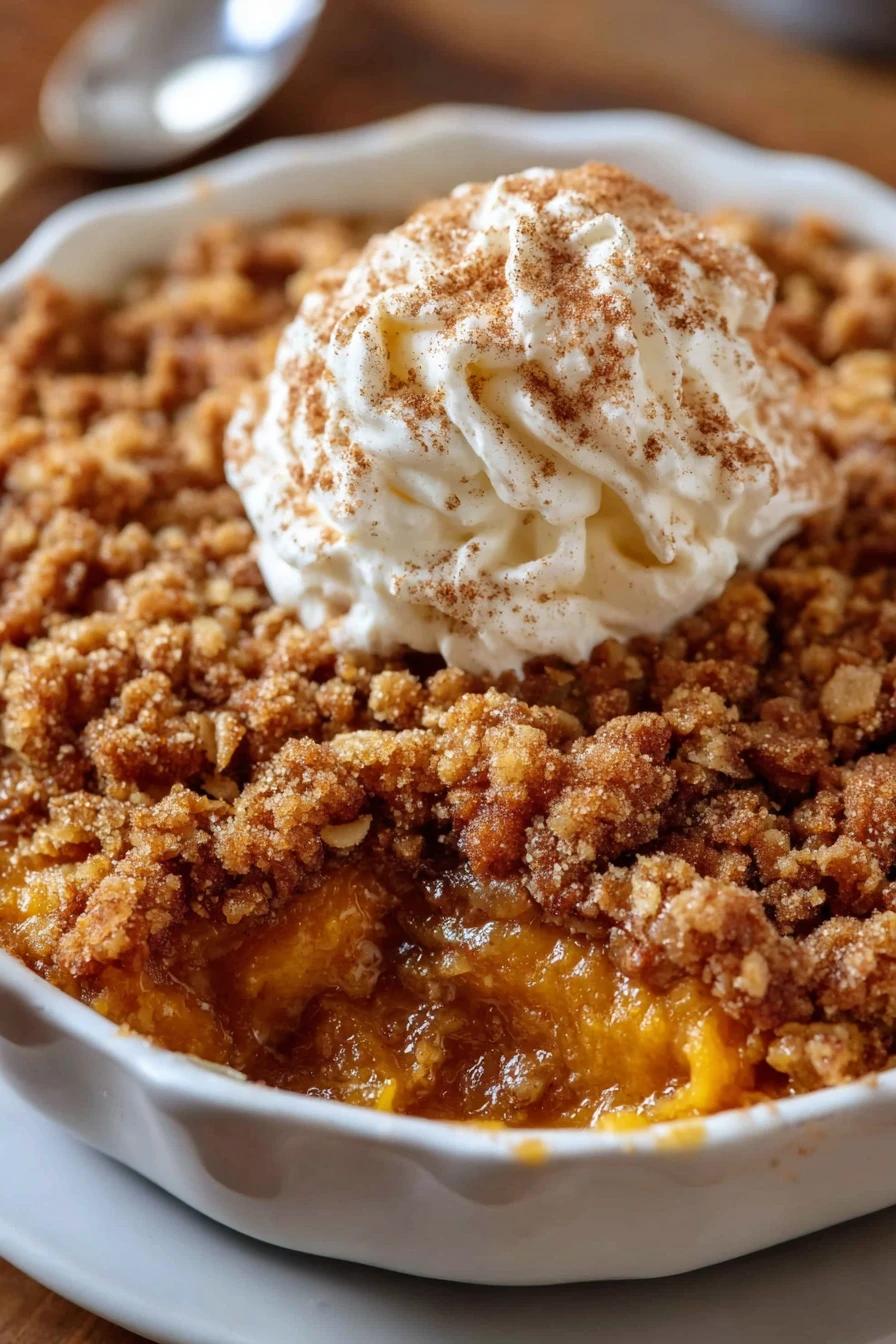
Fall is hands-down my favorite season, mostly because I get to whip up cozy, comforting desserts like Homemade Pumpkin Pie Crisp. There’s something magical about the smell of cinnamon and pumpkin wafting through the house, don’t ya think?
A few years back, I stumbled upon this recipe while trying to mash up my love for pumpkin pie with the addictive crunch of a crisp, and let me tell you, it was a game-changer. My family went nuts over this Homemade Pumpkin Pie Crisp, and now it’s a must-have at every Thanksgiving table.
I’ll never forget the first time I made Homemade Pumpkin Pie Crisp; I was so nervous about getting the topping just right that I overmixed it into a soggy mess. Lesson learned! But after a few tweaks (and a lot of taste-testing), I’ve nailed this dessert, and I’m pumped to share it with you. If you’re craving a twist on tradition, this Homemade Pumpkin Pie Crisp is gonna steal the show.
Why You’ll Love This Recipe
I’ve found that Homemade Pumpkin Pie Crisp hits all the right notes: it’s got the creamy, spiced goodness of pumpkin pie but with a buttery, crunchy topping that takes it to the next level. In my kitchen, this dessert is a crowd-pleaser every single time, especially when folks are expecting “just another pie.” It’s easy to throw together, even if you’re not a pro baker, and the ingredients are stuff you’ve probably got in your pantry already.
Plus, there’s something so satisfying about scooping out a warm serving of Homemade Pumpkin Pie Crisp and watching everyone’s eyes light up. I mean, who can resist that golden, crispy topping paired with velvety pumpkin filling? Trust me, you’ll be hooked from the first bite.
Ingredients List
Alright, let’s talk ingredients for Homemade Pumpkin Pie Crisp. I’m all about keeping things simple, so I stick to basics with a couple of personal faves to amp up the flavor. I usually buy canned pumpkin puree for convenience, but if you’ve got the time to roast your own, go for it—I’ve done it once or twice, and it’s worth the effort for a deeper taste.
Here’s what you’ll need to make this Homemade Pumpkin Pie Crisp. I’ve broken it down into sections for clarity, because nobody wants to be hunting for measurements mid-mix (been there, hated that). These amounts are perfect for a standard 9×13 dish.
For the Pumpkin Filling
- 1 can (15 oz) pumpkin puree, pure pumpkin, not pie filling
- 3/4 cup (150g) granulated sugar, for that sweet balance
- 1 teaspoon ground cinnamon, for warmth
- 1/2 teaspoon ground nutmeg, because it’s fall in a spice
- 1/4 teaspoon ground cloves, just a pinch for depth
- 2 large eggs, at room temperature for a smoother mix
- 1 cup (240ml) evaporated milk, for creamy richness
For the Crisp Topping
- 3/4 cup (95g) all-purpose flour, for structure
- 3/4 cup (150g) brown sugar, packed, for caramel vibes
- 1/2 cup (45g) old-fashioned oats, for texture (I prefer rolled over quick oats)
- 1/2 teaspoon ground cinnamon, to tie it to the filling
- 1/2 cup (115g) unsalted butter, cold and cubed, for that flaky magic
I like to keep my butter super cold for the topping—straight from the fridge, no exceptions. It’s my little secret for getting that “crumble perfection” in Homemade Pumpkin Pie Crisp. Grab these ingredients, and let’s get this party started!
Variations
I’m a big fan of tweaking recipes to fit different vibes or dietary needs, and Homemade Pumpkin Pie Crisp is super versatile for that. Over the years, I’ve played around with a bunch of twists, some inspired by family requests and others just out of curiosity. Here are a few of my go-to variations for this Homemade Pumpkin Pie Crisp that you can try depending on your mood or what’s in your pantry.
- Nutty Crunch: Toss in 1/2 cup of chopped pecans or walnuts into the crisp topping for an extra layer of texture. I tried this once for a holiday potluck, and it was a hit—folks couldn’t stop raving!
- Gluten-Free Swap: Use gluten-free flour and certified GF oats for the topping. I’ve made this for a friend with celiac, and it still turned out delish.
- Spice It Up: Add 1/4 teaspoon of ground ginger to the filling for a little zing. My husband loves this version of Homemade Pumpkin Pie Crisp with a kick.
- Maple Magic: Replace half the granulated sugar with maple syrup in the filling for a cozy, autumnal twist. It’s a bit sticky to work with, but oh man, the flavor!
- Coconut Craze: Mix 1/4 cup of shredded coconut into the topping for a tropical hint. My kids always ask for this one, though I’m not totally sold on it myself.
- Apple-Pumpkin Mashup: Layer in 1 cup of thinly sliced apples with the pumpkin filling for a pie-meets-cobbler feel. I did this on a whim last fall, and it’s now a staple.
- Vegan Vibes: Swap eggs for flax eggs (1 tbsp flaxseed meal + 2.5 tbsp water per egg) and use coconut milk instead of evaporated milk. I’ve tested this for a vegan pal, and it works surprisingly well with Homemade Pumpkin Pie Crisp.
- Chocolate Drizzle: Melt 1/4 cup of dark chocolate chips and drizzle over the top after baking. It’s a bit decadent, but my sweet tooth approves.
These are just starting points—feel free to get creative with your own Homemade Pumpkin Pie Crisp! What’s your favorite twist? I’m always down to hear new ideas.
Servings and Timing
When it comes to planning for Homemade Pumpkin Pie Crisp, I’ve got the timing down to a science after making it so many times. In my experience, this recipe is pretty straightforward, even if you’re juggling a busy kitchen. Here’s the breakdown for whipping up this Homemade Pumpkin Pie Crisp, so you’re not left guessing.
- Prep Time: 15 minutes
- Cook Time: 45 minutes
- Total Time: 1 hour
- Servings: 8-10 portions
I usually give myself a little wiggle room for prep, just in case I’m distracted by kids or a Netflix binge. This size is perfect for a family dessert or a small gathering with leftovers to savor!
Step-by-Step Instructions
Let’s dive into making Homemade Pumpkin Pie Crisp with a step-by-step guide that’s straight from my kitchen to yours. I’ve broken this down into manageable chunks with my own little tricks tossed in, because baking should feel like a breeze, not a chore. Follow along, and you’ll have a killer dessert in no time.
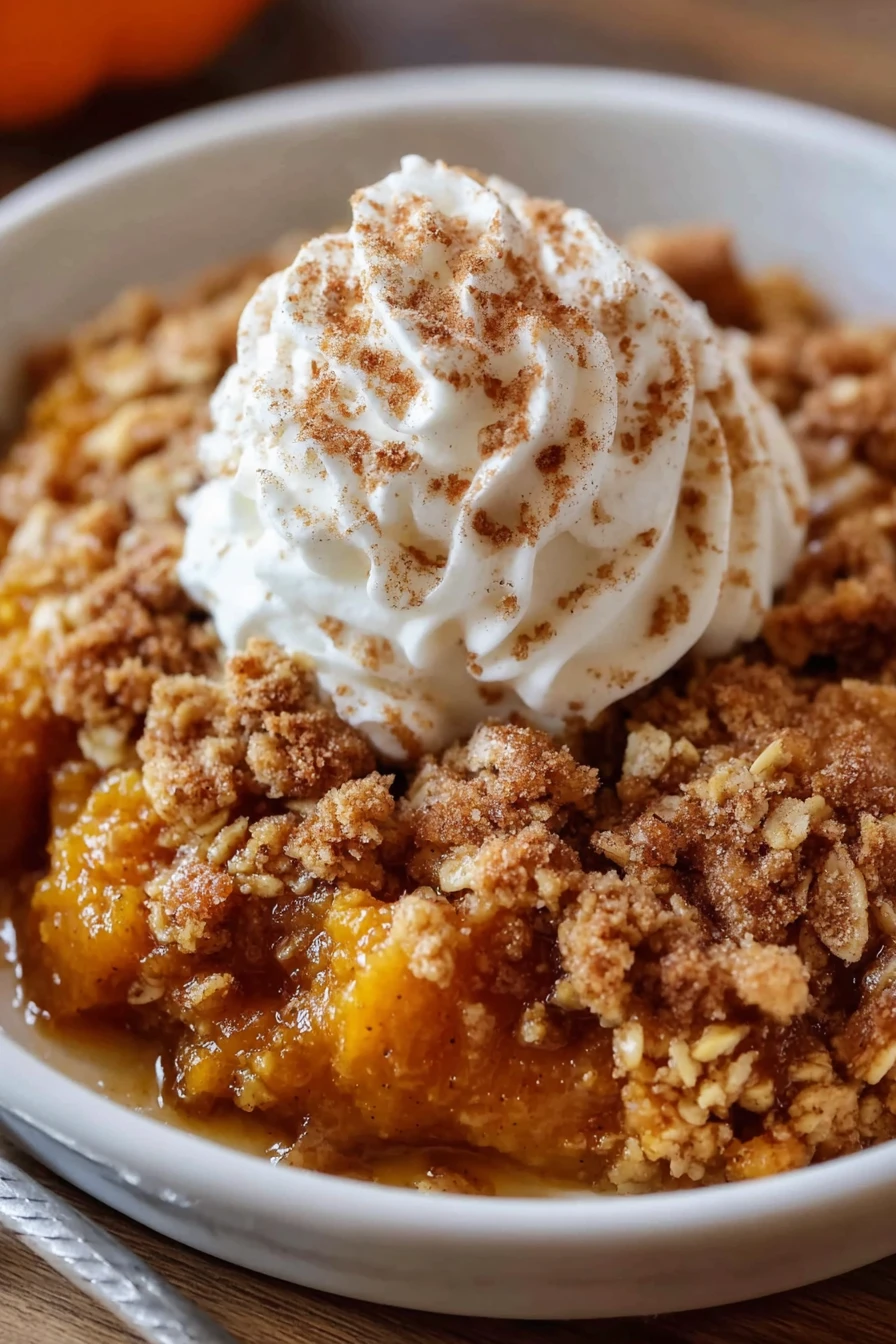
Step 1: Preheat and Prep
Start by preheating your oven to 350°F (175°C). Grease a 9×13-inch baking dish with a bit of butter or cooking spray—I’m a butter gal myself, just for that extra richness. This step sets the stage for your Homemade Pumpkin Pie Crisp, so don’t skip it.
Step 2: Mix the Pumpkin Filling
In a big ol’ bowl, whisk together the pumpkin puree, sugar, cinnamon, nutmeg, cloves, eggs, and evaporated milk until it’s smooth as silk. I’ve learned to mix the eggs in last to avoid any weird curdling—trust me, it’s a small step that saves headaches. This filling is the heart of your Homemade Pumpkin Pie Crisp, so give it some love.
Step 3: Make the Crisp Topping
Now, for that addictive topping! In another bowl, combine the flour, brown sugar, oats, and cinnamon, then cut in the cold butter with a pastry cutter or your fingers until it looks like coarse crumbs. I always keep my butter frigid for this—pop it in the freezer for 10 minutes if needed—to get that perfect “crumble factor” for Homemade Pumpkin Pie Crisp.
Step 4: Assemble and Bake
Pour the pumpkin filling into your greased dish, spreading it out nice and even. Sprinkle the crisp topping over it, covering every inch—don’t skimp, y’all, this is the best part of Homemade Pumpkin Pie Crisp! Bake for 40-45 minutes until the topping is golden and the filling is set but still a tad jiggly in the center.
Step 5: Cool and Enjoy
Let your Homemade Pumpkin Pie Crisp cool for at least 15 minutes before digging in, if you can resist the smell. I usually sneak a tiny bite straight from the corner (shh, don’t tell). It’s pure bliss warm, but honestly, it’s just as good the next day.
And that’s it! With these steps, you’ve got a dessert that’s sure to impress. What’s your go-to baking hack for dishes like Homemade Pumpkin Pie Crisp?
Nutritional Information
I’m not gonna pretend I’m a nutritionist, but I’ve crunched the numbers for Homemade Pumpkin Pie Crisp to give you a rough idea of what’s in each serving. I think it’s nice to know what you’re indulging in, especially if you’re balancing treats with healthier eats. Here’s the breakdown per slice, based on 10 servings.
- Calories: 310 per serving
- Fat: 14g
- Protein: 5g
- Carbohydrates: 42g
- Sodium: 120mg
Keep in mind, these are ballpark figures, and extras like whipped cream (my weakness) will bump up the stats. Enjoy your Homemade Pumpkin Pie Crisp guilt-free—it’s worth every bite in my book!
Healthier Alternatives
If you’re looking to lighten up Homemade Pumpkin Pie Crisp, I’ve got some swaps that I’ve tried over the years with pretty tasty results. I’m all for indulging, but sometimes I wanna cut back a bit without sacrificing that cozy flavor. Here are a few tweaks to make your Homemade Pumpkin Pie Crisp a smidge healthier.
- Lower Sugar: Cut the granulated sugar to 1/2 cup and add a tablespoon of honey for natural sweetness. I’ve done this when I’m watching my sweets, and it’s still delish.
- Reduced Fat: Swap half the butter in the topping for unsweetened applesauce. It’s not as rich, but it works for a lighter Homemade Pumpkin Pie Crisp.
- Dairy-Free Option: Use coconut milk instead of evaporated milk in the filling. I’ve made this for a dairy-free friend, and it’s got a cool tropical hint.
- Less Topping: Halve the crisp topping amount if you’re cutting calories. Honestly, I miss the extra crunch, but it still feels like Homemade Pumpkin Pie Crisp.
These changes don’t mess with the vibe too much, so give ’em a shot if you’re feeling health-conscious!
Serving Suggestions
Serving up Homemade Pumpkin Pie Crisp is half the fun, and I’ve got some ideas to make it shine based on how I roll in my kitchen. Whether it’s a holiday feast or just a random Tuesday treat, presentation and pairings can elevate this dessert. Here are my fave ways to dish out Homemade Pumpkin Pie Crisp.
- Classic Comfort: Serve warm with a dollop of whipped cream on top. I love how it melts into the crisp—it’s pure nostalgia.
- Ice Cream Dream: Add a scoop of vanilla ice cream for that hot-cold contrast. At my last dinner party, this combo with Homemade Pumpkin Pie Crisp was a total winner.
- Festive Flair: Sprinkle a pinch of extra cinnamon or nutmeg on top before serving. It looks fancy and smells amazing!
- Coffee Companion: Pair a slice with a hot cup of coffee or chai latte. It’s my go-to afternoon pick-me-up with Homemade Pumpkin Pie Crisp.
How do you like to serve yours? I’m always game for new ideas to mix things up!
Common Mistakes to Avoid
I’ve botched my fair share of desserts, including Homemade Pumpkin Pie Crisp, so I’m spilling the beans on pitfalls to dodge. Trust me on this one, learning the hard way isn’t fun, but it’s made me a better baker. Here are some common slip-ups I’ve made with Homemade Pumpkin Pie Crisp and how to steer clear.
- Overbaking: Don’t let it sit in the oven too long, or the filling gets rubbery. I’ve pulled a brick-like crisp before—total bummer.
- Warm Butter: If your butter isn’t cold for the topping, you’ll get a greasy mess instead of crumbs. I learned this after a rushed batch of Homemade Pumpkin Pie Crisp.
- Wrong Pumpkin: Using pumpkin pie filling instead of puree will mess with the sweetness and texture. Read the label, folks—I’ve grabbed the wrong can in a hurry.
- Uneven Topping: Spread the crisp layer evenly, or you’ll have bald spots. I’ve had sad, patchy servings, and it’s just not as satisfying.
Avoid these, and your Homemade Pumpkin Pie Crisp will come out like a dream. What kitchen flubs have you run into?
Storing Tips
Storing Homemade Pumpkin Pie Crisp is a cinch, and I’ve figured out the best ways to keep it tasting fresh after many batches. In my experience, a little care goes a long way to preserve that just-baked yum. Here’s how I handle leftovers of Homemade Pumpkin Pie Crisp.
- Refrigerator: Store in an airtight container for up to 4-5 days. I’ve found it tastes even better on day two!
- Freezer: Freeze individual portions in freezer-safe bags for up to 2 months. Thaw overnight in the fridge before reheating for that Homemade Pumpkin Pie Crisp magic.
I usually reheat slices in the microwave for a quick fix, but a low oven works too if you’ve got time. How do you store your fall desserts?

Frequently Asked Questions
I get a bunch of questions about Homemade Pumpkin Pie Crisp, so I’ve rounded up the most common ones I hear from friends and readers. Let’s tackle these head-on with answers straight from my kitchen. Here we go!
Can I make Homemade Pumpkin Pie Crisp ahead of time?
Absolutely, you can! I often prep the filling and topping a day ahead, store them separately in the fridge, then assemble and bake on the day of. It saves so much stress for big gatherings.
Can I use fresh pumpkin instead of canned?
For sure, if you’ve got the time. Roast and puree your own pumpkin—it’s a bit of work, but the flavor in Homemade Pumpkin Pie Crisp is next-level. Just make sure it’s not too watery.
Is this recipe gluten-free?
Not as is, but swap the flour for a gluten-free blend and use GF oats. I’ve done it, and it’s just as tasty!
Can I skip the oats in the topping?
Yeah, you can, though I love the texture they add. Just up the flour a bit to compensate for your Homemade Pumpkin Pie Crisp topping.
How do I know when it’s done baking?
Look for a golden topping and a filling that’s mostly set with a slight jiggle in the center. That’s been my cue every time.
Can I double the recipe?
Totally! Use two dishes or a larger pan, and keep an eye on baking time—it might need a few extra minutes.
Does it need to be refrigerated?
Yep, after cooling, pop it in the fridge because of the eggs in the filling. I’ve left it out too long before, and it’s not worth the risk.
Can I add whipped cream ahead of time?
I wouldn’t—it gets weepy. Add it right before serving your Homemade Pumpkin Pie Crisp for the best look and taste. What other questions ya got?
Conclusion
Well, there you have it—everything I’ve learned about making the perfect Homemade Pumpkin Pie Crisp! I hope you’re as excited as I am to bake up this cozy, crunchy dessert and share it with your crew.
Give this Homemade Pumpkin Pie Crisp a whirl, tweak it to your liking, and let me know how it turns out—I’m all ears for your stories and tips. Happy baking, y’all, and enjoy every sweet bite of your Homemade Pumpkin Pie Crisp!
Conclusion
I hope you enjoyed this recipe for Homemade Pumpkin Pie Crisp! It’s truly one of my favorites, and I’m confident you’ll love it too. Remember to follow the steps carefully for the best results. Don’t hesitate to experiment with your own variations and make this recipe your own.
Happy cooking!

Homemade Pumpkin Pie Crisp
- Author: Olivia
- Prep Time: 15 minutes
- Cook Time: 45 minutes
- Total Time: 1 hour
- Yield: 8-10 servings
- Category: Dessert
- Cuisine: American
Description
Discover our tested Homemade Pumpkin Pie Crisp recipe. Simple instructions, authentic flavors, and pro cooking tips included.
Ingredients
For the Pumpkin Filling
For the Crisp Topping
Instructions
-
Start by preheating your oven to 350°F (175°C). Grease a 9×13-inch baking dish with a bit of butter or cooking spray—I’m a butter gal myself, just for that extra richness. This step sets the stage for your Homemade Pumpkin Pie Crisp, so don’t skip it.
-
In a big ol’ bowl, whisk together the pumpkin puree, sugar, cinnamon, nutmeg, cloves, eggs, and evaporated milk until it’s smooth as silk. I’ve learned to mix the eggs in last to avoid any weird curdling—trust me, it’s a small step that saves headaches. This filling is the heart of your Homemade Pumpkin Pie Crisp, so give it some love.
-
Now, for that addictive topping! In another bowl, combine the flour, brown sugar, oats, and cinnamon, then cut in the cold butter with a pastry cutter or your fingers until it looks like coarse crumbs. I always keep my butter frigid for this—pop it in the freezer for 10 minutes if needed—to get that perfect “crumble factor” for Homemade Pumpkin Pie Crisp.
-
Pour the pumpkin filling into your greased dish, spreading it out nice and even. Sprinkle the crisp topping over it, covering every inch—don’t skimp, y’all, this is the best part of Homemade Pumpkin Pie Crisp! Bake for 40-45 minutes until the topping is golden and the filling is set but still a tad jiggly in the center.
-
Let your Homemade Pumpkin Pie Crisp cool for at least 15 minutes before digging in, if you can resist the smell. I usually sneak a tiny bite straight from the corner (shh, don’t tell). It’s pure bliss warm, but honestly, it’s just as good the next day. And that’s it! With these steps, you’ve got a dessert that’s sure to impress. What’s your go-to baking hack for dishes like Homemade Pumpkin Pie Crisp?
Notes
- Storing Tips: Storing Homemade Pumpkin Pie Crisp is a cinch, and I’ve figured out the best ways to keep it tasting fresh after many batches. In my experience, a little care goes a long way to preserve that just-baked yum. Here’s how I handle leftovers of Homemade Pumpkin Pie Crisp. Refrigerator: Store in an airtight container for up to 4-5 days. I’ve found it tastes even better on day two! Freezer: Freeze indiv
- Common Mistakes to Avoid: I’ve botched my fair share of desserts, including Homemade Pumpkin Pie Crisp, so I’m spilling the beans on pitfalls to dodge. Trust me on this one, learning the hard way isn’t fun, but it’s made me a better baker. Here are some common slip-ups I’ve made with Homemade Pumpkin Pie Crisp and how to steer clear. Overbaking: Don’t let it sit in the oven too long, or the filling gets rubbery. I’ve pulle
- Healthier Alternatives: If you’re looking to lighten up Homemade Pumpkin Pie Crisp, I’ve got some swaps that I’ve tried over the years with pretty tasty results. I’m all for indulging, but sometimes I wanna cut back a bit without sacrificing that cozy flavor. Here are a few tweaks to make your Homemade Pumpkin Pie Crisp a smidge healthier. Lower Sugar: Cut the granulated sugar to 1/2 cup and add a tablespoon of honey for


