

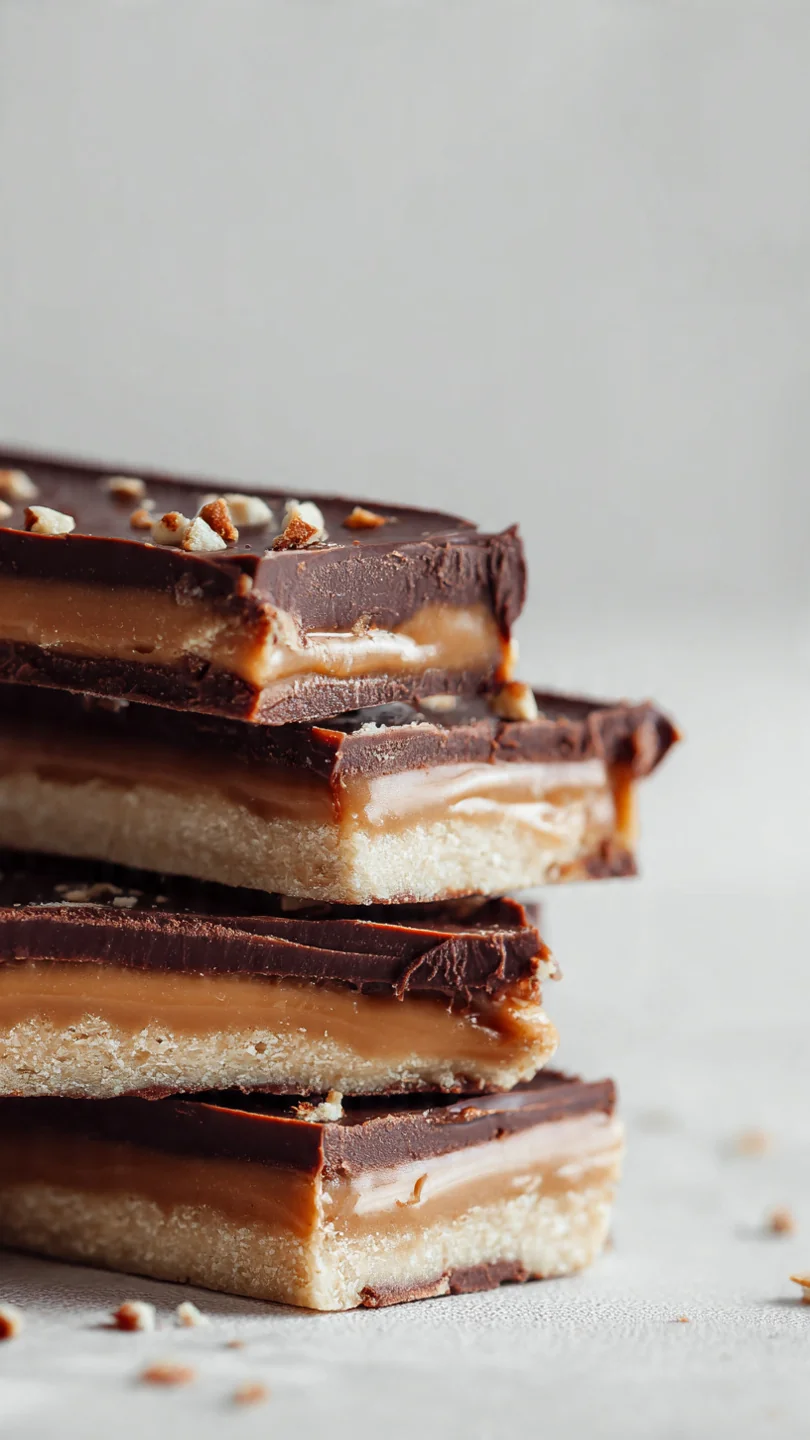
There’s a special kind of magic in recreating a beloved candy bar in your own kitchen. That first bite of a homemade Snickers—with its distinct layers of chewy nougat, sticky caramel, salty peanuts, and creamy chocolate—delivers a wave of nostalgia that’s somehow even more satisfying than the original. As a chef, I love deconstructing iconic treats to understand what makes them tick, and I can tell you the secret is in the texture and balance.
This recipe isn’t just a copycat; it’s an upgrade, using quality ingredients and techniques that give you complete control over the sweetness and richness. Whether you’re avoiding store-bought additives or just craving a fun weekend project, these bars are a guaranteed crowd-pleaser. Let’s make some candy.
- Superior Flavor & Texture: Using real butter, vanilla, and a higher peanut ratio creates a more complex, less cloyingly sweet bar with fantastic chew and crunch.
- No Special Equipment Needed: You likely have everything required in your kitchen right now—just a saucepan, a bowl, and a baking pan.
- Customizable to Your Taste: Easily swap milk chocolate for dark, use almonds instead of peanuts, or adjust the salt level to make it your own.
- Perfect for Gifting: These bars look impressive wrapped in parchment or cellophane and make a heartfelt, homemade gift for any occasion.
- A Fun Kitchen Project: The layering process is incredibly satisfying and a great activity to do with older kids or friends.
- Freezer-Friendly: Make a big batch and stash them in the freezer for instant dessert emergencies; they thaw perfectly.
Ingredients You’ll Need
Let’s gather our ingredients—this is where the alchemy happens. Using the right components in the right state is crucial for the signature Snickers texture. For the nougat layer, you’ll need creamy peanut butter (avoid the natural, oily kind as it won’t set properly), marshmallow fluff for that iconic chew, and powdered sugar for structure.
Trust me, the fluff is non-negotiable for authenticity. The caramel layer uses soft, wrapped caramels melted with a touch of heavy cream; it’s a reliable shortcut that yields a perfectly gooey consistency. For the crunch, dry roasted, lightly salted peanuts are ideal.
Finally, a good quality milk chocolate chip will give you the best melt and coating. If you want a darker bar, use semi-sweet chips. Every ingredient plays a specific role, so I don’t recommend skipping or radically substituting until you’ve tried the classic version first.
Note: You’ll find the complete list of ingredients, along with their exact measurements, in the printable recipe card at the bottom of this post.
Kitchen Equipment Needed
You don’t need any fancy candy-making tools for this recipe. An 8×8 inch baking pan is the perfect size for achieving the classic bar proportions. Parchment paper with overhanging edges is absolutely essential for clean removal—don’t skip it.
A medium saucepan will be used for both the nougat and caramel. A heatproof bowl that fits snugly over a pot creates an improvised double boiler for gently melting the chocolate, which is the best method to avoid seizing. An offset spatula makes spreading the chocolate layer smooth and effortless, and a sharp chef’s knife warmed under hot water is the secret to getting those pristine, clean cuts through all the layers.
How to Make Homemade Snickers Bars Recipe
Step 1: Build the Nougat Base
Line your pan with parchment paper; this is your best insurance policy for perfect bars. In your saucepan, gently melt a portion of the butter and peanut butter together over low heat. The goal is just to combine them smoothly without browning.
Tip from me: Remove the pan from the heat the moment it’s liquid. Whisk in the powdered sugar, marshmallow fluff, and vanilla. It will look thick and almost dough-like—that’s perfect.
Press this nougat firmly and evenly into the pan. A small piece of parchment or the bottom of a measuring cup helps press it down smoothly. Chill this layer for a full 20 minutes; it needs to be firm to support the warm caramel.
Step 2: Create the Caramel & Peanut Layer
Using the same unwashed saucepan adds a hint of peanut flavor to the caramel—a nice bonus. Combine the unwrapped caramels and cream over medium-low heat. Believe me, constant stirring is key here to prevent scorching.
In about 5-7 minutes, you’ll have a velvety, pourable caramel. Immediately pour it over the chilled nougat and spread it to the edges. The contrast between the cold base and warm caramel helps define the layers.
Without delay, sprinkle all of the chopped peanuts evenly over the caramel and give them a gentle press so they adhere. Pop the pan back into the fridge. This 30-minute chill solidifies the caramel enough so the final chocolate layer won’t melt it.
Step 3: Temper the Chocolate Topping
This step feels professional but is simple with a double boiler. Bring a small pot of water to a simmer and place your heatproof bowl on top, ensuring the bottom doesn’t touch the water. Add the chocolate chips and remaining butter.
The steam will melt the chocolate gently. Trust me, stirring constantly and removing the bowl from the heat when the chocolate is almost—but not completely—melted is the trick. The residual heat will finish the job, giving you a glossy, perfectly tempered chocolate that sets with a satisfying snap.
Step 4: Assemble and Set the Final Layer
Now comes the satisfying part. Pour the smooth chocolate over the peanut layer. Use your offset spatula to guide it into an even, beautiful coating, making sure it seals the edges.
A few gentle taps on the counter will settle the chocolate and release air bubbles. Let it sit at cool room temperature for about 10 minutes before moving it to the fridge. This gradual cooling helps prevent condensation on the chocolate.
Then, let it chill completely for at least 2 hours. Patience here is rewarded with perfectly defined, firm layers that are ready for cutting.
Step 5: Slice and Serve with Pride
Using the parchment paper, lift your candy slab onto a cutting board. Tip from me: Run your sharp knife under very hot water, dry it thoroughly, and make your first cut. For 16 classic-sized bars, cut a 4×4 grid.
Wipe and re-warm the knife between each cut for flawlessly clean edges. Step back and admire your work—those gorgeous layers are all your doing. Serve them slightly chilled for the ultimate textural experience that rivals anything from a checkout lane.
- Ingredient Temperature is Key: Use softened butter for the nougat and room temperature peanut butter. Cold ingredients can cause the nougat to seize or become grainy.
- The Caramel Pour: Work quickly once the caramel is melted. It begins to set as it cools, so pouring it over the chilled base and spreading it fast ensures an even layer.
- Chocolate Tempering Simplified: The double-boiler method described is a foolproof “chef’s cheat” for tempering at home. The key is gentle, indirect heat and constant stirring to keep the chocolate’s crystals stable.
- For Perfect Cuts: Chill the bars until they are very firm—overnight is even better. A hot knife glides through the cold chocolate and caramel without dragging or cracking the layers.
- Common Mistake to Avoid: Don’t try to speed up the chilling process by putting the warm pan directly into the freezer. This can cause the chocolate to develop a dull, whitish “bloom” from condensation and temperature shock.
Recipe Variations
- Dark Chocolate Snickers: Swap the milk chocolate chips for high-quality semi-sweet or dark chocolate chips. The deeper flavor balances the sweetness of the caramel beautifully.
- Sea Salt Caramel: After pouring the caramel layer, sprinkle a light pinch of flaky sea salt over it before adding the peanuts. This elevates the flavor profile with a sophisticated salty-sweet contrast.
- Nut-Free Version: Replace the peanut butter in the nougat with sunflower seed butter and omit the whole peanuts. Use a seed butter that’s smooth and not too oily for best results.
- Almond Joy Twist: Use sweetened shredded coconut mixed into the nougat layer and top the caramel with whole almonds instead of peanuts. Coat with dark chocolate.
- Gluten-Free Assurance: This recipe is naturally gluten-free, but always double-check your ingredient labels, particularly for marshmallow fluff and caramels, to ensure no hidden gluten is present.
- Extra-Crunchy: Add 1/4 cup of crushed pretzel pieces to the peanut layer for an added dimension of salty crunch.
- Vegan Adaptation: Use vegan butter, vegan caramels (available online or at health food stores), dairy-free chocolate, and a plant-based cream alternative. The texture will be slightly different but still delicious.
What to Serve With This Recipe
These Homemade Snickers Bars are a decadent dessert all on their own, but they can be the star of a larger sweet spread. For a classic ice cream sundae, chop a bar and sprinkle it over vanilla bean ice cream along with hot fudge. They pair wonderfully with a cup of strong, black coffee or a glass of cold milk to cut through the richness.
If you’re assembling a dessert board for a party, include these bars alongside some fresh fruit, cheese, and other bite-sized cookies. They’re perfect for potlucks, bake sales, holiday gift boxes, or as a special treat after a family dinner. Their portability and familiar flavor make them a universally loved choice.
Storage & Make-Ahead Instructions
- Refrigerator Storage: Store the cut bars in a single layer in an airtight container, separated by parchment paper, in the refrigerator for up to 2 weeks. They are best enjoyed within 10 days for optimal texture.
- Freezer Storage: These bars freeze exceptionally well. Wrap each bar individually in parchment paper and then place them in a freezer-safe bag or container. They will keep for up to 3 months. Thaw in the refrigerator overnight or for an hour at room temperature.
- Make-Ahead Strategy: This is an ideal make-ahead dessert. The bars need to chill for several hours anyway, so making them the day before you need them is highly recommended. In fact, the flavors meld and improve slightly overnight.
- Avoid Room Temperature: Due to the caramel and chocolate, I don’t recommend storing them at room temperature for more than a few hours, especially in warm climates, as they can become too soft and messy.
Frequently Asked Questions
Q: Can I use natural peanut butter?
A: I don’t recommend it for this recipe. Natural peanut butter, which separates, often has a different oil content and consistency that can prevent the nougat layer from setting up properly, resulting in a greasy, soft base.
Q: My caramel is too hard. What happened?
A: This usually means the caramel was cooked too long or at too high a temperature. Next time, use medium-low heat and remove it from the stove as soon as it’s completely smooth and fluid. The residual heat will continue to cook it slightly.
Q: Can I make these without a double boiler?
A: Yes, you can melt the chocolate in the microwave. Heat it in 20-second bursts at 50% power, stirring thoroughly between each burst, until almost melted. This method requires more vigilance to avoid overheating.
Q: Why did my chocolate get streaky or lumpy?
A: This is called “seizing” and happens if even a tiny drop of water or steam gets into the melting chocolate. Ensure all your tools are completely dry, and don’t let the simmering water from the double boiler touch the bottom of the bowl.
Q: How do I get perfectly even layers?
A: The secret is in the chilling. Make sure each layer is completely cold and set before adding the next warm layer. Rushing this process is the main cause of layers blending together.
Q: Are these as chewy as a real Snickers?
A: Yes, even more so! The homemade caramel and nougat have a wonderful, tender chew. For the absolute best texture, let the bars sit at room temperature for 5-10 minutes after taking them out of the fridge before eating.
Q: Can I double this recipe?
A: Absolutely. Double all ingredients and use a 9×13 inch pan. The chilling times may need to be extended slightly due to the greater volume.
Final Thoughts
Making your own Snickers Bars is more than just following a recipe; it’s a delightful lesson in texture, timing, and the pure joy of creating something iconic from scratch. The process of building each distinct layer is incredibly satisfying, and the final product—a rich, chewy, crunchy, chocolatey bar—is a testament to the power of simple, quality ingredients. This recipe demystifies candy-making and puts a truly impressive homemade treat within your reach.
I encourage you to make it your own, play with the variations, and most importantly, share them. There’s nothing quite like the smile on someone’s face when they bite into a candy bar made by you. I’d love to hear how your bars turn out—tag me on social media or leave a comment below.
Happy candy making
Homemade Snickers Bars
Equipment
- 8×8 inch baking pan
- Parchment paper
- Medium saucepan
- Heatproof bowl for double boiler
- Offset spatula
- Sharp chef’s knife
Ingredients
- 1/2 cup Unsalted butter softened, divided
- 1 cup Creamy peanut butter divided, not natural/oily style
- 1 1/4 cups Powdered sugar sifted
- 7 oz Marshmallow fluff or 16 large marshmallows
- 1 tsp Pure vanilla extract
- 14 oz Soft caramels like Kraft, unwrapped
- 3 tbsp Heavy cream or whole milk
- 1 1/2 cups Dry roasted peanuts lightly salted, coarsely chopped
- 2 cups Milk chocolate chips high quality for best tempering
Instructions
- Line an 8×8 inch baking pan with parchment paper, leaving overhang on two sides for easy removal. In a medium saucepan over low heat, melt 1/4 cup butter and 1/4 cup peanut butter together, stirring constantly until smooth. Remove from heat and whisk in the powdered sugar, marshmallow fluff, and vanilla until a thick, cohesive nougat forms. Press this mixture firmly and evenly into the bottom of your prepared pan. Chill for 20 minutes.
- In the same saucepan (no need to wash), combine the unwrapped caramels and heavy cream. Cook over medium-low heat, stirring frequently, until the caramels are completely melted and the mixture is smooth, about 5-7 minutes. Immediately pour the warm caramel over the chilled nougat layer, spreading it to the edges. Sprinkle the chopped peanuts evenly over the caramel, gently pressing them in. Return the pan to the refrigerator to set for 30 minutes.
- Create a double boiler by placing a heatproof bowl over a pot of simmering water (the bowl should not touch the water). Add the chocolate chips and remaining 1/4 cup butter. Stir gently and constantly until the chocolate is about 90% melted, then remove from the heat and continue stirring until completely smooth and glossy. This prevents the chocolate from seizing.
- Carefully pour the melted chocolate over the peanut layer, using an offset spatula to spread it into a smooth, even coating that reaches all edges. Tap the pan gently on the counter to release any air bubbles. Allow the chocolate to set at cool room temperature for 10 minutes before transferring to the refrigerator to chill completely for at least 2 hours, or until firm.
- Using the parchment paper overhang, lift the entire slab out of the pan and place it on a cutting board. Warm a large, sharp knife under hot water, dry it, and slice the slab into 16 bars (4×4 grid). For clean cuts, wipe the knife clean and re-warm between slices. Serve immediately or store.