
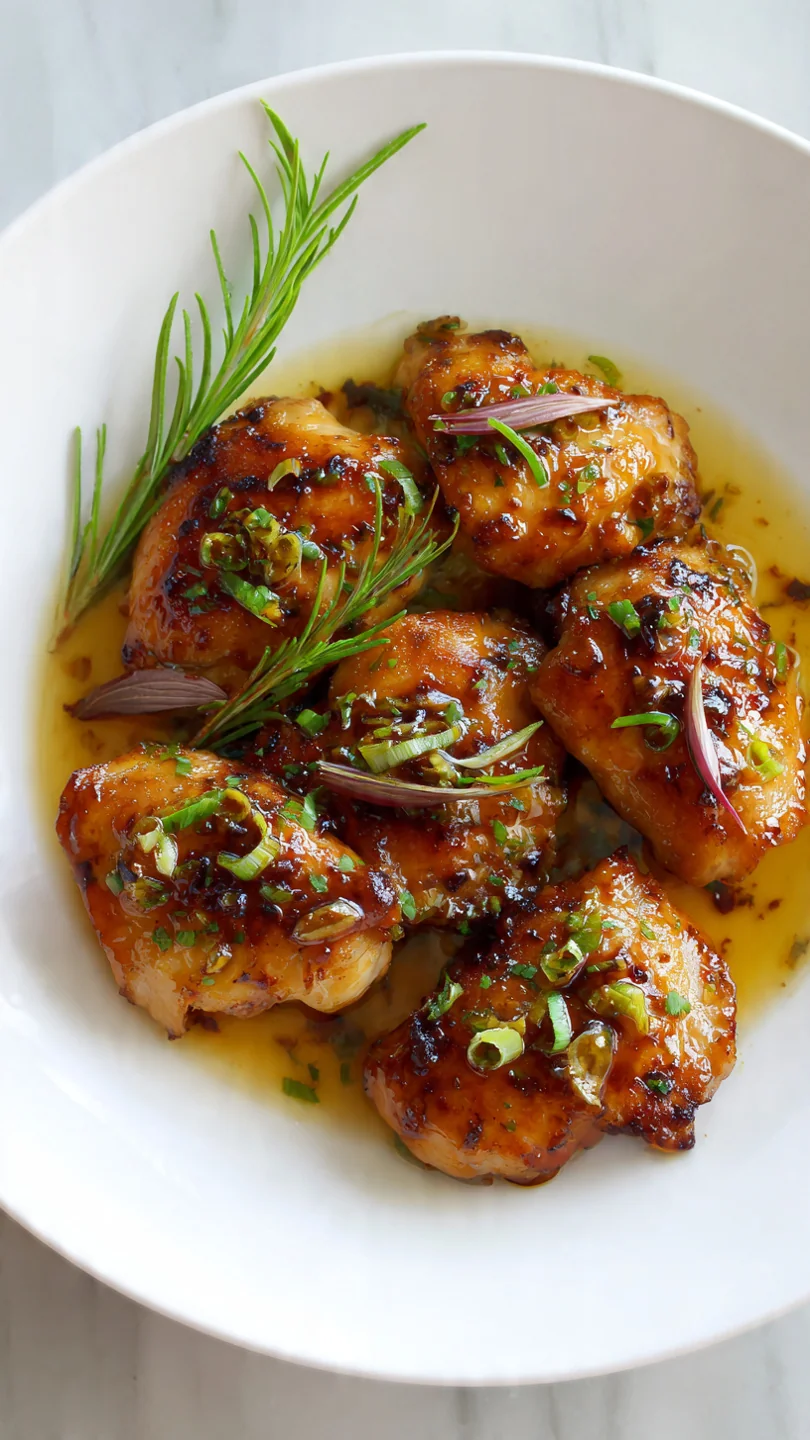
There’s a certain magic that happens when honey, garlic, and soy sauce meet over heat. It’s a transformation from simple pantry staples into a glossy, deeply flavorful sauce that can elevate humble chicken into a weeknight superstar. As a chef, I’ve made countless versions of this classic, but this particular recipe is the result of meticulous testing to find the perfect balance—sweet without being cloying, savory without being too salty, and sticky in the best possible way.
You can expect tender, juicy chicken pieces enveloped in a rich, caramel-like glaze that clings perfectly to every bite. It’s the kind of dish that makes you look forward to dinner all afternoon.
This honey garlic chicken checks every box for a perfect home-cooked meal. Here’s what makes it a keeper:
- One-pan convenience: Everything cooks in a single skillet, meaning maximum flavor with minimal cleanup.
- Big flavor, fast: From start to finish in 30 minutes, this recipe delivers a complex, restaurant-quality taste that belies its simple process.
- Kid-approved crowd-pleaser: The sweet and savory profile is a universal hit, making it a reliable choice for family dinners.
- Diet-flexible: Easily adaptable to be gluten-free or lower in sodium with simple swaps, without sacrificing taste.
- Meal prep friendly: The sauce holds up beautifully, and the chicken reheats wonderfully for lunches throughout the week.
- Restaurant quality at home: Mastering this sauce means you’ll never need to order takeout for that sticky honey garlic craving again.
Ingredients You’ll Need
- Let’s gather our ingredients—this is where simple pantry staples create magic together. The beauty of this recipe lies in the synergy of a few key components. For the chicken, I insist on boneless, skinless chicken breasts or thighs. Thighs will yield a slightly richer, more forgiving result, while breasts are leaner. The cornstarch plays a dual role: coating the chicken for a perfect sear and thickening the sauce to a glossy finish. For the sauce, the quality of your honey matters; a good raw honey adds floral notes, but any pure honey works. Use low-sodium soy sauce to control the salt level, and don’t skip the rice vinegar—its mild acidity is crucial for cutting through the sweetness. Fresh garlic is non-negotiable, and a touch of sesame oil at the end adds an authentic, aromatic finish.
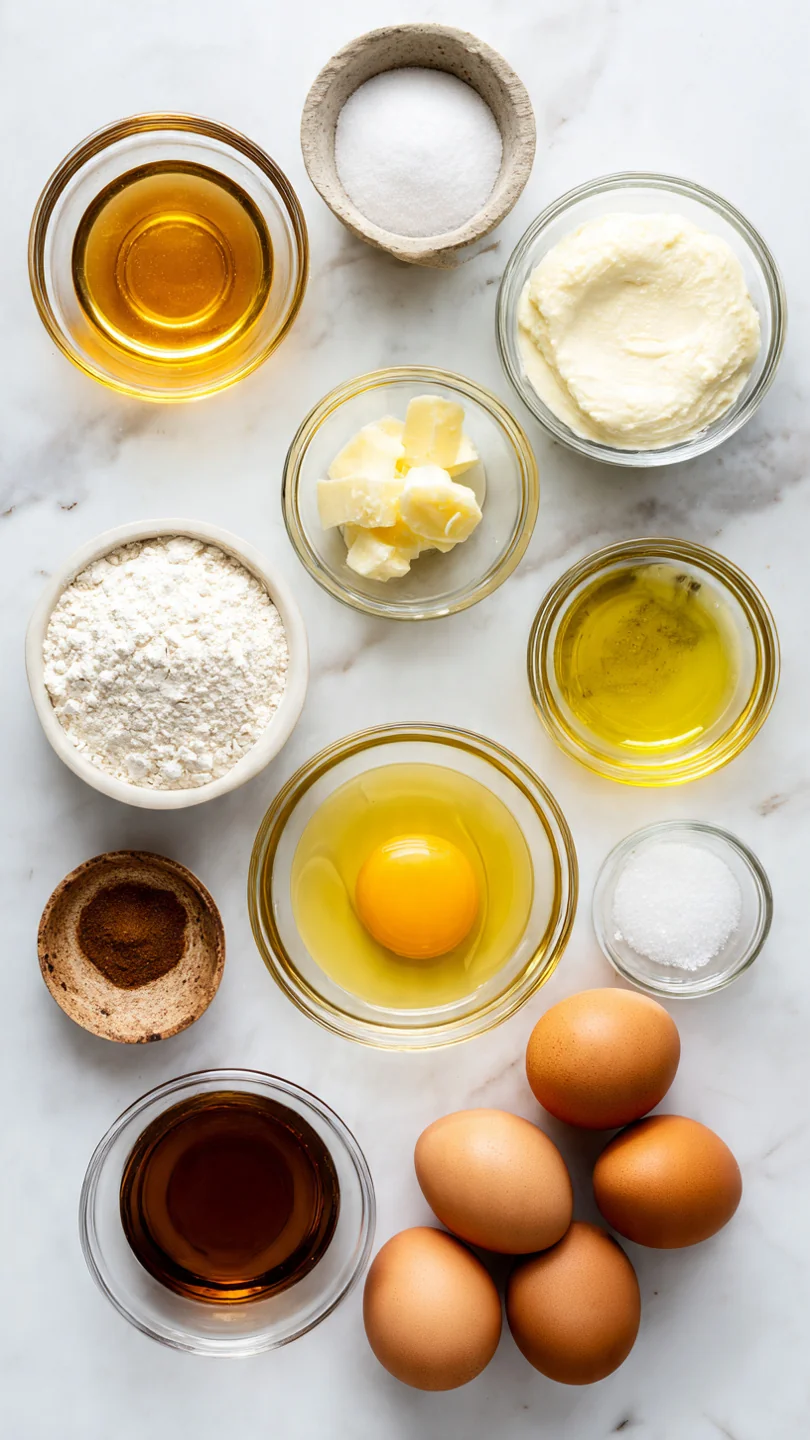
Note: You’ll find the complete list of ingredients, along with their exact measurements, in the printable recipe card at the bottom of this post.
Kitchen Equipment Needed
You don’t need any fancy gadgets for this recipe. A large skillet (10-12 inches) is the workhorse—non-stick is great for easy cleanup, but a well-seasoned cast iron or stainless steel skillet will give you an even better sear. A sharp chef’s knife makes quick work of cubing the chicken and mincing the garlic.
You’ll also need basic measuring cups and spoons, a whisk for emulsifying the sauce, and a couple of mixing bowls. Having a plate ready to hold the seared chicken keeps the workflow smooth. That’s truly all you need to create this impressive dish.
How to Make Honey Garlic Chicken Recipe
Step 1: Prep and Coat the Chicken
Begin by ensuring your chicken is completely dry; pat it firmly with paper towels. Any surface moisture will steam the chicken instead of letting it sear properly. Cube it into even, one-inch pieces for quick, uniform cooking.
In a bowl, toss the dry chicken with the cornstarch and black pepper until each piece has a light, even coating. This isn’t just for thickening—the cornstarch creates a delicate crust that browns beautifully and gives the sticky sauce something to grip onto. Believe me, this small step makes a monumental difference in the final texture.
Step 2: Sear to Golden Perfection
Heat your oil in the skillet over medium-high heat until it shimmers—this indicates it’s hot enough to sear, not steam. Add the chicken in a single layer, giving each piece space. If you crowd the pan, the temperature drops and the chicken will release liquid, leading to a pale, boiled texture.
Let it cook undisturbed for 3-4 minutes to develop a golden-brown crust before flipping. You should hear a steady sizzle. Once cooked through, transfer it to a plate.
This initial sear builds the flavorful “fond” on the pan bottom, which is the secret ingredient for your sauce.
Step 3: Build the Aromatic Base
With the chicken resting, reduce the heat to medium. In the same skillet, you’ll see those delicious browned bits. Add the minced garlic (and ginger if using) right into the residual oil.
Sauté for just 30 to 60 seconds, stirring constantly. The moment you smell that warm, nutty aroma, it’s done. Garlic burns in a heartbeat and turns bitter, so vigilance is key.
This quick cook unlocks its flavor without the harshness of raw garlic.
Step 4: Create the Glossy Sauce
Now for the fun part: building the sauce. Pour the honey, soy sauce, and rice vinegar directly into the skillet. Use your whisk to stir everything together, actively scraping up all those flavorful browned bits from the sear—this is called deglazing, and it’s where deep flavor lives.
Let the mixture come to a simmer. In a separate small bowl, make a slurry by whisking the remaining cornstarch with cold water until smooth. Tip from me: always use cold liquid for a slurry to prevent lumps.
Slowly stream this into the simmering sauce while whisking. In 2-3 minutes, you’ll witness the transformation into a thick, syrupy, and glossy glaze.
Step 5: Combine, Glaze, and Serve
Return the seared chicken and any juices on the plate back to the skillet. Gently toss and fold the chicken in the sauce, ensuring every nook and cranny is coated. Let it simmer together for just a final minute or two.
This allows the chicken to reheat and the flavors to marry perfectly. Remove the skillet from the heat and stir in the sesame oil—its nutty fragrance is heat-sensitive, so adding it off the heat preserves its character. Step back and admire that gorgeous, sticky coating before serving immediately.
A few chef-driven insights will ensure your honey garlic chicken is flawless every single time.
- Chicken texture is key: For the juiciest results, avoid overcooking. The chicken is done when it reaches 165°F internally and the juices run clear. It will continue to cook slightly when returned to the hot sauce.
- Control your heat: When reducing the sauce, maintain a steady simmer, not a rolling boil. A boil can cause the sugars in the honey to scorch or the sauce to over-thicken and become gummy.
- The slurry secret: Always mix cornstarch with a cold liquid before adding it to a hot sauce. Adding cornstarch directly to heat causes it to clump instantly. A smooth slurry guarantees a silky, lump-free glaze.
- Sauce consistency: Remember, the sauce will thicken further as it cools on the plate. If it seems a bit too thick straight from the pan, don’t hesitate to thin it with a tablespoon or two of water or chicken broth.
- Don’t skip the rest: Letting the seared chicken rest on the plate for a few minutes before saucing allows the juices to redistribute, ensuring every bite is moist.
Recipe Variations & Customizations
- This recipe is a fantastic canvas for your own flavor explorations. Here are some tested variations that work beautifully.
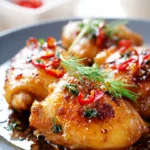
- Spicy Honey Garlic Chicken: Add 1-2 teaspoons of sriracha or gochujang to the sauce mixture, or garnish with sliced fresh chili peppers.
- Lemon Ginger Twist: Add the zest of one lemon and an extra teaspoon of grated ginger to the sauce for a bright, zingy profile.
- Crispy Version: For extra crunch, coat the cornstarch-dusted chicken in a beaten egg, then in panko breadcrumbs before pan-frying. Toss in the sauce just before serving to maintain crunch.
- Vegetarian Adaptation: Substitute the chicken with extra-firm tofu (pressed and cubed) or large cauliflower florets. Follow the same coating and searing steps.
- Low-Sugar Option: Replace half of the honey with a sugar-free maple syrup or a monk fruit sweetener blend designed for cooking. The texture of the sauce will be slightly thinner.
- Extra Veggie-Packed: After searing the chicken, sauté a mix of bell peppers, onions, and broccoli florets in the skillet before making the sauce. Add them back with the chicken at the end.
What to Serve With This Recipe
This sticky, savory chicken is incredibly versatile. For a classic pairing, serve it over a bed of steamed jasmine or white rice—the plain rice is the perfect vehicle for soaking up the extra sauce. Cauliflower rice makes a fantastic low-carb alternative.
For vegetable sides, simple steamed broccoli, sautéed snap peas, or roasted asparagus complement the rich flavors without competing. A quick cucumber salad dressed with rice vinegar and sesame seeds adds a refreshing, crunchy contrast. If you’re serving a crowd, it pairs wonderfully with other Asian-inspired dishes like vegetable spring rolls or a gingery cabbage slaw.
For beverages, a crisp lager, chilled riesling, or even sparkling water with lime all work beautifully.
Storage & Make-Ahead Instructions
- Proper storage ensures you can enjoy this dish beyond the first meal.
- Refrigerator Storage: Allow the chicken to cool completely, then transfer it to an airtight container. It will keep well in the refrigerator for 3-4 days.
- Freezer Instructions: This dish freezes reasonably well. Portion it into freezer-safe containers or bags, leaving a little headspace. It can be frozen for up to 2 months. Thaw overnight in the refrigerator before reheating.
- Best Reheating Method: Reheat gently in a skillet over medium-low heat, adding a splash of water or broth to loosen the sauce. You can also reheat in the microwave in 30-second intervals, stirring between each.
- Make-Ahead Strategy: You can cube and coat the chicken in cornstarch up to a day in advance, storing it covered in the fridge. The sauce ingredients can be measured and mixed (minus the cornstarch slurry) and kept in a jar in the fridge. This cuts your active cooking time to just 15 minutes.
Frequently Asked Questions
Q: Can I use chicken thighs instead of breasts?
Absolutely. Boneless, skinless thighs are my personal preference for this recipe. They are more forgiving and stay juicier, with a richer flavor.
The cooking time may be slightly longer—ensure they reach 165°F internally.
Q: My sauce didn’t thicken. What happened?
The most common reason is that the sauce wasn’t at a simmer when the cornstarch slurry was added, or the slurry wasn’t mixed well. Cornstarch needs to reach a simmer to activate its thickening power. If this happens, mix another tablespoon of cornstarch with cold water and whisk it into the simmering sauce.
Q: How can I make this gluten-free?
It’s very simple! Just ensure you use gluten-free tamari or coconut aminos instead of regular soy sauce. Double-check that your cornstarch is certified gluten-free, as some brands may be processed in facilities with wheat.
Q: Is there a substitute for honey?
You can use pure maple syrup, agave nectar, or even brown sugar. Note that the flavor profile will change, and the sauce may not achieve the same sticky, glossy quality. Brown sugar will create a darker, more caramel-like sauce.
Q: Can I bake this instead of cooking it on the stove?
Yes, for a hands-off approach. Coat the chicken as directed, then spread it on a parchment-lined baking sheet. Bake at 400°F for 15-20 minutes until cooked.
Meanwhile, make the sauce in a saucepan, thicken it with the slurry, and toss the baked chicken in it.
Q: The garlic burned while I was sautéing it. Can I save the sauce?
If the garlic has turned dark brown and tastes bitter, it’s best to start that step over. Remove the skillet from heat, carefully wipe it out, add a little fresh oil, and sauté new garlic. Burnt garlic will impart a bitter flavor to the entire sauce.
Q: How do I know when the chicken is cooked through?
The most reliable method is to use an instant-read meat thermometer. Insert it into the thickest piece of chicken; it should read 165°F. Visually, the meat should be opaque all the way through, and the juices should run clear.
Final Thoughts
This honey garlic chicken recipe embodies what I love most about cooking: transforming a handful of accessible ingredients into something truly special with just a bit of know-how. The technique of coating, searing, and building a sauce in the same pan is a fundamental skill that will serve you well in countless other dishes. I’ve made this for busy weeknights, for casual dinner parties, and even for my own family’s comfort food cravings—it never fails to satisfy.
The balance of sweet honey, pungent garlic, and savory soy is timeless. I encourage you to make it your own with the variations provided. Once you see how simple it is to create this sticky, glossy masterpiece at home, you might just find it becomes a regular in your dinner rotation.
Give it a try this week, and don’t forget to come back and let me know how it turned out!
Honey Garlic Chicken
Equipment
- Large skillet or non-stick pan (10-12 inch)
- Sharp chef’s knife and cutting board
- Measuring cups and spoons
- Whisk and mixing bowls
Ingredients
- 1.5 lbs boneless, skinless chicken breasts or thighs, cut into 1-inch cubes
- 2 tbsp cornstarch plus 1 tbsp for sauce
- 0.5 tsp black pepper freshly ground
- 2 tbsp neutral oil like avocado or vegetable oil
- 6 cloves garlic minced
- 0.5 cup honey preferably raw or local
- 0.33 cup low-sodium soy sauce or tamari for gluten-free
- 2 tbsp rice vinegar or apple cider vinegar
- 1 tsp sesame oil for finishing
- 1 tsp fresh ginger grated (optional but recommended)
- 1 tsp red pepper flakes optional, for heat
Instructions
- Pat the cubed chicken completely dry with paper towels. In a medium bowl, toss the chicken with 2 tablespoons of cornstarch and the black pepper until evenly coated. This step is non-negotiable—it creates a light crust that helps the sauce cling beautifully.
- Heat the neutral oil in a large skillet or non-stick pan over medium-high heat. Once the oil shimmers, add the chicken in a single layer, working in batches if needed to avoid crowding. Sear for 3-4 minutes per side until golden brown and cooked through. Transfer to a plate. Trust me, this initial sear builds the flavor foundation.
- Reduce the heat to medium. In the same skillet, add the minced garlic (and ginger, if using) and sauté for just 30-60 seconds until fragrant. Be careful not to burn it. Pour in the honey, soy sauce, and rice vinegar, whisking to combine and scrape up any browned bits from the pan bottom.
- In a small bowl, whisk the remaining 1 tablespoon of cornstarch with 2 tablespoons of cold water to create a slurry. While the sauce in the skillet is simmering, slowly whisk in the cornstarch slurry. Cook for 2-3 minutes, stirring constantly, until the sauce thickens into a glossy, syrupy consistency.
- Return the cooked chicken and any accumulated juices to the skillet. Toss gently to coat every piece in the sticky sauce. Let it simmer together for 1-2 minutes so the flavors meld. Remove from heat and stir in the sesame oil. Step back and admire that gorgeous, glossy glaze before serving.