
Let me tell you, the first time I whipped up a batch of Italian Grinder Sliders, I was a bit of a hot mess in the kitchen. I’d just stumbled across the idea while scrolling through food blogs late at night (you know, the usual rabbit hole), and I thought, “Hey, I can totally make these for game night!” My family went nuts over these little sandwiches, and now, Italian Grinder Sliders are a staple in our house for any casual get-together or lazy weekend.
I mean, who doesn’t love a bite-sized version of a classic Italian sub packed with all the meats, cheese, and zesty flavors? I’ve made Italian Grinder Sliders so many times since that first chaotic attempt, tweaking the recipe to get it just right. Stick with me, and I’ll walk you through how to make these crowd-pleasers at home.
Honestly, there’s something magical about pulling a tray of Italian Grinder Sliders out of the oven and watching everyone’s eyes light up. Let’s dive into why these are gonna become your go-to, too!
Why You’ll Love This Recipe
I’ve found that Italian Grinder Sliders are the ultimate party food, hands down. They’re super easy to throw together, even if you’re not a pro in the kitchen, and they pack a flavor punch that’ll have folks coming back for seconds (or thirds, no judgment). In my kitchen, these sliders are a lifesaver when I need something quick but impressive.
Plus, they’re customizable, which I adore—swap out ingredients based on what you’ve got or who’s picky at the table. Trust me, once you make Italian Grinder Sliders, you’ll see why they’re a hit every single time. They just bring people together!
Ingredients List
Alright, let’s talk about what you’ll need to make Italian Grinder Sliders that taste like they came straight from a deli. I prefer using high-quality meats and cheeses for that authentic vibe, but honestly, use what you can get your hands on. I usually buy my deli meats from a local Italian market when I can—it makes a difference, I swear!
For the Sliders
My friend at homemade italian bread recipe has a similar recipe that you might enjoy.
- 12 slider buns, soft and slightly sweet for balance
- 1/2 pound (225g) salami, thinly sliced for that classic kick
- 1/2 pound (225g) pepperoni, thinly sliced for a spicy bite
- 1/2 pound (225g) ham, deli-style for a milder flavor
- 12 slices provolone cheese, for that melty goodness
- 1 cup (240ml) Italian dressing, store-bought or homemade for drizzling
- 1 small red onion, thinly sliced for a sharp crunch
- 1 cup (100g) shredded lettuce, for a fresh touch
- 2 medium tomatoes, thinly sliced for juiciness
For the Butter Topping
- 1/2 cup (115g) unsalted butter, melted for richness
- 1 teaspoon garlic powder, for a savory punch
- 1 teaspoon Italian seasoning, to tie in those classic flavors
These ingredients come together to make Italian Grinder Sliders that are just bursting with flavor. If I’m feeling fancy, I’ll even grab some banana peppers or giardiniera for an extra zing. You’ve got everything you need to build these beauties, so let’s talk variations next!
Variations
I love how versatile Italian Grinder Sliders can be, and I’ve played around with so many twists over the years. Whether you’re catering to dietary needs or just wanna switch things up, there’s a version for everyone. Here are some of my favorite spins on these sliders—trust me, I’ve tried most of these myself!
- Spicy Kick: Toss in some sliced jalapeños or a drizzle of hot sauce if you’re a heat lover like me. I tried this once for a Super Bowl party, and whew, it was a game-changer.
- Vegetarian Vibes: Swap the meats for grilled veggies like zucchini, eggplant, and bell peppers. I made this for a friend who doesn’t eat meat, and she raved about it.
- Turkey Twist: Use turkey pepperoni and turkey ham for a lighter take. My kids always ask for this version when they’re “watching their snacks.”
- Cheesy Overload: Add a layer of mozzarella along with provolone for extra gooeyness. I’m a cheese fiend, so this is my go-to.
- Pesto Power: Spread a thin layer of pesto on the buns before assembling. I discovered this by accident when I had leftover pesto, and now I’m hooked.
- BBQ Fusion: Mix in a little BBQ sauce with the Italian dressing for a smoky twist. It’s weird, I know, but it works with Italian Grinder Sliders!
- Breakfast Style: Throw in some scrambled eggs and bacon instead of traditional meats. I made this for brunch once, and my husband hasn’t stopped talking about it.
Honestly, the possibilities with Italian Grinder Sliders are endless. Got a wild idea? Give it a shot and let me know how it turns out!
Servings and Timing
Let’s break down the nitty-gritty of making Italian Grinder Sliders so you can plan accordingly. In my experience, these don’t take long at all, which is why I love them for last-minute gatherings. Here’s how the timing usually shakes out for me.
- Prep Time: 15 minutes
- Cook Time: 15 minutes
- Total Time: 30 minutes
- Servings: 12 sliders (perfect for 6-8 hungry folks)
I’ve found that whipping up Italian Grinder Sliders is a breeze if you’ve got everything prepped ahead. Now, let’s get into the step-by-step magic!
Step-by-Step Instructions
I’m gonna walk you through how I make Italian Grinder Sliders, step by step, with all my little tricks thrown in. I’ve done this enough times to know where you might stumble, so let’s keep it real and easy. Grab your apron, and let’s get started!
Step 1: Preheat and Prep
First things first, crank your oven to 350°F (175°C). While it’s heating up, slice your slider buns in half horizontally and lay the bottom halves in a 9×13 baking dish. I like to line the dish with parchment paper for easier cleanup—learned that one after a sticky mess with Italian Grinder Sliders a while back!
Step 2: Layer the Meats
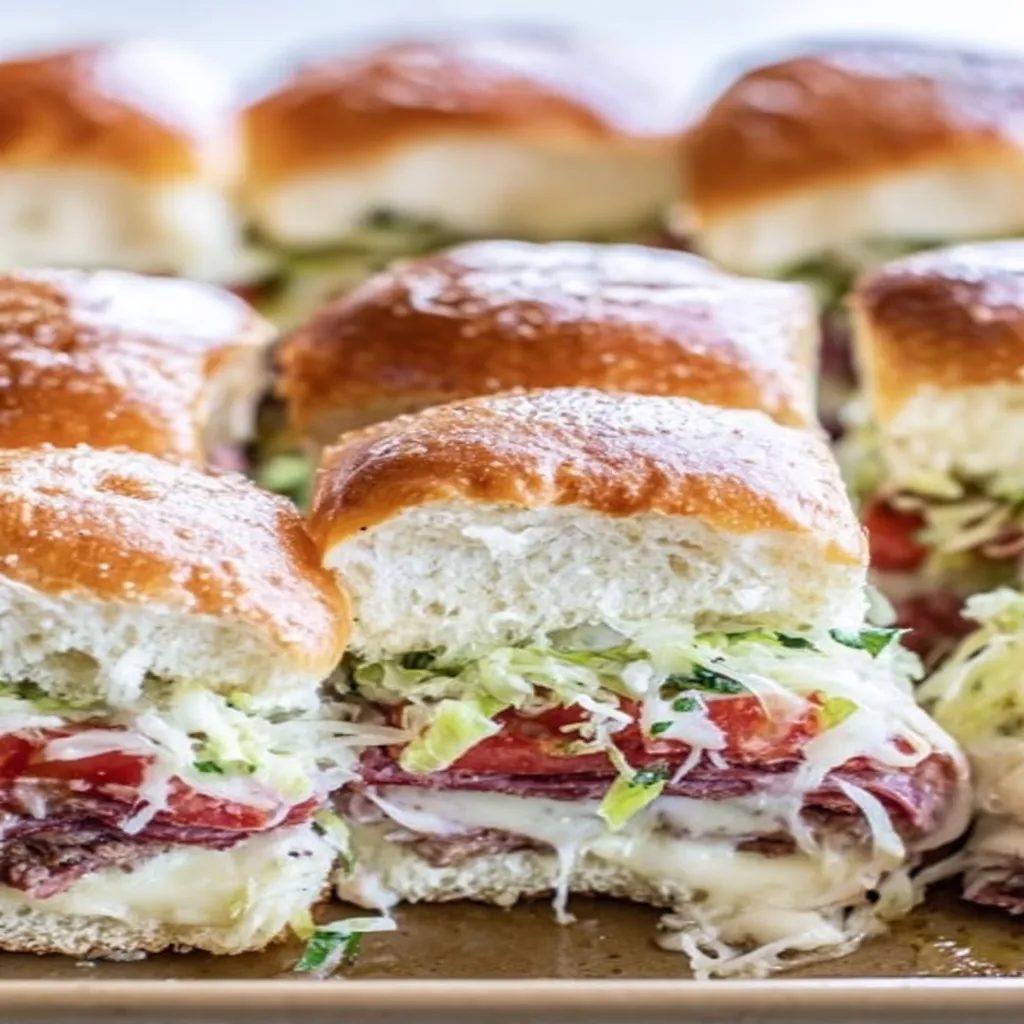
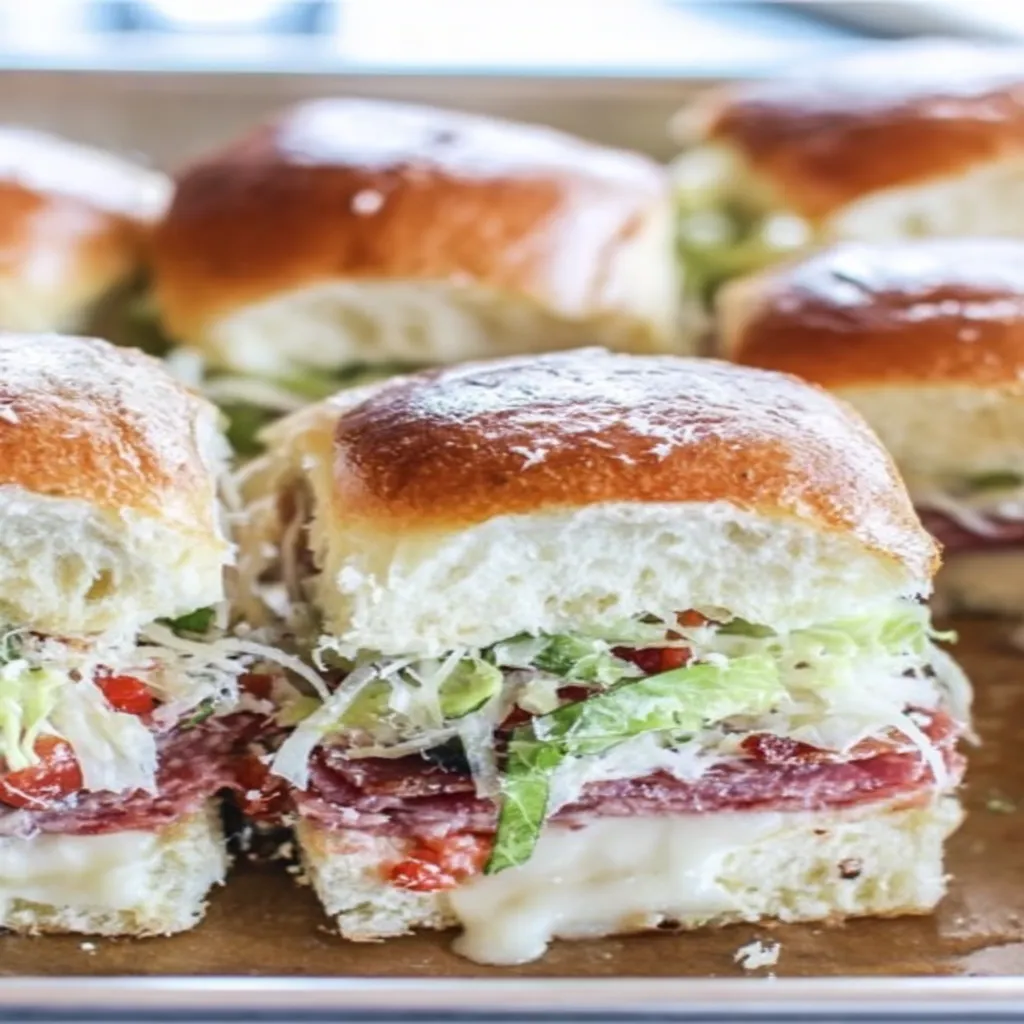
Now, start layering on the flavor. I usually go ham first, then salami, and pepperoni on top—spread them evenly so every bite’s got a bit of everything. This is where Italian Grinder Sliders start looking like a deli dream, and I can’t help but sneak a piece of pepperoni while I’m at it.
Step 3: Add Cheese and Toppings
Lay down those provolone slices next, making sure they cover the meats completely. Then, sprinkle on the shredded lettuce, tomato slices, and red onion for that classic grinder feel. Sometimes, I’ll drizzle a little Italian dressing right here for extra oomph in my Italian Grinder Sliders.
Step 4: Top and Brush
I was inspired by creamy italian dressing when creating this recipe.
Pop the top halves of the buns back on. Mix your melted butter with garlic powder and Italian seasoning, then brush it generously over the tops. This step makes Italian Grinder Sliders smell downright irresistible while they bake, trust me.
Step 5: Bake to Perfection
Cover the dish with foil and bake for about 10 minutes, then uncover and bake another 5 minutes until the tops are golden and the cheese is melty. I’ve overbaked Italian Grinder Sliders before, and they got a bit too crunchy, so keep an eye on ‘em.
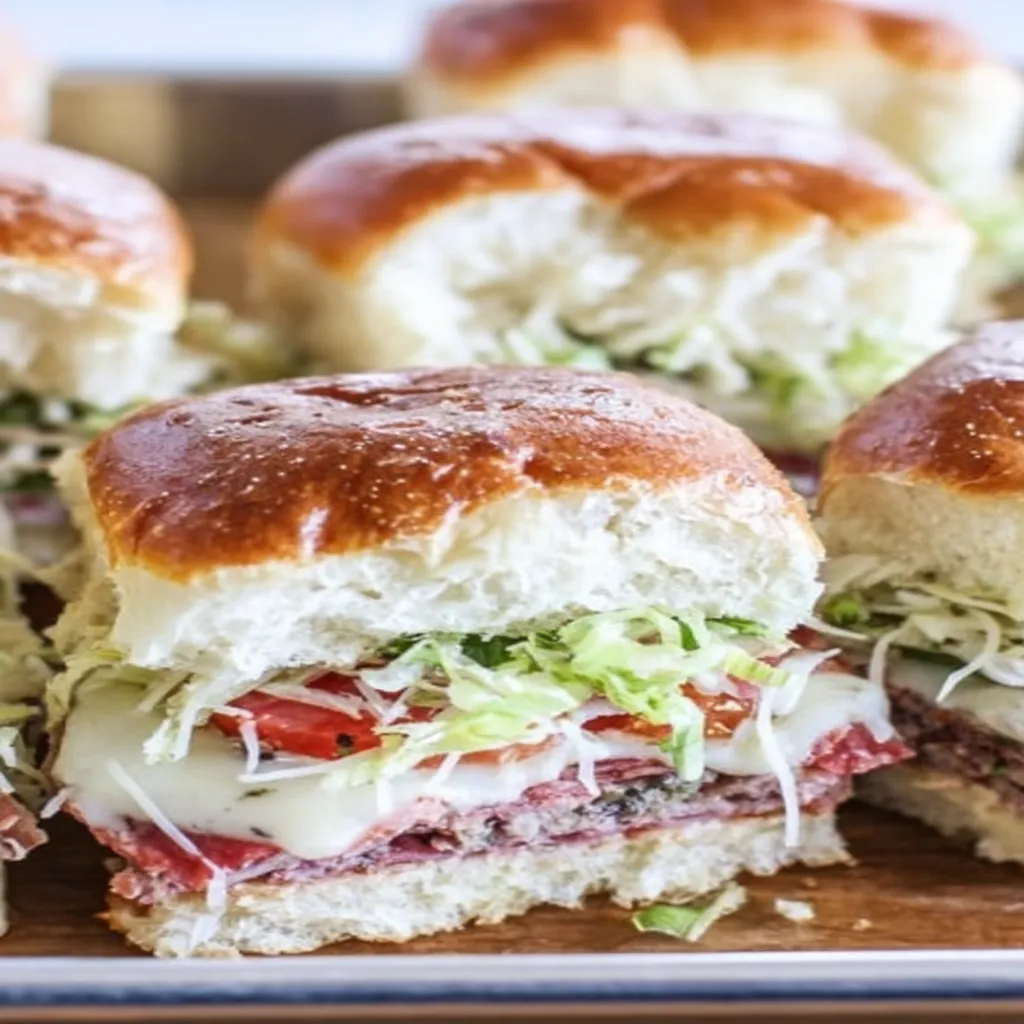
Step 6: Slice and Serve
Pull ‘em out, let ‘em cool for just a minute, then slice into individual sliders if they aren’t already separated. Serve with extra Italian dressing on the side for dipping—my family fights over who gets the last of it with these Italian Grinder Sliders! You’re all set to dig in.
Nutritional Information
You might also want to try italian chopped salad.
I’m no dietitian, but I think it’s helpful to know what’s in these Italian Grinder Sliders, especially if you’re keeping an eye on portions. These are definitely a treat, not an everyday meal, but they’re worth every bite in my book. Here’s the rough breakdown per slider.
- Calories: 350 per serving
- Fat: 20g
- Protein: 15g
- Carbohydrates: 25g
- Sodium: 900mg
These numbers can vary based on the brands you use for Italian Grinder Sliders, but it’s a decent guideline. Now, if you’re looking to lighten ‘em up, I’ve got some ideas!
Healthier Alternatives
I get it—not everyone wants the full-on indulgence of Italian Grinder Sliders every time. I’ve swapped things out plenty when I’m trying to keep things lighter, and they still taste amazing. Here are a few tweaks I’ve made to cut back without losing the vibe.
- Lean Meats: Use turkey versions of salami and pepperoni to drop the fat content. I’ve done this for Italian Grinder Sliders, and you barely notice the difference.
- Low-Fat Cheese: Go for reduced-fat provolone or even mozzarella. It still melts great in Italian Grinder Sliders.
- Whole Wheat Buns: Swap out regular slider buns for whole wheat ones. I find they add a nutty flavor to Italian Grinder Sliders that I kinda love.
- Less Butter: Cut the butter topping in half and use a light brush instead. It still works, I promise!
Serving Suggestions
I love serving Italian Grinder Sliders with a little extra something to round out the meal. They’re awesome on their own, but pairing them up just makes everything pop. Here are my go-to ideas for serving these bad boys.
- With a Side Salad: A simple Caesar or mixed green salad cuts through the richness. I toss one together almost every time I make Italian Grinder Sliders.
- Pickle Platter: Serve with dill pickles or pickled veggies for a tangy contrast. My friends always rave about this combo with Italian Grinder Sliders.
- Chips and Dip: Lay out some kettle chips and a creamy dip for casual snacking. It’s a staple at my house with Italian Grinder Sliders!
- Soup Pairing: A hot bowl of tomato basil soup is pure comfort alongside these. I did this last winter, and it was perfection.
Common Mistakes to Avoid
I’ve flubbed up Italian Grinder Sliders more times than I care to admit, so let me save you some headaches with a few pitfalls to dodge. Trust me on this—I learned the hard way! Here’s what to watch out for.
- Overloading Toppings: Too much lettuce or tomato can make Italian Grinder Sliders soggy. I did this once, and they fell apart. Keep it balanced!
- Skipping the Foil: Baking without foil can dry out the tops too fast. I forgot this step early on with Italian Grinder Sliders, ugh.
- Wrong Dressing Amount: Don’t drown them in Italian dressing—it’s a flavor boost, not a soup. I’ve overdone it and regretted it.
- Not Preheating: Popping Italian Grinder Sliders into a cold oven messes with the melt. Always preheat, y’all!
Storing Tips
Another great option is italian chopped salad.
I’ve found that Italian Grinder Sliders keep pretty well if you store ‘em right, which is great for leftovers. Here’s how I handle extras in my kitchen.
- Refrigerator: Store in an airtight container for up to 2 days. They’re still tasty cold or reheated with Italian Grinder Sliders!
- Freezer: Freeze unbaked, assembled sliders for up to a month. Just thaw and bake when ready for fresh Italian Grinder Sliders.
- Reheating: Pop in the oven at 300°F (150°C) for 10 minutes to refresh ‘em.
Frequently Asked Questions
For more recipes like this, check out italian stuffed cabbage rolls.
I get a ton of questions about making Italian Grinder Sliders, so let’s tackle the most common ones. I’ve got answers based on my own kitchen adventures!
Can I make Italian Grinder Sliders ahead of time?
Absolutely! Assemble them up to a day ahead, wrap tightly, and refrigerate. Just bake when you’re ready—super handy for parties.
What buns work best?
For more inspiration, I recommend checking out zesty italian cucumber salad.
I swear by soft Hawaiian rolls for Italian Grinder Sliders. They’ve got a slight sweetness that balances the savory meats so well.
Can I use different cheeses?
For sure, mix it up! I’ve used mozzarella or even cheddar in a pinch for Italian Grinder Sliders, and it’s still delish. For more inspiration, I recommend checking out pulled pork sliders in the instant pot.
Are these good for kids?
My kids love ‘em! Just go easy on spicy meats if they’re sensitive. Italian Grinder Sliders are a family win.
How do I prevent soggy sliders?
Don’t overdo the dressing or wet toppings. Layer strategically—meats on bottom, veggies sparse.
Can I grill these instead?
I’ve never tried, but I think a grill pan could work for a smoky twist. Let me know if you experiment!
What’s a good substitute for salami?
Turkey or even mortadella works great if salami’s not your thing. I’ve swapped it plenty.
How many should I make for a crowd?
Plan on 2-3 per person. I always make extra ‘cause they disappear fast! For another great variation, check out homemade apple cider vinegar.
Conclusion
Alright, friends, I hope you’re as pumped as I am to whip up some Italian Grinder Sliders soon. They’re such a fun, flavorful way to feed a crowd or just spice up dinner, and I’ve loved sharing my tips with you. Give these Italian Grinder Sliders a try, and let me know how they turn out—I’m all ears for your twists on this recipe!