
Hey there, friends! I still remember the first time I whipped up a batch of Mongolian Chicken in my tiny apartment kitchen.
The sizzle of the chicken hitting the hot pan, that sweet and savory aroma filling the air—it was love at first bite. My family couldn’t get enough of this Mongolian Chicken, and honestly, it’s been a go-to ever since for busy weeknights when I need something quick, tasty, and satisfying.
I discovered Mongolian Chicken years ago while flipping through an old cookbook, and I’ve tweaked the recipe over time to make it my own. It’s got that perfect balance of sticky sauce and tender meat that just hits the spot. And let me tell ya, once you’ve tried this Mongolian Chicken, you’ll be hooked too!
If you’re looking for a dish that’s packed with flavor and doesn’t take all day to make, stick with me. I’m spilling all my secrets on how to nail Mongolian Chicken at home, from the best ingredients to little tricks I’ve learned along the way.
Why You’ll Love This Recipe
I’ve found that Mongolian Chicken is one of those recipes that just wins everyone over. In my kitchen, it’s a crowd-pleaser whether I’m cooking for picky eaters or foodie friends. The glossy, garlicky sauce coating every piece of chicken is pure magic, and it’s way easier to pull off than you might think!
Seriously, who doesn’t love a meal that’s ready in under 30 minutes? I’m all about that quick turnaround, especially on hectic days, and Mongolian Chicken delivers every time. It’s become my secret weapon for impressing guests without breaking a sweat, and I bet it’ll be yours too.
Ingredients List
Let’s talk ingredients for Mongolian Chicken, ‘cause getting the right stuff makes all the difference. I’ve made this dish a million times, and I’ve got my preferences down pat. I usually buy boneless, skinless chicken thighs for extra juiciness, but breasts work if you’re in a pinch.
Here’s everything you’ll need to make this Mongolian Chicken recipe for about 4 servings. I’m super specific with measurements ‘cause, well, I’ve messed up by eyeballing things before (oops!). Grab these and let’s get cooking:
For the Chicken
- 1.5 pounds (680g) boneless, skinless chicken thighs, cut into bite-sized pieces for quick cooking
- 2 tablespoons (30ml) vegetable oil, for that perfect sear
- 1/4 cup (30g) cornstarch, to coat the chicken for a crispy edge
For the Sauce
- 1/2 cup (120ml) low-sodium soy sauce, to keep it from getting too salty
- 1/3 cup (65g) brown sugar, for that sticky-sweet vibe I adore
- 2 tablespoons (30ml) hoisin sauce, for depth (don’t skip this!)
- 1 tablespoon (15ml) rice vinegar, for a tangy balance
- 2 teaspoons (10g) minced garlic, fresh is best in my book
- 1 teaspoon (5g) grated fresh ginger, for a little zing
- 1/4 cup (60ml) water, to thin the sauce just right
- 2 green onions, sliced for garnish (I love the pop of color)
- 1 teaspoon (5g) sesame seeds, optional but adds a nice crunch
I prefer using fresh garlic and ginger over the powdered stuff—it’s a game-changer for Mongolian Chicken. If you’re short on time, pre-minced works, but trust me, the fresh route is worth it when you can swing it.
Variations
One thing I love about Mongolian Chicken is how easy it is to switch things up based on what I’ve got in the fridge or who I’m feeding. I’ve experimented a ton over the years, and some of these twists have become family faves. Here are a few variations on Mongolian Chicken that I’ve tried and loved.
- Spicy Kick: Toss in 1 teaspoon of red pepper flakes or a drizzle of sriracha to the sauce for some heat. I tried this once for a game night, and my friends couldn’t stop raving!
- Veggie-Packed: Add sliced bell peppers or broccoli florets when you cook the chicken. It’s a great way to sneak in some greens, especially if my kids are being picky.
- Beef Swap: Use thinly sliced flank steak instead of chicken for a classic Mongolian twist. I did this for a date night, and it felt so fancy!
- Low-Sodium Option: Cut back on soy sauce and use a bit more water with a splash of coconut aminos. I’ve done this when watching salt intake, and it still tastes amazing.
- Sweet Boost: Mix in a tablespoon of honey to the sauce for extra sweetness. My little one always asks for this version of Mongolian Chicken.
- Nutty Crunch: Sprinkle in some chopped peanuts or cashews at the end for texture. This was a happy accident when I ran out of sesame seeds!
- Tofu Twist: Swap chicken for firm tofu cubes for a meatless take. I wasn’t sure at first, but it soaked up the Mongolian Chicken sauce like a dream.
I’m always tinkering with recipes, and these variations keep Mongolian Chicken fresh every time I make it. Got a fave twist of your own? Let me know!
Servings and Timing
Let’s break down the nitty-gritty of servings and timing for this Mongolian Chicken recipe. In my experience, this dish comes together fast, which is why I keep coming back to it on crazy days. Here’s what you can expect when you whip up a batch of Mongolian Chicken.
- Prep Time: 10 minutes
- Cook Time: 15 minutes
- Total Time: 25 minutes
- Servings: 4 portions
I’ve found it usually takes me just under half an hour from start to finish, even if I’m distracted by kids or a phone call. That’s the beauty of Mongolian Chicken—it’s quick without skimping on flavor!
Step-by-Step Instructions
Alright, let’s get into the how-to of making Mongolian Chicken. I’ve done this so many times I could probably cook it blindfolded (okay, maybe not, but you get the idea). I’m walking you through each step with my little hacks to make it foolproof.
Step 1: Prep the Chicken
First things first, cut your chicken into bite-sized chunks if it’s not already done. Toss those pieces in a bowl with cornstarch until they’re lightly coated. This is my secret to getting that slightly crispy texture on the outside of Mongolian Chicken—it’s like a mini shield against the hot pan.
Step 2: Make the Sauce
While the chicken sits, whisk together the soy sauce, brown sugar, hoisin, rice vinegar, garlic, ginger, and water in a small bowl. I like to taste it at this point and tweak if needed—sometimes I’ll add a pinch more sugar if I’m in a sweet mood. This sauce is the heart of Mongolian Chicken, so don’t rush it!
Step 3: Sear the Chicken
Heat up your veggie oil in a large skillet or wok over medium-high heat. Add the coated chicken in a single layer and let it cook for about 3 to 4 minutes per side until golden. I’ve learned not to overcrowd the pan—cook in batches if you gotta, or you’ll end up steaming instead of searing.
Step 4: Combine and Simmer
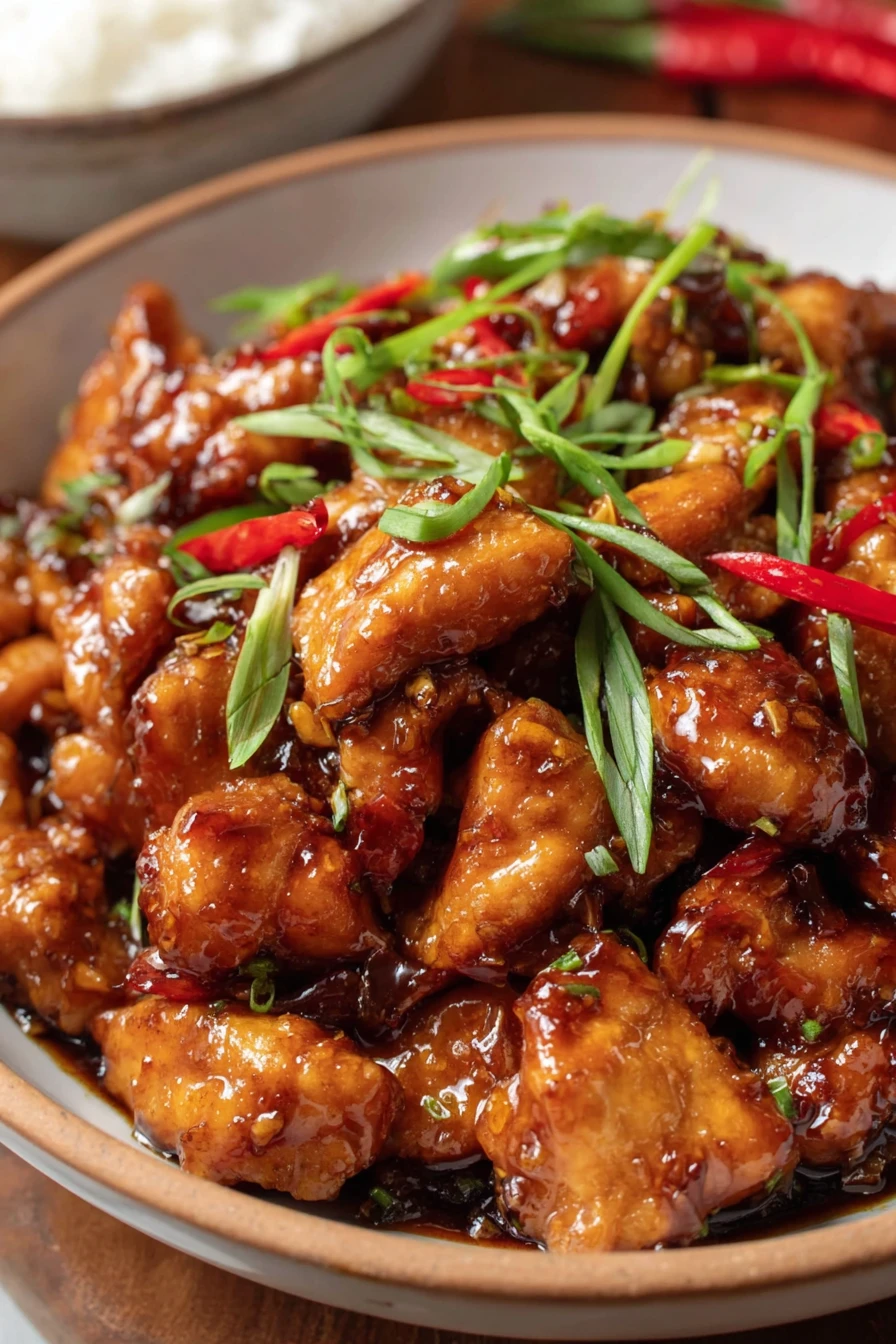
Once the chicken’s cooked through, pour that glorious sauce over it. Stir everything to coat and let it simmer for 2 to 3 minutes until the sauce thickens up nice and sticky. This is when my kitchen starts smelling like a takeout joint, and I’m living for it with every batch of Mongolian Chicken.
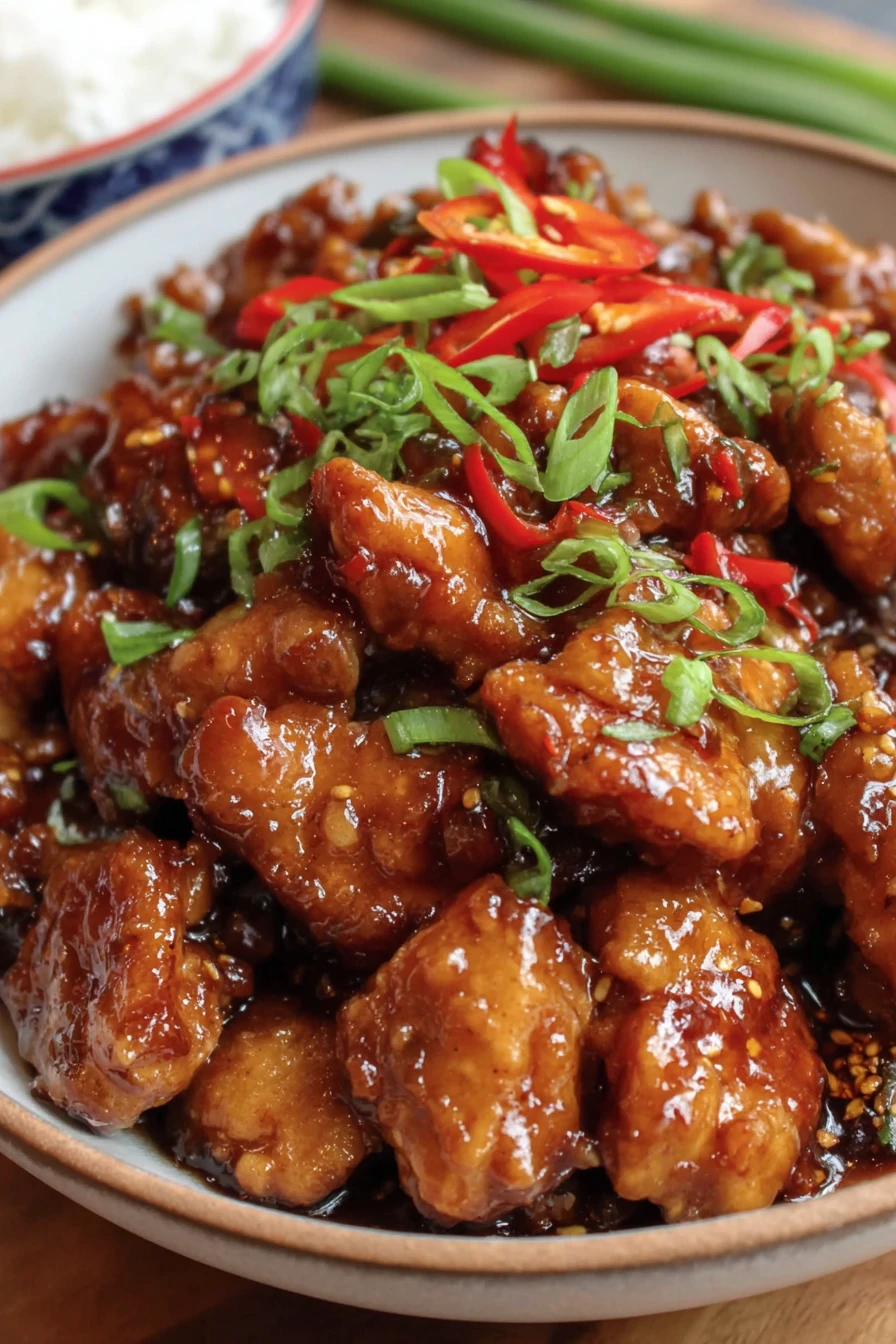
Step 5: Garnish and Serve
Turn off the heat and sprinkle on those green onions and sesame seeds if you’re using ‘em. I love this final touch—it makes Mongolian Chicken look as good as it tastes. Serve it hot, and watch it disappear!
Honestly, these steps are so straightforward, but they pack a punch. I still get excited every time I see that sauce bubble up in the pan.
Nutritional Information
I’m not gonna lie, Mongolian Chicken isn’t exactly diet food, but it’s worth every bite in my opinion. I’ve crunched the numbers for a rough idea of what you’re getting per serving (based on 4 portions). Here’s the nutritional breakdown for this tasty Mongolian Chicken dish:
- Calories: 380 per serving
- Fat: 14g
- Protein: 28g
- Carbohydrates: 35g
- Sodium: 900mg
I think it’s a solid balance for a hearty meal, especially if you pair it with some steamed veggies to round things out. Mongolian Chicken’s indulgence is part of its charm!
Healthier Alternatives
If you’re looking to lighten up Mongolian Chicken, I’ve got some swaps I’ve tried that still keep the flavor on point. I’m no health guru, but when I’m watching calories or sodium, these tweaks help me enjoy this dish guilt-free. Here are a few healthier spins on Mongolian Chicken.
- Lower Sodium: Use reduced-sodium soy sauce and skip the hoisin, adding a touch of molasses for depth instead. I’ve done this and barely noticed a difference.
- Less Sugar: Cut the brown sugar in half and toss in a teaspoon of stevia or honey. It’s still sweet enough for my taste in Mongolian Chicken.
- Leaner Protein: Swap thighs for chicken breast to trim some fat. I’ve tried it, and while it’s not as juicy, it works.
- Oil Reduction: Use just 1 tablespoon of oil or a non-stick pan with cooking spray. I’ve gone this route on lazy cleanup days!
These tweaks let me keep enjoying Mongolian Chicken without overdoing it. Play around and see what fits your vibe!
Serving Suggestions
I’ve served Mongolian Chicken a bunch of ways over the years, and it’s always a hit no matter how I plate it. Here are some of my go-to ideas for making this dish shine at the table. Trust me, these pairings take Mongolian Chicken to the next level!
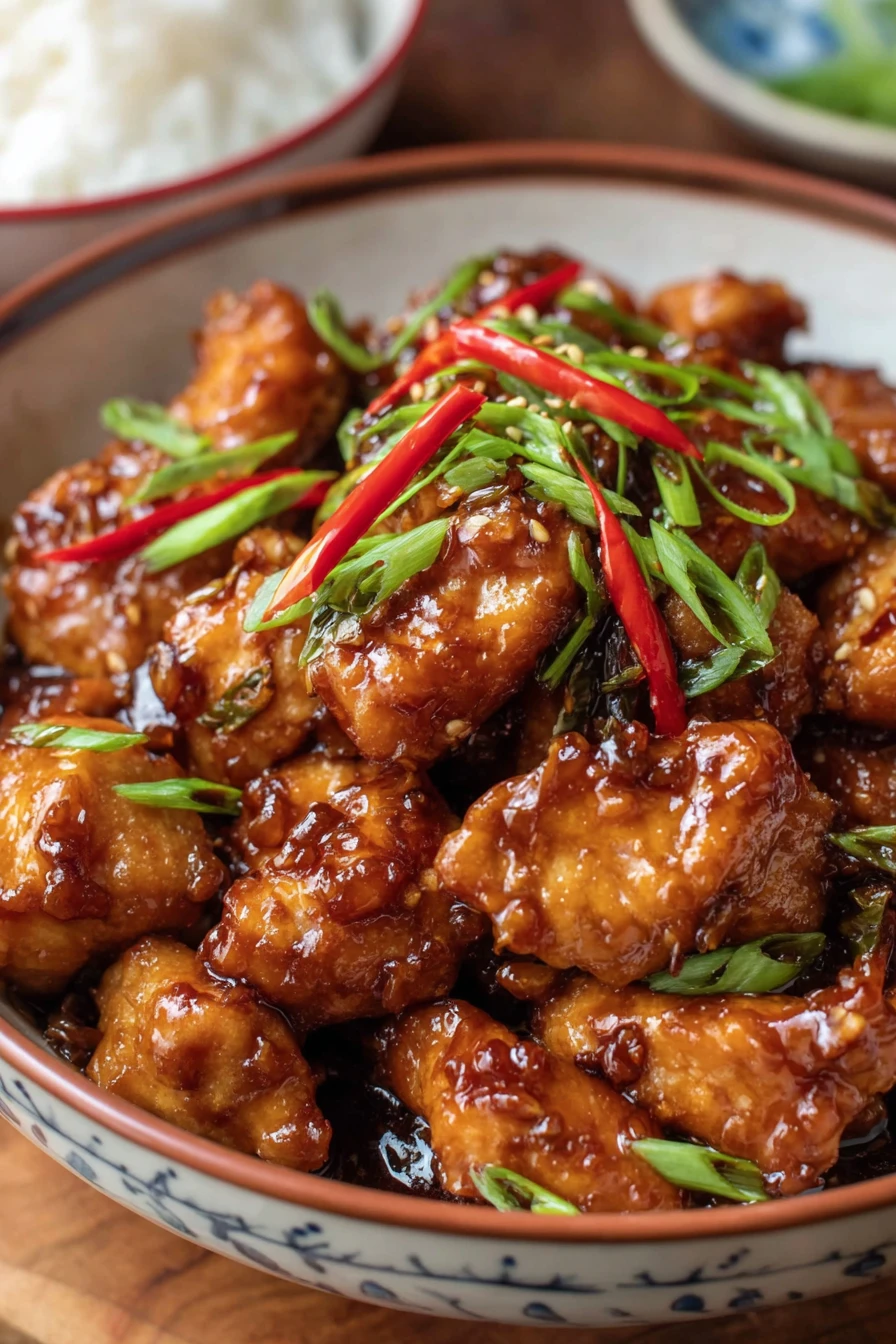
- Classic Combo: Spoon it over fluffy white rice to soak up that sauce. It’s my default, hands down.
- Veggie Side: Pair with steamed broccoli or snap peas for a fresh crunch. I love the balance!
- Noodle Night: Serve over lo mein noodles for a fun twist. I did this at my last dinner party, and everyone dug in.
- Low-Carb Option: Use cauliflower rice instead of regular rice. I wasn’t sold at first, but it grew on me with Mongolian Chicken.
How do you like to serve it? I’m always up for new ideas!
Common Mistakes to Avoid
I’ve flubbed Mongolian Chicken more times than I’d like to admit, so let me save you some grief with these common pitfalls. I learned the hard way, and I’m passing on the wisdom. Here are mistakes to dodge when making Mongolian Chicken.
- Overcrowding the Pan: Too much chicken at once means no crispy bits—just soggy meat. I’ve done this and regretted it.
- Skipping Cornstarch: Don’t skip coating the chicken; it’s key for texture. I forgot once, and it just wasn’t the same.
- Boiling the Sauce: Don’t crank the heat too high after adding sauce, or it’ll burn. Guilty as charged on this one!
- Wrong Cut of Meat: Don’t use huge chunks of chicken; they won’t cook evenly. I’ve messed up timing ‘cause of this.
Trust me on these—avoiding ‘em makes Mongolian Chicken so much better!
Storing Tips
Got leftovers of Mongolian Chicken? No problem! I’ve found these keep pretty well if you store ‘em right. Here’s how I handle extras of Mongolian Chicken so they’re just as tasty later.
- Refrigerator: Store in an airtight container for up to 3 days. I reheat mine on the stove with a splash of water.
- Freezer: Freeze in portion-sized bags for up to 2 months. I’ve thawed and eaten it weeks later with no issues.
- Reheating: Warm gently over low heat to avoid drying out the chicken. That sauce in Mongolian Chicken stays perfect this way!
Frequently Asked Questions
I get a lot of questions about Mongolian Chicken, so I’ve rounded up the most common ones I hear. Here are my answers, straight from my kitchen to yours!
Can I make Mongolian Chicken ahead of time?
Yep, you totally can! I often prep the sauce a day early and store it in the fridge. Just cook the chicken fresh when you’re ready to eat for the best texture.
Is Mongolian Chicken spicy?
Not by default, but you can make it fiery with some chili flakes or hot sauce. I usually keep it mild for my family.
Can I use chicken breast instead of thighs?
Sure thing, though I find breasts dry out faster. Just don’t overcook ‘em, and you’re golden.
What if I don’t have hoisin sauce?
No worries—mix a bit of soy sauce with a teaspoon of molasses or honey. It’s not perfect, but I’ve made do with this hack.
Can I double the recipe?
Absolutely, I do it all the time for bigger crowds. Just cook the chicken in batches so the pan doesn’t get too crowded.
Is this authentic Mongolian Chicken?
Honestly, it’s more of an American-Chinese take, not truly Mongolian. But hey, it’s delicious either way in my book!
Can I make it gluten-free?
For sure, swap soy sauce for tamari and double-check your hoisin. I’ve done this for a gluten-free friend, and it worked great.
What’s the best pan to use?
I swear by a wok or large skillet for even heat. Non-stick helps with cleanup if you’ve got it!
Conclusion
Well, there you have it—everything I know about making killer Mongolian Chicken at home! I’m so excited for you to try this recipe and make it your own, whether you stick to the basics or toss in your fave twists. Mongolian Chicken never fails to bring smiles to my table, and I bet it’ll do the same for yours. So, grab that pan and get cooking—I’d love to hear how it turns out!
Conclusion
I hope you enjoyed this recipe for Mongolian Chicken! It’s truly one of my favorites, and I’m confident you’ll love it too. Remember to follow the steps carefully for the best results.
Don’t hesitate to experiment with your own variations and make this recipe your own. Happy cooking!