
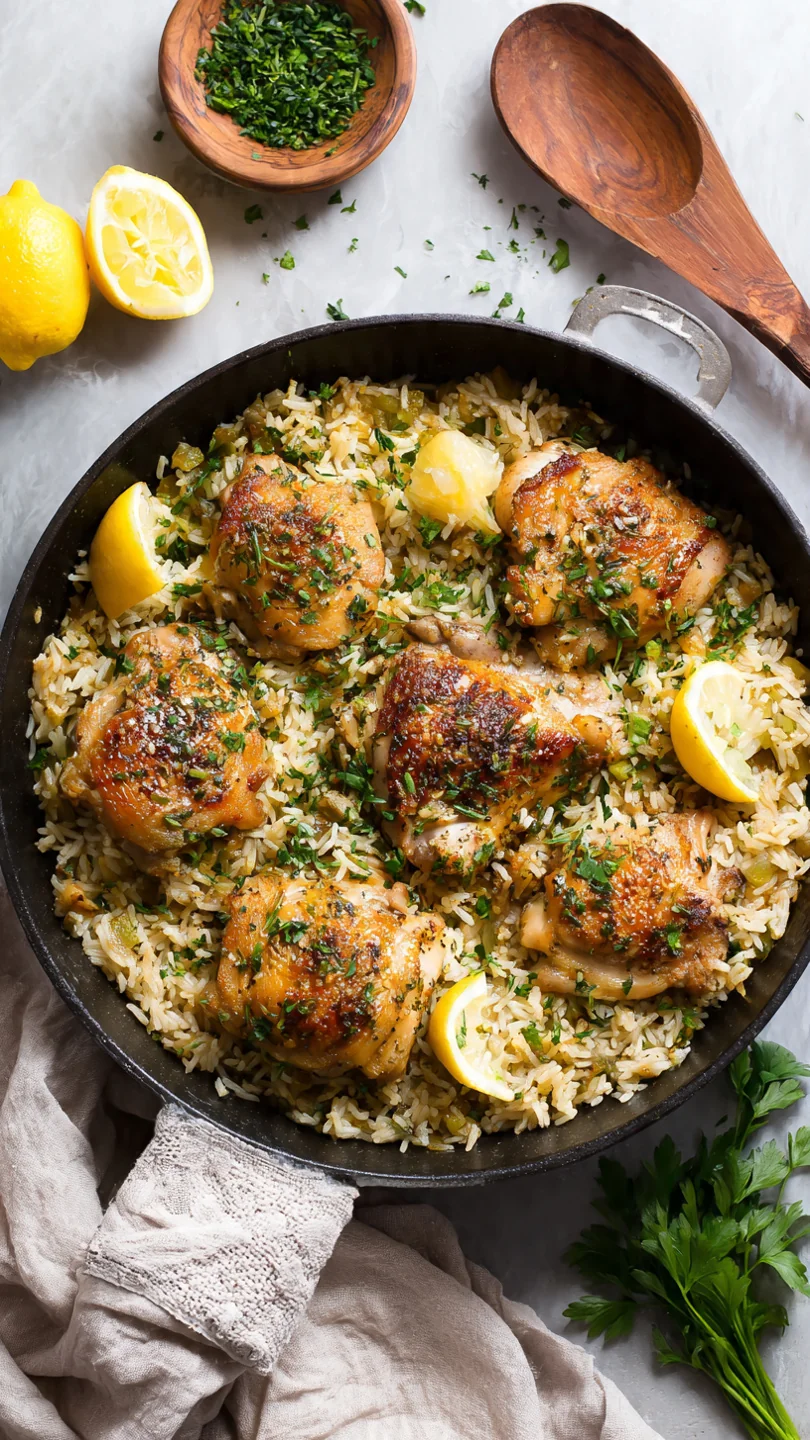
There’s a moment in every busy cook’s week when the thought of both cooking and cleaning feels overwhelming. That’s when this recipe becomes your secret weapon. Imagine tender, juicy chicken with crackling-crisp skin, resting atop a bed of fluffy, aromatic rice that has soaked up every drop of lemony, herby goodness—all from a single pot.
This isn’t just a meal; it’s a practical solution that delivers incredible flavor with respect for your time and effort. Let’s make dinner simple again.
This dish earns its place in your regular rotation for more than just its delicious taste. Here’s what makes it special:
- One-Pan Cleanup: The entire meal cooks in one vessel, meaning you spend less time washing and more time enjoying your evening.
- Crispy to Tender Texture: The method ensures the chicken skin stays beautifully crisp while the meat and rice beneath become perfectly tender.
- Bright, Balanced Flavor: The combination of fresh lemon, savory herbs, and rich chicken broth creates a sauce that’s vibrant but not overpowering.
- Hands-Off Cooking: Once you cover the pot, the recipe does the work for you, freeing you up for other tasks.
- Family-Friendly & Adaptable: It’s a crowd-pleaser that’s easy to customize with different herbs or vegetables based on what you have.
- Meal-Prep Ready: The leftovers reheat beautifully, making it a smart choice for planning ahead.
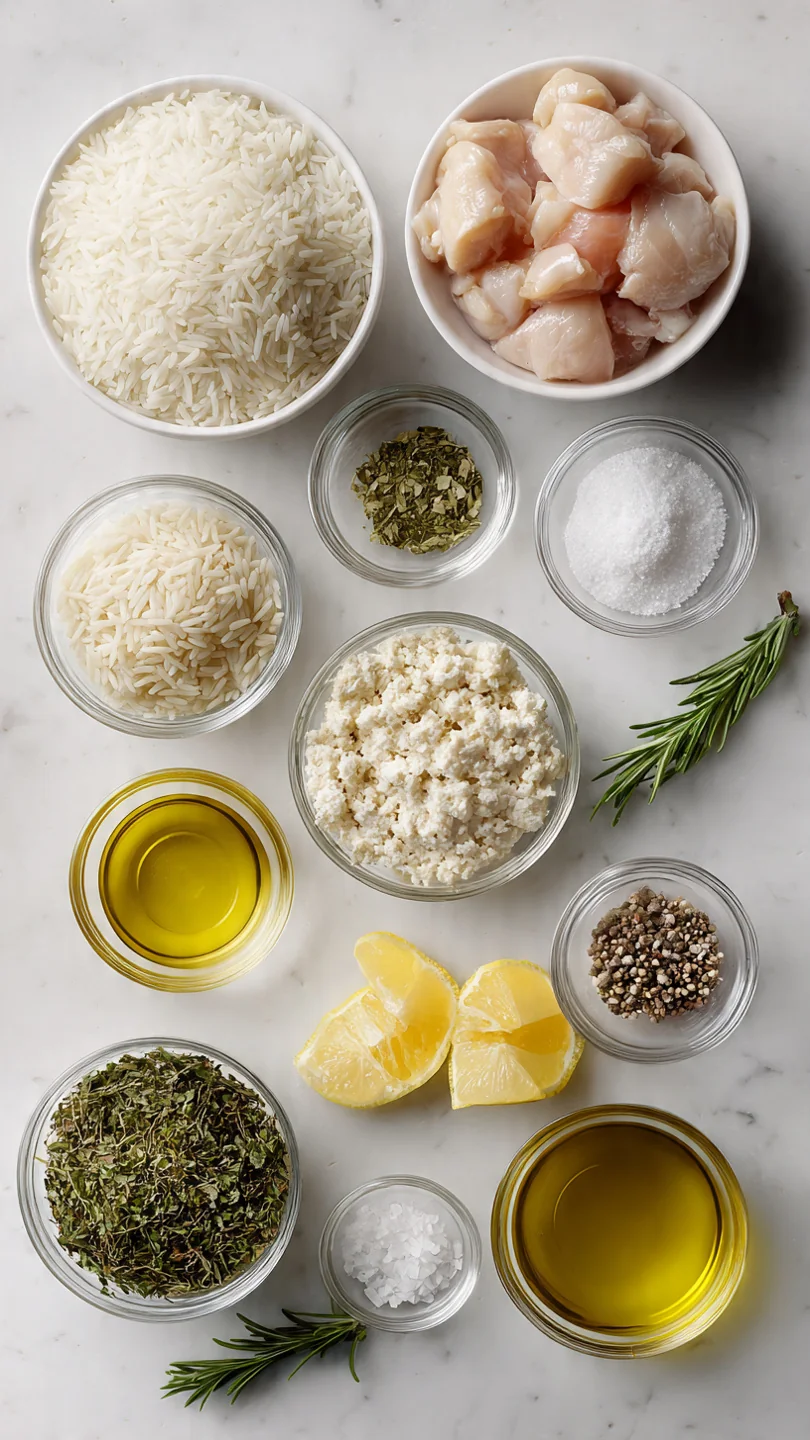
Ingredients You’ll Need
- Let’s gather our ingredients—this is where simple pantry staples transform into something special. The magic lies in the quality and balance. Using fresh lemon and herbs makes a noticeable difference, but dried will work in a pinch.
- Chicken Thighs: I insist on bone-in, skin-on thighs. They stay juicier during the longer cook time and the skin renders fat that flavors the entire dish. Pat them very dry for the crispiest result.
- Long-Grain White Rice: Jasmine or basmati are my top choices for their fragrance and ability to stay separate. Rinsing the rice is a small step with a big payoff—it removes excess starch so your rice isn’t gummy.
- Fresh Lemon: We’re using both the zest and the juice. The zest holds potent citrus oils that perfume the rice, while the juice provides the bright, tangy backbone.
- Aromatics: A yellow onion and fresh garlic build a savory foundation. Mince the garlic finely so it disperses evenly.
- Herbs: Fresh thyme and rosemary are classic with lemon and chicken. If using dried, use about one-third the amount.
- Chicken Broth: Use a low-sodium variety so you can control the seasoning. This forms the cooking liquid for the rice.
- Butter & Olive Oil: The oil is for browning, and a pat of cold butter stirred in at the end adds a silky, rich finish.
Note: You’ll find the complete list of ingredients, along with their exact measurements, in the printable recipe card at the bottom of this post.
Kitchen Equipment Needed
You don’t need specialized gear for this recipe. The most important item is a large, deep skillet or Dutch oven (at least 12 inches in diameter and 3 quarts in capacity) with a tight-fitting lid. This ensures enough surface area to brown the chicken without crowding and enough depth to hold all the rice and liquid.
A wooden spoon is helpful for scraping up the flavorful browned bits (the fond), and a microplane makes quick work of zesting the lemon. That’s truly the core of it.
How to Make One Pot Lemon Herb Chicken and Rice Recipe
Step 1: Season and Prep
Start by taking a few paper towels and patting your chicken thighs completely dry. This is my non-negotiable first step for achieving skin that crackles instead of steams. Season them generously on both sides with salt and pepper.
Let them sit while you dice the onion and mince the garlic—this brief rest helps the seasoning adhere and brings the chicken closer to room temperature for more even cooking.
Step 2: Achieve Golden Crispy Skin
Heat the oil in your pot over medium-high heat until it shimmers. Carefully place the chicken in, skin-side down. Now, the hardest part: don’t touch it!
Let it cook undisturbed for a good 6-8 minutes. Trust me, you’ll know it’s ready to flip when the skin releases easily from the pan and is a deep, golden brown. This step isn’t just for looks; it renders fat and creates incredible flavor in the pot.
Step 3: Build the Flavor Base
Transfer the chicken to a plate. You should have a couple tablespoons of beautiful golden fat left in the pot. Pour off all but one tablespoon.
Add the diced onion and cook until soft and translucent. Stir in the garlic until its fragrance fills your kitchen—about 60 seconds is perfect. Then, add the rinsed rice, stirring to coat each grain in the flavorful fat.
Toasting it for a minute here gives the rice a nuttier depth.
Step 4: Simmer and Nestle
Pour in the chicken broth, lemon juice, and zest, and add the remaining herbs and seasoning. Scrape the bottom of the pot thoroughly to lift all those delicious browned bits into the liquid. Bring it to a lively simmer.
Now, nestle the chicken thighs back in, skin-side up, along with any juices that collected on the plate. The rice will cook in that flavorful broth, and the chicken will finish cooking through via steam.
Step 5: The Hands-Off Cook and Rest
Reduce the heat to low, cover the pot with a tight lid, and set a timer for 25 minutes. Believe me, do not lift that lid. The steam trapped inside is cooking the rice perfectly.
After the timer goes off, turn off the heat but leave the lid on. Let it rest for 10 full minutes. This final steam is the secret to fluffy, separate grains.
Uncover, add the butter, fluff the rice, garnish with parsley, and step back to admire your masterpiece.
A few insights from the kitchen can elevate this from great to foolproof:
- The Dry Chicken Rule: Moisture is the enemy of browning. Taking the extra minute to pat your chicken completely dry ensures that skin sears and crisps instead of steaming in its own moisture.
- The Fond is Flavor: Those dark, sticky bits left in the pan after browning the chicken are pure concentrated taste. Deglazing the pot with your broth and scraping thoroughly incorporates this flavor into every bite of rice.
- The Lid Stays On: It’s tempting to check on progress, but lifting the lid releases the essential steam that cooks the rice. Trust the process and the timer.
- The Power of Resting: Letting the dish rest off the heat with the lid on allows the rice to absorb the last bit of liquid evenly and finish cooking gently, preventing a soggy or undercooked bottom layer.
- Butter at the End: Adding cold butter after cooking, rather than during, gives the sauce a glossy, restaurant-quality finish without breaking or making the dish greasy.
Recipe Variations
- This recipe is wonderfully adaptable. Here are some tested variations to make it your own:
- Mediterranean Twist: Add a pinch of saffron threads to the broth and stir in 1/4 cup of chopped Kalamata olives and 2 tbsp of capers with the butter at the end.
- Creamy Parmesan: After resting, stir in 1/2 cup of grated Parmesan cheese along with the butter for a richer, umami-packed version.
- Vegetable-Packed: Sauté 1 cup of diced carrots or bell peppers with the onion. In the last 5 minutes of cooking, add a cup of fresh spinach or peas on top before replacing the lid.
- Whole Chicken Legs: Substitute two whole chicken legs (drumstick and thigh attached) for the four thighs. You may need to add 3-5 minutes to the covered cooking time.
- Dairy-Free: Simply omit the finishing butter. The dish will still be incredibly flavorful from the chicken fat and broth.
- Brown Rice Version: Use an equal amount of brown rice and increase the broth to 3 cups and the covered cook time to 45-50 minutes. You may need to add a splash more broth at the end if the rice isn’t tender.
What to Serve With This Recipe
This dish is a complete meal in a pot, but a simple side can round it out beautifully. A crisp green salad with a light vinaigrette cuts through the richness perfectly. For something warmer, steamed green beans, asparagus, or broccoli are excellent choices.
If you’re serving a crowd, a crusty loaf of garlic bread is always welcome for soaking up the delicious lemony juices. For drinks, a glass of Sauvignon Blanc or Pinot Grigio complements the citrus notes, or a sparkling water with a lemon wedge keeps it refreshing and simple.
Storage & Make-Ahead Instructions
- This recipe is a fantastic make-ahead option. Let the dish cool completely before transferring it to an airtight container.
- Refrigerator: It will keep well for up to 3-4 days.
- Freezer: For longer storage, freeze portions in airtight containers for up to 2 months. Thaw overnight in the refrigerator before reheating.
- Reheating: The best method is to reheat it gently in a covered skillet over low heat with a tablespoon or two of broth or water added to rehydrate the rice. You can also use the microwave, covered, stirring occasionally.
- Make-Ahead Tip: You can season the chicken and chop all your vegetables the night before. Store them separately in the fridge to make assembly even faster when you’re ready to cook.
Frequently Asked Questions
Q: Can I use chicken breasts instead of thighs?
I don’t recommend it for this method. Boneless, skinless chicken breasts will overcook and become dry during the time needed to cook the rice. Thighs are more forgiving and flavorful.
Q: My rice is still hard after 25 minutes. What happened?
This usually means your heat was too low, your lid wasn’t tight, or you lifted it during cooking. Next time, ensure a good simmer is achieved before covering and check that steam isn’t escaping. You can add a splash of hot broth, cover, and cook for another 5 minutes on low if needed.
Q: Can I double this recipe?
Yes, but you must use a pot large enough to brown the chicken in a single layer without crowding (a large Dutch oven is essential). You may also need to add 1-2 minutes to the browning time and 3-5 minutes to the covered cooking time.
Q: Is rinsing the rice really necessary?
For the best texture, yes. Rinsing removes the surface starch that causes rice to become sticky and gummy as it cooks. Just place it in a fine-mesh strainer and run cold water over it until the water runs clear.
Q: Can I use bottled lemon juice?
Fresh is vastly superior for both flavor and acidity. Bottled juice often has preservatives and lacks the bright, clean taste of fresh lemon. In a pinch, use half the amount of bottled juice and add a bit more zest.
Q: How do I know the chicken is done?
The safest way is to use an instant-read thermometer inserted into the thickest part of the thigh, avoiding the bone. It should read 165°F (74°C). The juices should also run clear.
Q: The bottom of my rice is sticking/burning.
This indicates your heat was too high during the simmering stage. Always reduce to a true low heat once covered. If you have a thin-bottomed pot, using a heat diffuser can help.
Final Thoughts
This One Pot Lemon Herb Chicken and Rice is more than a recipe—it’s a reliable strategy for getting a fantastic, satisfying dinner on the table with minimal stress. It combines foundational cooking techniques (proper browning, building layers of flavor) with the ultimate convenience of a single pot. The result is a meal that feels special enough for company but simple enough for any Tuesday night.
I’ve tested this method rigorously to ensure it works in your kitchen as well as it does in mine. Give it a try this week, and I think you’ll find it becomes a trusted favorite. I’d love to hear how it turns out for you—share your results or any creative twists you tried!

One Pot Lemon Herb Chicken and Rice
Equipment
- Large, deep skillet or Dutch oven with a tight-fitting lid (at least 12-inch diameter, 3-quart capacity)
- Wooden spoon or spatula
- Measuring cups and spoons
- Microplane or zester
- Juicer or fork for lemon
Ingredients
- 4 bone-in, skin-on chicken thighs about 1.5 lbs total, patted dry
- 1 tsp kosher salt divided, plus more for seasoning
- 1/2 tsp freshly ground black pepper divided
- 1 tbsp olive oil
- 1 medium yellow onion finely diced
- 4 cloves garlic minced
- 1 1/2 cups long-grain white rice such as jasmine or basmati, rinsed
- 2 1/2 cups low-sodium chicken broth
- 1 large lemon zested and juiced (about 3 tbsp juice)
- 2 tsp fresh thyme leaves or 3/4 tsp dried
- 1 tsp fresh rosemary finely chopped, or 1/2 tsp dried
- 2 tbsp unsalted butter cold, cut into pieces
- 2 tbsp fresh parsley chopped, for garnish
Instructions
- Season the chicken. Pat the chicken thighs completely dry with paper towels. This is crucial for crispy skin. Season generously on both sides with about 3/4 tsp of the salt and 1/4 tsp of the black pepper. Let them sit at room temperature while you prep the other ingredients, about 10 minutes.
- Brown the chicken. Heat the olive oil in a large, deep skillet or Dutch oven over medium-high heat. Once the oil shimmers, add the chicken thighs skin-side down. Cook without moving for 6-8 minutes until the skin is deeply golden brown and crispy. Flip and cook for 2 more minutes. Transfer the chicken to a plate; it will not be cooked through. Pour off all but about 1 tablespoon of the rendered fat from the pot.
- Sauté the aromatics. Reduce the heat to medium. Add the diced onion to the pot and cook, stirring occasionally, for 4-5 minutes until softened. Add the minced garlic and cook for 1 more minute until fragrant. Stir in the rinsed rice, coating it in the oil and toasting it lightly for 1 minute.
- Build the cooking liquid. Pour in the chicken broth, lemon juice, and lemon zest. Add the remaining salt, pepper, thyme, and rosemary. Scrape up any browned bits from the bottom of the pot—that’s pure flavor. Bring the mixture to a simmer.
- Cook the rice and chicken. Nestle the browned chicken thighs back into the pot, skin-side up, along with any accumulated juices. Reduce the heat to low, cover the pot tightly with a lid, and cook for 25 minutes. Do not lift the lid during this time—trust me, the steam is doing its work.
- Rest and finish. After 25 minutes, remove the pot from the heat. Keep it covered and let it rest for 10 minutes. This allows the rice to finish steaming and absorb any remaining liquid evenly. Uncover, dot the top with the cold butter and let it melt in. Fluff the rice gently with a fork. Garnish with fresh parsley and serve immediately.