
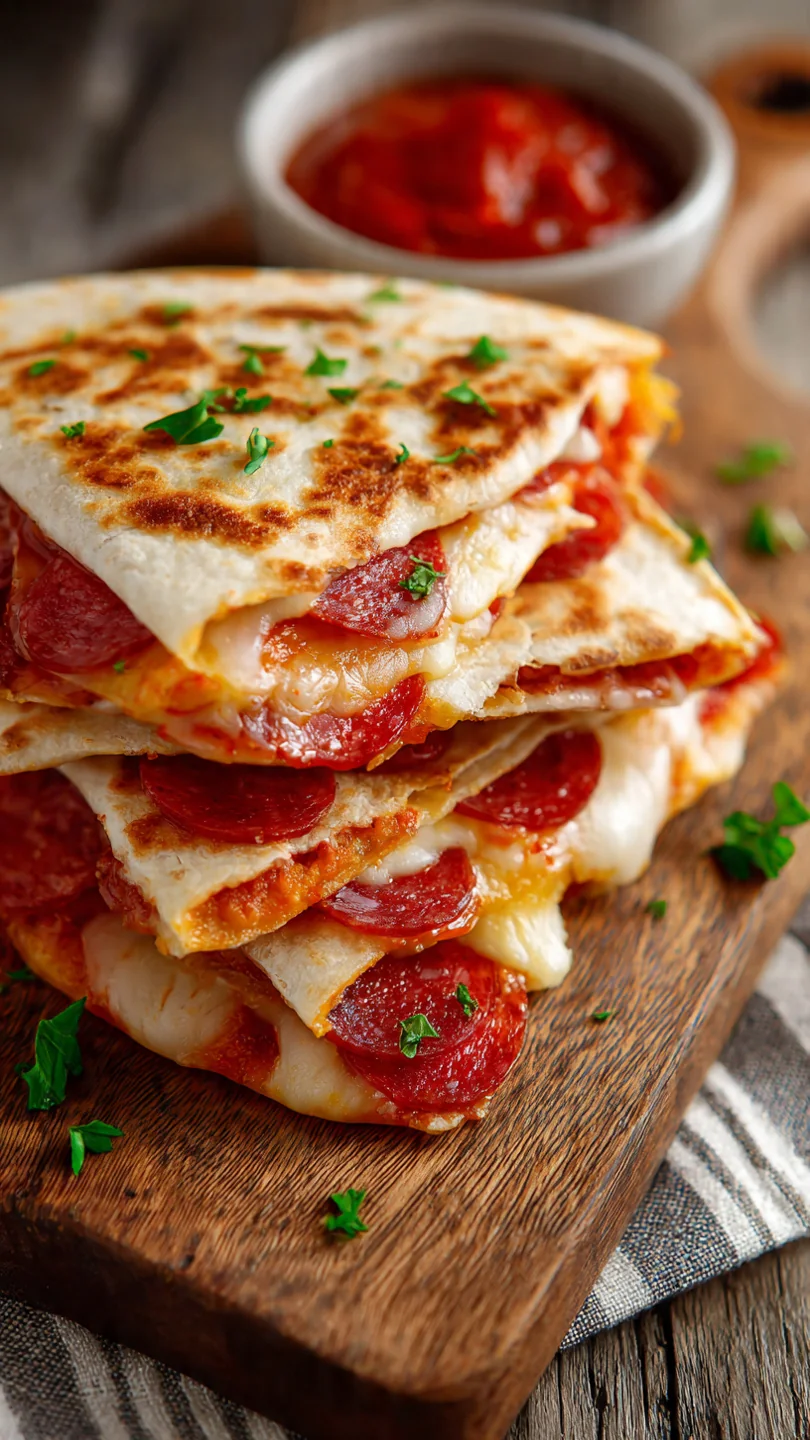
The sizzle of butter in a hot pan, the irresistible smell of toasting flour and melting cheese, and the promise of a hot, satisfying meal in mere minutes—this is the magic of a well-made quesadilla. Now, imagine infusing that with all the beloved flavors of a classic pepperoni pizza. As a chef who has cooked for hundreds of busy families, I can tell you that the quest for a quick, universally loved dinner is real.
This recipe is my tested answer: a crispy, gooey, savory hand-held pie that delivers maximum joy with minimal effort. It’s the perfect union of two comfort food giants, designed to get a hot dinner on the table faster than you can call for delivery.
This recipe earns a permanent spot in your weeknight rotation for several practical reasons.
- 15-Minute Speed: From fridge to plate in the time it takes to preheat a traditional pizza oven.
- Kid-Approved Favorite: Combines two of the most requested flavors in one irresistible package, solving the “what’s for dinner” debate.
- Minimal Cleanup: You only need one skillet and a cutting board, making post-dinner cleanup a breeze.
- Highly Customizable: Think of it as a blank canvas. I’ll show you how to adapt it for different tastes, diets, and what you have on hand.
- Perfect Texture: My chef technique of buttering the tortilla guarantees a shatteringly crisp exterior that holds up to the molten cheese inside.
- Budget-Friendly: Uses simple, affordable pantry staples to create a meal that feels like a treat.
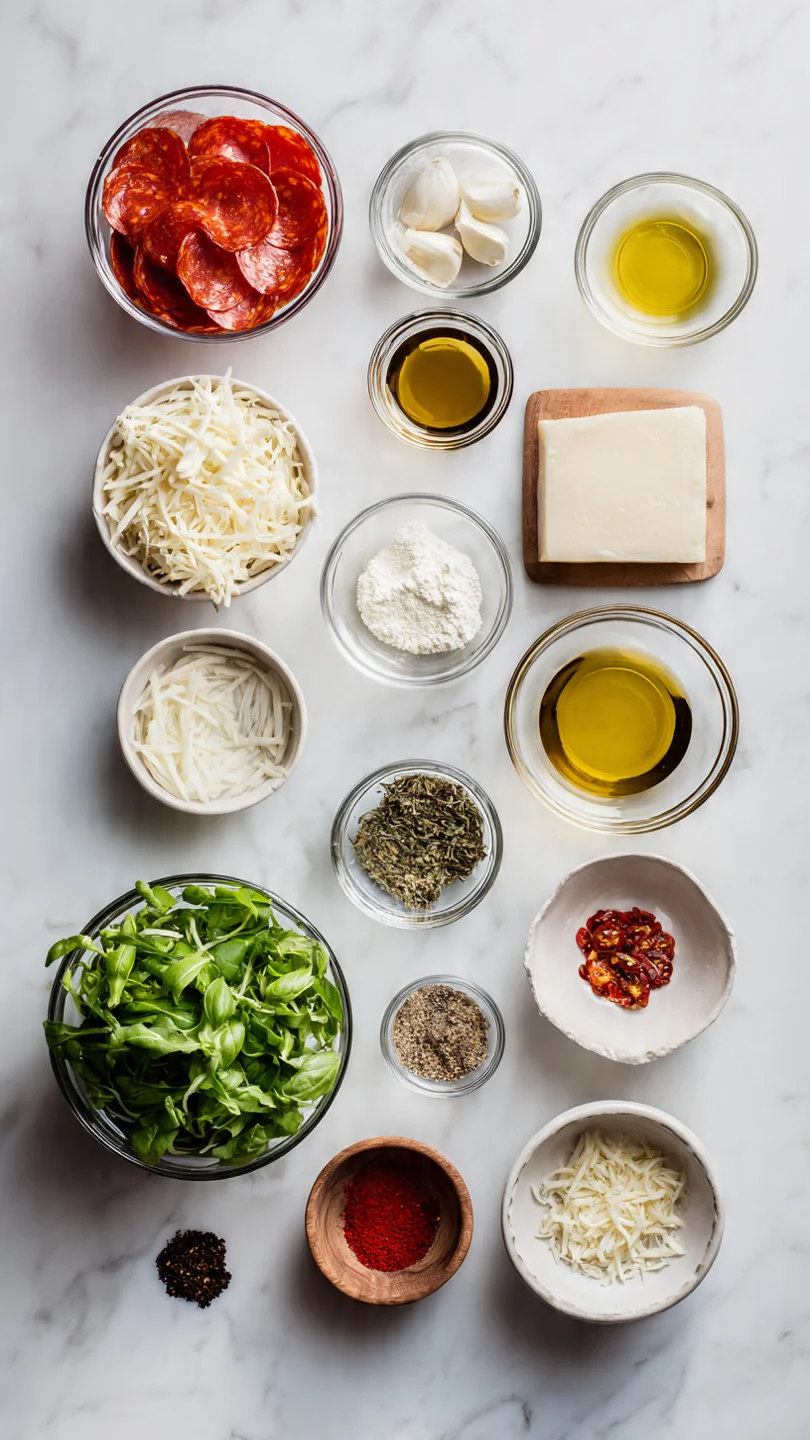
Ingredients You’ll Need
- Let’s gather our ingredients—this is where simple components come together to create something greater than the sum of its parts. The beauty here is in the quality of a few key items.
- Large Flour Tortillas: The 8- to 10-inch “burrito-size” tortillas are ideal. They’re sturdy enough to hold the fillings without tearing and provide the perfect crispy-to-filling ratio. I don’t recommend thin “street taco” size for this.
- Shredded Low-Moisture Mozzarella: This is non-negotiable for the perfect melt. The “low-moisture” part (often labeled “whole milk mozzarella”) is key. Fresh mozzarella in water has too much liquid and will make your quesadilla soggy. For the best melt, shred it yourself from a block, but a good-quality pre-shredded bag will work in a pinch.
- Pepperoni: Standard slices or mini pepperoni both work wonderfully. The minis distribute flavor in every bite, while standard slices offer that classic look. For a crisper texture and richer flavor, you can quickly pan-fry the pepperoni for 30 seconds before assembling.
- Pizza Sauce: Just a few tablespoons per quesadilla. Use your favorite jarred brand or a simple homemade version. The sauce adds essential moisture and tangy flavor.
- Italian Seasoning: This optional sprinkle is my secret weapon. It adds an herby, complex note that makes the flavor pop.
- Unsalted Butter: My preferred fat for cooking. It promotes incredible browning and adds a rich, nutty flavor. You can substitute with olive oil or even mayonnaise for a different kind of crisp.
Note: You’ll find the complete list of ingredients, along with their exact measurements, in the printable recipe card at the bottom of this post.
Kitchen Equipment Needed
You don’t need any special gadgets for this recipe, which is part of its charm. A large (10-12 inch) non-stick or well-seasoned cast-iron skillet is the MVP—it ensures even heating and easy flipping. A wide, thin spatula is crucial for getting under the quesadilla without breaking it.
A pastry brush makes buttering the tortilla neat and easy, but you can use the back of a spoon in a pinch. Finally, have a cutting board and sharp knife or pizza cutter ready for serving.
How to Make Pepperoni Pizza Quesadillas Recipe
Step 1: Assemble the Fillings
Lay out your tortillas like blank canvases. Spread the pizza sauce thinly but evenly over just one half of each tortilla, leaving a small border. This border is your leak-prevention seal.
Next, layer on the cheese—this is your glue. The cheese layer should be generous but not mountainous. Finally, arrange the pepperoni in a single layer.
A light dusting of Italian seasoning here works wonders. By keeping all the components on one half, you set yourself up for a clean, mess-free fold. Trust me, this simple organizational step prevents filling spillage during the crucial flip.
Step 2: Fold and Prepare for the Skillet
Gently fold the bare half of the tortilla over the loaded half, pressing down lightly to adhere. Now, melt your first tablespoon of butter in your skillet over medium heat. As it melts and foams slightly, use your pastry brush to lightly coat the top side of your first quesadilla with butter.
This technique of buttering the food, not just the pan, is a restaurant trick for achieving unparalleled, all-over crispiness and color. Believe me, it’s the difference between good and great.
Step 3: Cook the First Side to Golden Brown
Place the quesadilla, buttered-side down, into the skillet. You should hear a confident sizzle. Let it cook undisturbed for 2-3 minutes.
This patience allows the tortilla to crisp and brown beautifully and gives the cheese on the bottom layer time to start melting, which helps seal everything together. As it cooks, brush the now-top side with more melted butter. Tip from me: If your skillet seems too hot and the tortilla is browning too fast, simply reduce the heat.
The goal is a deep golden brown, not black.
Step 4: The Confident Flip
This is the moment of truth. Slide your wide spatula completely under the quesadilla. With a firm, swift motion, flip it over.
You should see a perfectly golden, speckled surface. If a little cheese escapes, just tuck it back in with the spatula. Let the second side cook for another 2-3 minutes.
To test for doneness, gently press the center—it should feel soft from the melted cheese but structured. The aroma at this point is absolutely irresistible.
Step 5: Rest, Slice, and Serve
Transfer the finished quesadilla to a cutting board. This brief 1-2 minute rest is non-negotiable. It allows the furious, molten cheese to relax and set slightly, ensuring it stays inside when you cut it.
Repeat the process with your second quesadilla. Then, using a sharp knife or pizza cutter, slice each into three triangles. The sound of the crispy shell cracking is so satisfying.
Serve immediately with small bowls of extra pizza sauce or cool ranch dressing for dipping. Step back and admire your handiwork—a delicious, hot, and homemade dinner is ready.
A few insights from my years in professional kitchens will elevate your results from home cook to chef-level.
- Heat Management is Key: Medium heat is your friend. It gives the cheese time to melt completely before the tortilla burns. If your quesadilla is browning in one minute, your pan is too hot.
- The Dry-Start Method: For ultimate crispiness, place the folded, unbuttered quesadilla in a dry, preheated skillet for 30 seconds per side before buttering and cooking. This toasts the tortilla and creates a sturdier base.
- Press Lightly: After flipping, you can gently press down on the quesadilla with your spatula for better contact and even browning, but don’t smash it.
- Cheese as Glue: Ensure your cheese layer extends to the edges of the filling area. As it melts, it acts as an adhesive, sealing the two tortilla halves together.
- Avoid Steam: Don’t cover the skillet while cooking. Trapped steam is the enemy of crispiness and will lead to a soggy tortilla.
Recipe Variations & Customizations
- This recipe is incredibly adaptable. Here are some of my favorite tested twists.
- Supreme Style: Add finely diced green bell pepper, sliced black olives, and thin slices of red onion with the pepperoni.
- Meat Lover’s: Mix in some cooked, crumbled Italian sausage or chopped ham with the pepperoni.
- Vegetarian: Omit the pepperoni and add sautéed sliced mushrooms, spinach, and roasted red peppers.
- Hawaiian: A controversial but delicious combo! Use chopped ham and drained pineapple tidbits (pat them very dry first).
- Spicy Kick: Use spicy pepperoni or add a few slices of pickled jalapeño inside. A sprinkle of red pepper flakes works too.
- White “Pizza”: Replace the red sauce with a thin layer of ricotta cheese mixed with garlic powder and a pinch of salt.
- Breakfast Version: Fill with scrambled eggs, cooked bacon or sausage, and cheddar cheese. Serve with salsa.
What to Serve With This Recipe
While these quesadillas are a complete meal on their own, a few simple sides can round out the dinner table perfectly. A crisp green salad with a tangy Italian vinaigrette cuts through the richness beautifully. For a heartier meal, a bowl of tomato soup is a classic and comforting pairing.
If you’re serving a crowd, consider a platter of oven-baked potato wedges or crudité with ranch dressing. For drinks, an ice-cold sparkling lemonade is fantastic for kids, while a light lager or pale ale complements the savory flavors for adults. This dish is ideal for busy weeknights, casual game-day gatherings, or even a fun weekend lunch.
Storage & Make-Ahead Instructions
- These are best enjoyed immediately, but you can manage leftovers and prep with ease.
- Refrigerating Leftovers: Allow quesadillas to cool completely, then store in an airtight container in the refrigerator for up to 3 days.
- Freezing for Later: Cool completely, wrap each quesadilla individually in parchment paper, then place in a freezer bag. Freeze for up to 2 months.
- Reheating for Best Results: To restore crispiness, always reheat in a dry skillet over medium-low heat until warmed through and crisp on the outside. The microwave will make them soggy.
- Make-Ahead Assembly: You can assemble the quesadillas (folded but uncooked) up to 4 hours in advance. Keep them on a plate in the refrigerator, covered with a damp paper towel and plastic wrap, until ready to cook.
Frequently Asked Questions
Q: Can I use corn tortillas instead of flour?
A: I don’t recommend it for this specific recipe. Corn tortillas are smaller, more fragile, and don’t fold as cleanly. They also have a stronger flavor that competes with the pizza profile.
Flour tortillas provide the ideal pliable, neutral base.
Q: My cheese isn’t melting before the tortilla burns. What am I doing wrong?
A: Your heat is too high. This is the most common issue. Lower your burner to a true medium heat.
The cooking process should take 4-6 minutes total. The slower cook gives the cheese ample time to melt.
Q: Can I make these in an air fryer?
A: Absolutely! Preheat the air fryer to 370°F. Lightly brush both sides of the assembled quesadilla with butter or oil.
Air fry for 5-6 minutes, flipping halfway through, until golden and crispy.
Q: How can I keep them warm for a crowd?
A: Place cooked quesadillas on a wire rack set over a baking sheet in a 200°F oven. This keeps them warm and crisp for up to 30 minutes without getting soggy.
Q: What’s the best way to cut them without squishing?
A: Use a very sharp chef’s knife and a gentle sawing motion, or a pizza cutter which rolls easily through the crispy shell. Letting them rest for 2 minutes first is crucial.
Q: Can I use a different cheese?
A: Yes, but for the classic pizza pull, mozzarella is best. A Monterey Jack blend will also melt well. Avoid pre-shredded “pizza cheese” blends with anti-caking agents, as they can melt less smoothly.
Q: Are there any gluten-free options?
A: Yes! Use your favorite gluten-free flour tortillas. Be gentle when flipping, as they can sometimes be more delicate.
Final Thoughts
The Pepperoni Pizza Quesadilla is more than just a quick meal; it’s a testament to how a little culinary creativity can transform a few basic ingredients into a dinner that everyone gets excited about. It captures the essence of two beloved foods in a format that’s fast, fun, and foolproof. As a professional, I value recipes that deliver consistent, delicious results without complexity, and this one checks every box.
I’ve tested the timing, the techniques, and the variations so you don’t have to. So tonight, when the dinner clock is ticking, skip the stress and embrace the sizzle. Give this recipe a try, and I’m confident it will become a trusted favorite in your home.
I’d love to hear how it turned out for you—what variations did your family love? Share your results and tag me! And if you’re looking for more quick, flavor-packed dinners, explore the other recipes on my site.
Happy cooking

Pepperoni Pizza Quesadillas
Equipment
- Large non-stick or cast-iron skillet (10-12 inch)
- Wide spatula
- Pastry brush (optional but helpful)
- Cutting board and sharp knife or pizza cutter
Ingredients
- 4 large flour tortillas 8-10 inch burrito-size work best
- 1 cup shredded low-moisture mozzarella cheese pre-shredded is fine, but block cheese melts better
- 30 slices pepperoni about 2.5 ounces; standard or mini size
- 1/3 cup pizza sauce store-bought or homemade
- 1 tsp Italian seasoning optional, for extra flavor
- 2 tbsp unsalted butter or olive oil for cooking
Instructions
- Prep your fillings. Lay out your tortillas on a clean work surface. Spread about 1.5 tablespoons of pizza sauce evenly over one half of each tortilla, leaving a 1/2-inch border around the edge. This prevents the sauce from leaking out during cooking. Sprinkle a generous 1/4 cup of shredded mozzarella over the sauce on each tortilla, then arrange 7-8 pepperoni slices (or a handful of minis) over the cheese. A light sprinkle of Italian seasoning here adds great depth. Trust me, keeping the fillings on one half makes folding and flipping much easier.
- Fold and butter. Carefully fold the empty half of each tortilla over the filled half, creating a half-moon shape. Press down gently. Melt 1 tablespoon of butter in a large non-stick or cast-iron skillet over medium heat. Using a pastry brush or the back of a spoon, lightly coat the top of one quesadilla with some of the melted butter. This step is key for that beautifully golden, crispy exterior. Believe me, it makes a noticeable difference compared to just adding fat to the pan.
- Cook to golden perfection. Place the quesadilla, buttered-side down, into the skillet. Cook for 2-3 minutes, until the bottom is deeply golden brown and crispy. While it cooks, brush the top side with more melted butter. Tip from me: Don’t rush this by cranking up the heat. Medium heat allows the cheese to melt completely before the tortilla burns. You should see the cheese starting to ooze a bit at the seams.
- Flip and finish. Using a wide spatula, carefully flip the quesadilla. Cook for another 2-3 minutes on the second side until equally golden and crispy. The cheese inside should be fully melted—you can gently press the center with your spatula; it should give slightly. Transfer to a cutting board. Repeat the process with the remaining tablespoon of butter and the second quesadilla.
- Rest, slice, and serve. Let the quesadillas rest on the cutting board for 1-2 minutes before slicing. This allows the molten cheese to set slightly so it doesn’t all run out when you cut. Use a sharp knife or pizza cutter to slice each into 3 triangles. Serve immediately with extra pizza sauce or ranch dressing for dipping. Step back and admire your perfectly crispy, cheesy creation—dinner is served in under 15 minutes!