
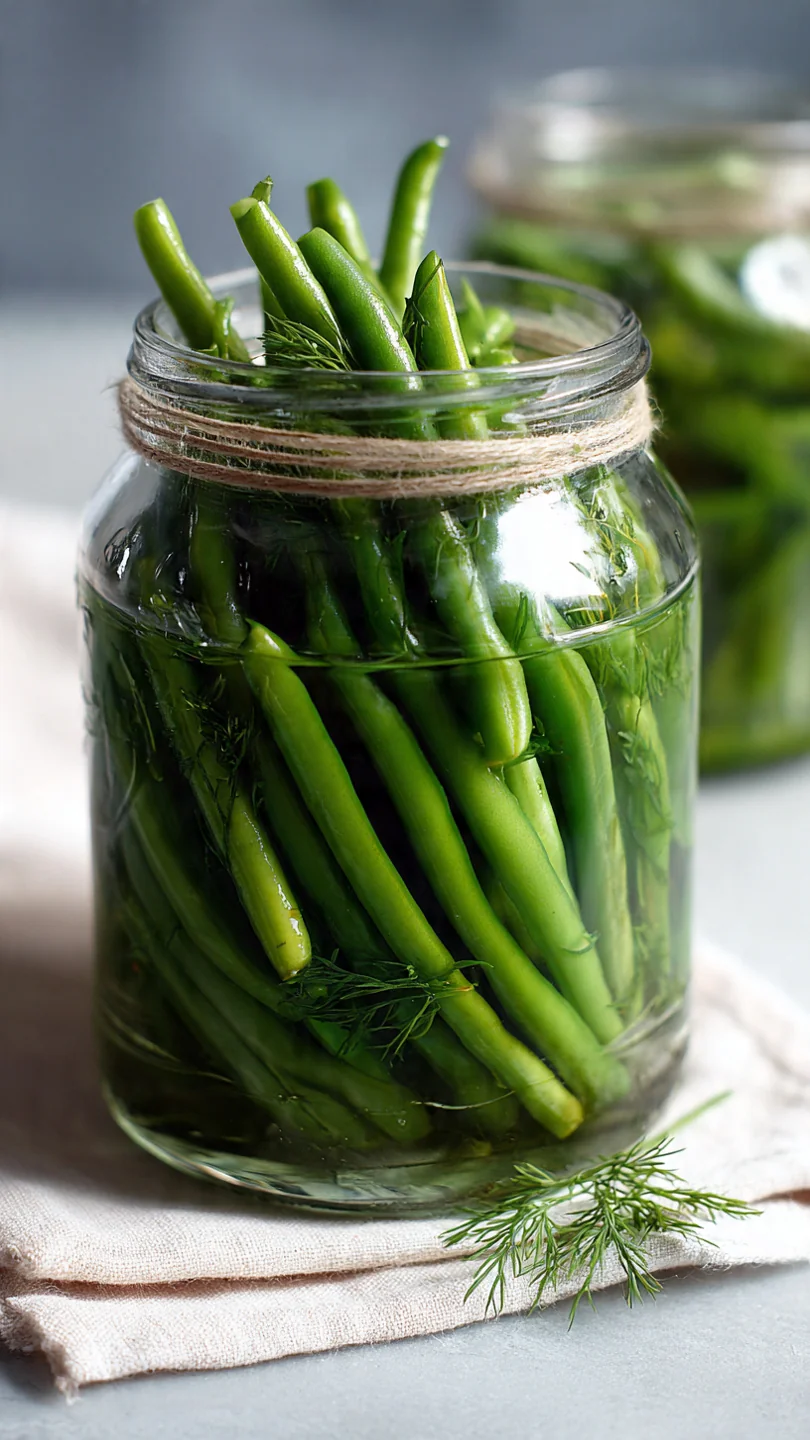
The vibrant snap of fresh green beans transformed into a tangy delight, pickled green beans are a delightful way to preserve the essence of summer. Whether you’re enjoying them straight from the jar or adding a zesty crunch to your favorite dishes, these pickled green beans are sure to become a pantry staple. With a perfect balance of acidity and spice, they offer a burst of flavor that enhances any meal.
- Easy to Make: With minimal ingredients and a straightforward process, you can whip up a batch of these pickled green beans in no time.
- Flavorful and Tangy: The combination of vinegar, garlic, and dill creates a deliciously zesty pickle that’s perfect for snacking or adding to dishes.
- Crisp Texture: The hot pack method ensures your beans stay crisp and crunchy, providing the perfect bite.
- Versatile Use: Enjoy them as a snack, a side, or a garnish. They’re great in salads, on sandwiches, or as part of a charcuterie board.
- Long Shelf Life: Properly stored, these pickled green beans can last for months, allowing you to enjoy summer’s bounty well into the winter.
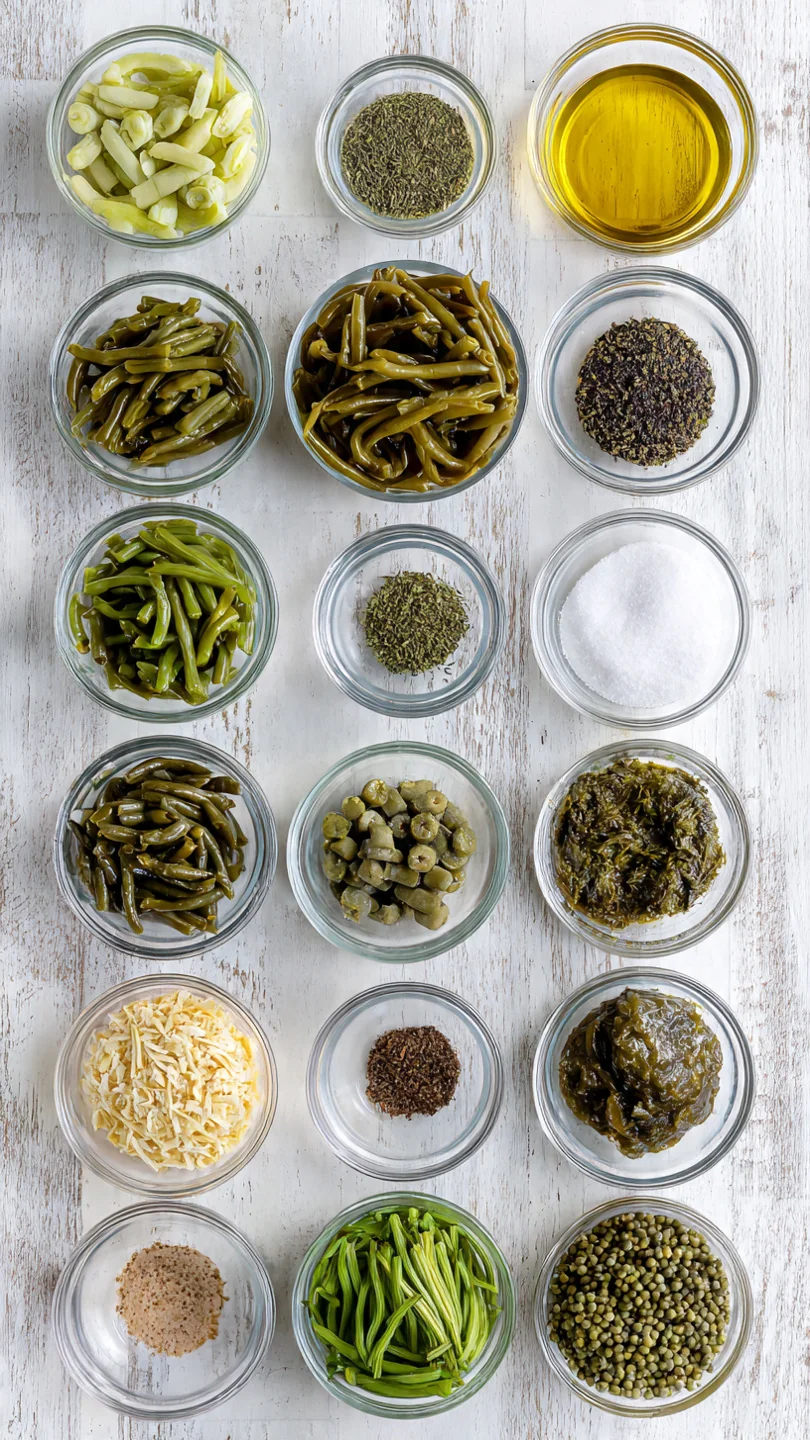
Ingredients You’ll Need
Let’s gather our ingredients—these simple pantry staples create magic together, transforming fresh green beans into a zesty delight.
For the Pickling Brine:- White vinegar: Provides the necessary acidity for pickling.
- Water: Dilutes the vinegar to the right strength.
- Kosher salt: Essential for flavor and preservation.
- Sugar: Balances the acidity and adds a touch of sweetness.
- Fresh green beans: Look for firm, bright green beans for the best results.
- Garlic cloves: Adds a pungent flavor that mellows during pickling.
- Fresh dill: Infuses the beans with a classic pickle flavor.
- Black peppercorns: Adds a subtle spice.
- Red pepper flakes: Optional, for those who like a bit of heat.
When selecting your green beans, choose ones that are fresh and snappy. If you can’t find fresh dill, dried dill can be used, though fresh is preferred for the best flavor. For vinegar, white distilled vinegar is recommended for its clear color and sharp taste, but apple cider vinegar can be used for a slightly different flavor profile.
Note: You’ll find the complete list of ingredients, along with their exact measurements, in the printable recipe card at the bottom of this post.
Kitchen Equipment Needed
To make these pickled green beans, you’ll need:
- Sterilized glass jars with lids: Essential for proper pickling and storage.
- Large saucepan: To heat the pickling brine.
- Tongs or jar lifter: Helpful for handling hot jars safely.
How to Make Pickled Green Beans Recipe
Step 1: Prepare the Green Beans
Start by washing your green beans and trimming them to fit into your jars. Pack the beans tightly into clean, sterilized jars, leaving about 1/2 inch of headspace at the top. Trust me, packing them snugly ensures they stay crisp and flavorful.
Step 2: Create the Brine
In a saucepan, combine the vinegar, water, salt, and sugar. Bring the mixture to a boil, stirring until the salt and sugar dissolve completely. This brine is crucial for the pickling process, so ensure it’s well mixed.
Believe me, a well-balanced brine makes all the difference.
Step 3: Add Flavorings and Pour Brine
Add the garlic cloves, dill sprigs, peppercorns, and red pepper flakes (if using) to each jar. Pour the hot brine over the beans, ensuring they are fully submerged. Seal the jars with sterilized lids.
Tip from me: the hot brine helps to start the pickling process immediately.
Step 4: Let Them Pickle
Allow the jars to cool to room temperature before refrigerating. Let the pickled green beans sit for at least 24 hours before enjoying to allow the flavors to develop fully. Now comes the fun part—watching your beans transform into tangy delights.
Step 5: Enjoy and Serve
Your pickled green beans are ready to enjoy! Serve them as a tangy snack, or use them to add a zesty crunch to salads and sandwiches. Step back and admire your handiwork—these pickled green beans are a testament to the joy of home preservation.
Pro tip: To ensure your green beans stay crisp, use the hot pack method. This involves pouring hot brine over the beans, which helps to maintain their texture during the pickling process. Temperature matters: Always bring your brine to a full boil to ensure the salt and sugar are completely dissolved. This also helps to start the pickling process immediately. Visual cues: Look for the beans to turn a vibrant green after being submerged in the hot brine. This indicates they are ready to start the pickling process. Common mistake to avoid: Do not overcook the brine, as this can cause the beans to lose their vibrant color and crisp texture.Recipe Variations & Customizations
- Spicy Kick: For a spicier version, increase the amount of red pepper flakes or add a sliced jalapeño to each jar.
What to Serve With This Recipe
Pickled green beans are incredibly versatile. Serve them as a snack on their own, or pair them with:
- Cheese and charcuterie boards: They add a zesty crunch that complements rich cheeses and cured meats.
- Sandwiches and burgers: Use them as a tangy topping for added flavor and texture.
- Salads: Toss them into green or grain salads for a burst of acidity and crunch.
- Grilled meats: Serve alongside grilled chicken or steak for a refreshing contrast.
They’re perfect for summer picnics, barbecues, or as a pantry staple for quick meals.
Storage & Make-Ahead Instructions
- Store your pickled green beans in the refrigerator for up to 2 months. Use glass jars with tight-fitting lids to maintain freshness. For a make-ahead strategy, prepare the pickled green beans up to a week in advance to allow the flavors to fully develop. To check if they’re still good, look for any signs of spoilage like off odors or mold. If in doubt, it’s best to discard them.
Nutritional Benefits
- Green beans are a great source of fiber, vitamins A and C, and potassium. Pickling them preserves these nutrients and adds a probiotic boost if fermented. This recipe is vegan and gluten-free, making it a healthy and versatile addition to your diet.
Frequently Asked Questions
Q: Can I make this ahead of time?
Yes, you can make pickled green beans up to a week in advance. The longer they sit, the more flavorful they become.
Q: What can I use instead of fresh dill?
Dried dill can be used, though fresh dill provides a more vibrant flavor. You can also experiment with other herbs like tarragon or basil.
Q: How do I know when the pickled green beans are done?
The beans are ready to eat after 24 hours, but for the best flavor, let them sit for at least a week. They should be tangy and crisp.
Q: Can I freeze pickled green beans?
It’s not recommended to freeze pickled green beans as the texture may become mushy upon thawing. Store them in the refrigerator for best results.
Q: How can I adjust the flavor?
You can adjust the flavor by adding more or less sugar, salt, or spices. For a spicier pickle, increase the red pepper flakes or add jalapeños.
Q: What if my beans are too soft?
To prevent soft beans, use the hot pack method and avoid overcooking the brine. Adding a grape leaf to each jar can also help maintain crunchiness.
Q: Are there any substitutions for vinegar?
Apple cider vinegar can be used for a slightly different flavor, but white distilled vinegar is best for clear, crisp pickles.
Q: Can I reuse the brine?
It’s not recommended to reuse the brine for pickling as it may not preserve the new batch effectively. However, you can use it as a base for dressings or marinades.
Recipe Origin or History
Pickled green beans, also known as “dilly beans,” have roots in traditional American pickling. They’re a popular choice for home canning, especially in regions with abundant summer produce. This recipe is a modern take on the classic, using simple ingredients to create a tangy and crisp pickle.
Final Thoughts
Pickled green beans are a delightful way to enjoy the freshness of summer all year round. With their tangy flavor and crisp texture, they’re perfect for snacking or adding a zesty touch to your meals. This easy recipe is a great introduction to the art of pickling, and I encourage you to give it a try.
Let me know how your pickled green beans turn out, and don’t forget to share this recipe with your friends on social media. Enjoy the process of preserving and savoring summer’s bounty!
Pickled Green Beans
Equipment
- Sterilized glass jars with lids
- Large saucepan
- Tongs or jar lifter
Ingredients
- 1 pound fresh green beans trimmed to fit in jars
- 2 cups white vinegar
- 2 cups water
- 2 tablespoons kosher salt
- 1 tablespoon sugar
- 4 garlic cloves peeled
- 2 sprigs fresh dill
- 1 teaspoon black peppercorns
- 1/2 teaspoon red pepper flakes optional, for heat
Instructions
- Start by washing your green beans and trimming them to fit into your jars. Pack the beans tightly into clean, sterilized jars, leaving about 1/2 inch of headspace at the top.
- In a saucepan, combine the vinegar, water, salt, and sugar. Bring the mixture to a boil, stirring until the salt and sugar dissolve completely. This brine is crucial for the pickling process.
- Add the garlic cloves, dill sprigs, peppercorns, and red pepper flakes (if using) to each jar. Pour the hot brine over the beans, ensuring they are fully submerged. Seal the jars with sterilized lids.
- Allow the jars to cool to room temperature before refrigerating. Let the pickled green beans sit for at least 24 hours before enjoying to allow the flavors to develop fully.
- Your pickled green beans are ready to enjoy! Serve them as a tangy snack, or use them to add a zesty crunch to salads and sandwiches.