
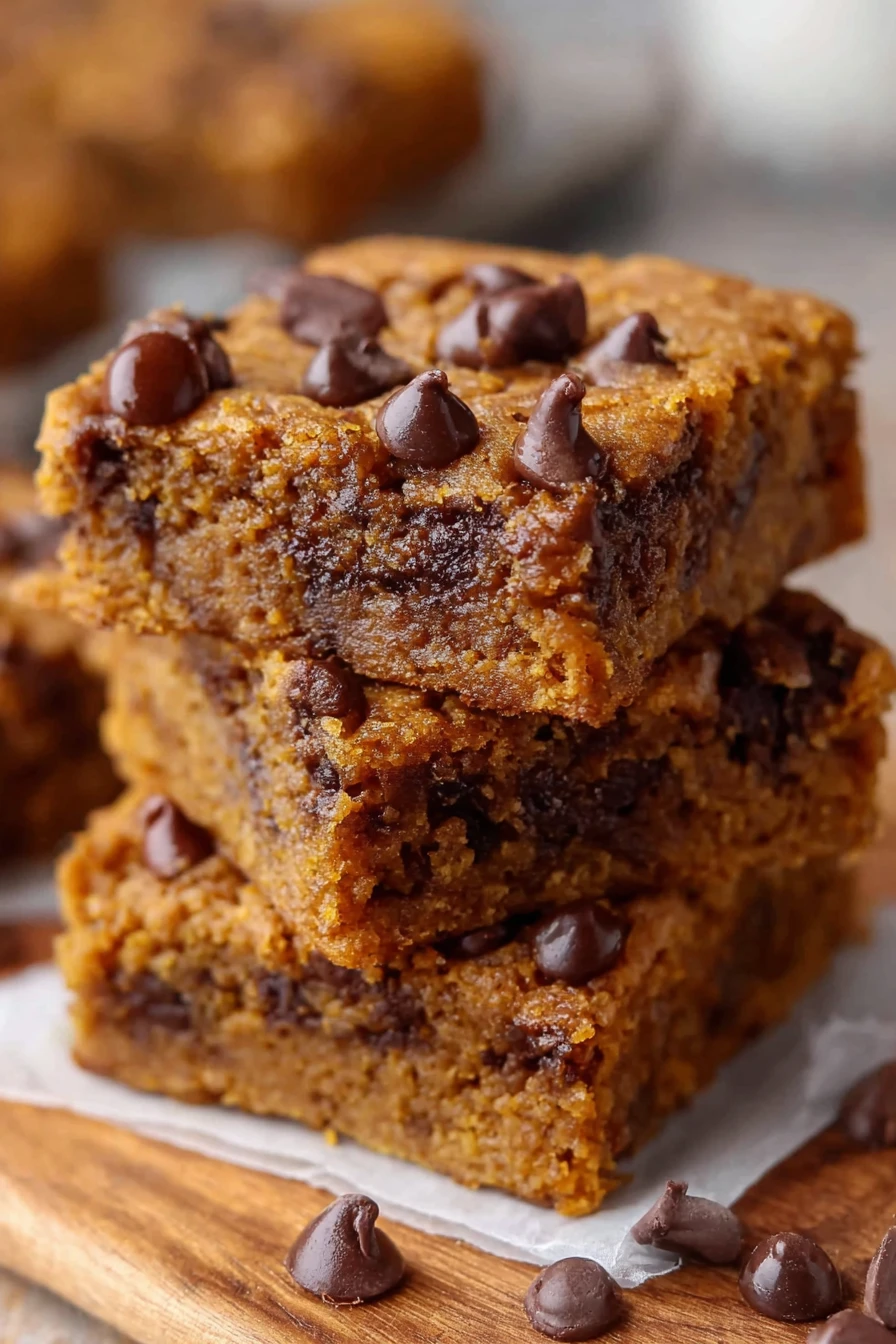
Hey there, friends! I’m beyond excited to share my go-to recipe for Pumpkin Chocolate Chip Bars today. I stumbled upon this gem a few autumns ago when I was desperate to use up some leftover canned pumpkin, and let me tell you, it’s been a game-changer in my kitchen ever since. My family goes absolutely nuts for these Pumpkin Chocolate Chip Bars, and I’m pretty sure yours will too!
I remember the first time I whipped up a batch of these Pumpkin Chocolate Chip Bars; the smell of warm spices and melting chocolate filled the house, and my kids were practically hovering over the oven. It’s one of those recipes that just screams fall, ya know? So, let’s dive into why these bars are a must-try and how you can nail them at home.
Why You’ll Love This Recipe
I’ve found that Pumpkin Chocolate Chip Bars are the perfect blend of cozy and indulgent, and honestly, they’re a breeze to make. Whether you’re a seasoned baker or just dabbling in the kitchen, these bars come together with minimal fuss and maximum flavor. In my kitchen, they’ve become a staple for fall gatherings, potlucks, or just a sweet treat on a chilly evening.
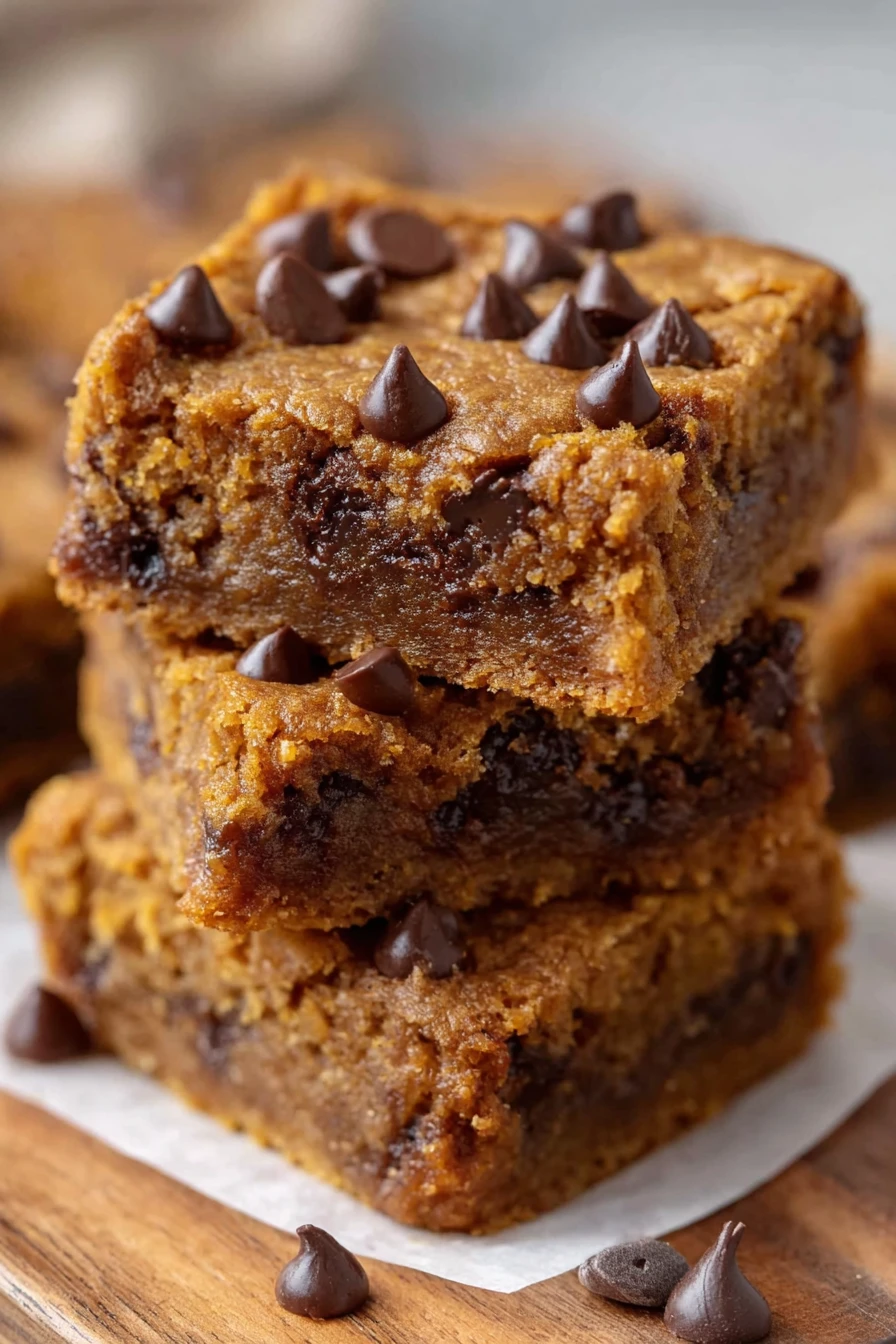
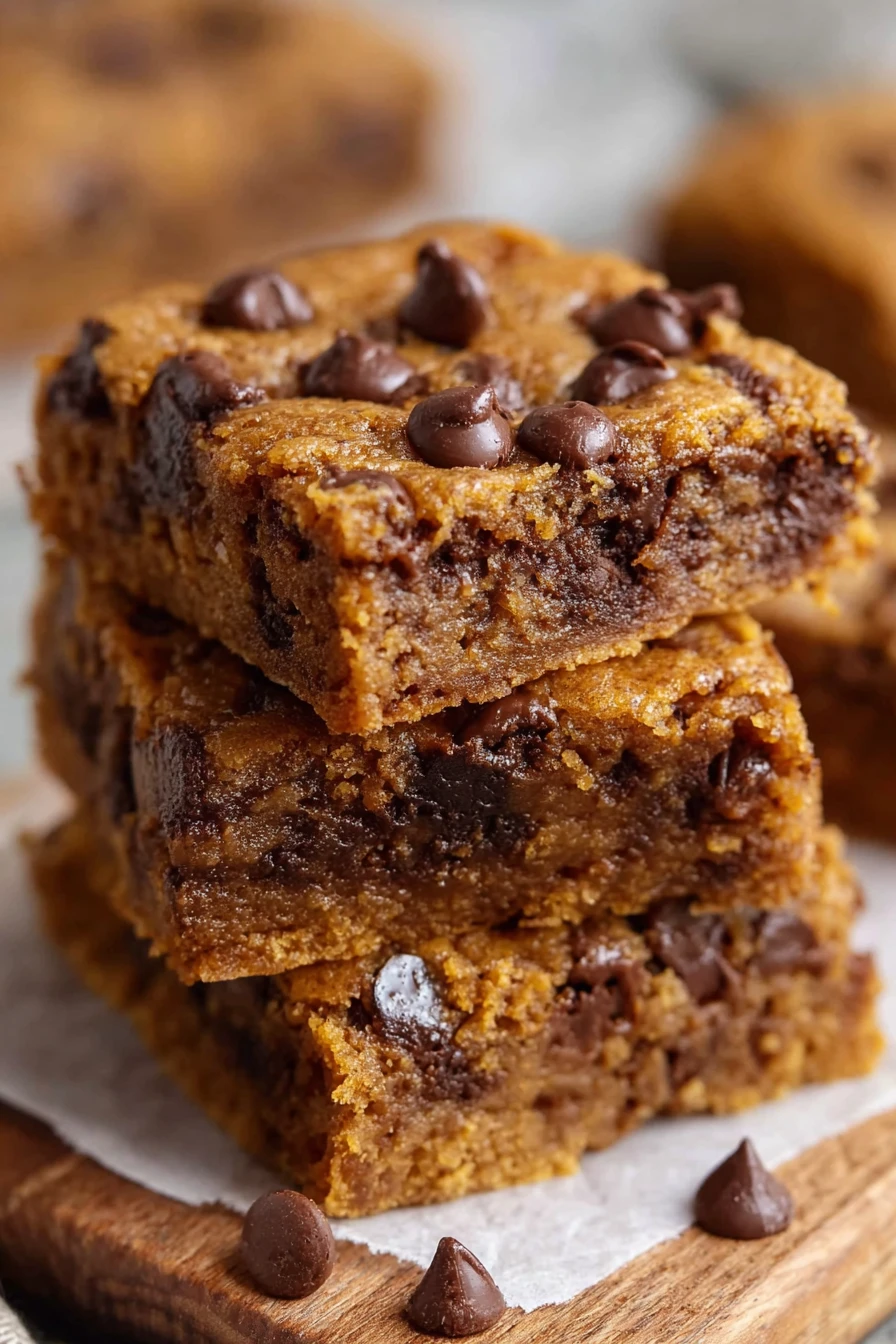
What really hooks me is how versatile Pumpkin Chocolate Chip Bars are; they’re like a hug in dessert form! The pumpkin keeps them moist (sorry, I know some folks hate that word), and the chocolate chips add just the right pop of sweetness. Trust me, one bite and you’ll be as obsessed as I am.
Ingredients List
Alright, let’s talk about what you’ll need to make these irresistible Pumpkin Chocolate Chip Bars. I’m super picky about using fresh, quality ingredients because, in my experience, it makes all the difference in the final result. I usually buy organic pumpkin puree when I can, but any canned version works just fine if you’re in a pinch.
Here’s the full rundown for a batch of Pumpkin Chocolate Chip Bars that’ll have everyone begging for seconds. I’ve included exact measurements because, let’s be real, baking is a science, and I’ve messed up enough recipes to know precision matters.
- 1 cup (240g) canned pumpkin puree, not pumpkin pie filling
- 1/2 cup (115g) unsalted butter, melted and slightly cooled
- 3/4 cup (150g) granulated sugar, for that perfect sweetness
- 1/4 cup (50g) brown sugar, packed, for a hint of molasses depth
- 1 large egg, at room temperature for better mixing
- 1 teaspoon vanilla extract, pure if you’ve got it for extra oomph
- 1 1/2 cups (190g) all-purpose flour, spooned and leveled
- 1 teaspoon baking soda, to give these bars their lift
- 1/2 teaspoon salt, to balance the sweet
- 1 teaspoon ground cinnamon, for that fall vibe
- 1/2 teaspoon ground nutmeg, just a pinch for warmth
- 1/4 teaspoon ground cloves, don’t skip this—it’s magic
- 1 cup (180g) semi-sweet chocolate chips, because Pumpkin Chocolate Chip Bars need that melty goodness
I prefer semi-sweet chips for balance, but if you’re a milk chocolate fan, go for it! This lineup makes a batch that’s just right for sharing.
Variations
One thing I adore about Pumpkin Chocolate Chip Bars is how easy they are to tweak based on your mood or what’s in your pantry. I’ve played around with this recipe more times than I can count, and I’m thrilled to share some of my favorite twists. These variations keep the core of Pumpkin Chocolate Chip Bars intact while adding a fun spin.
Here are a few ideas I’ve tried over the years that might inspire you to mix things up with your Pumpkin Chocolate Chip Bars:
- White Chocolate Twist: Swap half the semi-sweet chips for white chocolate chips for a creamier, sweeter bite.
- Nutty Crunch: Toss in 1/2 cup of chopped pecans or walnuts for some texture; my husband loves this one!
- Spiced Up: Add an extra 1/4 teaspoon of ginger to amp up the warmth in your bars.
- Pumpkin Seed Pop: Sprinkle 1/4 cup of roasted pumpkin seeds on top before baking for a seasonal flair.
- Cranberry Zing: Mix in 1/2 cup dried cranberries with the chocolate chips for a tart contrast; I tried this once and it was a hit at Thanksgiving.
- Maple Glaze: Drizzle a quick glaze of 1/2 cup powdered sugar mixed with 1 tablespoon maple syrup over cooled bars for extra sweetness.
- Oatmeal Add-In: Stir in 1/3 cup rolled oats for a heartier texture; my kids always ask for this version.
- Caramel Swirl: Swirl in 1/4 cup caramel sauce before baking for a gooey surprise.
I think you’ll find a variation that suits your taste, or hey, come up with your own spin on Pumpkin Chocolate Chip Bars!
Servings and Timing
Let’s break down the nitty-gritty of making Pumpkin Chocolate Chip Bars so you can plan ahead. In my experience, timing can vary a smidge based on your oven, but these are my go-to numbers. I’ve baked these bars enough to know roughly how long you’ll be in the kitchen.
- Prep Time: 15 minutes
- Cook Time: 25-30 minutes
- Total Time: About 45 minutes
- Servings: 12-16 bars, depending on how generous you slice ‘em
These Pumpkin Chocolate Chip Bars are perfect for a quick dessert or a crowd-pleasing treat. You’ll have plenty to share… if you don’t eat them all first!
Step-by-Step Instructions
Now, let’s get to the good stuff—making these Pumpkin Chocolate Chip Bars! I’m walking you through each step as if we’re baking side by side. I’ve got some little tricks up my sleeve to ensure your bars turn out just as scrumptious as mine.
Step 1: Preheat and Prep
First things first, crank your oven to 350°F (175°C) and line an 8×8-inch baking pan with parchment paper, leaving a bit of overhang. I’ve learned the hard way that this makes cleanup a cinch and helps lift out the Pumpkin Chocolate Chip Bars without a mess. Grease the paper lightly if you’re worried about sticking.
Step 2: Mix Wet Ingredients
In a big ol’ bowl, whisk together the melted butter, granulated sugar, and brown sugar until it’s nice and smooth. Add the pumpkin puree, egg, and vanilla extract, and give it a good stir. I usually use a whisk here because it gets everything blended without overdoing it—key for tender Pumpkin Chocolate Chip Bars.
Step 3: Combine Dry Ingredients
In another bowl, mix the flour, baking soda, salt, cinnamon, nutmeg, and cloves. I like to sift these together to avoid any clumps, especially with the spices. This step ensures your Pumpkin Chocolate Chip Bars have that even, spiced flavor in every bite.
Step 4: Bring It Together
Slowly add the dry mix to the wet ingredients, stirring just until combined. Don’t go overboard here; overmixing is the enemy of soft bars! Fold in those chocolate chips with a spatula, making sure they’re spread throughout the batter for perfect Pumpkin Chocolate Chip Bars.
Step 5: Bake It Up
Spread the batter evenly into your prepared pan, smoothing the top with a spatula (or, let’s be real, sometimes I just shake the pan a little). Bake for 25-30 minutes, or until a toothpick comes out mostly clean with a few moist crumbs. I start checking at 25 minutes since my oven runs hot, and I don’t want dry Pumpkin Chocolate Chip Bars.
Step 6: Cool and Slice
Let the bars cool in the pan for at least 20 minutes before lifting them out using the parchment overhang. Slice into squares once they’re at room temp—patience is tough, I know, but it’s worth it for neat cuts of Pumpkin Chocolate Chip Bars. Dive in and enjoy!
Nutritional Information
I’m no dietitian, but I like to keep an eye on what’s in my treats like these Pumpkin Chocolate Chip Bars. Here’s a rough breakdown per serving, based on cutting the batch into 12 pieces. Keep in mind, this is just a guide, and portions can vary.
- Calories: 220 per bar
- Fat: 10g
- Protein: 3g
- Carbohydrates: 30g
- Sodium: 180mg
These Pumpkin Chocolate Chip Bars aren’t exactly health food, but they’re a soul-warming indulgence. I figure a little balance in life never hurt anyone, right?
Healthier Alternatives
If you’re looking to lighten up these Pumpkin Chocolate Chip Bars, I’ve got some swaps I’ve tried when I’m watching my waistline. They still taste amazing, just with a few tweaks. Here’s how you can make Pumpkin Chocolate Chip Bars a tad guilt-free.
- Lower Sugar: Cut the granulated sugar to 1/2 cup and add a tablespoon of maple syrup for natural sweetness.
- Less Fat: Replace half the butter with unsweetened applesauce; I’ve done this and it keeps things moist.
- Flour Swap: Use half whole wheat flour instead of all-purpose for a fiber boost in your Pumpkin Chocolate Chip Bars.
- Chocolate Cut: Reduce chocolate chips to 3/4 cup or use dark chocolate for less sugar.
These tweaks work great, though I’ll admit I usually stick to the original for full decadence!
Serving Suggestions
I love brainstorming fun ways to serve Pumpkin Chocolate Chip Bars because they’re so darn versatile. Whether it’s a casual snack or a party dessert, here are some ideas from my kitchen to yours. These have all wowed folks at my table when I’ve served Pumpkin Chocolate Chip Bars.
- With a Drink: Pair with a hot cup of coffee or spiced chai for the ultimate fall vibe.
- Dessert Style: Top with a dollop of whipped cream for an extra treat; my guests rave about this.
- Ice Cream Combo: Serve warm Pumpkin Chocolate Chip Bars with a scoop of vanilla ice cream—pure heaven.
- Brunch Addition: Add to a brunch spread alongside fresh fruit for a sweet balance.
Common Mistakes to Avoid
I’ve botched my fair share of batches of Pumpkin Chocolate Chip Bars over the years, so let me save you some heartache. Trust me on this one, avoiding these pitfalls makes all the difference. Here are mistakes I’ve made with Pumpkin Chocolate Chip Bars that you can sidestep.
- Overbaking: Pull them out when a toothpick has moist crumbs; I’ve left them in too long and ended up with dry bars.
- Wrong Pumpkin: Don’t use pumpkin pie filling—it’s too sweet and spiced already.
- Skipping Cooling: Cutting too soon makes a crumbly mess; I learned the hard way with a ruined batch of Pumpkin Chocolate Chip Bars.
- Overmixing Batter: Mix just until combined, or you’ll get tough bars instead of chewy ones.
Storing Tips
I’ve found that Pumpkin Chocolate Chip Bars keep surprisingly well if you store ‘em right. Here’s how I keep mine fresh for as long as possible. These tips work great for Pumpkin Chocolate Chip Bars after many trial runs.
- Room Temp: Store in an airtight container for up to 2 days if you’re snacking soon.
- Refrigerator: Keeps for 5-7 days chilled in a sealed container; I prefer this for longer freshness.
- Freezer: Freeze cut bars for up to 2 months, wrapped individually in plastic wrap.
Frequently Asked Questions
I get a bunch of questions about making Pumpkin Chocolate Chip Bars, so I’ve rounded up the most common ones. Let’s tackle these so you’ve got all the info to bake with confidence. Here we go with some answers about Pumpkin Chocolate Chip Bars!
Can I use fresh pumpkin instead of canned?
Absolutely, you can! I’ve done it by roasting and pureeing my own pumpkin, but just make sure it’s not too watery—strain it if needed. It’s more work, but the flavor in Pumpkin Chocolate Chip Bars can be even deeper.
Can I make these gluten-free?
Yep, I’ve swapped in a 1:1 gluten-free baking flour before, and it worked fine. The texture might be a tad different, but still yummy.
Do these bars freeze well?
They freeze like a dream! Wrap ‘em tight and they’re good for a couple months.
Can I double the recipe?
Sure thing, just use a 9×13 pan and add a few minutes to the bake time. I’ve done this for parties with great results.
What if I don’t have all the spices?
No worries, just use a teaspoon of pumpkin pie spice instead. It’s a solid shortcut.
Can I use milk chocolate chips?
Go for it! I prefer semi-sweet, but milk chocolate makes sweeter bars if that’s your vibe.
How do I know when they’re done?
Check with a toothpick at 25 minutes; a few moist crumbs mean they’re good to go. Don’t overthink it!
Can kids help make these?
Oh, for sure—mine love stirring in the chips. It’s an easy recipe for little helpers.
Conclusion
So there you have it, my tried-and-true guide to making Pumpkin Chocolate Chip Bars that’ll steal the show. I can’t wait for you to try these and fill your home with that amazing fall aroma. If you’ve got questions or fun twists on Pumpkin Chocolate Chip Bars, drop ‘em below—I’m all ears! Happy baking, y’all!
Conclusion
I hope you enjoyed this recipe for Pumpkin Chocolate Chip Bars! It’s truly one of my favorites, and I’m confident you’ll love it too.
Remember to follow the steps carefully for the best results. Don’t hesitate to experiment with your own variations and make this recipe your own. Happy cooking!