
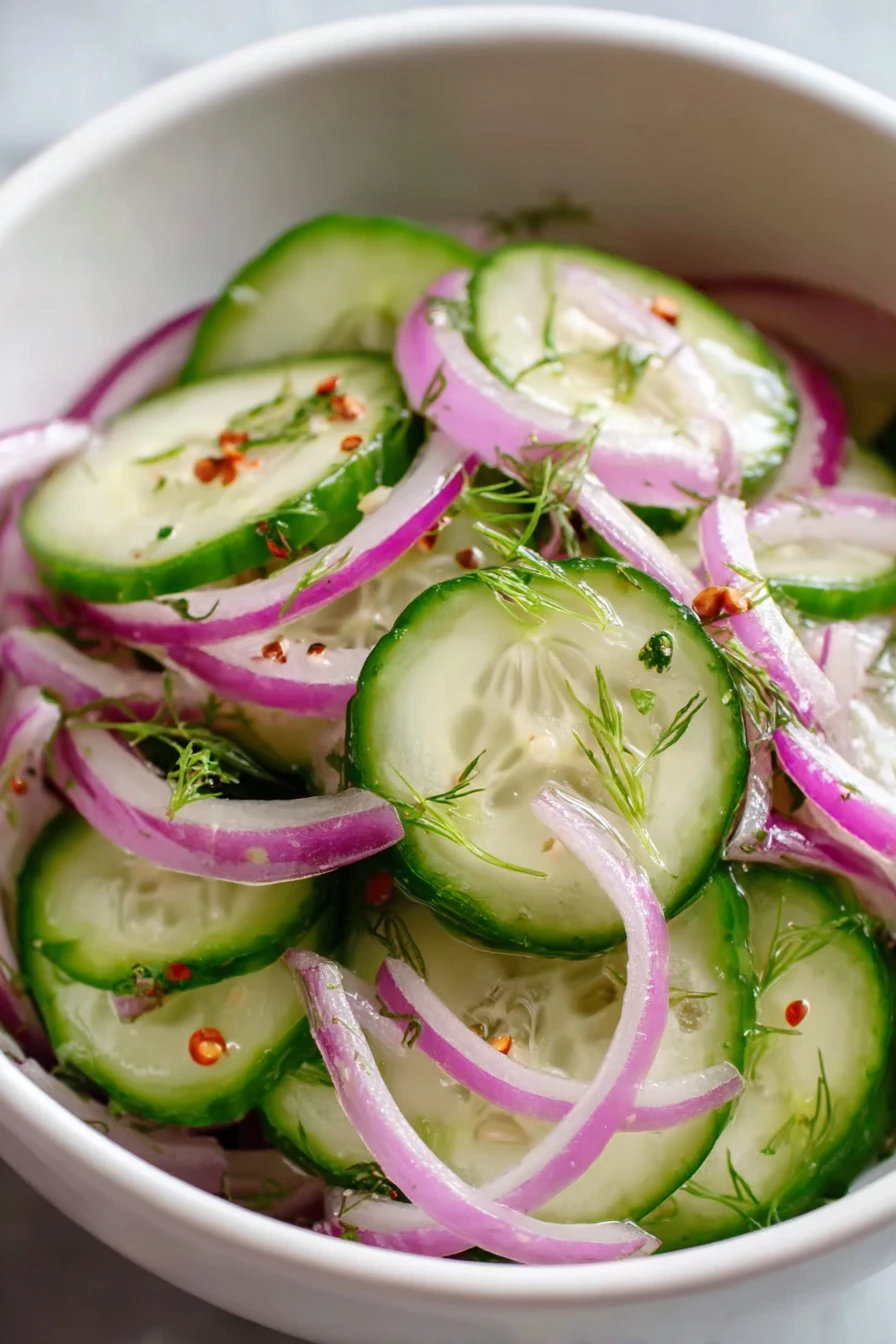
I’ll never forget the first time I whipped up a batch of Quick Pickled Cucumbers and Onions. It was one of those sweltering summer afternoons, and I was desperate for something tangy to pair with my grilled burgers. My family was coming over, and I needed a side dish that wouldn’t keep me slaving over a hot stove. That’s when I stumbled upon this gem of a recipe for Quick Pickled Cucumbers and Onions, and let me tell ya, it was a game-changer!
Seriously, the bright, zippy flavors were an instant hit. My picky uncle, who usually turns his nose up at anything remotely “fancy,” couldn’t stop munching on these. Ever since, Quick Pickled Cucumbers and Onions have been a staple in my kitchen, whether I’m throwing a backyard BBQ or just jazzing up a boring sandwich.
And honestly, if I can pull this off with minimal effort (and a few kitchen disasters under my belt), you can too. Let’s dive into why Quick Pickled Cucumbers and Onions deserve a spot on your table!
Why You’ll Love This Recipe
I’ve found that Quick Pickled Cucumbers and Onions are the ultimate crowd-pleaser, mostly ‘cause they’re so darn easy to make. You don’t need any fancy equipment or chef skills to get that perfect balance of sweet, sour, and crunchy. In my kitchen, this recipe has saved the day more times than I can count, especially when I’ve got last-minute guests.
Plus, the versatility of Quick Pickled Cucumbers and Onions is off the charts! Toss ‘em on tacos, pile ‘em into salads, or just snack straight from the jar (guilty as charged). I promise, once you try these, you’ll be hooked on that crisp, tangy bite just like I am.
Ingredients List
I’m pretty picky about the ingredients for Quick Pickled Cucumbers and Onions because fresh stuff makes all the difference. I usually buy my cukes and onions from the local farmers’ market when I can; there’s something about that just-picked vibe that elevates the whole dish. But don’t stress if you’re grabbing yours from the grocery store, they’ll still turn out amazing.
Here’s everything you’ll need to make a solid batch of Quick Pickled Cucumbers and Onions. I’ve tweaked these measurements over time to get the flavors just right, so trust me on the portions. And hey, if you’ve got a favorite vinegar or spice, feel free to play around a bit!
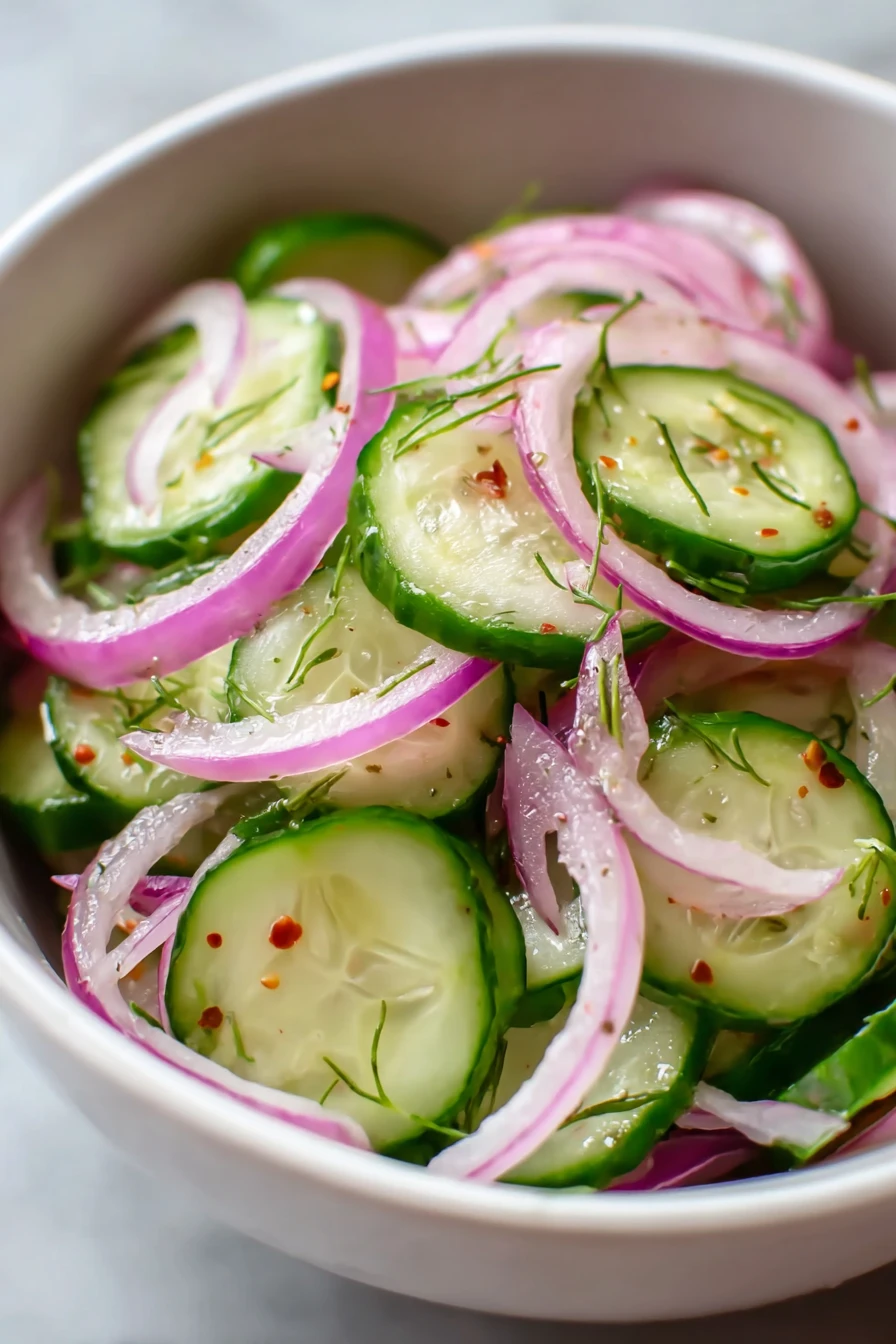
- 2 medium cucumbers, thinly sliced (I like using a mandoline for even cuts)
- 1 large red onion, thinly sliced (red adds a pretty color, but yellow works too)
- 1 cup (240ml) white vinegar, for that classic tangy punch
- 1/2 cup (120ml) apple cider vinegar, for a subtle sweetness
- 3/4 cup (150g) granulated sugar, to balance the acidity
- 1 tablespoon (15g) kosher salt, for depth of flavor
- 1 teaspoon mustard seeds, for a little pop of spice
- 1/2 teaspoon black peppercorns, for a mild kick
- 2 cups (480ml) water, to dilute the brine just enough
I’ve made Quick Pickled Cucumbers and Onions with different vinegars before, and I prefer this mix of white and apple cider for the best balance. If you’re new to pickling, don’t skimp on the salt, it’s what draws out the moisture and keeps things crisp. Honestly, getting the right ingredients is half the battle won!
Variations
One thing I adore about Quick Pickled Cucumbers and Onions is how easy it is to switch things up. I’ve experimented with a bunch of twists over the years, depending on what I’ve got in the pantry or who I’m cooking for. Here are some of my go-to variations for Quick Pickled Cucumbers and Onions that you might wanna try.
- Spicy Kick: Toss in a sliced jalapeño or 1/2 teaspoon of red pepper flakes to the brine for some heat. I tried this once for a game night, and my friends couldn’t get enough!
- Garlic Lover’s Dream: Add 2-3 smashed garlic cloves to the jar. It infuses a deep, savory note that’s just heavenly.
- Dill Delight: Mix in a handful of fresh dill sprigs or 1 teaspoon dried dill. My kids always ask for this version with their sandwiches.
- Sweet and Sour: Bump up the sugar by 1/4 cup if you’re into a sweeter pickle. I did this by accident once and ended up loving it.
- Asian Twist: Swap half the vinegar for rice vinegar and add a teaspoon of sesame seeds. It’s amazing with stir-fries.
- Herby Vibes: Throw in some fresh thyme or rosemary for an earthy touch. I’ve done this for fancy dinners, and it looks so pretty!
- Turmeric Glow: Add 1/2 teaspoon turmeric powder for a vibrant color and subtle warmth. It’s a fun change-up for Quick Pickled Cucumbers and Onions.
I think playing with flavors is half the fun of making Quick Pickled Cucumbers and Onions. Whether you’re a spice fiend or a sweet-tooth like me, there’s a version out there for you. What tweak are you most excited to try?
Servings and Timing
In my experience, making Quick Pickled Cucumbers and Onions is a breeze when it comes to timing. It’s one of those recipes where you can whip it up and have it ready before you’ve even finished prepping the rest of your meal. Here’s the breakdown of how long it usually takes me to get a batch of Quick Pickled Cucumbers and Onions done.
- Prep Time: 10 minutes
- Cook Time: 5 minutes (just for heating the brine)
- Total Time: 15 minutes (plus chilling time)
- Servings: 6-8 portions (or one big jar for snacking)
Step-by-Step Instructions
I’ve made Quick Pickled Cucumbers and Onions so many times, I could probably do it blindfolded (okay, maybe not, but you get the idea). I’m gonna walk you through each step like I’m right there in your kitchen. Let’s get started with this no-fuss recipe for Quick Pickled Cucumbers and Onions!
Step 1: Prep Your Veggies
First things first, grab those cucumbers and that onion. I like to slice ‘em super thin using a mandoline ‘cause it saves time and keeps everything uniform, but a sharp knife works just fine too. Pack your sliced cukes and onions into a clean glass jar or a bowl if you’re planning to eat Quick Pickled Cucumbers and Onions right away.
Step 2: Make the Brine
Now, let’s get that brine going. In a small saucepan, combine your vinegars, water, sugar, salt, mustard seeds, and peppercorns, then heat it over medium until the sugar and salt dissolve, about 3-5 minutes. I usually give it a good stir and take a whiff, there’s nothing like the smell of a brine coming together for Quick Pickled Cucumbers and Onions!
Step 3: Pour and Chill
Once the brine is ready, carefully pour it over your veggies in the jar. Make sure everything’s submerged, and if not, press ‘em down with a spoon (I’ve had to do this a few times when I overpack the jar). Let it cool to room temp, then pop it in the fridge for at least an hour before digging into your Quick Pickled Cucumbers and Onions.
Step 4: Enjoy or Store
After chilling, you’re good to go! I always sneak a taste straight from the jar to make sure the flavors are on point. Honestly, Quick Pickled Cucumbers and Onions get even better after a day or two in the fridge as they soak up more of that tangy goodness.
Nutritional Information
I’m no dietitian, but I like to keep an eye on what I’m eating, especially with something as snackable as Quick Pickled Cucumbers and Onions. Here’s the rough breakdown per serving, based on what I’ve looked up and calculated for a batch of Quick Pickled Cucumbers and Onions. It’s a light option, which is why I love having it around!
- Calories: 45 per serving
- Fat: 0g
- Protein: 1g
- Carbohydrates: 11g
- Sodium: 290mg
These numbers can vary a bit depending on how much sugar you use, but in my experience, Quick Pickled Cucumbers and Onions are a guilt-free way to add flavor to any meal.
Healthier Alternatives
I’m all for indulging, but sometimes I wanna lighten things up with my Quick Pickled Cucumbers and Onions. Over the years, I’ve swapped ingredients here and there to cut down on sugar or sodium. Here are a few healthier twists I’ve tried for Quick Pickled Cucumbers and Onions that still taste awesome.
- Less Sugar: Replace half the sugar with a natural sweetener like honey or just cut it down to 1/4 cup. I do this when I’m watching my sweet intake.
- Low Sodium: Use only 1/2 tablespoon of salt or switch to a salt substitute. It’s still tasty, trust me.
- Vinegar Switch: Opt for all apple cider vinegar if you’re avoiding processed stuff. I’ve done this for a mellower flavor in Quick Pickled Cucumbers and Onions.
These tweaks let me enjoy Quick Pickled Cucumbers and Onions without overdoing it, especially when I’m munching on them straight from the fridge (which is, uh, often).
Serving Suggestions
I love getting creative with how I serve Quick Pickled Cucumbers and Onions, ‘cause they go with just about everything. Whether it’s a casual lunch or a big family dinner, these pickles add a zesty punch. Here are some of my fave ways to dish up Quick Pickled Cucumbers and Onions.
- Burger Topper: Pile ‘em high on a juicy burger for crunch and tang. It’s my go-to for BBQs!
- Sandwich Booster: Layer into a turkey or ham sandwich. It’s a lunchtime game-changer.
- Salad Add-In: Toss into a green salad for extra zing. I did this at my last potluck, and it stole the show.
- Taco Twist: Use as a topping for fish or carnitas tacos. Quick Pickled Cucumbers and Onions bring such a fresh vibe!
Common Mistakes to Avoid
I’ve botched my share of Quick Pickled Cucumbers and Onions over the years, so lemme save you some headaches. These are mistakes I learned the hard way, and I’m passing on the wisdom. Avoid these pitfalls when making Quick Pickled Cucumbers and Onions, and you’ll be golden.
- Overcooking the Brine: Don’t boil it too long, or the vinegar loses its punch. I did this once, and the flavor was flat.
- Not Slicing Thin Enough: Thick slices don’t soak up the brine well. Trust me, I’ve had soggy, uneven pickles before.
- Skipping the Chill: Eating them too soon means missing out on max flavor. I’ve been impatient, and it’s just not the same.
- Wrong Jar Size: Pack too tight, and the brine won’t cover everything. Guilty of this with my first batch of Quick Pickled Cucumbers and Onions!
Storing Tips
I’ve found that Quick Pickled Cucumbers and Onions keep really well if you store ‘em right. I’m always making big batches, so I’ve got this down to a science. Here’s how to make your Quick Pickled Cucumbers and Onions last.
- Refrigerator: Store in an airtight jar for up to 2 weeks. I’ve gone longer, but the crunch starts to fade.
- Room Temp: Don’t leave ‘em out for more than a day before chilling. They’re best cold anyway for Quick Pickled Cucumbers and Onions!

Frequently Asked Questions
I get a lotta questions about Quick Pickled Cucumbers and Onions, so I’ve rounded up the most common ones. Here’s the scoop based on my own trials and errors. Let’s clear up any confusion about making Quick Pickled Cucumbers and Onions!
Can I use other veggies?
Absolutely, toss in carrots, radishes, or even green beans. I’ve done carrots with great success, just slice ‘em thin.
How long do they need to sit before eating?
At least an hour in the fridge, but overnight is best. I usually can’t wait that long, ha!
Can I reuse the brine?
I wouldn’t recommend it since it loses potency. I tried once, and the second batch was meh.
Do I need to sterilize the jar?
Not for fridge pickles like these, just make sure it’s clean. I’ve never had an issue.
Can I can these for long-term storage?
This recipe isn’t for canning, it’s a quick pickle. Use a proper canning recipe if you want shelf-stable jars.
What if I don’t have mustard seeds?
Skip ‘em or use a pinch of ground mustard. I’ve done both, no biggie.
Are these safe for kids?
Totally, unless they’re sensitive to vinegar or spice. My kiddos love Quick Pickled Cucumbers and Onions!
Can I make a bigger batch?
For sure, just double or triple the recipe. I do this for parties all the time.
Conclusion
I’m so excited for you to try making Quick Pickled Cucumbers and Onions at home! They’re such a simple way to add a burst of flavor to any meal, and I’ve yet to meet someone who doesn’t love ‘em. So grab those cukes, whip up a batch of Quick Pickled Cucumbers and Onions, and let me know how it goes, I’m all ears for your kitchen stories!
Conclusion
I hope you enjoyed this recipe for Quick Pickled Cucumbers and Onions! It’s truly one of my favorites, and I’m confident you’ll love it too. Remember to follow the steps carefully for the best results.
Don’t hesitate to experiment with your own variations and make this recipe your own. Happy cooking!