

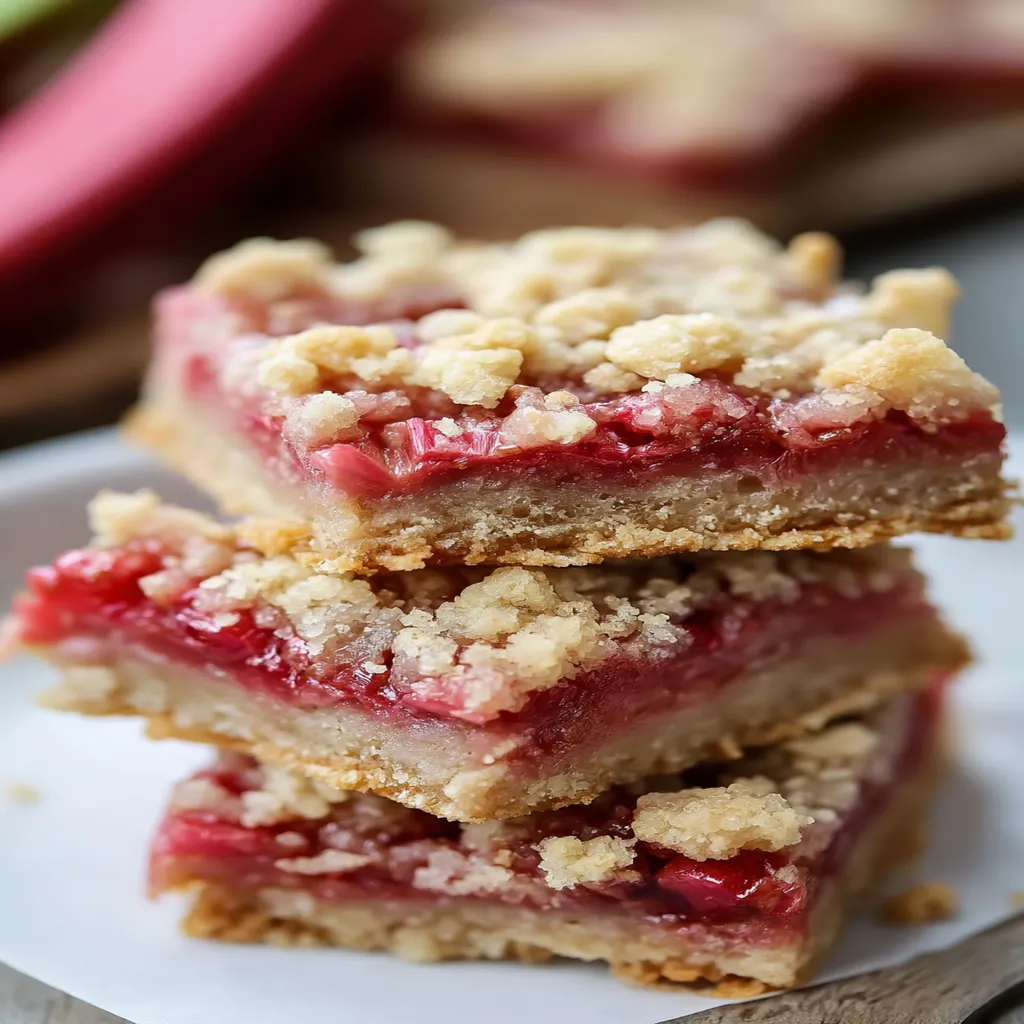
I’ll never forget the first time I tried making Rhubarb Bars. It was a rainy spring afternoon, and I’d just picked up a bundle of bright red rhubarb stalks from the local farmers’ market, all excited to turn them into something sweet. My kitchen smelled like a dream as they baked, but boy, did I mess up the crust that day (more on that later)!
Honestly, though, once I got the hang of it, Rhubarb Bars became a staple in my house. My family can’t get enough of that tart-sweet combo, and I love how easy they are to whip up, even on busy weeknights. So, if you’re looking to impress with a dessert that’s as pretty as it is tasty, stick with me—I’ve got seven no-fail tips to make your bars the talk of the table.
Why You’ll Love This Recipe
I’ve found that Rhubarb Bars strike the perfect balance between nostalgia and a little something special. There’s just something about that tangy rhubarb paired with a buttery, crumbly base that takes me back to my grandma’s kitchen—but with my own twist. They’re a crowd-pleaser, no doubt, whether it’s a potluck or just a cozy night in.
Plus, in my kitchen, they’re a fantastic way to use up rhubarb when it’s in season. I’m all about simple recipes that don’t require a million steps, and trust me, this one delivers big flavor without the fuss. You’ll be hooked after the first bite!
Ingredients List
I’m pretty picky about ingredients when it comes to baking Rhubarb Bars, because the quality really shines through in the final result. I usually buy fresh rhubarb from a local market for that vibrant color and tart punch, but frozen works in a pinch if you thaw it first. Here’s what you’ll need to make a batch of these beauties, split into the crust and filling components for clarity.
Crust Ingredients
- 2 cups (240g) all-purpose flour, sifted for a smoother texture
- 3/4 cup (150g) granulated sugar, for just the right sweetness
- 1 cup (225g) unsalted butter, cold and cubed for that flaky, melt-in-your-mouth crust
- 1/2 teaspoon (2.5g) salt, to balance the flavors
Filling Ingredients
- 4 cups (400g) rhubarb, chopped into 1/2-inch pieces for even cooking
- 1 1/2 cups (300g) granulated sugar, to tame the tartness
- 4 large eggs, at room temperature for a smoother mix
- 1/2 cup (60g) all-purpose flour, to thicken the filling
- 1 teaspoon (5ml) vanilla extract, for a warm, cozy note
- 1/4 teaspoon (1g) ground cinnamon, because I can’t resist that subtle spice
I prefer using unsalted butter since it lets me control the saltiness, and I always go for real vanilla extract over imitation—it’s worth the splurge. If your rhubarb is super tart, you might tweak the sugar a bit, but this ratio usually nails it for me.
Variations
I’ve played around with Rhubarb Bars a ton over the years, and I’m thrilled to share some variations that’ll spice up your baking game. Whether you’re catering to different tastes or just feeling adventurous, these twists keep things fresh. Here are a few I’ve tried (and loved) in my own kitchen.
- Strawberry-Rhubarb Mix: Swap out 1 cup of rhubarb for fresh strawberries to add a sweeter, juicier layer. I tried this once for a summer picnic, and it was a hit!
- Nutty Crunch: Mix 1/2 cup of chopped walnuts or pecans into the crust for extra texture. My kids always ask for this version.
- Lemon Zest Pop: Add the zest of one lemon to the filling for a bright, citrusy kick that pairs so well with rhubarb.
- Oatmeal Crumble: Replace 1/2 cup of flour in the crust with rolled oats for a rustic, chewy vibe. It’s my go-to when I want something heartier.
- Ginger Spice: Toss in 1/2 teaspoon of ground ginger to the filling for a warm, zesty note. I stumbled on this by accident and now it’s a fave.
- Cream Cheese Swirl: Dollop 4 ounces of softened cream cheese mixed with 2 tablespoons sugar over the filling before baking. It’s pure decadence.
- Gluten-Free Swap: Use a 1:1 gluten-free flour blend instead of all-purpose flour. I’ve made this for friends with dietary needs, and they couldn’t tell the difference.
- Maple Twist: Substitute 1/4 cup of sugar in the filling with maple syrup for a deeper, autumnal flavor. It’s a bit unconventional, but I’m obsessed.
Servings and Timing
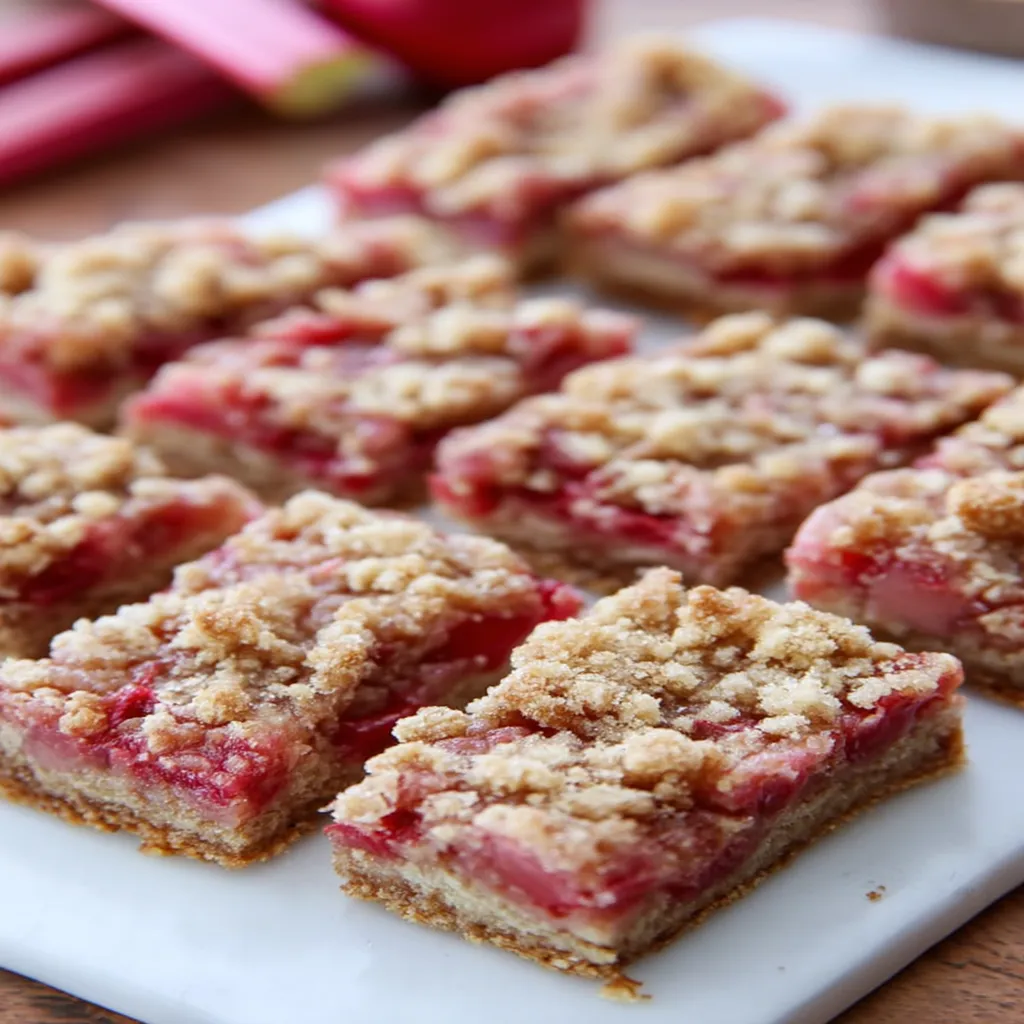
In my experience, this recipe for Rhubarb Bars yields about 12 generous pieces, perfect for a small gathering or a few days of snacking. If you’re feeding a bigger crowd, just double it up in a larger pan. Here’s how the timing usually shakes out for me.
- Prep Time: 20 minutes
- Bake Time: 45-50 minutes
- Total Time: About 1 hour 10 minutes, plus cooling
It usually takes me a bit longer if I’m chatting with someone while chopping rhubarb, but hey, that’s half the fun of baking, right?
Step-by-Step Instructions
I’m gonna walk you through making Rhubarb Bars like I’m right there in your kitchen. These steps are straight from my many trial-and-error batches, complete with little tricks I’ve picked up. Let’s get to it!
Step 1: Preheat and Prep Your Pan
First things first, crank your oven to 350°F (175°C). Grab a 9×13-inch baking pan and line it with parchment paper, leaving some overhang to lift the bars out later. I learned the hard way that skipping this step makes for a sticky mess—trust me, parchment is your friend.
Step 2: Make the Crusty Foundation
In a big bowl, mix 2 cups of flour, 3/4 cup sugar, and 1/2 teaspoon salt. Cut in that cold, cubed butter with a pastry cutter or your fingers until it looks like coarse crumbs—kinda like wet sand. Press this into your pan firmly; I usually use the bottom of a glass to get it even, then bake it for 15 minutes until it’s just golden.
Step 3: Whip Up the Rhubarb Filling
While the crust bakes, toss your chopped rhubarb with 1 1/2 cups sugar, 4 eggs, 1/2 cup flour, vanilla, and cinnamon in another bowl. Stir it until it’s well combined, but don’t overmix—rhubarb can get mushy fast. I’ve botched Rhubarb Bars before by rushing this and not coating the pieces evenly, so take your time here.
Step 4: Assemble and Bake Those Bars
Pour that gorgeous pink filling over your pre-baked crust, spreading it out nice and even. Pop it back in the oven for 30-35 minutes until the filling is set but still a tad jiggly in the center. I always toothpick-test it; if it comes out clean, your Rhubarb Bars are good to go!
Step 5: Cool and Slice
Let the pan cool completely on a wire rack—about an hour or so—before slicing into bars. I’m impatient, so I’ve cut into hot Rhubarb Bars before, and they just crumble. Give ‘em time, and you’ll get those perfect squares for showing off.
Nutritional Information
I’m not gonna pretend I’m a nutritionist, but I’ve crunched the numbers on these Rhubarb Bars for anyone curious about what they’re digging into. These are per serving, based on 12 pieces, and honestly, they’re a treat worth indulging in occasionally. Here’s the breakdown.
- Calories: 320 per serving
- Fat: 16g
- Protein: 4g
- Carbohydrates: 42g
- Sodium: 200mg
Healthier Alternatives
When I’m trying to lighten up my Rhubarb Bars, I’ve swapped a few things without losing that drool-worthy taste. Baking doesn’t have to mean guilt, and these tweaks have worked for me over the years. Give ‘em a shot if you’re watching your intake.
- Reduced Sugar: Cut the sugar in the filling to 1 cup and add a splash of apple juice for natural sweetness. I do this when my rhubarb isn’t too tart.
- Butter Swap: Replace half the butter in the crust with unsweetened applesauce for fewer calories. I’ve done this and still got a tasty base for Rhubarb Bars.
- Whole Wheat Flour: Use half whole wheat flour in the crust for a fiber boost. It’s a bit denser, but I kinda like the nutty vibe.
Serving Suggestions
I love getting creative with how I dish up Rhubarb Bars, and I’ve got a couple of ideas that’ll make ‘em shine at your table. Whether it’s a casual snack or a fancy dessert, these pair beautifully with a few extras. Here’s what I’ve tried and adored.
- Coffee Break Treat: Serve a square with a hot cup of coffee for a mid-morning pick-me-up. It’s my go-to on slow weekends.
- Dessert Deluxe: Top Rhubarb Bars with a dollop of whipped cream or a scoop of vanilla ice cream. At my last dinner party, this combo got all the oohs and aahs!
Common Mistakes to Avoid
I’ve flubbed Rhubarb Bars more times than I care to admit, so I’m spilling the beans on pitfalls to dodge. These are straight from my own kitchen disasters, and I’m hoping you’ll skip the frustration I felt. Listen up!
- Undercooked Crust: Don’t skip pre-baking the crust, or it’ll turn soggy under the filling. I learned the hard way with a mushy batch of Rhubarb Bars.
- Overbaking the Filling: Pull ‘em out when the center still has a slight wobble, or you’ll end up with a rubbery mess. Trust me on this one—I’ve overdone it before.
Storing Tips
I’ve found that Rhubarb Bars keep surprisingly well if you store ‘em right, which is great for making ahead. Here’s how I keep mine fresh and tasty for as long as possible. These tricks have saved me many times.
- Refrigerator: Store in an airtight container for up to 5 days. I layer parchment between pieces to avoid sticking.
- Freezer: Freeze individual bars wrapped in plastic wrap for up to 2 months. Thaw overnight in the fridge when you’re ready.
Frequently Asked Questions
I get a bunch of questions about making Rhubarb Bars, so I’ve rounded up the most common ones with answers straight from my kitchen. Let’s dive into these queries—I’m happy to help!
Can I use frozen rhubarb for Rhubarb Bars?
Absolutely, you can! Just thaw it completely and pat it dry with paper towels to avoid extra moisture. I’ve used frozen plenty of times, and it works like a charm.
How do I know when the bars are done?
Look for a set filling with a slight jiggle in the center, and a toothpick should come out mostly clean. I usually check at 30 minutes and go from there.
Can I make Rhubarb Bars gluten-free?
Yep, swap the flour for a 1:1 gluten-free baking blend. I’ve done this for friends, and they couldn’t tell the difference. Just double-check your blend for best results.
Do I have to pre-bake the crust?
You bet—don’t skip it! Pre-baking keeps it from getting soggy under the wet filling. I forgot once, and it was a total flop.
Can I reduce the sugar?
Sure, try cutting it down by a quarter and taste your rhubarb first. If it’s super tart, you might need more. I’ve tweaked it based on the batch.
How long do they last?
In the fridge, about 5 days if stored airtight. I’ve pushed it to a week, but they’re best fresh.
Can I add other fruits?
Totally, strawberries or raspberries pair awesome with rhubarb. I’ve mixed in berries for extra sweetness, and it’s always a hit.
Why did my filling crack?
That’s usually from overbaking or cooling too fast. Pull ‘em out a bit early and cool slowly on a rack. I’ve had cracks before, but they still taste great!
Conclusion
I’m so stoked to share these tips for Rhubarb Bars with y’all, and I hope they bring as much joy to your kitchen as they do to mine. Grab some rhubarb, roll up your sleeves, and give these Rhubarb Bars a whirl—I’d love to hear how they turn out! Drop a comment or tag me if you try ‘em; nothing makes me happier than seeing your baking wins.