
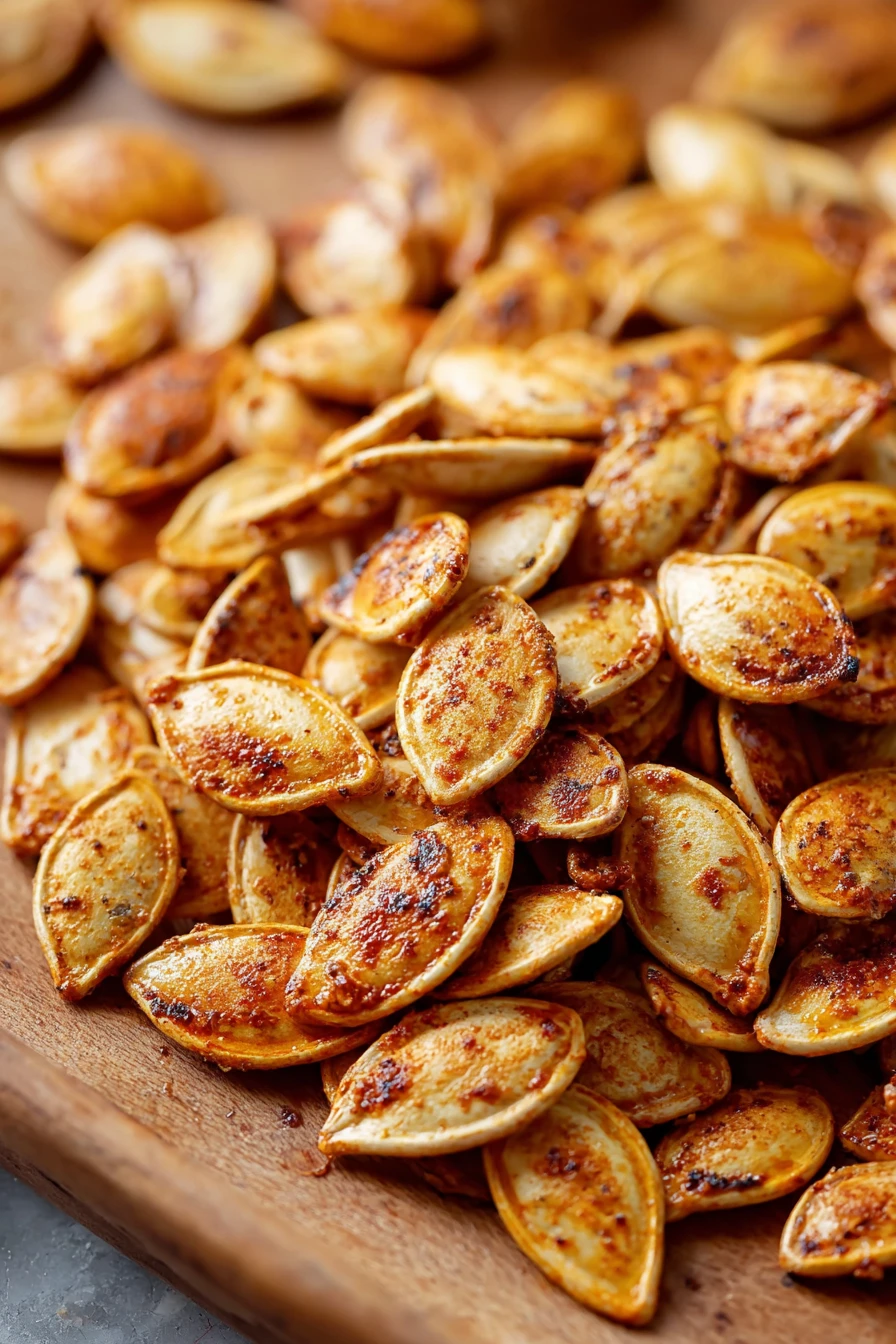
I’ll never forget the first time I made Roasted Pumpkin Seeds after carving pumpkins with my kids a few years back. We’d scooped out all that slimy goop (yep, it’s as gross as it sounds), and I figured I couldn’t just toss it in the trash. So, I separated the seeds, gave ‘em a rinse, and turned them into a crunchy, salty snack that disappeared in minutes. Honestly, whipping up Roasted Pumpkin Seeds has become a fall tradition in my house ever since, and I’m stoked to share how easy it is with you!
If you’ve got a pumpkin on hand, whether from Halloween shenanigans or just a seasonal haul, don’t sleep on those seeds. They’re like little nuggets of gold once you roast ‘em up right. I’m talking about a snack that’s cheap, healthy, and totally customizable.
And trust me, once you get the hang of making Roasted Pumpkin Seeds, you’ll be hooked. Let’s dive into why this recipe is worth your time and how to nail it every single go.
Why You’ll Love This Recipe
I’ve found that Roasted Pumpkin Seeds are the ultimate crowd-pleaser in my kitchen, no matter who’s munching. They’re super simple to make, requiring just a few ingredients and minimal effort, but the payoff is huge with that satisfying crunch. Plus, they’re a fantastic way to use up something you’d normally chuck out, which always feels like a small win to me.
In my experience, the best part is how versatile Roasted Pumpkin Seeds can be. Sweet, spicy, savory—you name it, you can tweak ‘em to fit your mood. I’ve yet to meet someone who doesn’t sneak a handful (or three) straight from the baking sheet!
Ingredients List
When it comes to making Roasted Pumpkin Seeds, I prefer keeping things pretty basic but with room to jazz it up if I’m feeling fancy. You don’t need much, and honestly, I usually just eyeball the measurements after years of doing this. Still, for those who like precision, I’ve got you covered with exact amounts. Here’s what you’ll need to whip up a batch of these irresistible Roasted Pumpkin Seeds.
- 2 cups pumpkin seeds, scooped from a medium pumpkin, rinsed and patted dry
- 1 tablespoon (15ml) olive oil, for that nice sheen and crisp (I usually go with extra virgin for flavor)
- 1 teaspoon kosher salt, or to taste—I’m a bit heavy-handed with salt, personally
- 1/2 teaspoon smoked paprika, optional, for a subtle kick (this is my go-to for Roasted Pumpkin Seeds with a twist)
I tend to buy my olive oil in bulk because I use it for everything, but if you’ve got avocado oil or even melted butter, those work too. The key is getting those Roasted Pumpkin Seeds coated evenly so they don’t burn. And hey, if you’re harvesting seeds from your own pumpkin, make sure you give ‘em a good rinse to get rid of all that stringy mess—trust me, it’s worth the extra minute.
Variations
One thing I adore about Roasted Pumpkin Seeds is how easy they are to play around with. I’ve tried a bunch of flavors over the years, some total hits and others…
well, let’s just say they didn’t make the cut. Whether you’re a sweet tooth or a spice fiend, there’s a version of Roasted Pumpkin Seeds for you. Here are a few of my fave twists to keep things interesting.
- Spicy Kick: Toss in 1/2 teaspoon chili powder and a pinch of cayenne for some heat. I made this for a game night once, and my buddies couldn’t stop eating ‘em!
- Cinnamon Sugar: Mix 1 tablespoon sugar with 1/2 teaspoon cinnamon for a sweet treat. My kids always beg for this one after pumpkin carving.
- Garlic Lover’s: Add 1 teaspoon garlic powder and a sprinkle of dried rosemary. Smells amazing while roasting, I’m telling ya.
- Everything Bagel: Use 1 tablespoon everything bagel seasoning for that savory, seedy vibe. I stumbled on this combo last fall and haven’t looked back.
- Maple Glaze: Drizzle with 1 tablespoon maple syrup and a pinch of sea salt before roasting. It’s sticky but oh-so-good.
- Ranch Style: Toss with 1 teaspoon ranch seasoning mix for a tangy punch. I tried this on a whim, and it’s now a staple for movie nights.
- Curry Twist: Sprinkle on 1/2 teaspoon curry powder and a dash of turmeric. It’s a bit out there, but in my experience, it works surprisingly well with Roasted Pumpkin Seeds.
Don’t be afraid to experiment with Roasted Pumpkin Seeds—I mean, half the fun is coming up with your own spin. What’ve you got in your spice rack? Go wild!
Servings and Timing
In my experience, making Roasted Pumpkin Seeds doesn’t take up much of your day, which is perfect for busy folks like me who still want a homemade snack. I’ve got the timing down to a science after doing this every autumn. Here’s the breakdown for a batch of Roasted Pumpkin Seeds that’ll feed a small crowd.
- Prep Time: 10 minutes
- Cook Time: 25 minutes
- Total Time: 35 minutes
- Servings: 4-6 portions (about 1/2 cup each)
Step-by-Step Instructions
Alright, let’s get down to business with making Roasted Pumpkin Seeds. I’ve been through the wringer with trial and error, so I’m sharing my best tricks to keep this process smooth as butter. Follow along, and you’ll have a tray of perfectly crunchy Roasted Pumpkin Seeds in no time.
Step 1: Scoop and Clean
First up, grab your pumpkin and slice it open. Scoop out the seeds with a spoon—don’t be shy about getting messy, ‘cause it’s inevitable. Rinse the seeds under cold water in a colander to get rid of all that slimy pulp. I usually spend a good minute or two picking out stray bits; it’s tedious, but worth it for clean Roasted Pumpkin Seeds.
Step 2: Dry Thoroughly
Spread the seeds on a clean kitchen towel and pat ‘em dry. I’ve learned the hard way that wet seeds equal soggy results, so don’t skip this. Let ‘em sit for 10-15 minutes if you’ve got the time—dry seeds are the secret to that perfect crunch.
Step 3: Season ‘Em Up
Toss the seeds in a bowl with olive oil, salt, and any spices you’re using. I like to use my hands to really coat every little seed. This is where you can get creative with flavors for your Roasted Pumpkin Seeds, so don’t hold back!
Step 4: Roast to Perfection
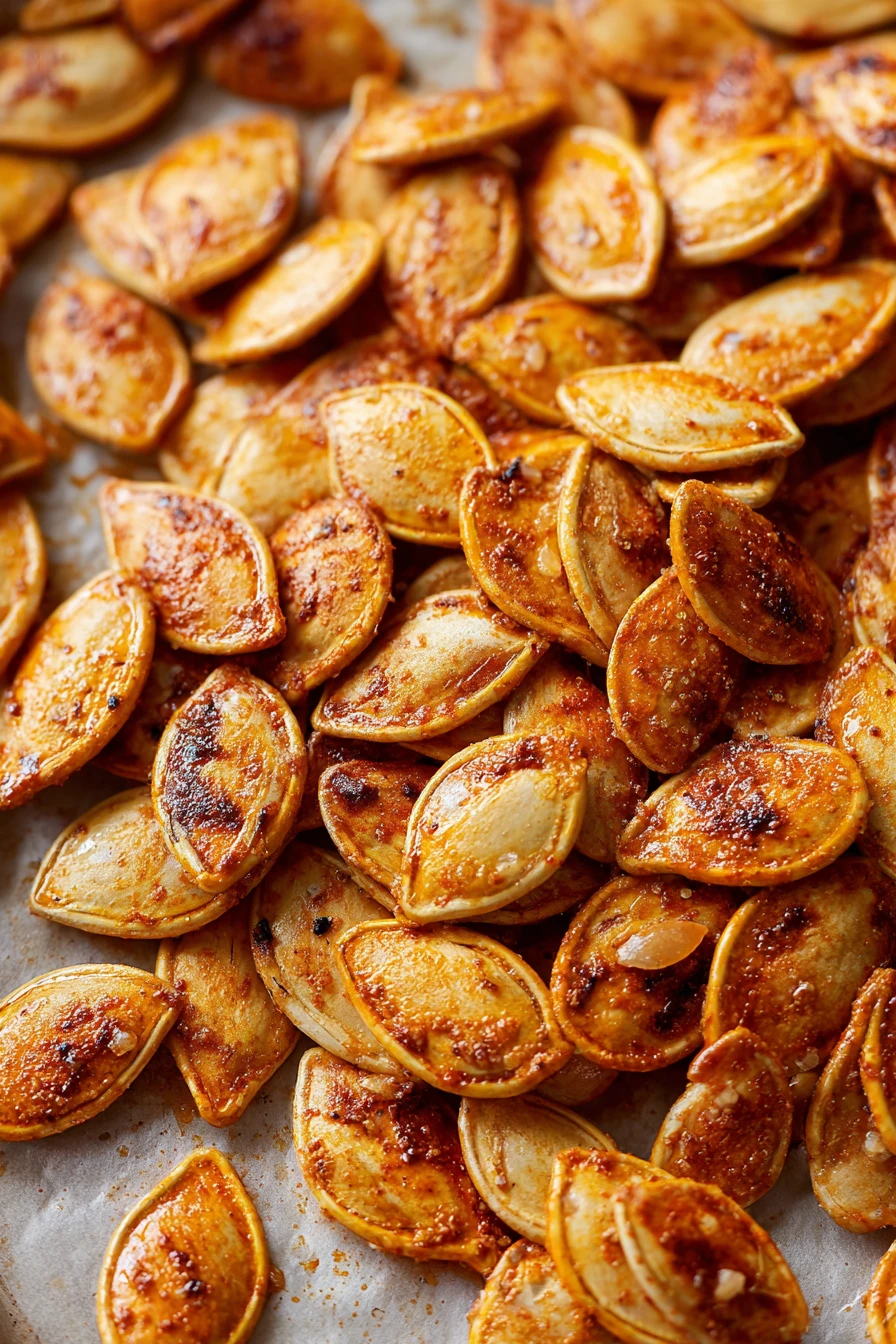
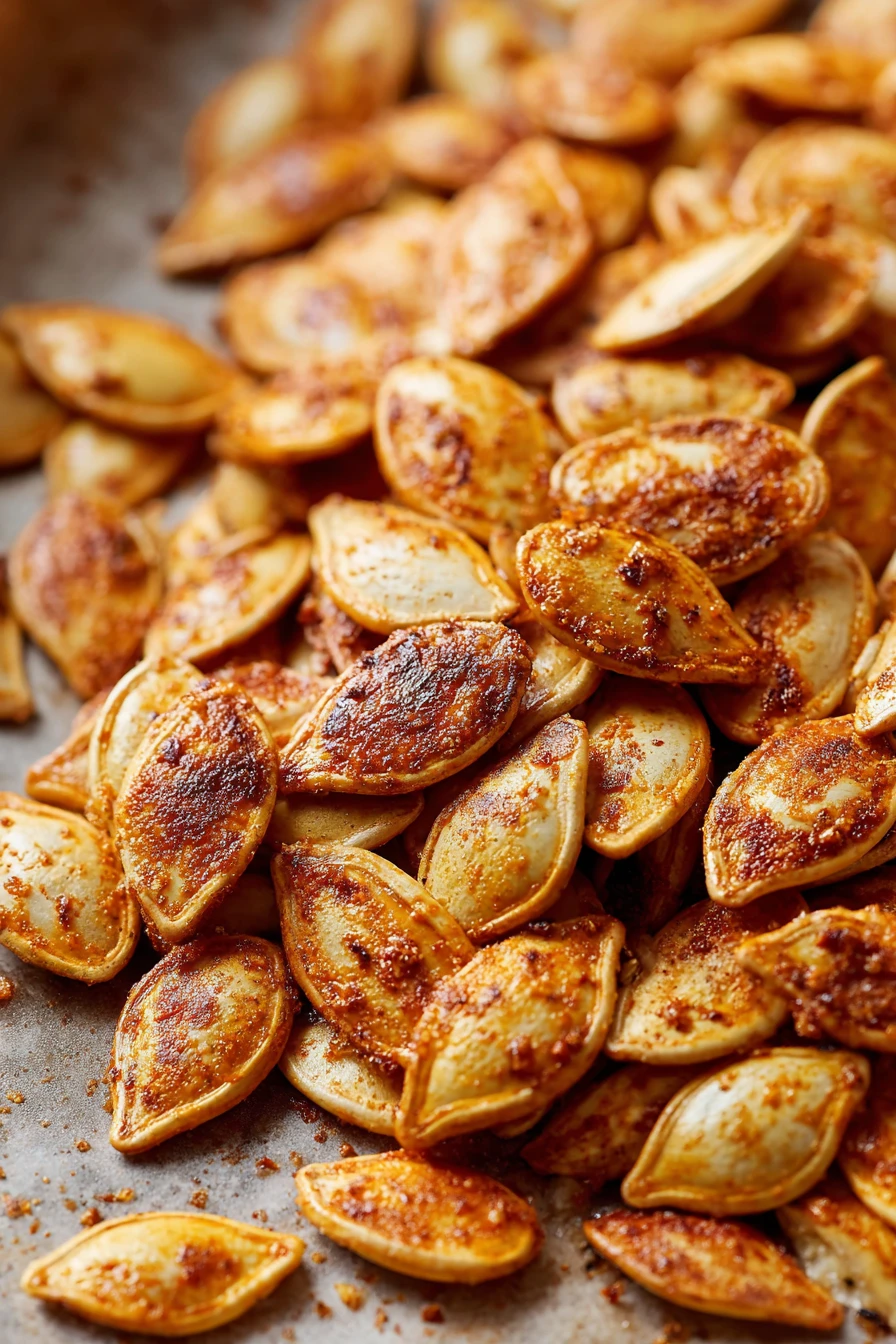
Spread the seeds in a single layer on a baking sheet lined with parchment paper. Pop ‘em into a preheated 300°F (150°C) oven for about 25 minutes, stirring halfway through. I always keep an eye on ‘em toward the end ‘cause I’ve burned a batch or two of Roasted Pumpkin Seeds by getting distracted (oops!).
Step 5: Cool and Crunch
Once they’re golden and fragrant, pull the tray out and let your Roasted Pumpkin Seeds cool for a few minutes. They’ll crisp up as they sit, so resist the urge to dig in right away. Trust me, it’s tough, but waiting pays off.
And there you have it! A simple, no-fuss way to make Roasted Pumpkin Seeds that’ll have everyone asking for more.
Nutritional Information
I’m no dietitian, but I’ve looked into the perks of Roasted Pumpkin Seeds, and they’re honestly a pretty solid snack. They pack a surprising nutritional punch, which is a bonus when I’m munching guilt-free. Here’s the rough breakdown per 1/2 cup serving of basic Roasted Pumpkin Seeds.
- Calories: 285 per serving
- Fat: 19g
- Protein: 12g
- Carbohydrates: 17g
- Sodium: 200mg (depending on how much salt you add)
Healthier Alternatives
If you’re looking to lighten up your Roasted Pumpkin Seeds, I’ve swapped things around a few times with decent results. I’m not always counting calories, but when I am, these tweaks help. Here are a couple of ways to make Roasted Pumpkin Seeds a bit better for you without losing that tasty vibe.
- Low-Salt Option: Cut the salt in half and boost flavor with herbs like thyme or rosemary. I’ve done this when I’m trying to watch sodium, and it still hits the spot.
- Oil-Free: Skip the oil and roast them dry—just keep a close eye so they don’t burn. I’ve tried this, and while they’re not as glossy, the crunch is still there for Roasted Pumpkin Seeds.
- Sweetener Swap: If you’re doing a sweet version, use a drizzle of honey instead of sugar. It’s a natural switch I make for my kids’ batch of Roasted Pumpkin Seeds.
Serving Suggestions
I love serving Roasted Pumpkin Seeds in all sorts of ways, depending on the occasion or just my mood. They’re so versatile that you can sneak ‘em into just about anything. Here are a few ideas for enjoying Roasted Pumpkin Seeds that I’ve leaned on over the years.
- As a Snack: Keep a bowl out for quick nibbling during movie night. My family demolishes these in record time!
- On Salads: Sprinkle over a green salad for added crunch. I toss ‘em on my fall salads with cranberries and goat cheese.
- With Soup: Use as a garnish for pumpkin or butternut squash soup. It’s a little touch that makes Roasted Pumpkin Seeds feel gourmet.
- Trail Mix Add-In: Mix with nuts and dried fruit for a homemade trail mix. I pack this for hikes, and it’s always a hit.
Common Mistakes to Avoid
I’ve botched my fair share of Roasted Pumpkin Seeds over the years, so I’m spilling the tea on what not to do. Trust me on this one, learning the hard way ain’t fun. Avoid these slip-ups when making your batch of Roasted Pumpkin Seeds.
- Not Drying Enough: Wet seeds steam instead of roast, leaving you with sad, chewy results. I’ve rushed this step before and regretted it.
- Overcrowding the Pan: Pile ‘em up, and they won’t crisp evenly. Spread ‘em out, folks—I learned this after a soggy mess.
- Burning by Overcooking: They can go from golden to charred real quick. I’ve lost a tray of Roasted Pumpkin Seeds by stepping away too long.
- Skimping on Seasoning: Don’t be shy with flavors, or they’ll taste blah. I’ve had to re-roast batches to fix this mistake.
Storing Tips
I’ve found that Roasted Pumpkin Seeds keep pretty well if you store ‘em right, which is great for making a big batch. Here’s how I make sure they stay crunchy for as long as possible. These tips work wonders for keeping Roasted Pumpkin Seeds fresh.
- Room Temperature: Store in an airtight container for up to 2 weeks. I use a mason jar on my counter.
- Freezer: Freeze in a zip-top bag for up to 2 months if you’ve got extras. I’ve done this with Roasted Pumpkin Seeds and they’re still tasty after thawing.
Frequently Asked Questions
I get a lot of questions about making Roasted Pumpkin Seeds, so I’ve rounded up the most common ones. Here’s the scoop based on my own kitchen adventures. Let’s tackle these head-on!
Do I need to boil pumpkin seeds before roasting?
Nah, you don’t have to, but boiling them in salted water for 10 minutes can make ‘em easier to digest and a bit more tender. I’ve skipped this plenty of times and still love my Roasted Pumpkin Seeds just fine.
Can I use seeds from any type of pumpkin?
Yep, pretty much! I’ve used everything from sugar pumpkins to the big carving ones. The smaller pumpkins often have tastier seeds, in my opinion.
How do I know when they’re done?
Look for a golden-brown color and a nutty smell. I usually pop one in my mouth to test the crunch—works every time for Roasted Pumpkin Seeds.
Can I roast seeds with the pulp still on?
You could, but I don’t recommend it. The pulp makes ‘em soggy and messy. I’ve tried it once, and it was a disaster.
What if my seeds aren’t crispy?
They probably weren’t dry enough before roasting. Pop ‘em back in the oven for 5-10 more minutes at a low temp. I’ve saved a batch or two this way.
Are Roasted Pumpkin Seeds good for you?
Absolutely! They’re packed with protein, fiber, and healthy fats. I snack on ‘em when I need a quick energy boost.
Can I use other oils for roasting?
For sure—avocado oil or coconut oil works great. I’ve even used melted butter for a richer flavor in my Roasted Pumpkin Seeds.
How long do they take to cool?
Just 5-10 minutes on the tray should do it. I’m always impatient, but waiting helps ‘em crisp up nicely.
Conclusion
So, there you have it—everything I’ve learned about making Roasted Pumpkin Seeds over countless fall seasons. I hope you’ll give this a try next time you’ve got a pumpkin on hand; it’s such a rewarding little project. If you’ve got your own tricks or flavors for Roasted Pumpkin Seeds, I’d love to hear ‘em—drop a comment and let’s swap ideas!
Conclusion
I hope you enjoyed this recipe for Roasted Pumpkin Seeds ! It’s truly one of my favorites, and I’m confident you’ll love it too.
Remember to follow the steps carefully for the best results. Don’t hesitate to experiment with your own variations and make this recipe your own. Happy cooking!