
Man, I still remember the first time I tried making Sesame Chicken at home. It was a total disaster—soggy chicken, sauce that wouldn’t stick, and a kitchen that looked like a tornado hit it.
But after a few (okay, many) trial-and-error sessions, I’ve cracked the code on this takeout classic, and now my family begs for Sesame Chicken every other week. If you’re craving that sweet, sticky, nutty goodness without shelling out for delivery, stick with me—I’ve got you covered.
You don’t need to be a pro chef to nail Sesame Chicken. I’m just a home cook who loves experimenting, and I’ve figured out how to make this dish doable even on a busy weeknight. Whether you’ve botched it before or you’re a first-timer, this recipe for Sesame Chicken is gonna become your go-to. Let’s dive into the nitty-gritty of making it happen in your own kitchen.
Why You’ll Love This Recipe
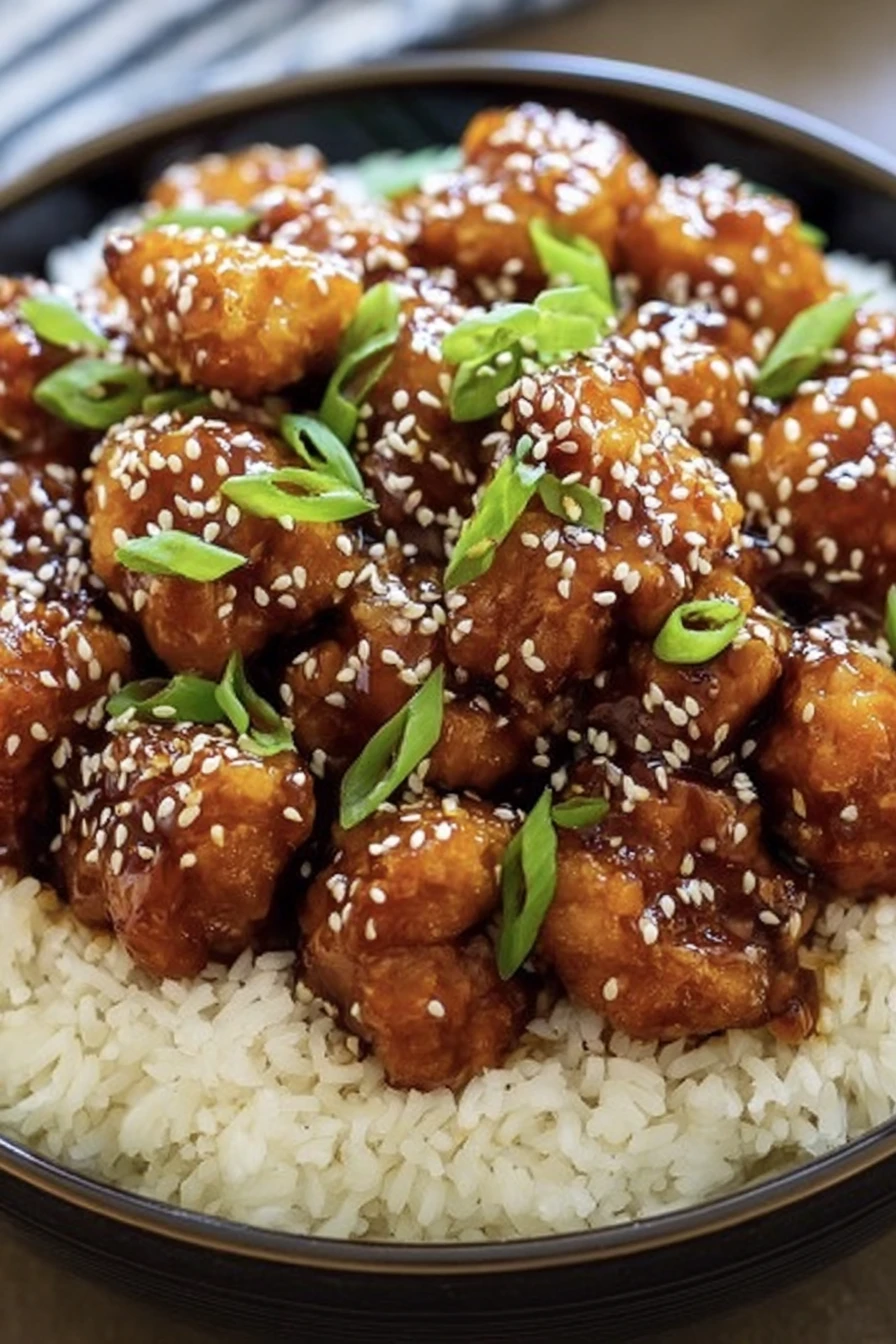
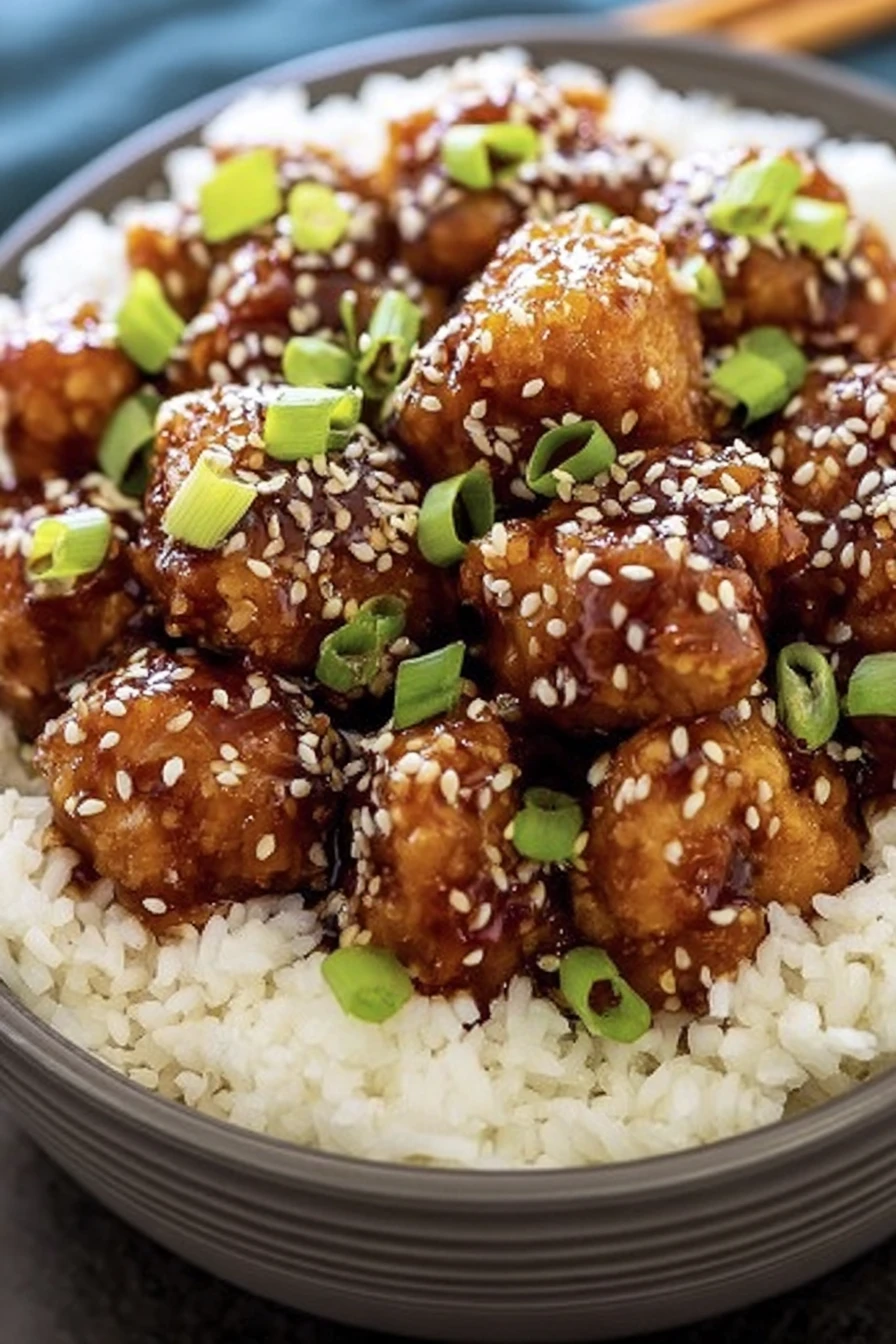
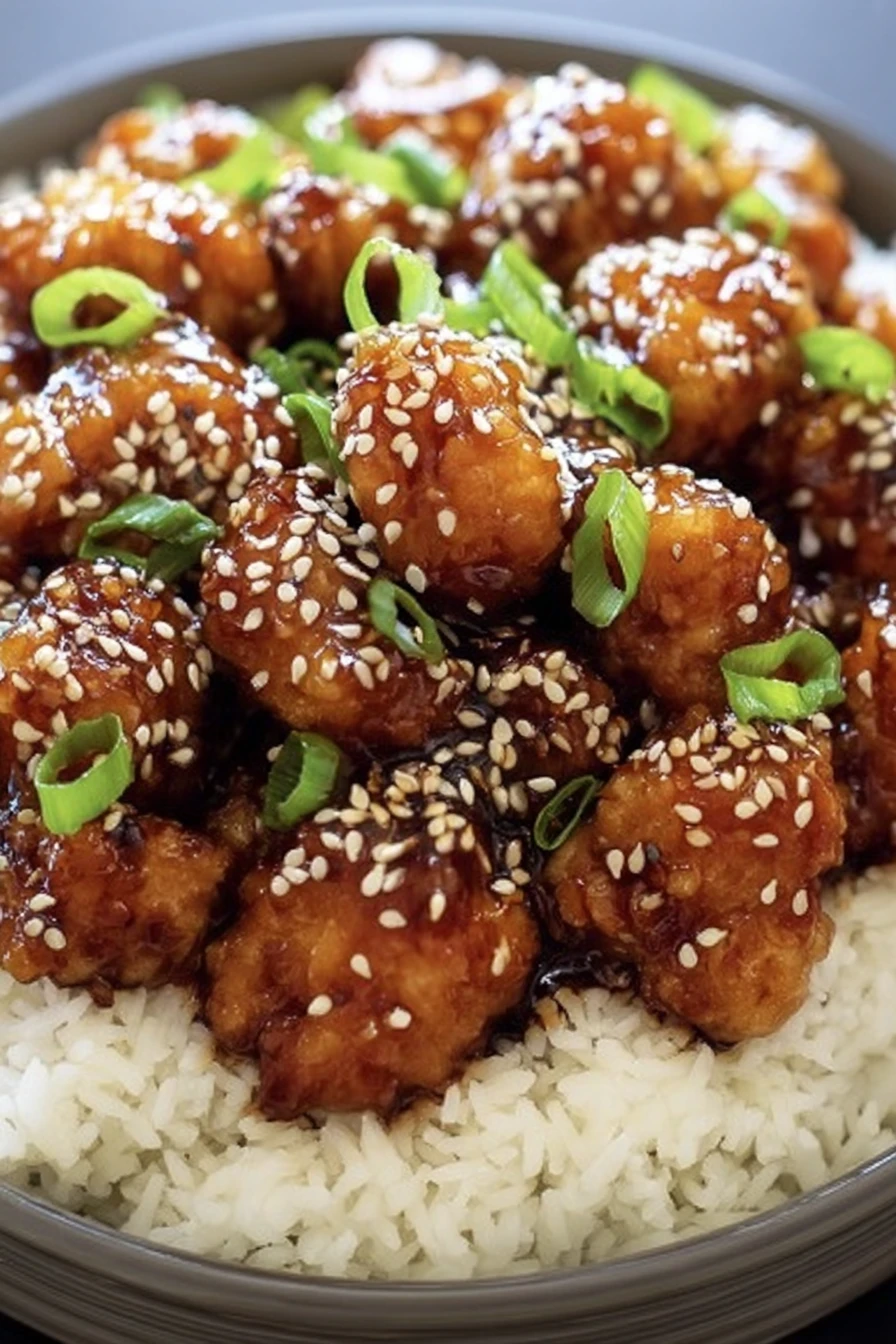
I’ve found that Sesame Chicken hits all the right notes—crispy, tender bites of chicken coated in a glossy, sweet-savory sauce that’s got just the right amount of sesame kick. It’s comfort food with a bit of flair, and honestly, it feels like a win every time I pull it off without a hitch. Plus, it’s way cheaper than takeout!
In my kitchen, this Sesame Chicken recipe is a crowd-pleaser for picky eaters and foodies alike. My kids love the sticky sweetness, while I dig how customizable it is (more on that later). Trust me, once you master this, you’ll be hooked.
Ingredients List
I’m all about keeping things simple but flavorful when it comes to Sesame Chicken. I prefer using pantry staples and a few key extras to make this dish pop. Here’s what you’ll need to whip up Sesame Chicken that rivals your favorite restaurant.
For the Chicken
- 1.5 lbs (680g) boneless, skinless chicken thighs, cut into bite-sized pieces (I like thighs for juiciness, but breasts work too)
- 2 large eggs, beaten
- 1/2 cup (60g) cornstarch, for that perfect crispy coating
- 1/4 tsp salt, to season
- Vegetable oil, for frying (I usually grab canola or peanut oil)
For the Sesame Chicken Sauce
- 1/3 cup (80ml) soy sauce, low-sodium if you’re watching salt
- 1/4 cup (60ml) rice vinegar, for a tangy punch
- 1/3 cup (65g) brown sugar, for sweetness (I go for dark brown for extra depth)
- 2 tbsp (30ml) honey, to make it sticky and glossy
- 1 tbsp (15ml) sesame oil, for that signature nutty vibe
- 2 tsp (10g) minced garlic, fresh is best in my book
- 1 tsp (5g) grated ginger, don’t skip this—it’s a game-changer
- 1 tbsp (8g) sesame seeds, for garnish and crunch
- 1 tsp (5g) cornstarch, mixed with 2 tbsp water for thickening
I usually buy my sesame oil and seeds at an Asian market for better prices, but any grocery store works. These ingredients are key to nailing that authentic Sesame Chicken flavor.
Variations
One thing I love about Sesame Chicken is how easy it is to switch things up based on what I’ve got in the fridge or what my family’s craving. I’ve played around with this recipe a ton over the years, and here are some tweaks that’ll keep your Sesame Chicken game fresh. Trust me, experimenting is half the fun!
- Spicy Kick: Toss in 1-2 tsp of red pepper flakes or a drizzle of sriracha to the sauce if you like heat. I tried this once for a game night, and my friends couldn’t stop raving.
- Teriyaki Twist: Swap half the soy sauce for teriyaki sauce for a deeper, umami vibe. This is a go-to when I want something a little different.
- Honey Heavy: Double the honey and cut back on brown sugar for a sweeter Sesame Chicken. My kids always ask for this version!
- Veggie Packed: Add steamed broccoli or bell peppers to the mix right before tossing in the sauce. It’s a sneaky way to get more greens in.
- Gluten-Free: Use tamari instead of soy sauce and double-check your cornstarch is certified gluten-free. I’ve made this for a friend with dietary needs, and it still tasted spot-on.
- Baked Option: Skip the frying and bake the chicken at 400°F (200°C) for 20 minutes for a lighter take on Sesame Chicken. It’s not as crispy, but still tasty.
- Citrus Zing: Add a splash of orange juice (about 2 tbsp) to the sauce for a bright twist. I stumbled on this by accident, and it was a happy surprise!
These variations keep Sesame Chicken from ever getting boring at my house. What twist will you try first?
Servings and Timing
In my experience, timing for Sesame Chicken depends a bit on how fast you can chop and fry, but I’ve got it down to a science now. Here’s the breakdown for whipping up this dish for a hungry crew. It’s perfect for a family dinner or meal prep!
- Prep Time: 15 minutes
- Cook Time: 25 minutes
- Total Time: 40 minutes
- Servings: 4-6 portions
These times are based on how long it usually takes me to make Sesame Chicken. If you’re multitasking, it might stretch a bit, but it’s still doable on a weeknight.
Step-by-Step Instructions
Let’s get into the nitty-gritty of making Sesame Chicken that’ll have everyone asking for seconds. I’ve broken this down into steps based on how I do it in my kitchen, with a few tricks I’ve picked up along the way. Follow along, and you’ll be golden!
Step 1: Prep the Chicken
Start by cutting your chicken into bite-sized chunks if you haven’t already. I like to pat them dry with paper towels—soggy chicken is the enemy of crispiness. Then, toss them in a bowl with beaten eggs and a pinch of salt to get that coating started.
Step 2: Coat and Fry
Next, dredge the chicken pieces in cornstarch until they’re fully coated. Heat about 2 inches of oil in a deep skillet or wok over medium-high heat (I aim for around 350°F if I’m using a thermometer). Fry the chicken in batches for 4-5 minutes until golden and cooked through, then drain on paper towels. This step is key for that classic Sesame Chicken crunch!
Step 3: Make the Sauce
While the chicken rests, whip up the sauce in a small saucepan. Combine soy sauce, rice vinegar, brown sugar, honey, sesame oil, garlic, and ginger over medium heat, stirring until it simmers. Add the cornstarch slurry to thicken it up—trust me, you want that glossy texture for Sesame Chicken.
Step 4: Toss and Serve
Now, toss the fried chicken in the warm sauce until every piece is coated in that sticky goodness. Sprinkle sesame seeds on top for that authentic Sesame Chicken look. I usually serve it right away while it’s hot and crispy—don’t let it sit too long or it’ll soften up!
Honestly, this process gets easier every time I make Sesame Chicken. My little hack? Fry in small batches to avoid crowding the pan—it makes all the difference.
Nutritional Information
I’m not gonna lie, Sesame Chicken isn’t exactly diet food, but it’s worth every bite in my opinion. Here’s the rough breakdown per serving (based on 6 portions) so you can plan accordingly. I’ve calculated this using standard ingredients, though frying oil can vary.
- Calories: 450 per serving
- Fat: 22g
- Protein: 25g
- Carbohydrates: 38g
- Sodium: 780mg
Sesame Chicken is a treat, so I balance it with lighter sides (more on that soon). But hey, sometimes you just gotta indulge!
Healthier Alternatives
If you’re looking to lighten up Sesame Chicken, I’ve got some swaps I’ve tried that still keep the flavor on point. When I’m watching calories or just want to feel a bit better about dinner, these tweaks save the day. Here’s what works for me.
- Air Fryer Option: Instead of deep frying, cook the coated chicken in an air fryer at 400°F (200°C) for 12-15 minutes. It’s not as crispy, but cuts way down on oil.
- Less Sugar: Cut the brown sugar in half and use a bit more honey for sweetness with fewer processed carbs.
- Low-Sodium Soy: Swap regular soy sauce for a low-sodium version to reduce the salt in Sesame Chicken. I barely notice the difference!
- More Veggies: Bulk up the dish with broccoli or snap peas to lower the calorie density per bite of Sesame Chicken. Plus, it stretches the meal!
These changes let me enjoy Sesame Chicken guilt-free. Which one are you gonna try?
Serving Suggestions
I love serving Sesame Chicken in ways that make it feel like a full-on feast, even on a random Tuesday. Here are my favorite pairings that elevate the dish without much extra effort. These ideas come straight from my dinner table!
- Over Rice: Spoon Sesame Chicken over steamed jasmine rice to soak up that sauce. It’s classic for a reason!
- With Noodles: Pair it with lo mein or rice noodles for a fun twist. I did this at my last dinner party, and it was a hit.
- Side of Veggies: Serve with steamed broccoli or stir-fried green beans for balance. It’s how I sneak in nutrients with Sesame Chicken.
- Appetizer Style: Skewer the chicken bites for a party-friendly finger food. My kids love eating Sesame Chicken this way!
What’s your favorite way to dish this up? I’m always looking for new ideas.
Common Mistakes to Avoid
I’ve messed up Sesame Chicken more times than I can count, so let me save you some grief with these pitfalls I’ve learned the hard way. Trust me on this one—avoiding these will make your dish shine. Here’s what to watch out for.
- Overcrowding the Pan: Frying too much chicken at once drops the oil temp and makes it soggy. I’ve ruined batches this way—small batches are key for Sesame Chicken!
- Skipping the Dry: Not patting the chicken dry before coating leads to a sad, non-crispy mess. Been there, done that.
- Overcooking the Sauce: If you boil the sauce too long, it gets too thick and gloopy. I’ve had to remake sauce before because of this with Sesame Chicken.
- Wrong Oil Temp: If the oil’s not hot enough, the chicken absorbs it and gets greasy. Get it right for perfect Sesame Chicken!
These are rookie mistakes I’ve made, but now I’ve got it down. Don’t stress—you’ll get the hang of it!
Storing Tips
I’ve found that Sesame Chicken keeps pretty well if you store it right, though it’s best fresh. Here’s how I handle leftovers to keep that flavor intact for as long as possible. These tips work like a charm for me.
- Refrigerator: Store Sesame Chicken in an airtight container for up to 3 days. Reheat in a skillet to crisp it up a bit.
- Freezer: Freeze cooked Sesame Chicken for up to 2 months, but freeze the sauce separately if possible to avoid sogginess.
- Reheating Tip: Pop it in the oven at 350°F (175°C) for 10 minutes rather than microwaving to maintain texture.
These tricks help me enjoy Sesame Chicken even on day two. How do you store yours?
Frequently Asked Questions
I get a lot of questions about making Sesame Chicken, so I’ve rounded up the most common ones I’ve heard (and asked myself!). Here are the answers based on my experience in the kitchen. Let’s clear up any doubts!
Can I make Sesame Chicken ahead of time?
Yep, you can fry the chicken and make the sauce a day ahead. Just store them separately in the fridge and toss together when you’re ready to eat. Reheating might soften the crispiness a tad, but it’s still delish.
Is Sesame Chicken gluten-free?
Not traditionally, since soy sauce has gluten, but you can swap it for tamari and ensure your cornstarch is certified gluten-free. I’ve done this for friends, and it works great.
Can I bake instead of fry?
Absolutely! Bake the coated chicken at 400°F (200°C) for 20 minutes, flipping halfway. It won’t be as crispy as fried Sesame Chicken, but it’s lighter and still tasty.
What if my sauce is too thin?
No worries—just simmer it a bit longer or add a touch more cornstarch slurry. I’ve had to tweak mine a few times to get that perfect sticky texture.
Can I use chicken breasts instead of thighs?
Sure thing. Breasts work fine for Sesame Chicken, though they can dry out faster. I prefer thighs for juiciness, but it’s your call!
How do I get the chicken extra crispy?
Double-fry it! Fry once, let it rest for a minute, then fry again for 1-2 minutes. It’s a trick I stumbled on, and it really amps up the crunch.
Is this recipe kid-friendly?
In my house, it’s a hit with the kids, especially the sweet sauce. You can cut back on ginger or garlic if they’re picky, but mine gobble it up as is.
What’s the best oil for frying?
I usually go for canola or peanut oil because they’ve got a high smoke point and neutral flavor. Vegetable oil works too—just make sure it’s hot enough before frying.
Conclusion
There you have it—my tried-and-true guide to making Sesame Chicken that’ll rival any takeout joint. I’ve poured years of kitchen mishaps and wins into this recipe, and I hope it brings as much joy to your table as it does to mine. So, grab those ingredients, give this Sesame Chicken a whirl, and let me know how it turns out—I’d love to hear!
Conclusion
I hope you enjoyed this recipe for Sesame Chicken! It’s truly one of my favorites, and I’m confident you’ll love it too. Remember to follow the steps carefully for the best results.
Don’t hesitate to experiment with your own variations and make this recipe your own. Happy cooking!