
I’ll never forget the first time I made Sesame Chicken at home. It was one of those rainy weekends where I just craved something comforting yet exciting, and I’d been dreaming of that sticky, sweet, and savory flavor from my favorite takeout spot. So, I rolled up my sleeves, dug through my pantry, and gave it a shot. Let me tell you, the smell of Sesame Chicken sizzling in my kitchen was pure magic, even if my first batch was a little too saucy (live and learn, right?).
Fast forward a few years, and I’ve tweaked my Sesame Chicken recipe to perfection. My family goes nuts for it, especially my picky teenager who usually turns up his nose at anything homemade. I’m thrilled to share this with you because I know you’ll get that same “I did it!” feeling when you nail this dish.
If you’re like me, you love a good recipe that’s doable but still feels like a treat. Well, stick around, ‘cause I’ve got all the tips, tricks, and little kitchen secrets to help you whip up some seriously tasty Sesame Chicken.
Why You’ll Love This Recipe
I’ve found that making Sesame Chicken at home isn’t just about saving a few bucks on takeout (though that’s a nice perk!). There’s something so satisfying about getting that crispy coating and glossy sauce just right—it’s like a little kitchen victory every time. Plus, in my experience, you can tweak the sweetness or heat to match your vibe, which is a game-changer.
And honestly, in my kitchen, Sesame Chicken has become a go-to for busy weeknights. It comes together faster than you’d think, and the ingredients are mostly stuff I already have on hand. Trust me, once you try this, you’ll be hooked on making it yourself!
Ingredients List
Alright, let’s talk about what you’ll need to make some killer Sesame Chicken. I’m all about keeping it real with ingredients, so I usually buy stuff that’s affordable but still packs flavor. Here’s my tried-and-true list, with a few personal notes thrown in ‘cause I can’t help myself.
For the Chicken
- 1.5 pounds (680g) boneless, skinless chicken thighs, cut into bite-sized pieces (I prefer thighs over breasts for juiciness)
- 2 large eggs, beaten for that perfect batter cling
- 1 cup (120g) cornstarch, to get that crispy magic going
- 1/2 teaspoon salt, just a pinch to season
- Vegetable oil, for frying (I use about 2 cups, depending on my pan)
For the Sesame Chicken Sauce
- 1/4 cup (60ml) soy sauce, low-sodium if I’ve got it
- 1/4 cup (50g) granulated sugar, for that sweet balance
- 2 tablespoons (30ml) rice vinegar, for a tangy zing (apple cider vinegar works in a pinch)
- 1 tablespoon (15ml) sesame oil, ‘cause it’s not Sesame Chicken without it
- 2 cloves garlic, minced (I’m a garlic fiend, so sometimes I sneak in an extra)
- 1 teaspoon grated ginger, fresh if I’ve got it, or a pinch of ground if I’m lazy
- 1 tablespoon (8g) sesame seeds, for that nutty finish
- 1 tablespoon cornstarch mixed with 2 tablespoons water, for thickening the sauce
I’ve made Sesame Chicken with whatever’s in my fridge sometimes, and it still turns out great. Just don’t skimp on the sesame oil—it’s the soul of this dish!
Variations
One thing I adore about Sesame Chicken is how easy it is to switch things up based on my mood or what’s in my pantry. I’ve played around with this recipe a ton over the years, and my family’s always game to try new twists. Here are some variations that have worked like a charm for me when I’m craving something different with my Sesame Chicken.
- Spicy Kick: Toss in 1 teaspoon of red pepper flakes or a drizzle of sriracha to the sauce for a fiery punch. I tried this once on a whim, and my husband couldn’t stop raving!
- Honey Glaze: Swap half the sugar for honey in the Sesame Chicken sauce for a deeper, stickier sweetness. It’s my go-to when I want something a bit more indulgent.
- Teriyaki Twist: Add a tablespoon of mirin and cut back on the vinegar for a Japanese-inspired Sesame Chicken vibe. My kids always ask for this one.
- Extra Nutty: Throw in a handful of chopped peanuts or cashews along with the sesame seeds. I did this for a potluck, and it was a hit!
- Veggie Boost: Mix in steamed broccoli or bell peppers right before serving to sneak in some greens with your Sesame Chicken. I’m all about balance (sometimes).
- Orange Zest: Grate in a teaspoon of orange zest to the sauce for a citrusy brightness. I stumbled on this combo by accident, and wow, it’s refreshing!
- Low-Sodium Option: Use coconut aminos instead of soy sauce if you’re watching salt. I’ve done this a few times and barely noticed the difference.
These tweaks keep Sesame Chicken exciting, so don’t be afraid to experiment a little. What’s your favorite spin on classic dishes like this? I’m always up for new ideas!
Servings and Timing
Let’s break down the nitty-gritty of making Sesame Chicken so you can plan your meal without stress. In my experience, this recipe fits perfectly into a busy evening if you’ve got your ingredients prepped. Here’s how it usually shakes out for me in the kitchen.
- Prep Time: 15 minutes
- Cook Time: 25 minutes
- Total Time: 40 minutes
- Servings: 4-6 portions
I’ve found these timings hold true as long as I don’t get distracted by my phone mid-fry (guilty!). Sesame Chicken is quick enough for a weeknight win, so let’s get to the how-to!
Step-by-Step Instructions
Alright, let’s roll up our sleeves and make some mouthwatering Sesame Chicken. I’ve done this enough times to know the little tricks that save hassle, so I’m sharing my process step by step. Follow along, and you’ll have a dish that rivals any takeout joint.
Step 1: Prep the Chicken
Start by cutting your chicken thighs into bite-sized chunks—about 1-inch pieces work best. Toss them in a bowl with the beaten eggs and a pinch of salt, then dredge in cornstarch until they’re fully coated. I’ve learned to do this in batches so every piece gets that crispy armor; it’s a game-changer for texture!
Step 2: Fry to Golden Perfection
Heat about 2 inches of vegetable oil in a deep skillet or wok over medium-high heat until it shimmers (around 350°F if you’ve got a thermometer). Fry the chicken in small batches for 4-5 minutes until golden and cooked through, then drain on paper towels. I always sneak a piece to test (chef’s privilege, right?), and this is where Sesame Chicken starts smelling irresistible.
Step 3: Whip Up the Sauce
While the chicken rests, grab a small saucepan and mix soy sauce, sugar, rice vinegar, sesame oil, garlic, and ginger over medium heat. Stir until the sugar dissolves, then add the cornstarch slurry to thicken it into a glossy glaze. I’ve burned this sauce once by walking away—don’t do that; keep stirring!
Step 4: Combine and Coat
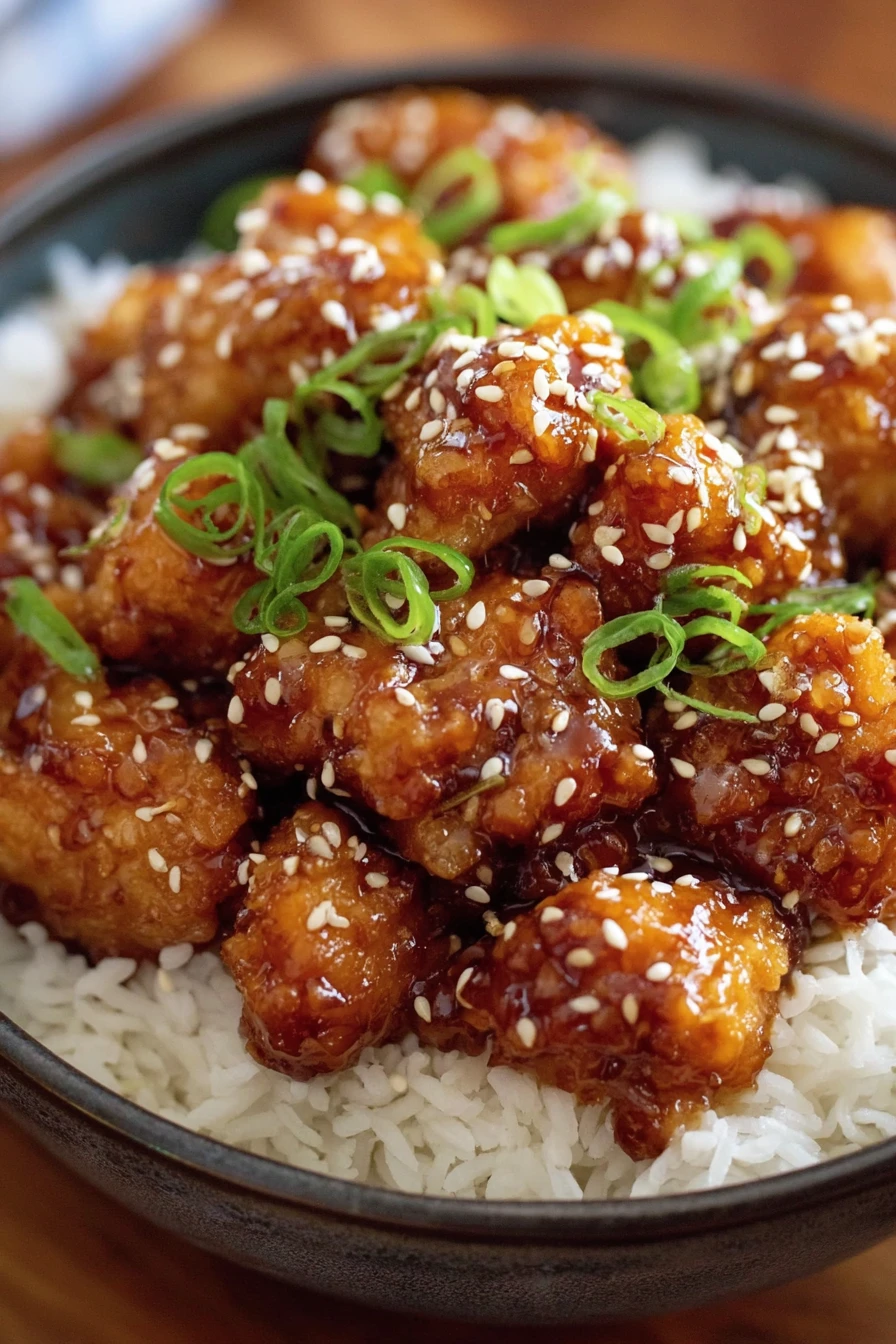
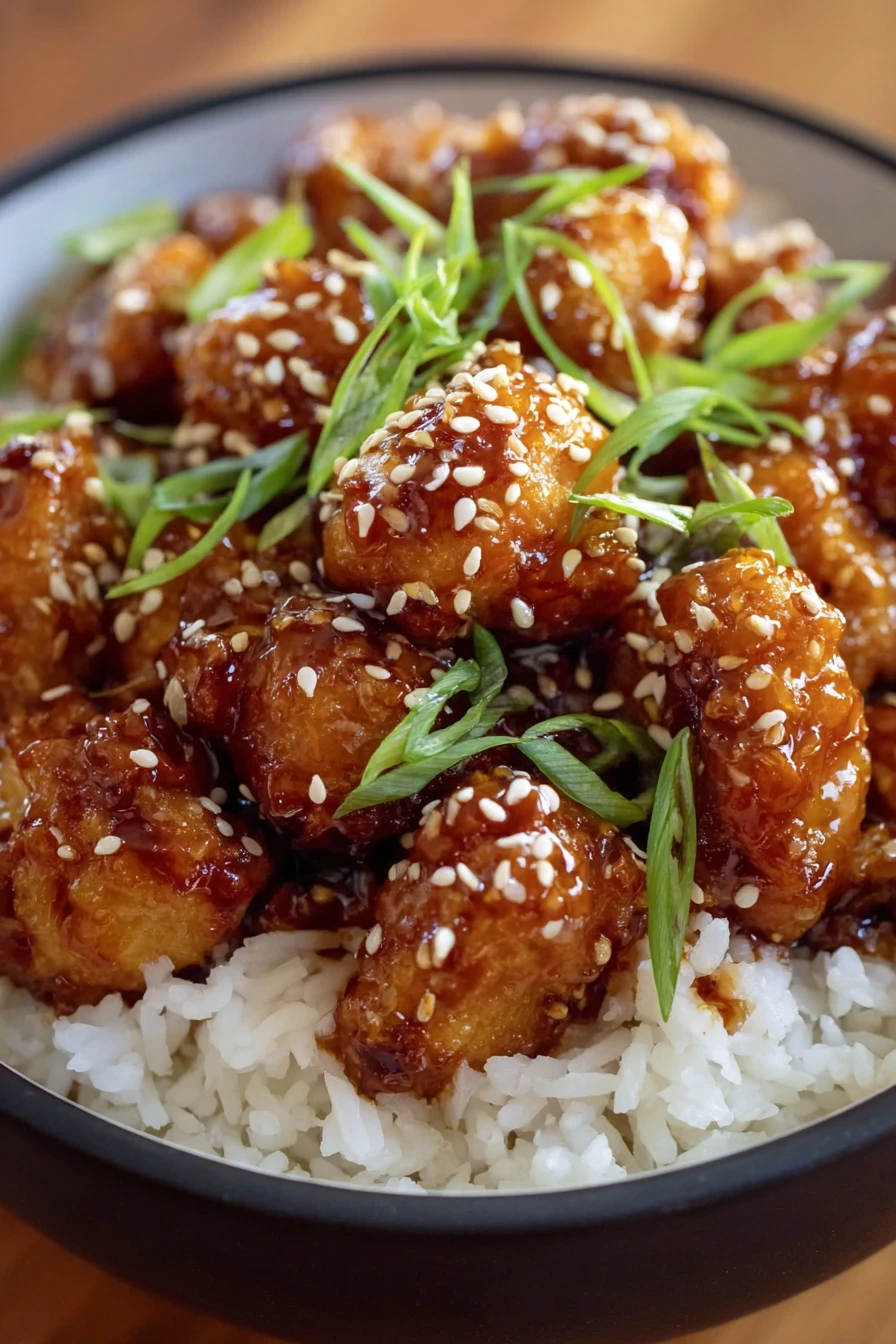
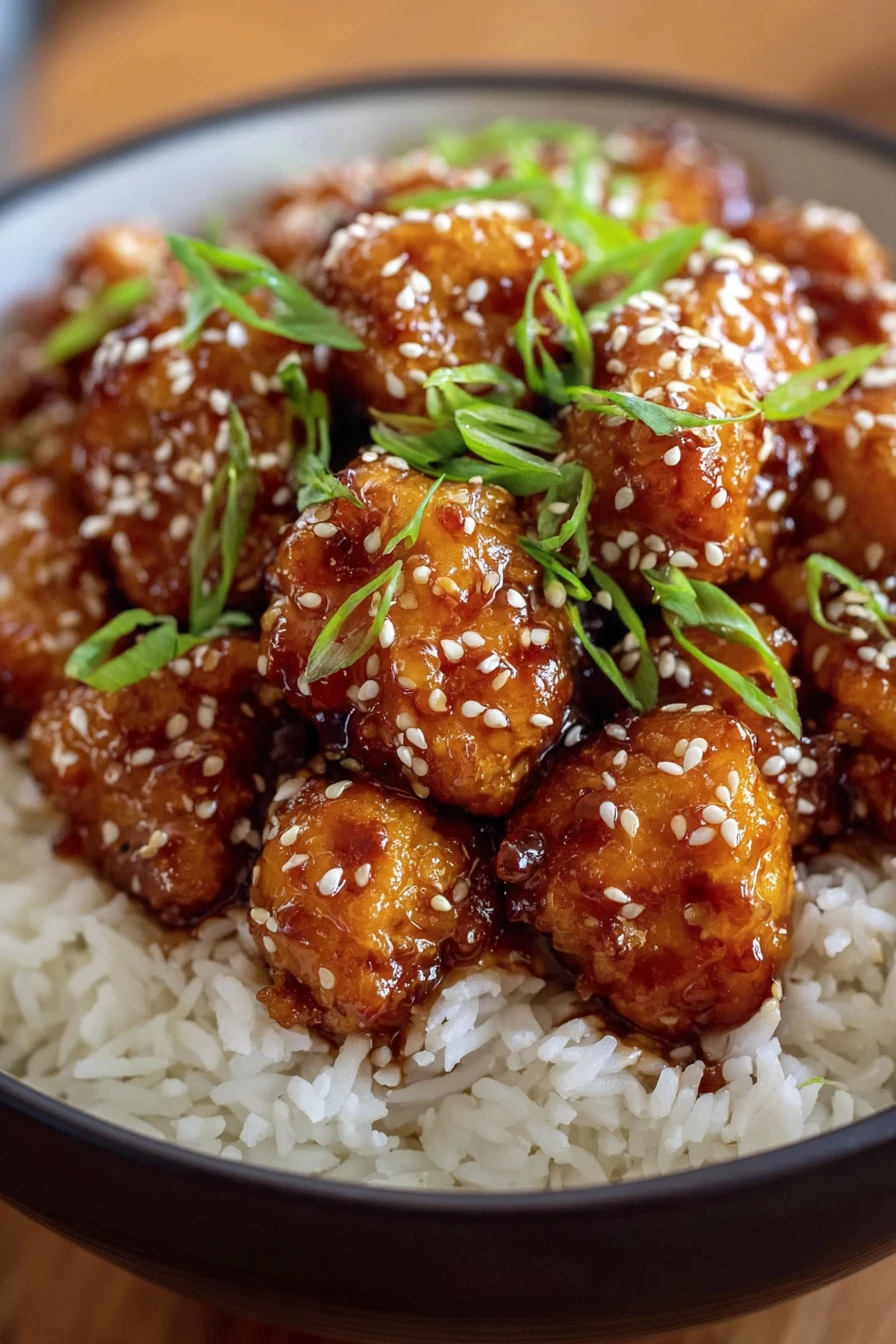
Toss the fried chicken into the sauce, making sure every piece gets that sticky, shiny coating. Sprinkle in sesame seeds for that classic Sesame Chicken look and nutty crunch. This step is pure satisfaction for me—seeing it come together feels like a win every time.
Step 5: Serve It Up
Plate your Sesame Chicken hot and fresh, ideally over a bed of steamed rice or noodles. I usually garnish with a few extra sesame seeds or chopped green onions if I’m feeling fancy. Dig in quick ‘cause this stuff doesn’t last long at my table!
These steps are pretty straightforward, but don’t hesitate to adjust based on your kitchen setup. Sesame Chicken is forgiving if you’ve got the basics down!
Nutritional Information
I’m not gonna lie, Sesame Chicken isn’t exactly a diet food, but it’s worth every bite in my book. I’ve looked into the stats for a standard serving (about 1 cup), and here’s the breakdown. Keep in mind, this can vary based on how much oil gets absorbed during frying.
- Calories: 450 per serving
- Fat: 22g
- Protein: 25g
- Carbohydrates: 38g
- Sodium: 780mg
I don’t stress too much about the numbers when I’m enjoying Sesame Chicken, but I do try to balance it with lighter sides. Moderation, right?
Healthier Alternatives
If you’re looking to lighten up Sesame Chicken, I’ve got some swaps that I’ve tried and loved. I’m not always in the mood for a full-on indulgence, so these tweaks help me enjoy the dish without the guilt. Here’s what’s worked for me over the years.
- Baked Instead of Fried: Skip the deep frying and bake the coated chicken at 400°F for 20-25 minutes, flipping halfway. I’ve done this when I’m cutting calories, and it’s still pretty darn crispy.
- Less Sugar: Cut the sugar in half and add a splash of orange juice for natural sweetness in your Sesame Chicken sauce. It’s a trick I picked up from a friend.
- Leaner Protein: Use chicken breast instead of thighs if you want to trim fat. I’ve swapped this when I’m feeling health-conscious, though I miss the juiciness.
- Low-Sodium Soy: Always opt for reduced-sodium soy sauce to keep the salt in check for Sesame Chicken. Honestly, I can’t tell much difference in flavor.
These tweaks let me enjoy Sesame Chicken more often without overdoing it. What healthy hacks do you use for your favorite dishes?
Serving Suggestions
I love serving Sesame Chicken in ways that make the meal feel complete, whether it’s a quick family dinner or a casual get-together. Here are a few of my favorite pairings that have always gone over well at my table. These ideas just seem to click with that sweet-savory vibe.
- Classic Combo: Serve over fluffy white rice to soak up that glorious Sesame Chicken sauce. It’s my default, hands down.
- Noodle Night: Pair with stir-fried lo mein or rice noodles for a hearty twist. I did this at my last dinner party, and everyone loved it!
- Veggie Side: Add steamed broccoli or snap peas on the side for a pop of color and crunch with Sesame Chicken. It’s how I sneak in greens.
- Appetizer Style: Skewer bite-sized pieces for a fun party snack with toothpicks. My kids think this is the coolest way to eat it!
How do you like to plate your Sesame Chicken? I’m always curious about new ideas to shake things up.
Common Mistakes to Avoid
I’ve flubbed Sesame Chicken more times than I’d like to admit, but those mess-ups taught me what not to do. Trust me on this one, avoiding these pitfalls will save you some kitchen frustration. Here are the biggest blunders I’ve made (and how to dodge them).
- Overcrowding the Pan: Frying too much chicken at once drops the oil temp and leaves you with soggy pieces. I learned the hard way on my first try with Sesame Chicken.
- Skipping the Cornstarch: Don’t think flour will cut it—it won’t give you that crisp. I tried subbing once, and it was a mushy disaster.
- Burning the Sauce: Keep the heat low when simmering the Sesame Chicken glaze, or it’ll turn bitter. Guilty as charged on this one!
- Not Tasting as You Go: Adjust the sweetness or salt in the sauce before coating the chicken. I’ve served a too-sweet batch before, and my family wasn’t impressed.
Avoid these, and your Sesame Chicken will be golden. What kitchen flops have you had to overcome?
Storing Tips
I’ve found that Sesame Chicken holds up pretty well if you store it right, though it’s rarely around long enough in my house to test the limits. Here’s how I keep leftovers tasting fresh when I manage to save some. These tricks work like a charm for me.
- Refrigerator: Store in an airtight container for up to 3 days. I reheat it on the stove with a splash of water to revive the sauce.
- Freezer: Freeze cooked Sesame Chicken for up to 2 months, but keep the sauce separate if possible. Thaw overnight before reheating.
- Reheating Tip: Avoid the microwave if you can—it makes the coating soggy. I pop mine in a skillet for best results with Sesame Chicken.
Frequently Asked Questions
I get a bunch of questions about making Sesame Chicken, so I’m tackling the most common ones here. I’ve been there with these doubts myself, so let’s clear ‘em up with what I’ve learned over time.
Can I make Sesame Chicken ahead of time?
Totally! Fry the chicken and make the sauce a day ahead, then store separately in the fridge. Toss together when you’re ready to eat for that fresh-off-the-stove feel.
Is there a gluten-free option?
Yup, swap soy sauce for tamari and use gluten-free cornstarch. I’ve done this for a friend with dietary needs, and it’s just as tasty.
Can I use an air fryer?
Yes, and I’ve tried it! Air fry the coated chicken at 400°F for 10-12 minutes, shaking halfway. It’s not quite as crispy as deep frying, but it works for a lighter Sesame Chicken.
What if my sauce is too thin?
No worries, just simmer it a bit longer or add an extra teaspoon of cornstarch slurry. I’ve had to fix mine a few times—takes patience!
Can I use chicken breast instead of thighs?
Sure thing, though I think thighs are juicier. Breasts work fine; just don’t overcook ‘em or they’ll dry out.
How do I get that restaurant gloss?
It’s all in the cornstarch slurry and sesame oil in the sauce. Stir over low heat till it thickens, and you’ve got that pro-level shine on your Sesame Chicken!
What oil is best for frying?
I stick with vegetable oil or canola for a neutral taste and high smoke point. Peanut oil is great too if you’ve got it.
Can I double the recipe?
Absolutely, just fry in batches so you don’t overcrowd the pan. I’ve doubled it for gatherings, and it scales up nicely.
Conclusion
I hope you’re as pumped as I am to whip up some Sesame Chicken in your kitchen! There’s nothing like that first bite of crispy, saucy goodness to make you feel like a rockstar chef. Give this recipe a spin, tweak it to your taste, and let me know how it turns out—I’d love to hear! Sesame Chicken nights are a staple at my house, and I’m betting they’ll become one at yours too.
Conclusion
I hope you enjoyed this recipe for Sesame Chicken! It’s truly one of my favorites, and I’m confident you’ll love it too. Remember to follow the steps carefully for the best results.
Don’t hesitate to experiment with your own variations and make this recipe your own. Happy cooking!