
The humble deviled egg is a party classic for a reason, but sometimes it needs a wake-up call. Imagine that familiar creamy center transformed—infused with the addictive, savory heat of chili crisp and the pungent punch of fresh garlic. That’s exactly what you get with these Spicy Chili Garlic Deviled Eggs.
They’re the appetizer that disappears first from the platter, leaving guests asking for the recipe. I developed this version after years of catering events, where I learned that a little bold flavor goes a long way in making a memorable first bite. The result is a perfect harmony: cool, firm egg whites cradling a rich, spicy, and complex filling with delightful crunchy bits.
Whether it’s for game day, a holiday gathering, or just because, this recipe is your secret weapon.
- Elevated Classic: Takes the familiar deviled egg to a sophisticated, flavor-packed level that will impress any guest.
- Quick & Easy: From fridge to platter in about 30 minutes, with most of that time being hands-off while the eggs cook and cool.
- Make-Ahead Friendly: You can boil and peel the eggs a day ahead, and fill them a few hours before your event, making party prep a breeze.
- Customizable Heat: The spice level is easily controlled by how much chili crisp you use and whether you include the crunchy fried onions and garlic from the jar.
- Crowd-Pleasing: The combination of creamy, spicy, and savory hits all the right notes for a wide range of palates.
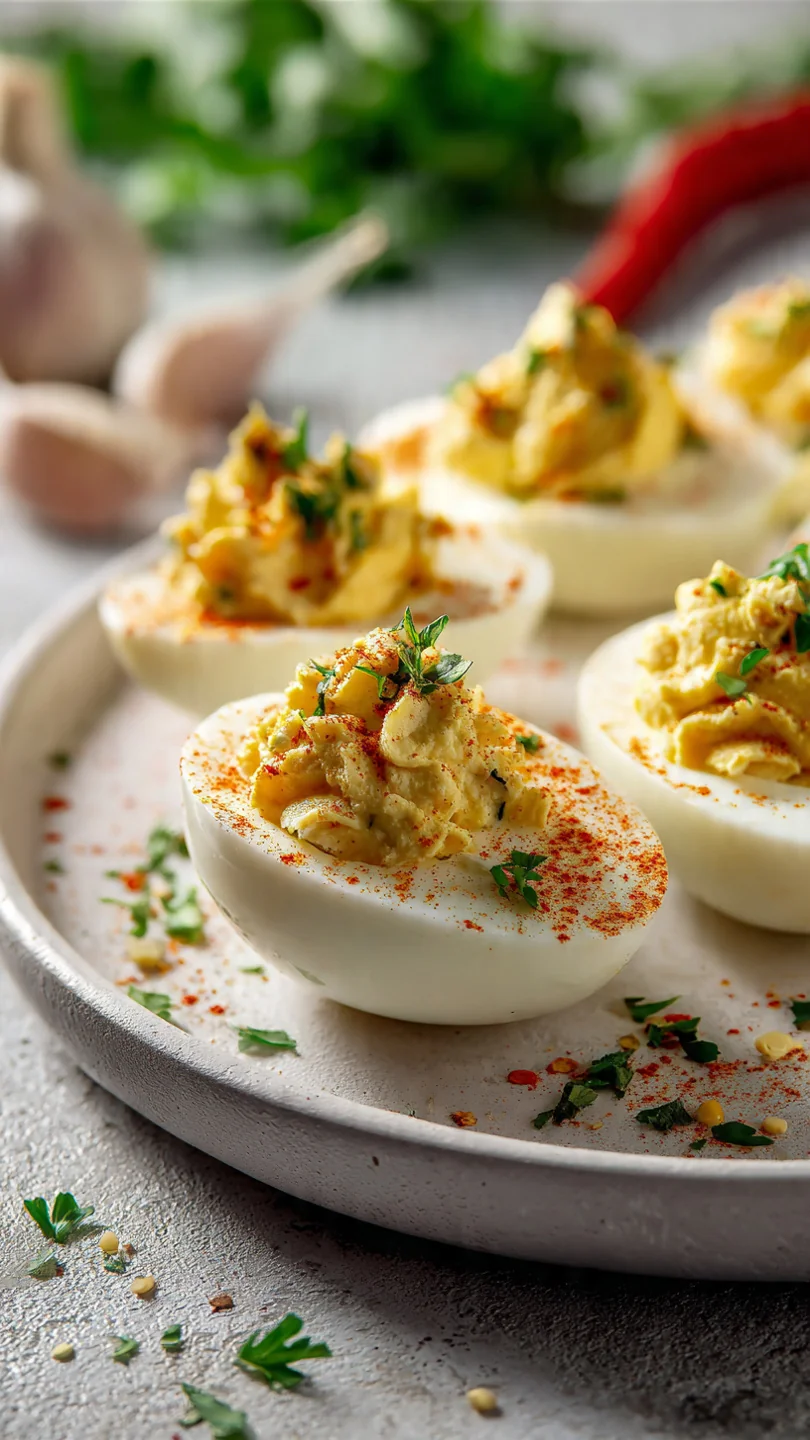
- Visually Stunning: The vibrant orange-red specks from the chili crisp and green garnishes make these eggs look as incredible as they taste.
Ingredients You’ll Need
Let’s gather our ingredients—this is where simple components come together to create something truly special. The magic lies in the chili crisp, a condiment I always have in my fridge for instantly adding depth, heat, and texture. If you’re new to it, you’re in for a treat.
- Large Eggs: The foundation. I recommend using eggs that are at least a week old; they peel much more cleanly than super-fresh ones.
- Mayonnaise: This creates the luxurious, creamy base for the filling. Full-fat mayo provides the best flavor and stability.
- Chili Crisp: The star of the show. Brands like Lao Gan Ma are widely available and provide a perfect balance of chili oil, crunchy bits, and umami. You’ll use it both in the filling and as a garnish.
- Dijon Mustard: A small amount adds a subtle tang and helps emulsify the filling, preventing it from becoming greasy.
- Fresh Garlic: Just one small clove, finely minced or grated, infuses the filling with a sharp, aromatic punch that complements the chili heat beautifully.
- Rice Vinegar: A touch of acidity (white wine vinegar works too) brightens the rich filling and balances the flavors.
- Kosher Salt & Black Pepper: For seasoning. Remember to taste before adding extra salt, as the chili crisp and mayo contain sodium.
- Green Onions & Smoked Paprika: For garnish. The fresh green color and smoky dusting provide the perfect finishing touch.

Note: You’ll find the complete list of ingredients, along with their exact measurements, in the printable recipe card at the bottom of this post.
Kitchen Equipment Needed
You don’t need any fancy gadgets for this recipe. A standard kitchen setup will do perfectly.
- A Medium Saucepan with a lid is essential for the steam-cook method.
- A Slotted Spoon makes transferring the hot eggs to the ice bath safe and easy.
- A Large Bowl for the ice bath—this step is non-negotiable for easy peeling.
- A Mixing Bowl and Fork for combining the filling. A potato masher also works well.
- A Sharp Knife for cleanly slicing the egg halves.
- A Piping Bag with a Star Tip (Optional): While a spoon works, piping gives a beautiful, professional presentation that elevates the whole dish. A zip-top bag with a corner snipped off is a great alternative.
How to Make Spicy Chili Garlic Deviled Eggs Recipe
Step 1: Perfect Hard-Cooked Eggs
Place your eggs in a single layer in the saucepan and cover them with cold water by at least an inch. Add a generous pinch of salt—this actually makes peeling easier later. Bring the pot to a full, rolling boil over high heat.
The moment it boils, immediately cover the pot and remove it from the heat. Let it stand, covered, for exactly 12 minutes. Trust me, this steam-cook method is the chef’s secret to tender yolks without that unappetizing gray-green ring.
Step 2: The Essential Ice Bath
While the eggs cook, prepare your ice bath. Fill a large bowl with very cold water and plenty of ice. As soon as the 12 minutes are up, use your slotted spoon to swiftly transfer each hot egg into the icy water.
Let them sit for at least 10-15 minutes until they are completely cold to the touch. This rapid cooling shocks the eggs, stopping the cooking process and causing the cooked egg to contract away from the shell, which is the key to frustration-free peeling.
Step 3: Peel and Prepare
Once the eggs are chilled, gently tap each one on the counter to create a web of cracks all over the shell. I find peeling them under a thin stream of cool running water helps wash away tiny shell fragments and guides the shell off smoothly. Slice each peeled egg in half lengthwise with a clean, sharp knife.
Carefully pop the yolks out into your mixing bowl and arrange the pristine white halves on your serving platter.
Step 4: Create the Flavor-Packed Filling
To the bowl of yolks, add the mayonnaise, chili crisp (don’t be shy with the crunchy bits!), Dijon mustard, minced garlic, vinegar, salt, and pepper. Now, mash and stir everything together with a fork until you have a mostly smooth, creamy, and speckled filling. Believe me, a few tiny lumps are fine and add texture.
For an impeccably silken filling, you can press the mixture through a fine-mesh sieve, but it’s not necessary for great flavor.
Step 5: Fill and Garnish
Now comes the satisfying part. You can simply spoon the filling into the egg white cavities, but for a truly elegant look, scoop the filling into a piping bag fitted with a star or plain tip. Pipe a generous, beautiful swirl into each egg white.
Step back and admire your work—they already look incredible!
Step 6: The Final Touches and Serve
To finish, add the garnishes that make these eggs sing. Drizzle a tiny bit more chili crisp oil over each one, then sprinkle with finely sliced green onions or chives. A final light dusting of smoked paprika or sesame seeds adds color and depth.
They are ready to serve immediately, or you can cover and refrigerate them for up to a few hours until your guests arrive.
- Peeling Perfection: The ice bath is your best friend. For ultimate ease, after cracking, start peeling at the wider end of the egg where the air pocket is—you’ll often find a little space to get your thumb under the membrane.
- Garlic Management: To avoid harsh, raw garlic flavor, grate the clove on a microplane or crush it with a bit of salt. This almost creates a paste that distributes evenly and mellows slightly in the creamy filling.
- Filling Consistency: If your filling seems too thick, add a teaspoon of water or more mayo. If it’s too loose, chill it in the fridge for 15 minutes to firm up before piping.
- Taste as You Go: Before you fill all the eggs, do a taste test. Adjust salt, pepper, or vinegar to suit your preference. Remember, the flavor will bloom a bit as it chills.
- Presentation Pro-Tip: If your egg halves wobble on the platter, take a tiny slice off the bottom (the rounded side) to create a flat, stable base. No more rolling eggs!
Recipe Variations
- Sriracha Mayo Twist: For a different spicy profile, replace the chili crisp with 1 tablespoon of sriracha mixed into the mayo. Garnish with black sesame seeds.
- Bacon & Chipotle: Add 2 tablespoons of finely crumbled cooked bacon and 1 teaspoon of minced chipotle in adobo sauce to the filling for a smoky, savory kick.
- Herb Garden: Fold 1 tablespoon of finely chopped fresh dill, chives, or cilantro into the filling for a bright, fresh flavor that cuts through the richness.
- Everything Bagel: Top the filled eggs with a sprinkle of everything bagel seasoning for fantastic crunch and flavor.
- Avocado Cream: Replace half the mayonnaise with mashed ripe avocado for a cooler, greener filling. Add a squeeze of lime juice to prevent browning.
- Truffle Elegance: Add a few drops of truffle oil or a teaspoon of truffle zest to the filling for a luxurious, earthy variation perfect for fancy dinners.
What to Serve With This Recipe
These spicy deviled eggs are incredibly versatile. They are the perfect starter for a casual backyard barbecue or an elegant cocktail party. For a full spread, pair them with other bold-flavored bites like crispy spring rolls, buffalo chicken dip, or a sharp cheese board with crackers and olives.
They also make a fantastic companion to grilled meats like burgers, steaks, or barbecue ribs. Beverage-wise, the spice calls for something refreshing: a crisp lager or pilsner, a citrusy gin and tonic, or even a sparkling water with lime are all excellent choices to cleanse the palate between bites.
Storage & Make-Ahead Instructions
- Make-Ahead: You can hard-cook, peel, and store the egg white halves and the yolk filling separately in airtight containers in the refrigerator for up to 24 hours ahead. Fill and garnish within 2-3 hours of serving for the best texture.
- Storage: Store any leftover filled deviled eggs in a single layer in an airtight container in the refrigerator for up to 2 days. The whites may become slightly softer, but the flavor will still be great.
- What to Avoid: Do not freeze deviled eggs, as the filling will separate and become watery upon thawing. Also, avoid leaving them at room temperature for more than 2 hours for food safety.
Frequently Asked Questions
Q: Can I make these deviled eggs ahead of time?
A: Absolutely, and I recommend it for stress-free entertaining. Prep the eggs and filling separately up to a day ahead. Assemble them within a few hours of serving to keep the whites firm and the filling fresh.
Q: My eggs are impossible to peel! What did I do wrong?
A: This is usually due to very fresh eggs. Next time, try using eggs that have been in your fridge for 7-10 days. Also, ensure your ice bath is truly icy and that you let the eggs cool completely before attempting to peel.
Q: What can I use if I don’t have chili crisp?
A: You can use 1 tablespoon of sriracha or another chili-garlic sauce mixed with 1 tablespoon of neutral oil and a pinch of crushed red pepper flakes for heat. You’ll miss the crunchy bits, but the flavor will be in the same family.
Q: How can I make these less spicy for some guests?
A: Prepare the base filling with less or no chili crisp. Divide it in half, and add chili crisp to only one portion. You can also garnish the spicy ones with an extra drizzle to easily identify them.
Q: Why is my filling a bit runny?
A: This can happen if the yolks are still warm when mixed, or if you add a bit too much mayo or vinegar. Simply chill the filling mixture in the fridge for 15-20 minutes to firm it up before piping.
Q: Can I make this recipe vegetarian/vegan?
A: For a vegetarian version, simply ensure your chili crisp brand doesn’t contain animal products (some have dried shrimp). For vegan, use vegan mayo and a plant-based egg substitute for the filling, like mashed chickpeas or tofu, though the texture will differ.
Q: How do I pipe the filling without a piping bag?
A: A plastic zip-top bag is a perfect substitute. Spoon the filling into one corner of the bag, press out the air, seal it, and then snip a small (or larger) corner off with scissors. Squeeze and you’re piping!
Final Thoughts
These Spicy Chili Garlic Deviled Eggs are more than just an appetizer; they’re a conversation starter and a guaranteed way to bring exciting flavor to any table. The process is straightforward, but the result feels special and chef-crafted. As someone who has tested this recipe multiple times to get the balance of heat, creaminess, and garlic just right, I can confidently say this is a foolproof path to a standout dish.
I encourage you to make them your own—adjust the heat, play with garnishes, and enjoy the process. Once you see how quickly they vanish from the platter, you’ll know they were a hit. I’d love to hear how yours turn out!
Share your creations online and tag me, and don’t forget to explore more of my tested, professional recipes for your next culinary adventure. Happy cooking
Spicy Chili Garlic Deviled Eggs
Equipment
- Medium saucepan
- Slotted spoon
- Large bowl for ice bath
- Mixing bowl
- Fork or potato masher
- Piping bag with tip (optional, but recommended for presentation)
- Sharp knife
Ingredients
- 6 large eggs preferably not brand new, as they peel easier
- 1/4 cup mayonnaise full-fat for best texture and flavor
- 2 tablespoons chili crisp such as Lao Gan Ma, plus more for garnish
- 1 teaspoon Dijon mustard
- 1 small clove garlic finely minced or grated
- 1/2 teaspoon rice vinegar or white wine vinegar
- 1/4 teaspoon kosher salt plus more for boiling water
- 1/8 teaspoon freshly ground black pepper
- sliced green onions or chives for garnish
- smoked paprika or sesame seeds for garnish
Instructions
- Place the eggs in a single layer in a medium saucepan and cover with cold water by at least 1 inch. Add a generous pinch of salt. Bring to a full boil over high heat, then immediately cover and remove from heat. Let stand for 12 minutes. Trust me, this steam-cook method prevents that green sulfur ring and yields perfect, tender yolks every time.
- Prepare an ice bath by filling a large bowl with cold water and ice. Using a slotted spoon, immediately transfer the hot eggs to the ice bath. Let them cool completely for at least 10-15 minutes. This rapid cooling stops the cooking process and contracts the egg inside the shell, making them infinitely easier to peel.
- Once completely cool, gently tap each egg on the counter to crack the shell all over, then peel under cool running water. Slice each egg in half lengthwise. Tip from me: use a sharp, thin-bladed knife and wipe it clean between cuts for the neatest halves. Carefully pop the yolks into a medium bowl and arrange the whites on a serving platter.
- To the bowl with yolks, add the mayonnaise, chili crisp (including some of the crunchy bits), Dijon mustard, minced garlic, vinegar, salt, and pepper. Mash everything together with a fork until mostly smooth. Believe me, a little texture is fine and adds character. For an ultra-silky filling, you can press the mixture through a fine-mesh sieve.
- Now for the fun part: filling the eggs. You can spoon the mixture into the egg white cavities, but for a professional look, transfer the filling to a piping bag fitted with a star or plain tip. Pipe a generous swirl into each egg white. Step back and admire your handiwork!
- Garnish each deviled egg with an extra tiny drizzle of chili crisp oil, a sprinkle of sliced green onions or chives, and a dusting of smoked paprika or sesame seeds. Serve immediately or chill until ready to serve.