

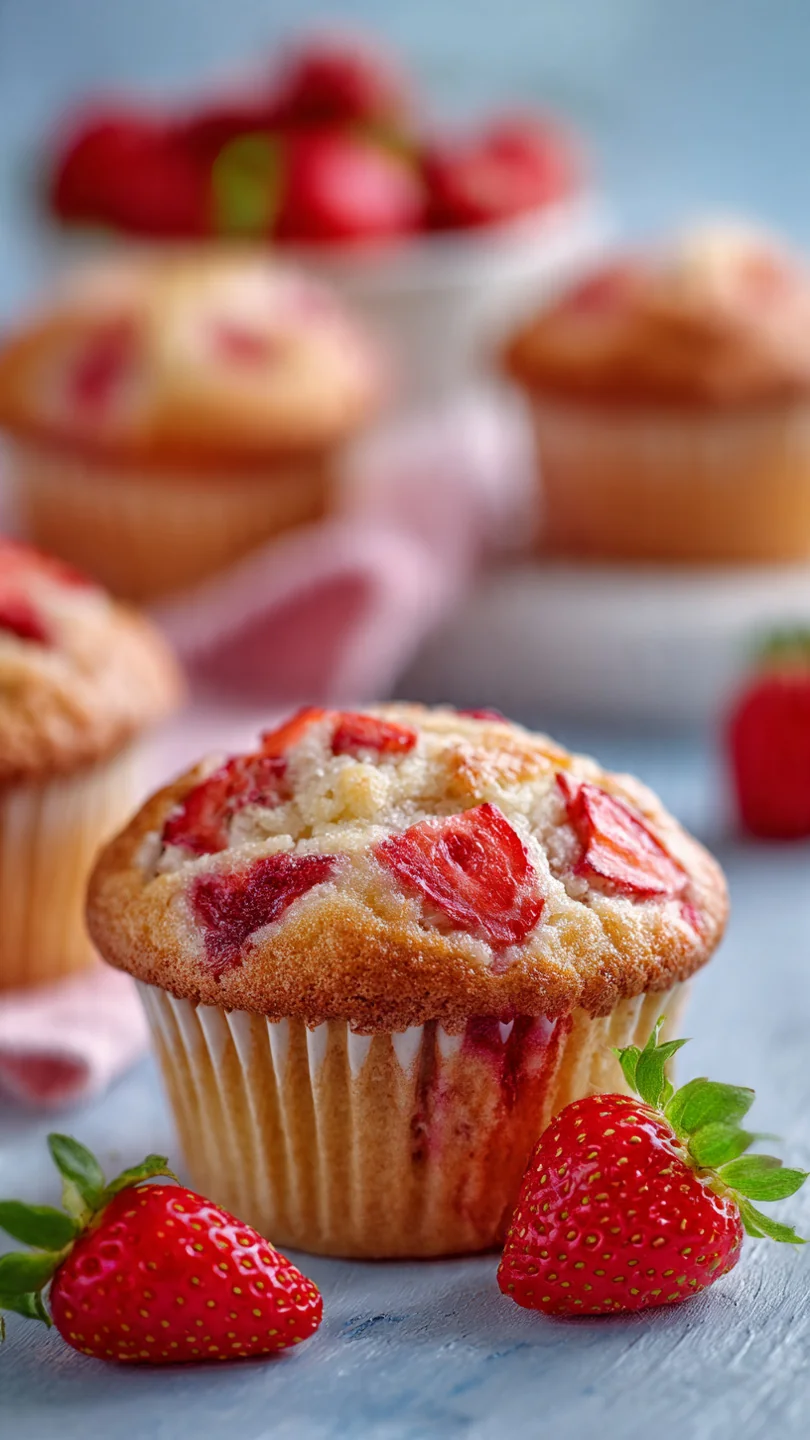
There’s something magical about a perfect strawberry muffin. It should have a tender, bakery-soft crumb that practically melts in your mouth, be packed with pockets of sweet, jammy berries, and boast a beautifully domed top with just the right amount of golden crust. For years in professional kitchens, I chased that ideal, often finding recipes that were either too dense, too dry, or where all the fruit sank to the bottom.
After extensive testing, I perfected a method that guarantees exceptional results with surprisingly little effort. This strawberry muffin recipe uses a professional baker’s trick—reverse creaming—to create an incredibly tender texture, and a simple flour-dusting step to keep those juicy strawberries perfectly suspended. You’re about to make the best strawberry muffins of your life, and I promise, it’s secretly so easy.
- Bakery-Soft Texture: The reverse-creaming method coats the flour in fat first, resulting in an exceptionally tender, fine crumb that rivals any professional bakery.
- Juicy Berry in Every Bite: Tossing the strawberries in a light dusting of flour is the foolproof secret to preventing sinkage, ensuring sweet, juicy fruit is distributed throughout the entire muffin.
- Effortless & Foolproof: With clear, sequential steps and common ingredients, this recipe is designed for success on the first try, even for beginner bakers.
- Perfect Dome Every Time: Starting with a blast of high oven heat gives the muffins an initial lift, creating that beautiful, classic bakery-style dome.
- Versatile & Customizable: This recipe serves as a perfect base. Once you master it, you can easily swap the strawberries for other fruits or add different mix-ins.
- Family-Friendly Favorite: These muffins are a guaranteed hit for breakfast, snacks, or packed lunches, appealing to both kids and adults with their sweet, fruity flavor.
Ingredients You’ll Need
Let’s gather our ingredients—this is where simple pantry staples come together to create something truly special. Using quality ingredients makes a noticeable difference, so here’s what you’ll need and why each one matters.
You’ll need all-purpose flour as the foundation; be sure to spoon it into your measuring cup and level it off for accuracy. Granulated sugar sweetens the batter and also contributes to a tender texture and golden crust. A full tablespoon of baking powder is essential for that signature high rise and light, airy crumb.
Fine sea salt balances all the sweetness and enhances the strawberry flavor.
For the wet ingredients, whole milk and large eggs should be at room temperature to blend seamlessly into the batter, creating a smooth, emulsified mixture. Using unsalted butter that’s been melted and cooled gives us rich flavor and tenderness while keeping the method simple. Don’t forget pure vanilla extract for that warm, aromatic background note.
The star of the show is, of course, fresh strawberries. Look for ripe, fragrant berries and dice them into ¼-inch pieces. You’ll also need one extra tablespoon of flour specifically for tossing the berries—this is the non-negotiable step that keeps them from sinking to the bottom during baking.
Note: You’ll find the complete list of ingredients, along with their exact measurements, in the printable recipe card at the bottom of this post.
Kitchen Equipment Needed
You likely have everything you need already. The essential tool is a standard 12-cup muffin tin. I highly recommend using paper muffin liners for easy cleanup and perfect release, though thoroughly greasing the tin works too.
You’ll need a large mixing bowl for the dry ingredients, a medium bowl or large measuring jug for the wet ingredients, a whisk, and a flexible rubber spatula for gentle folding. A large cookie scoop (about a 3-tablespoon capacity) makes portioning the batter quick, neat, and even, which helps the muffins bake uniformly. Finally, have a wire cooling rack ready to transfer the muffins to after baking; this prevents steam from making the bottoms soggy.
How to Make Strawberry Muffin Recipe
Step 1: Mix the Dry Foundation
Preheat your oven to 425°F (220°C) and prepare your muffin tin with liners. In your large bowl, whisk together the flour, sugar, baking powder, and salt. Whisk for a good 30 seconds to ensure the leavening is evenly distributed—this is the reverse-creaming method’s secret weapon.
By coating the flour particles with fat (which we’ll add next) and sugar first, you inhibit gluten development, which is exactly what gives us that tender, cake-like crumb instead of a tough, bread-like one. Trust me, this simple change in sequence makes all the difference.
Step 2: Combine the Wet Ingredients
In your separate medium bowl or large measuring cup, whisk the room temperature milk and eggs together until smooth. Then, while whisking continuously, slowly stream in the melted, slightly cooled butter. Keep whisking until the mixture is fully emulsified—it should look creamy and uniform, not separated.
Finally, whisk in the vanilla extract. Having your liquids at room temperature is crucial here; cold ingredients can cause the melted butter to solidify into little lumps, which won’t incorporate properly into the dry mix.
Step 3: Gently Combine Wet and Dry
Now, create a well in the center of your dry ingredients. Pour all of the wet mixture into this well. Using your rubber spatula, begin folding the batter together.
Start from the edges, bringing the dry ingredients into the wet center. Your goal is to combine them until no large pockets of dry flour remain. The batter will be thick and a little lumpy—this is perfect!
Overmixing is the enemy of tender muffins, as it develops gluten. Believe me, walk away from the bowl as soon as it’s just combined.
Step 4: Prepare and Fold in the Berries
Take your diced strawberries and place them in a small bowl. Sprinkle the reserved tablespoon of flour over them and toss gently until all pieces have a very light, dusty coating. This thin barrier absorbs excess juice and provides a bit of grip for the batter, preventing the heavy fruit from sinking during baking.
Gently fold the floured berries into your muffin batter until they’re evenly distributed. Now comes the fun part—you can see those gorgeous red jewels speckled throughout.
Step 5: Portion and Bake for the Perfect Dome
Using your cookie scoop or a large spoon, divide the batter evenly among the 12 muffin cups. For that classic bakery dome, you need to fill each cup to the very top—don’t be shy. I like to press a couple of extra strawberry pieces onto the top of each mound of batter for a pretty presentation.
Place the tin in the preheated 425°F oven and bake for exactly 5 minutes. This initial high heat gives the muffins a powerful burst of lift. Then, without opening the oven door, reduce the temperature to 350°F (175°C) and bake for another 16-18 minutes.
Step 6: Cool and Enjoy
The muffins are done when the tops are springy to the touch and a toothpick inserted into the center comes out clean or with a few moist crumbs (but no wet batter). Let them cool in the pan for just 5 minutes—this allows them to set enough to handle. Then, carefully transfer each muffin to a wire rack to cool completely.
This step is vital; it stops the cooking process and lets steam escape, preventing a soggy bottom. Step back and admire your beautiful, domed creations before enjoying one warm.
- Room Temperature is Key: Taking the extra 30 minutes to let your milk and eggs come to room temperature ensures they emulsify smoothly with the melted butter, creating a homogeneous batter that bakes evenly.
- The Flour Coat is Non-Negotiable: Skipping the step of tossing the berries in flour is the number one reason for fruit sinkage. That light dusting is your insurance policy for perfect berry distribution.
- Don’t Peek!: Resist the urge to open the oven door during the first 15 minutes of baking. The sudden drop in temperature can cause the delicate structure to collapse, resulting in flat muffins.
- Test for Doneness Correctly: Insert a toothpick into the center of a middle muffin (they bake slower than edge ones). It should come out with a few moist crumbs attached, not wet batter. Overbaking leads to dry muffins.
- Measure Flour Accurately: The most common baking mistake is scooping flour directly from the bag with the measuring cup, which packs it in. Always spoon flour into the cup and level it off with a knife for the correct weight.
Recipe Variations & Customizations
- Lemon-Strawberry: Add the zest of one large lemon to the dry ingredients for a bright, citrusy twist that complements the berries beautifully.
- Streusel Topping: For a decadent crunch, mix 1/4 cup flour, 1/4 cup brown sugar, 2 tbsp granulated sugar, and a pinch of cinnamon. Cut in 3 tbsp cold butter until crumbly and sprinkle over batter before baking.
- Gluten-Free Version: Substitute the all-purpose flour with a 1:1 gluten-free baking blend. The results are nearly identical in texture and rise.
- Double Berry Bliss: Replace half of the strawberries with an equal amount of fresh blueberries or raspberries for a mixed berry flavor explosion.
- Whole Wheat Option: For a heartier muffin, substitute up to half of the all-purpose flour with whole wheat pastry flour. It adds a nutty flavor and extra fiber.
- Dairy-Free Adaptation: Use a neutral-flavored plant-based milk (like oat or almond) and replace the butter with an equal amount of melted coconut oil or vegan butter.
What to Serve With This Recipe
These strawberry muffins are wonderfully versatile. For a simple, satisfying breakfast, pair one with a hot cup of coffee or a glass of cold milk. They make an excellent addition to a brunch spread alongside savory quiches, scrambled eggs, and a fresh fruit salad.
For an elegant dessert, serve a muffin slightly warmed with a scoop of vanilla bean ice cream or a dollop of freshly whipped cream. They’re also perfect for picnics, packed lunches, or as an afternoon snack with a cup of tea. I love making a double batch on weekends—they disappear quickly!
Storage & Make-Ahead Instructions
- Room Temperature Storage: Once completely cooled, store muffins in an airtight container at room temperature for up to 2 days. They are best enjoyed within 24 hours.
- Refrigerator Storage: For longer storage, place cooled muffins in an airtight container or zip-top bag and refrigerate for up to 5 days. Let them come to room temperature or warm briefly in the microwave.
- Freezer-Friendly: These muffins freeze exceptionally well. Wrap each cooled muffin individually in plastic wrap, then place them all in a freezer bag. Freeze for up to 3 months. Thaw at room temperature or warm in a 300°F oven for 10 minutes.
- Make-Ahead Batter: You can prepare the dry and wet mixtures separately the night before. Keep the dry mix in its bowl covered at room temp, and the wet mix in a sealed jar in the fridge. In the morning, let the wet mix come to room temp, then combine and bake as directed.
Frequently Asked Questions
Q: Can I use frozen strawberries instead of fresh?
Yes, but do not thaw them first. Dice them while still frozen, toss with the flour (you may need an extra teaspoon as they’re wetter), and fold directly into the batter. You may need to add 2-3 minutes to the baking time.
Q: Why did my muffins turn out dense and gummy?
This is almost always due to overmixing the batter after adding the wet ingredients. Once the flour is hydrated, mixing develops gluten. Fold gently and stop as soon as no dry streaks remain.
Q: My berries still sank to the bottom. What happened?
The most likely culprit is not coating them sufficiently in flour, or the berries were too large/wet. Ensure they are diced no larger than 1/4-inch and are thoroughly dusted. Also, avoid over-stirring after adding them.
Q: Can I make these muffins with less sugar?
You can reduce the sugar to 1/2 cup without major structural issues, though the muffins will be less sweet, less tender, and have a paler crust. I don’t recommend going lower.
Q: How do I get that perfect, crackly muffin top?
The high initial oven temperature (425°F) is the key. It causes the exterior to set quickly while the interior continues to rise, creating that classic domed and crackly top.
Q: Can I use this recipe to make mini muffins or a loaf?
For mini muffins, fill mini liners 3/4 full and bake at 350°F for 10-12 minutes. For a loaf, bake in a greased 9×5-inch loaf pan at 350°F for 50-60 minutes, tenting with foil if it browns too quickly.
Q: What’s the best way to reheat a muffin?
For the best texture, reheat in a 300°F oven for 8-10 minutes until warmed through. A 15-second burst in the microwave works in a pinch but can make it slightly chewy.
Final Thoughts
This strawberry muffin recipe represents everything I love about baking: transforming simple, accessible ingredients into something extraordinary with just a few smart techniques. The reverse-creaming method and the berry-dusting trick are game-changers that deliver professional-quality results in your own kitchen. These muffins are the perfect combination of tender, sweet, and bursting with fruit—exactly what a great strawberry muffin should be.
I encourage you to give this recipe a try this weekend. Share them with family, bring them to a friend, or simply enjoy one with your morning coffee. Once you experience how reliably delicious and easy they are, they’ll become a staple in your baking repertoire.
I’d love to hear how yours turn out! Please leave a comment or rating below, and if you share a photo on social media, tag me so I can see your beautiful creations. Happy baking
Bakery-Soft Strawberry Muffins
Equipment
- Standard 12-cup muffin tin
- Paper muffin liners or non-stick cooking spray
- Large mixing bowl
- Medium mixing bowl
- Whisk
- Rubber spatula
- Large cookie scoop (3-tbsp size)
- Wire cooling rack
Ingredients
- 2 cups all-purpose flour spooned and leveled
- 3/4 cup granulated sugar
- 1 tbsp baking powder
- 1/2 tsp fine sea salt
- 1 cup whole milk room temperature
- 2 large eggs room temperature
- 1/2 cup unsalted butter melted and cooled slightly
- 1 tsp pure vanilla extract
- 1 1/2 cups fresh strawberries hulled and diced into 1/4-inch pieces
- 1 tbsp all-purpose flour for tossing berries
Instructions
- Preheat your oven to 425°F (220°C). Line a standard 12-cup muffin tin with paper liners or grease thoroughly. In a large bowl, whisk together the 2 cups of flour, sugar, baking powder, and salt until very well combined. This is the reverse-creaming method’s foundation.
- In a separate medium bowl or large measuring jug, whisk together the room temperature milk, eggs, melted butter, and vanilla extract until smooth and fully emulsified. The mixture should be uniform in color.
- Create a well in the center of your dry ingredients. Pour the wet mixture into the well. Using a spatula, gently fold the batter together until just combined and no large pockets of dry flour remain. Do not overmix; a few lumps are perfectly fine.
- In a small bowl, toss the diced strawberries with the 1 tablespoon of flour until lightly coated. This crucial step prevents the berries from sinking. Gently fold the floured berries into the muffin batter until evenly distributed.
- Using a large cookie scoop or spoon, divide the batter evenly among the 12 prepared muffin cups, filling each to the very top. This is key for a tall, domed muffin top. Optionally, place a few extra strawberry pieces on top of each.
- Bake at 425°F for 5 minutes, then without opening the door, reduce the oven temperature to 350°F (175°C). Continue baking for 16-18 minutes, or until the tops are golden and a toothpick inserted into the center of a muffin comes out clean or with a few moist crumbs.
- Let the muffins cool in the pan for 5 minutes, then transfer them to a wire rack to cool completely. This stops the cooking process and prevents soggy bottoms. Enjoy warm or at room temperature.