
Why You’ll Love This Recipe
- Quick and Easy: Ready in just 30 minutes, this Tuna Mac and Cheese is perfect for busy weeknights.
- Comforting and Satisfying: The creamy cheese sauce and tender macaroni make this a comforting meal that’s sure to please.
- Nutritious Boost: With the addition of tuna, you get a protein-packed dish that’s both delicious and nutritious.
- Customizable: Easily adaptable to different tastes and dietary needs, making it a versatile option for any family.
- Kid-Friendly: A hit with kids and adults alike, this dish is a great way to get some essential nutrients into your family’s diet.
Ingredients & Preparation Notes
- Macaroni: Choose a high-quality pasta for the best texture. Elbow macaroni works well, but any short pasta will do.
- Butter and Flour: These form the base of the roux, which thickens the cheese sauce. Use unsalted butter to control the salt level.
- Milk: Whole or 2% milk works best for a creamy sauce. Skim milk may result in a thinner consistency.
- Cheddar Cheese: Sharp cheddar adds a rich flavor, but feel free to mix in other cheeses like mozzarella or gouda for variety.
- Tuna: Canned tuna in water is convenient and adds a nice texture and flavor. Ensure it’s well-drained to avoid a watery dish.
- Salt and Pepper: Season to taste, but start with the recommended amounts for a balanced flavor.
- Breadcrumbs: Optional, but they add a nice crunch when broiled on top.
Professional Tips & Techniques
- Roux Mastery: Whisk the flour into the melted butter thoroughly to avoid lumps. Cook the roux for a minute or two to eliminate the raw flour taste and enhance the sauce’s flavor.
- Cheese Melting: Add the cheese gradually and off the heat to prevent it from separating. Stir until completely melted for a smooth sauce.
- Pasta Timing: Cook the macaroni to al dente, as it will continue to cook slightly in the hot sauce. Overcooking can lead to a mushy texture.
- Broiling: If using breadcrumbs, keep a close eye on the dish under the broiler to prevent burning. It should only take 2-3 minutes to achieve a golden brown topping.
- Flavor Enhancement: A pinch of mustard powder or a dash of hot sauce can add depth to the cheese sauce without overpowering the dish.
Recipe Variations
- Vegetarian Option: Omit the tuna and add steamed broccoli or peas for a veggie-packed version.
- Gluten-Free: Use gluten-free pasta and a gluten-free flour blend for the roux.
- Spicy Kick: Add diced jalapeños or a pinch of cayenne pepper to the cheese sauce for some heat.
- Herb Infusion: Mix in fresh herbs like parsley or dill for a fresh flavor twist.
- Cheese Blend: Experiment with different cheeses like smoked gouda or pepper jack for unique flavors.
- Baked Version: Transfer the mixture to a baking dish, top with breadcrumbs, and bake at 350°F (175°C) for 20 minutes for a casserole-style dish.
- Seafood Twist: Substitute the tuna with cooked shrimp or crab for a seafood mac and cheese.
- Vegan Adaptation: Use plant-based milk, vegan cheese, and a vegan butter substitute for a dairy-free version.
Serving Suggestions
- As a Main Dish: Serve as a standalone meal with a side salad for a complete and balanced dinner.
- With Veggies: Pair with steamed or roasted vegetables like broccoli, carrots, or green beans for added nutrition.
- For a Crowd: Double the recipe and serve in a large casserole dish at family gatherings or potlucks.
- Presentation: Garnish with fresh herbs or a sprinkle of paprika for a pop of color and flavor.
- Pairing: A light white wine like Sauvignon Blanc or a crisp beer complements the richness of the dish.
Storage & Make-Ahead Tips
- Refrigeration: Store leftovers in an airtight container in the refrigerator for up to 3-4 days.
- Freezing: This dish can be frozen for up to 2 months. Thaw in the refrigerator overnight before reheating.
- Make-Ahead: Prepare the dish up to the point of adding breadcrumbs, then refrigerate. Add breadcrumbs and broil just before serving.
- Reheating: Reheat in the microwave or oven until heated through. Add a splash of milk if the sauce has thickened too much.
Frequently Asked Questions
Q: Can I make this ahead of time?
A: Yes, you can prepare the dish up to the point of adding breadcrumbs, then refrigerate. Add breadcrumbs and broil just before serving.
Q: What can I use instead of tuna?
A: You can substitute tuna with cooked chicken, shrimp, or even skip it for a vegetarian version with added veggies.
Q: Can I use a different type of pasta?
A: Absolutely! Any short pasta like penne, shells, or fusilli will work well in this recipe.
Q: How do I prevent the cheese sauce from becoming grainy?
A: Add the cheese gradually and off the heat, stirring until completely melted. Avoid high heat, which can cause the cheese to separate.
Q: Can I make this dish gluten-free?
A: Yes, use gluten-free pasta and a gluten-free flour blend for the roux to make it gluten-free.
Q: What can I add to enhance the flavor?
A: A pinch of mustard powder, a dash of hot sauce, or fresh herbs like parsley or dill can add depth and freshness to the dish.
Q: How do I store leftovers?
A: Store leftovers in an airtight container in the refrigerator for up to 3-4 days. Reheat in the microwave or oven.
Q: Can I freeze Tuna Mac and Cheese?
A: Yes, you can freeze it for up to 2 months. Thaw in the refrigerator overnight before reheating.
Conclusion
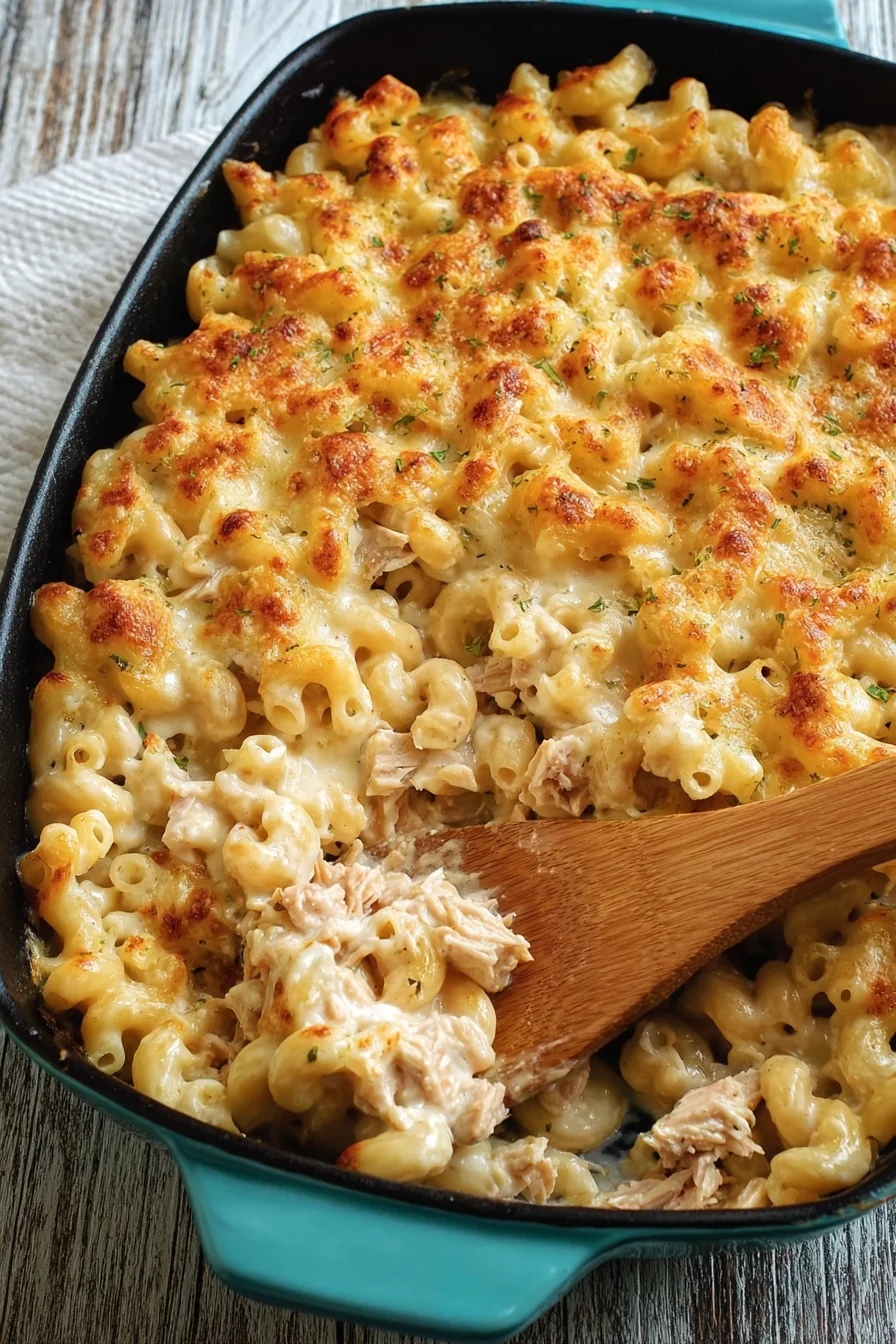
Tuna Mac and Cheese is a delightful combination of comfort and nutrition, perfect for any busy cook looking for a quick and satisfying meal. With its easy preparation and customizable nature, it’s a recipe that can be enjoyed by everyone in the family. Give it a try and see how it becomes a staple in your meal rotation.
Don’t forget to share your creations and feedback on social media, and enjoy this comforting dish with your loved ones!
Tuna Mac and Cheese
Equipment
- Large pot for boiling pasta
- Saucepan for making cheese sauce
- Whisk for smooth sauce
- Baking dish (optional for broiling)
Ingredients
- 8 oz macaroni elbow or any short pasta
- 2 tbsp butter unsalted
- 2 tbsp all-purpose flour
- 2 cups milk whole or 2%
- 2 cups shredded cheddar cheese
- 1 5 oz canned tuna drained and flaked
- 1/2 tsp salt
- 1/4 tsp black pepper
- 1/4 cup breadcrumbs optional, for topping
Instructions
- Cook the macaroni according to package instructions until al dente, about 8-10 minutes. Drain and set aside.
- In a saucepan over medium heat, melt the butter. Whisk in the flour and cook for 1-2 minutes to form a roux. Gradually whisk in the milk, ensuring no lumps form. Cook, stirring constantly, until the sauce thickens, about 5 minutes.
- Reduce heat to low and stir in the shredded cheese until melted and smooth. Add the drained tuna, salt, and pepper, mixing well.
- Combine the cooked macaroni with the cheese sauce and tuna mixture. If using, sprinkle breadcrumbs over the top.
- Serve immediately or transfer to a baking dish and broil for 2-3 minutes until the breadcrumbs are golden brown.