
Y’know, there’s something downright magical about the smell of apples and cinnamon wafting through the house on a crisp fall day. I discovered my obsession with the Ultimate Apple Crisp years ago when I was desperate to use up a haul of apples from a local orchard. My first attempt at the Ultimate Apple Crisp was a bit of a mess (more on that later), but now? It’s my go-to dessert for cozy family nights or when I just need a hug in dessert form.
I’m not exaggerating when I say this Ultimate Apple Crisp has become a legend in my household. My family loves it so much they start dropping hints as soon as the leaves turn. So, let’s dive into this recipe that’s equal parts comfort food and kitchen triumph!
And trust me, if I can nail the Ultimate Apple Crisp after a few epic fails, you’ve got this in the bag too.
Why You’ll Love This Recipe
I’ve found that there’s nothing quite like the Ultimate Apple Crisp to bring everyone to the table with a smile. It’s got that perfect balance of sweet, tart apples and a buttery, crunchy topping that just screams autumn. In my kitchen, this dish isn’t just a dessert; it’s a full-on memory maker.
Plus, it’s ridiculously easy to whip up, even if you’re not a baking pro. I mean, if I can throw together the Ultimate Apple Crisp on a busy weeknight, anyone can. It’s forgiving, customizable, and oh-so-satisfying with every bite.
Ingredients List
Alright, let’s talk about what you’ll need to make the Ultimate Apple Crisp. I’m pretty picky about my ingredients because, well, I’ve learned that quality matters when you’re going for that perfect bite. I prefer using fresh, in-season apples and real butter for that unbeatable flavor.
Here’s everything you’ll need to create the Ultimate Apple Crisp, split into two parts for clarity. I usually buy my apples from a local market, but any good grocery store will do. Let’s break it down!
For the Apple Filling
- 6 medium apples (about 2.5 lbs or 1.1kg), peeled, cored, and sliced thinly – I love a mix of Granny Smith and Honeycrisp for tart-sweet balance
- 1/2 cup (100g) granulated sugar, for sweetness
- 2 tablespoons (15g) all-purpose flour, to thicken the juices
- 1 teaspoon ground cinnamon, for that cozy vibe
- 1/4 teaspoon ground nutmeg, just a pinch for depth
- 1 tablespoon (15ml) lemon juice, to keep the apples bright and zesty
For the Crisp Topping
- 1 cup (120g) all-purpose flour, for structure
- 3/4 cup (150g) brown sugar, packed – I go for dark brown for extra molasses kick
- 1/2 cup (45g) rolled oats, for that classic crunch
- 1/2 teaspoon ground cinnamon, to tie it all together
- 1/2 cup (115g) unsalted butter, cold and cut into small cubes – don’t skimp here!
- 1/4 teaspoon salt, to balance the sweetness
These ingredients are the heart of the Ultimate Apple Crisp, and trust me, they’re worth every penny.
Variations
One of the things I adore about the Ultimate Apple Crisp is how easy it is to switch things up based on what’s in your pantry or what you’re craving. I’ve played around with this recipe more times than I can count, and my family’s always game to be my taste testers. Here are some of my favorite twists on the Ultimate Apple Crisp that might just inspire you.
- Nutty Delight: Toss in 1/2 cup of chopped pecans or walnuts into the topping for extra crunch. I tried this once for a holiday party, and it was a total game-changer.
- Berry Blast: Mix 1 cup of fresh or frozen blueberries with the apples for a fruity twist. My kids always ask for this version!
- Spiced Up: Add 1/4 teaspoon of ground cloves or allspice to the filling for a deeper, warmer flavor. It’s like a hug in every bite.
- Caramel Drizzle: Drizzle 1/4 cup of store-bought or homemade caramel sauce over the apples before adding the topping. I did this for a date night dessert, and let’s just say it was a hit.
- Gluten-Free Swap: Use gluten-free flour and certified gluten-free oats for the topping. I’ve made this for a friend with dietary restrictions, and they couldn’t tell the difference.
- Oatmeal Overload: Double the oats in the topping to 1 cup for an even heartier texture. This is my go-to when I want the Ultimate Apple Crisp to feel more like breakfast.
- Cranberry Kick: Stir in 1/2 cup of dried cranberries with the apples for a tart-sweet punch. I stumbled on this combo last Thanksgiving, and it’s been a staple since.
- Maple Magic: Swap half the granulated sugar in the filling with maple syrup for a richer taste. This one’s a personal fave for the Ultimate Apple Crisp on chilly mornings.
Servings and Timing
Let’s chat about how much this Ultimate Apple Crisp will make and how long it’ll take. In my experience, this recipe is perfect for a small gathering or just a family dessert with leftovers (if you’re lucky!). I’ve timed it out over many baking sessions, so here’s the breakdown.
- Prep Time: 20 minutes
- Cook Time: 45 minutes
- Total Time: 1 hour 5 minutes
- Servings: 6-8 portions
This Ultimate Apple Crisp usually takes me right around an hour from start to finish, and it feeds my crew of six with a little to spare for seconds. You’ll probably find the prep goes even faster once you’ve made it a couple of times!
Step-by-Step Instructions
Making the Ultimate Apple Crisp is straightforward, but I’ve got some little tricks up my sleeve to make it shine. I’ll walk you through each step like I’m right there in your kitchen. Let’s get started!
Step 1: Preheat and Prep
First things first, crank your oven to 350°F (175°C) and grease a 9×13-inch baking dish with butter or cooking spray. I always do this step right away so I’m not scrambling later. (Been there, done that!)
Step 2: Prepare the Apples
Peel, core, and slice your apples into thin wedges—aim for about 1/4-inch thick so they cook evenly. Toss them in a big bowl with sugar, flour, cinnamon, nutmeg, and lemon juice until they’re nicely coated. I’ve learned to really mix it well to avoid any dry pockets in the Ultimate Apple Crisp.
Step 3: Make the Topping
In another bowl, combine flour, brown sugar, oats, cinnamon, and salt. Cut in the cold butter with a pastry cutter or your fingers until it looks like coarse crumbs—don’t overdo it; those buttery clumps are gold! I usually pop the bowl in the fridge for a few minutes if the butter starts softening too much.
Step 4: Assemble and Bake
Spread the apple mixture evenly in your baking dish, then sprinkle the topping over it. Bake for 40-45 minutes until the apples are tender and the top is golden and crispy. The smell of the Ultimate Apple Crisp at this stage? Pure heaven.
Step 5: Cool and Serve
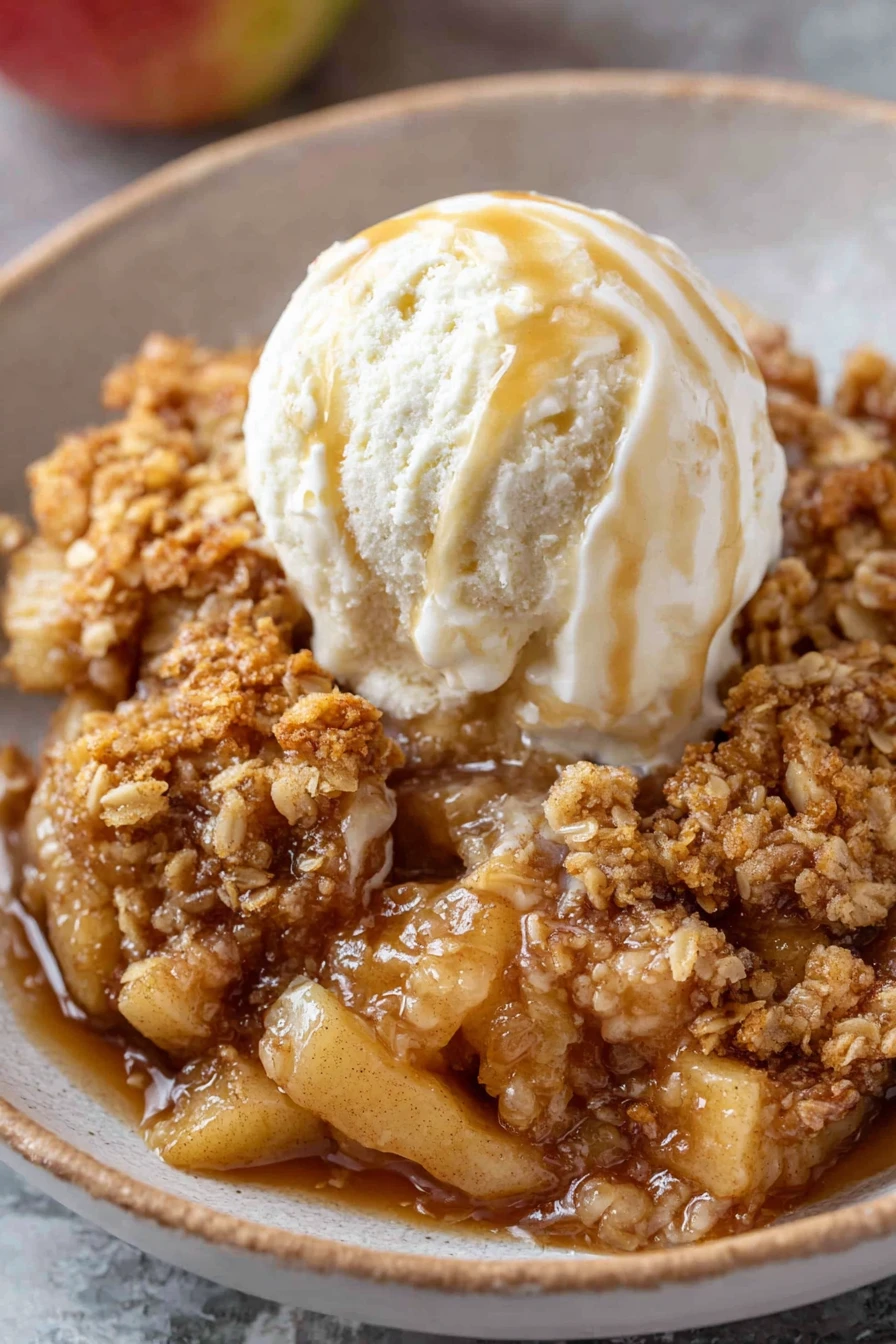
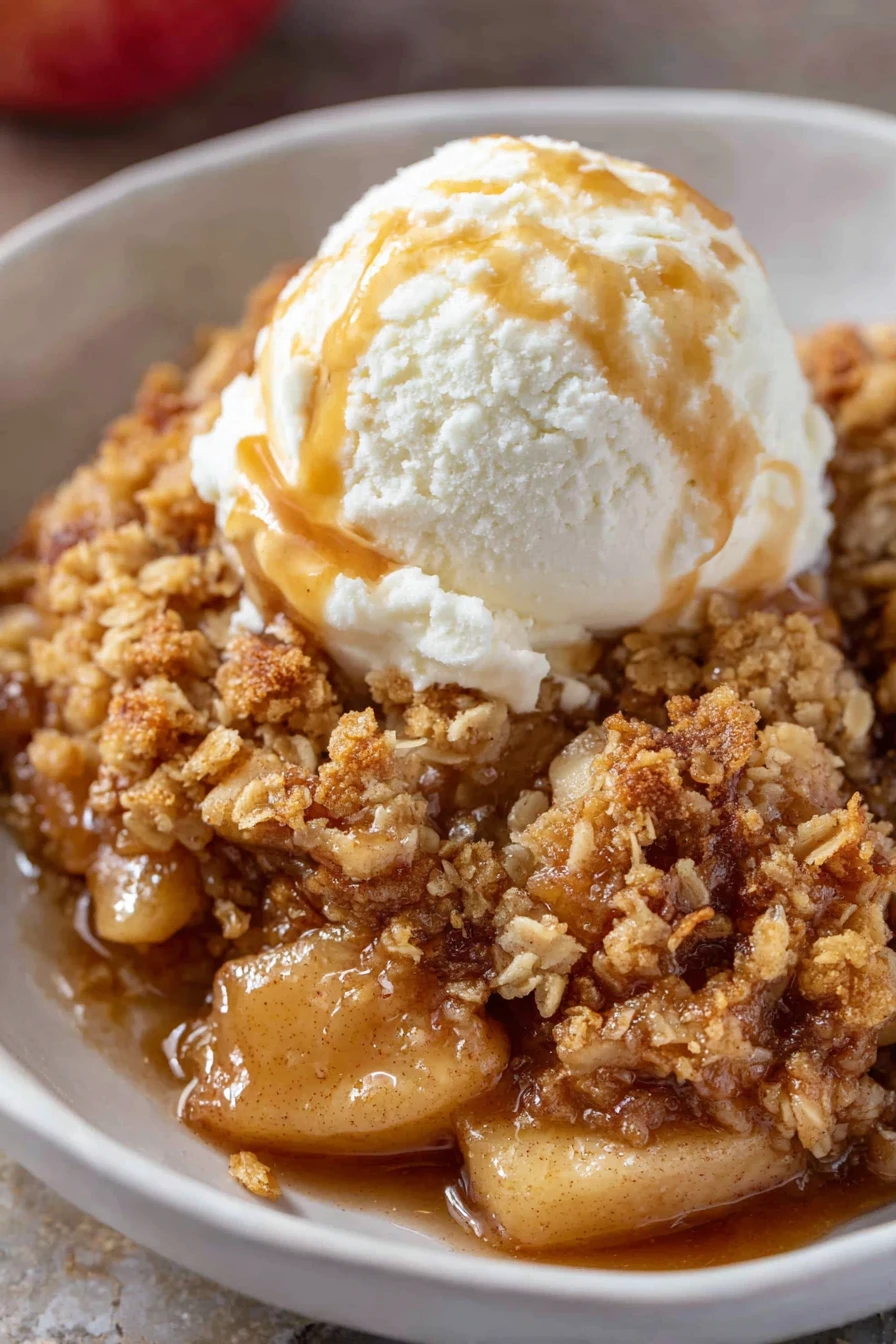
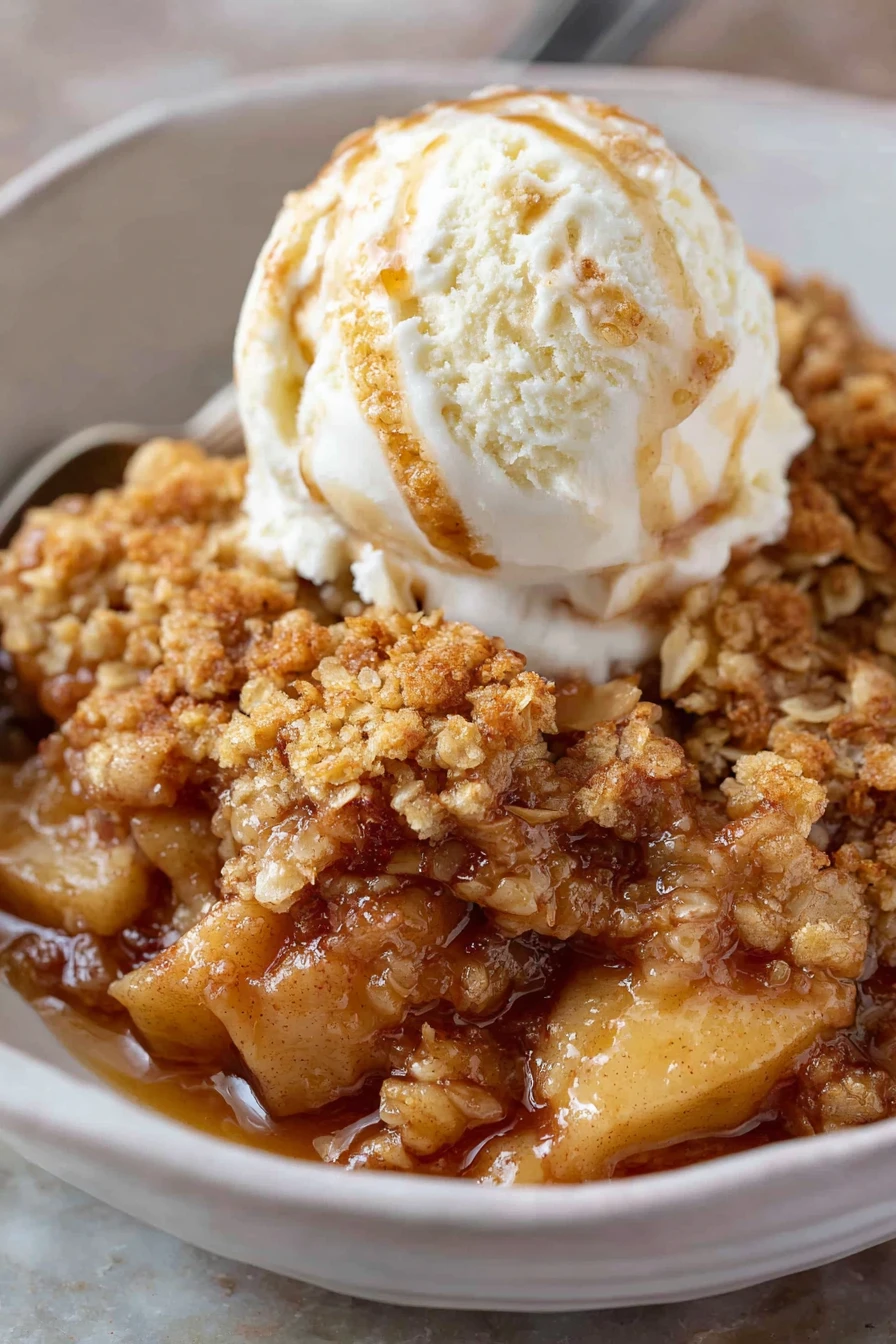
Let it cool for at least 10 minutes before digging in—trust me, those apples are lava-hot straight outta the oven! I’ve burned my tongue more times than I care to admit. This Ultimate Apple Crisp is best enjoyed warm, maybe with a scoop of vanilla ice cream if you’re feeling fancy.
There you go, a no-fuss way to whip up the Ultimate Apple Crisp that’ll have everyone asking for the recipe!
Nutritional Information
I’m not gonna lie, the Ultimate Apple Crisp isn’t exactly a health food, but it’s worth every calorie in my book. I’ve crunched the numbers for a rough idea of what you’re getting per serving (based on 8 portions). Here’s the breakdown for this Ultimate Apple Crisp.
- Calories: 320 per serving
- Fat: 12g
- Protein: 2g
- Carbohydrates: 52g
- Sodium: 80mg
I think it’s a fair trade for a dessert this comforting, but if you’re watching your intake, I’ve got some swaps coming up next.
Healthier Alternatives
If you’re like me and sometimes wanna lighten things up, there are ways to tweak the Ultimate Apple Crisp without sacrificing flavor. I’ve swapped ingredients here and there when I’m trying to cut back on sugar or fat. Here are a few ideas for a healthier Ultimate Apple Crisp.
- Less Sugar: Cut the granulated sugar in the filling to 1/4 cup and use a natural sweetener like honey instead.
- Lower Fat: Replace half the butter in the topping with unsweetened applesauce—it still keeps things moist!
- Whole Grain: Swap the all-purpose flour for whole wheat flour for a bit more fiber. I’ve done this for my Ultimate Apple Crisp, and it adds a nice nutty vibe.
- Skip the Extras: Hold off on add-ins like caramel or nuts if you’re trimming calories. It’s still delicious, I promise!
These tweaks let you enjoy the Ultimate Apple Crisp with a little less guilt, and honestly, I barely notice the difference.
Serving Suggestions
I love getting creative with how I serve the Ultimate Apple Crisp—it’s such a versatile dessert! Whether it’s a casual weeknight or a special occasion, here are some ways I’ve plated it up. These ideas for the Ultimate Apple Crisp always get rave reviews.
- Classic Comfort: Scoop it warm into bowls with a dollop of whipped cream on top—pure bliss.
- Ice Cream Dream: Add a generous scoop of vanilla ice cream and let it melt over the hot crisp. This is my personal fave!
- Breakfast Treat: Pair leftovers with a drizzle of Greek yogurt for a sneaky morning indulgence.
- Fancy Finish: Dust with powdered sugar and serve with a sprig of mint for a dinner party vibe. I did this for my last gathering, and it felt so upscale for the Ultimate Apple Crisp!
Common Mistakes to Avoid
I’ve made my fair share of blunders with the Ultimate Apple Crisp over the years, so let me save you some trouble. Trust me on this one—I learned the hard way! Here are some pitfalls to dodge when making the Ultimate Apple Crisp.
- Overcooking Apples: Don’t slice them too thin, or they’ll turn to mush. I’ve ended up with apple sauce instead of crisp more than once!
- Soggy Topping: Make sure your butter is cold when mixing the topping; warm butter equals a flat, greasy mess. Guilty as charged on this.
- Uneven Baking: Spread the apples and topping evenly in the dish, or you’ll get burnt bits and raw spots. Been there with my Ultimate Apple Crisp.
- Skipping the Cool: Don’t dive in right away—it needs a few minutes to set, or you’ll burn your mouth like I did the first time.
Storing Tips
If you’ve got leftovers of the Ultimate Apple Crisp (which is rare in my house!), here’s how to keep it tasting great. I’ve found these methods work best in my experience. Let’s make sure your Ultimate Apple Crisp stays yummy!
- Refrigerator: Store in an airtight container for up to 4 days—reheat in the oven for that crisp topping.
- Freezer: Freeze unbaked or baked crisp for up to 2 months; just thaw and reheat at 350°F.
- Reheating Tip: Pop it in the oven at 300°F for 10-15 minutes to revive the texture of the Ultimate Apple Crisp.
Frequently Asked Questions
I get a lot of questions about the Ultimate Apple Crisp, so I’ve rounded up the most common ones. Let’s tackle these head-on like we’re chatting over coffee. Here’s everything you might wanna know about making the Ultimate Apple Crisp!
Can I use different types of apples?
Absolutely! I usually mix tart apples like Granny Smith with sweeter ones like Honeycrisp for balance. Experiment with what’s local to you.
Can I make this ahead of time?
Yup, you can assemble the Ultimate Apple Crisp up to a day ahead and refrigerate it. Just bake it when you’re ready.
Is it okay to use frozen apples?
Sure thing. Thaw them first and pat dry to avoid extra liquid in your dish. I’ve done this in a pinch.
How do I keep the topping crispy?
Store it separately if possible, and reheat in the oven, not the microwave. Learned that one after a soggy disaster!
Can I double the recipe?
Go for it! Use a larger baking dish and add about 10 minutes to the bake time. I’ve done this for potlucks.
What if I don’t have oats?
No worries, just sub in more flour or even crushed nuts for texture. It’s not quite the same, but it works.
Can I make this vegan?
Totally. Swap butter for vegan margarine or coconut oil. I’ve tried it, and it’s still delish.
How do I know when it’s done?
Look for bubbling apples and a golden-brown topping. Poke with a fork to check if the apples are soft—usually 40-45 minutes.
Conclusion
Well, there you have it—my tried-and-true guide to the Ultimate Apple Crisp that’s been a lifesaver in my kitchen. I hope you’ll give this recipe a whirl and make some sweet memories with it, just like I have. If you’ve got questions or fun twists on the Ultimate Apple Crisp, drop ‘em in the comments—I’d love to hear!
Conclusion
I hope you enjoyed this recipe for Ultimate Apple Crisp! It’s truly one of my favorites, and I’m confident you’ll love it too. Remember to follow the steps carefully for the best results.
Don’t hesitate to experiment with your own variations and make this recipe your own. Happy cooking!