
There’s a moment in cake decorating that separates the good from the great: when your piping bag is full and you give it that first test squeeze. If the frosting holds a sharp peak, feels silky, and tastes like a cloud of chocolate, you know you’ve won. For years in professional kitchens, I chased that perfect consistency—a buttercream that was stable enough for intricate roses but light enough to melt on the tongue.
After countless tests, this whipped chocolate buttercream formula became my non-negotiable secret. It’s the one I teach in all my classes because it reliably turns simple bakes into fluffy delights.
This frosting is designed for success, whether you’re a first-time baker or a seasoned pro. Here’s what makes it special:
- Unbeatable Texture: The extended whipping technique incorporates air, creating a frosting that’s noticeably lighter and fluffier than standard buttercreams, without being greasy.
- Pipeable Perfection: It holds intricate shapes beautifully for decorating cupcakes and cakes, yet spreads like a dream for a smooth finish.
- Deep Chocolate Flavor: Using a combination of quality cocoa powder and a pinch of salt delivers a rich, well-rounded chocolate taste that isn’t overly sweet.
- Stable and Forgiving: Thanks to the careful structure built during mixing, this frosting is less likely to melt or deflate in warmer conditions compared to other whipped frostings.
- Simple Ingredients: Everything you need is likely already in your pantry and fridge—no speciality products or complicated steps required.
- Versatile Base: Once you master this method, it’s easy to customize with different extracts, mix-ins, or even colors for any occasion.
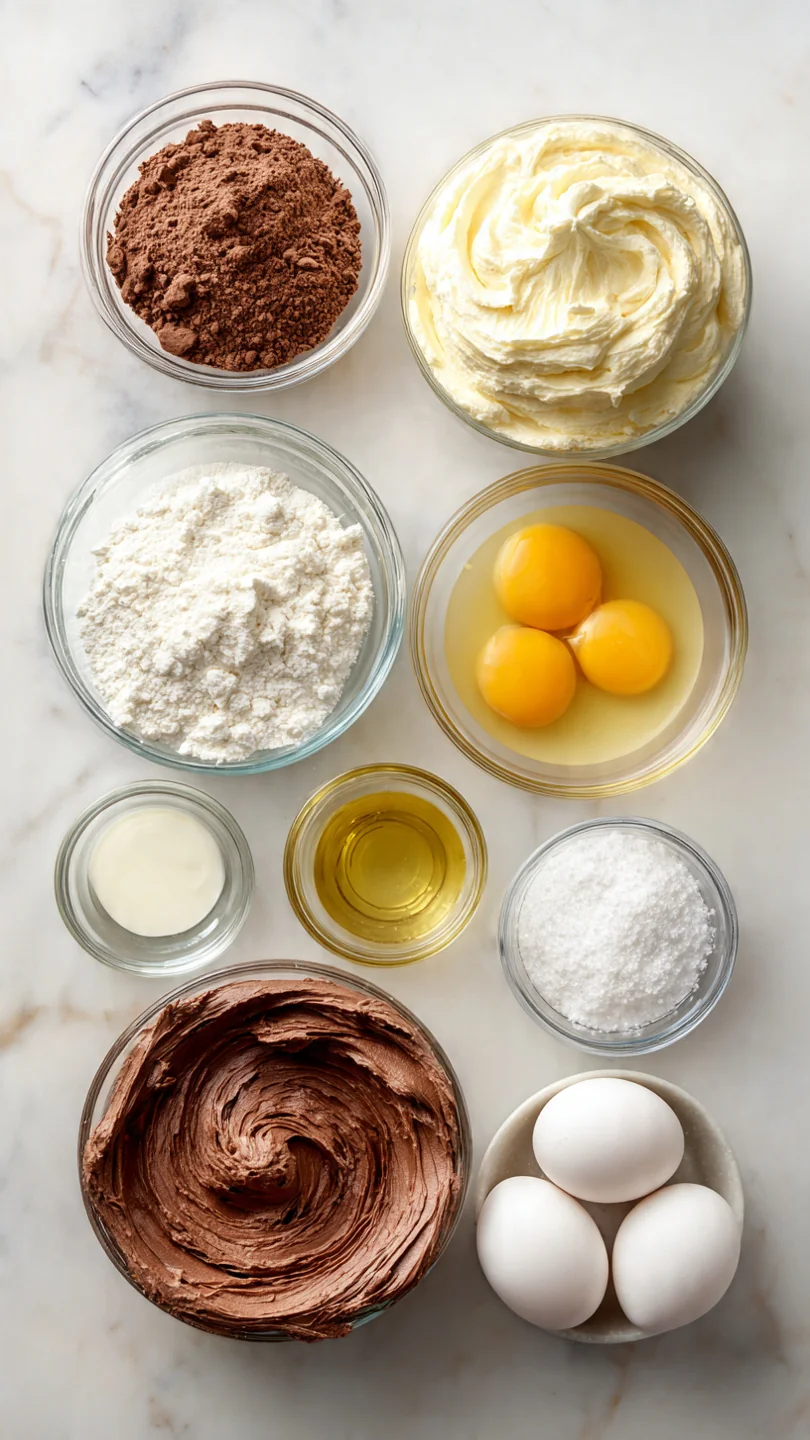
Ingredients You’ll Need
- Let’s gather our ingredients—this is where a little attention to detail pays off in spectacular texture and flavor. The magic of this frosting lies not in complexity, but in the quality and temperature of these few simple components.
- Unsalted butter: This is the foundation. It must be at a cool room temperature (about 65-68°F). If it’s too warm, your frosting will be soft and greasy; too cold, and it won’t cream properly. A good test: it should yield to gentle pressure but not feel oily.
- Powdered sugar: Also called confectioners’ or icing sugar. Sifting is non-optional here—it removes lumps that can clog your piping tips and ensures a silky-smooth final product.
- Unsweetened cocoa powder: I strongly recommend Dutch-processed cocoa for this recipe. It’s treated with an alkali, which gives it a darker color, richer flavor, and less acidity. It blends more smoothly into the fat base.
- Heavy cream: Use it cold, straight from the fridge. The cold temperature helps stabilize the air we’re whipping in, giving the frosting structure and body. Whipping cream works just as well.
- Pure vanilla extract: A splash enhances the chocolate flavor and adds depth. Avoid artificial imitations.
- Fine sea salt: Don’t skip this! Salt is a flavor enhancer that cuts the sweetness and makes the chocolate taste more pronounced and complex.
Note: You’ll find the complete list of ingredients, along with their exact measurements, in the printable recipe card at the bottom of this post.
Kitchen Equipment Needed
You don’t need a bakery’s worth of tools, but the right equipment makes the process effortless. A stand mixer is ideal for the extended mixing times, as it’s powerful and hands-free. A good hand mixer will work, but you’ll need to be patient and may need to whip a minute or two longer to achieve the same volume.
You’ll also need a large bowl, a fine-mesh sieve for sifting the dry ingredients, a flexible rubber spatula for scraping, and standard measuring tools. If you plan to decorate, have your piping bags and tips ready.
How to Make Whipped Chocolate Buttercream Frosting Recipe
Step 1: Cream the Butter to Perfection
In your stand mixer bowl, beat the cool room-temperature butter on medium-high speed for a full 5 minutes. This isn’t just mixing; it’s aeration. You are physically beating tiny air bubbles into the fat, which is the first step to a light texture.
Scrape the bowl down at the 2.5-minute mark. Trust me, you’ll know it’s ready when the butter has transformed from yellow to a very pale, almost white color and has the consistency of fluffy whipped cream.
Step 2: Incorporate the Sugar Gradually
Reduce the mixer speed to low. The key here is patience. Add the sifted powdered sugar about one cup at a time, letting each addition fully disappear into the butter before adding the next.
This prevents a huge cloud of sugar dust and ensures a smooth base. Once all the sugar is in, bump the speed back up to medium and beat for 2 minutes until the mixture is uniformly smooth and slightly fluffy.
Step 3: Add the Chocolate Foundation
Now, add your sifted cocoa powder, vanilla extract, and salt to the bowl. Start mixing on low speed until the cocoa is just incorporated—this keeps it from poofing out of the bowl. The mixture will look very thick, dry, and almost crumbly.
Don’t panic! This is exactly what you want. You’ve created a concentrated paste that’s ready to absorb the liquid.
Step 4: Stream in the Cream and Transform
With the mixer running on medium speed, begin slowly drizzling the cold heavy cream down the side of the bowl in a thin, steady stream. Tip from me: pouring too fast can cause the mixture to separate or become grainy. As the cream is absorbed, you’ll see the thick paste relax into a stiffer, darker frosting.
Stop the mixer, scrape the bowl and beater thoroughly to incorporate any dry pockets, and then swap out the paddle attachment for the whisk.
Step 5: Whip to Fluffy Peaks and Serve
This is the final, crucial aeration phase. Whip the frosting on medium-high speed for 4 to 5 minutes. Believe me, set a timer.
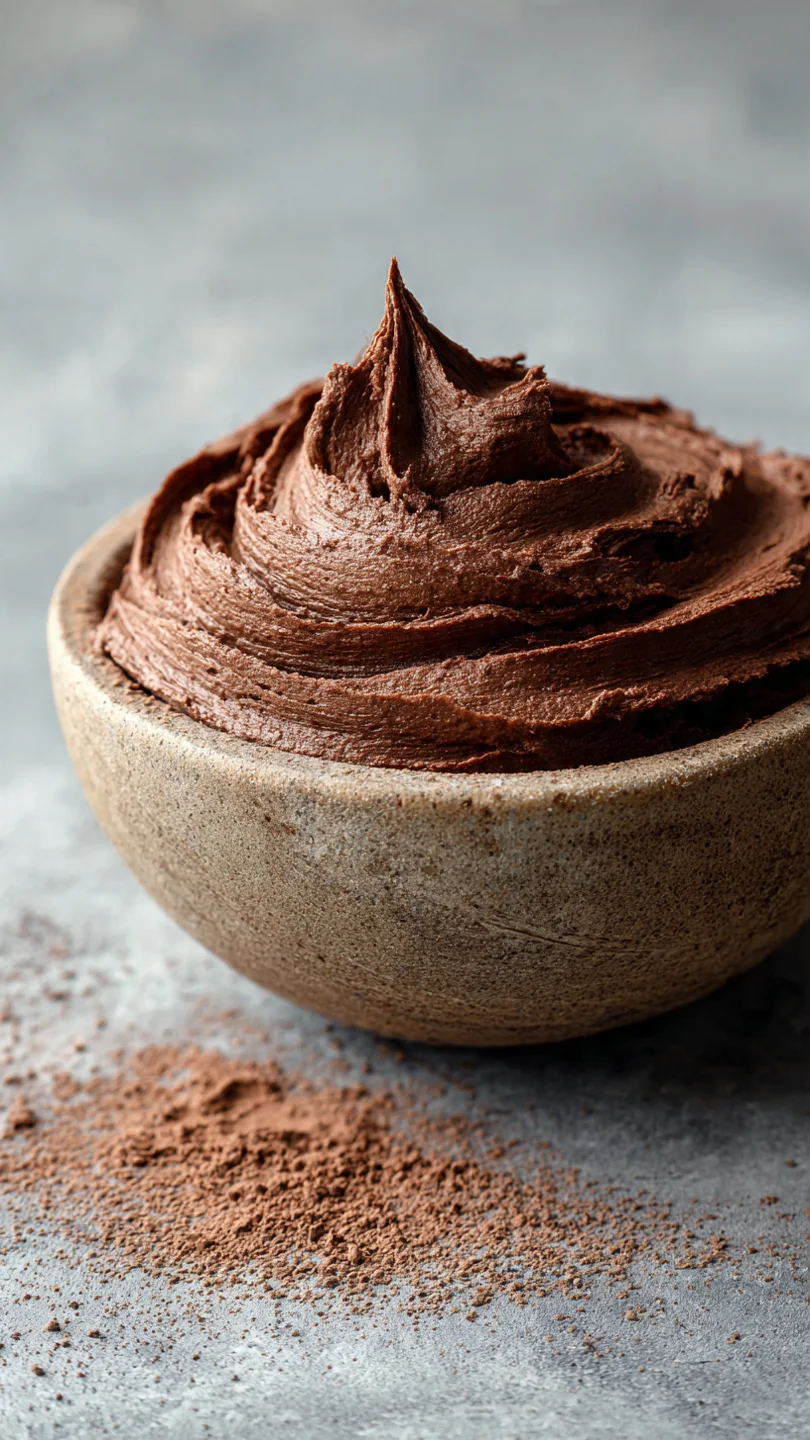
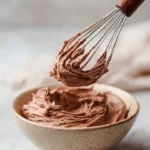
Watch as the frosting becomes lighter in color, increases visibly in volume, and transforms into a silky, spreadable, and pipeable dream. It’s done when you lift the whisk and the frosting forms stiff, defined peaks that hold their shape. Step back and admire your cloud of chocolate.
It’s now ready to elevate your cakes, cupcakes, or even just a spoon.
My years in pastry have taught me that the difference between good and great frosting is in the details. Here are my tested insights:
- Temperature is Everything: The butter temperature is the most critical factor. If your kitchen is warm (above 72°F), chill your mixing bowl and beaters for 10 minutes before starting. Butter that’s too soft will never hold air properly.
- Sift, Don’t Skip: Lumps in powdered sugar or cocoa will never fully dissolve, leaving you with a grainy texture. Taking one minute to sift guarantees a flawlessly smooth mouthfeel.
- The Whisk Attachment Finale: Switching from the paddle to the whisk for the final whipping is a game-changer. The wires incorporate more air more efficiently, which is what gives this frosting its signature whipped, light texture.
- Rescue Operations: If you accidentally add the cream too fast and the frosting looks curdled or separated, don’t despair. Simply add 1-2 more tablespoons of powdered sugar and whip on high for another minute. It should come back together.
- Color Cue: The frosting is adequately whipped when its color lightens by a shade or two from its initial dark brown. This visual sign is as reliable as the stiff peak test.
Recipe Variations
- This master recipe is a perfect canvas for creativity. Here are some of my favorite tested twists:
- Mocha Whipped Frosting: Dissolve 1-2 tablespoons of instant espresso powder in the heavy cream before adding it to the mixer for a rich coffee-chocolate flavor.
- Mint Chocolate: Replace the vanilla extract with 1 teaspoon of pure peppermint extract. For a festive look, add a drop of green gel food coloring during the final whipping stage.
- Orange Chocolate: Add the zest of one large orange along with the cocoa powder. The citrus oils brighten the deep chocolate flavor beautifully.
- Salted Caramel Swirl: After frosting your cake, warm 1/3 cup of thick salted caramel sauce slightly and drizzle it over the top, using a knife or skewer to create a marbled effect.
- Vegan/Dairy-Free: Use an equal amount of high-quality vegan butter sticks (like Miyoko’s or Earth Balance) and full-fat coconut cream (chilled) in place of the dairy butter and heavy cream. The results are surprisingly similar in texture.
- Milk Chocolate Version: For a sweeter, milder frosting, replace 1/2 cup of the cocoa powder with an additional 1/2 cup of powdered sugar.
What to Serve With This Recipe
This frosting is the crowning glory for so many desserts. It’s the classic partner for a tender Vanilla Buttermilk Cake or a decadent Devil’s Food Cake. For cupcakes, it pipes beautifully onto Chocolate Cupcakes or Red Velvet Cupcakes.
Beyond cake, try it as a dip for chocolate chip cookies, a filling for whoopie pies, or a luxurious topping on brownies. For a dinner party, consider a chocolate frosting shot glass dessert—layer crumbs of chocolate cake, frosting, and fresh berries. Beverage-wise, it pairs wonderfully with cold milk, a bold cup of coffee, or a glass of port.
Storage & Make-Ahead Instructions
- Proper storage ensures your frosting retains its perfect texture. For short-term storage, place the frosting in an airtight container and refrigerate for up to one week. For longer storage, it freezes exceptionally well for up to 3 months. To use stored frosting, you must bring it back to a spreadable consistency. For refrigerated frosting, let it sit at room temperature for about an hour, then re-whip it in the mixer on medium speed for 1-2 minutes to restore its fluffiness. For frozen frosting, thaw it overnight in the refrigerator, then follow the same re-whipping process at room temperature. A frosted cake can be kept at cool room temperature for a day, but should be refrigerated if holding longer. Always bring slices to room temperature for about 30 minutes before serving for the best flavor and texture.
Frequently Asked Questions
Q: Can I make this frosting ahead of time?
A: Absolutely, and I often do. It stores beautifully in the fridge for a week or freezer for months. The key is re-whipping it for a minute or two after it comes to room temperature to bring back its light, airy texture.
Q: My frosting is too soft/greasy. What went wrong?
A: This almost always points to butter that was too warm. Next time, ensure your butter is cool (65-68°F). For a quick fix now, chill the entire bowl of frosting in the refrigerator for 20-30 minutes, then re-whip.
Q: Can I use milk instead of heavy cream?
A: I don’t recommend it. Heavy cream has a much higher fat content (30-36%), which is necessary to create a stable, rich emulsion with the butter and sugar. Milk will make the frosting thinner and less stable.
Q: Why Dutch-process cocoa? Can I use natural cocoa?
A: Dutch-process cocoa is less acidic, has a smoother flavor, and dissolves more readily into fats. Natural cocoa can be used in a pinch, but the flavor will be sharper and more acidic, and the color lighter.
Q: How do I fix frosting that is too thick or too thin?
A: Too thick? Add more cold heavy cream, one tablespoon at a time, while whipping. Too thin?
Add more sifted powdered sugar, a quarter cup at a time, until the desired consistency is reached.
Q: Is this frosting crusting?
A: No, this is a non-crusting buttercream. It stays soft to the touch, which is part of its delightful melt-in-your-mouth quality. If you need a crust for detailed decoration, a Swiss meringue buttercream is a better choice.
Q: Can I color this frosting?
A: Yes, but use gel food coloring, not liquid. Liquid coloring can alter the consistency. Add the gel during the final whipping stage for even distribution.
Final Thoughts
This whipped chocolate buttercream is more than just a recipe; it’s a reliable technique that will upgrade your home baking. By understanding the why behind each step—the creaming, the sifting, the whipping—you gain the confidence to create professional-quality results every time. It’s the frosting I turn to when a cake needs to feel special, and the one my readers tell me finally gave them the fluffy, pipeable, not-too-sweet chocolate frosting of their dreams.
I encourage you to give it a try, pay close attention to those butter and cream temperatures, and don’t rush the whipping time. When you taste that light, rich result, you’ll understand why this method has been a kitchen secret worth sharing. I’d love to hear how it turns out for you—tag me in your creations or leave a comment below!
Whipped Chocolate Buttercream Frosting
Equipment
- Stand mixer with paddle and whisk attachments (a hand mixer works but requires more time)
- Large mixing bowl
- Fine-mesh sieve or sifter
- Rubber spatula
- Measuring cups and spoons
Ingredients
- 1 cup unsalted butter must be at cool room temperature (65-68°F)
- 3 1/2 cups powdered sugar also called confectioners’ sugar, sifted
- 3/4 cup unsweetened cocoa powder use Dutch-processed for a richer flavor and darker color
- 1/3 cup heavy cream or whipping cream, cold
- 2 tsp pure vanilla extract
- 1/4 tsp fine sea salt enhances the chocolate flavor
Instructions
- In the bowl of a stand mixer fitted with the paddle attachment, beat the cool room temperature butter on medium-high speed for 5 full minutes. Trust me, this extended creaming is non-negotiable. You want it to become very pale, almost white, and have the texture of fluffy whipped cream. Scrape down the bowl halfway through.
- With the mixer on low, gradually add the sifted powdered sugar, one cup at a time, allowing each addition to incorporate fully before adding the next. This prevents a sugar cloud. Once all sugar is added, increase speed to medium and beat for 2 minutes until smooth and combined.
- Add the sifted cocoa powder, vanilla extract, and salt to the bowl. Start mixing on low until the cocoa is incorporated, then increase to medium speed. The mixture will look very thick and dry at this stage—this is normal and exactly what you want.
- Now comes the magic. With the mixer running on medium speed, slowly drizzle in the cold heavy cream. Tip from me: pour it in a thin, steady stream down the side of the bowl. Once all cream is added, stop the mixer, scrape the bowl thoroughly, and switch to the whisk attachment.
- Whip the frosting on medium-high speed for 4-5 minutes. Believe me, this is where the transformation happens. Watch it become lighter in color, increase in volume, and develop a silky, pipeable consistency. It’s ready when stiff peaks form and the frosting is noticeably fluffier.