
I’ll never forget the first time I stumbled upon the magic of Basic Overnight Oats. It was one of those chaotic mornings when I overslept, the kids were running late for school, and I had zero time to whip up breakfast. In a desperate scroll through my fridge, I remembered a jar of Basic Overnight Oats I’d prepped the night before on a whim.
That little jar saved my sanity, and honestly, I’ve been hooked on making Basic Overnight Oats ever since.
It’s not just about convenience, though. There’s something so satisfying about pulling a ready-to-eat, creamy bowl of Basic Overnight Oats from the fridge, knowing it’s packed with good stuff. My family loves it too, especially when I jazz it up with their favorite toppings.
So, let’s chat about how to make this super easy recipe at home. Trust me, once you get the hang of it, you’ll wonder how you ever lived without it!
Why You’ll Love This Recipe
I’ve found that Basic Overnight Oats are a total game-changer for busy folks like me who still want a nutritious start to the day. They’re ridiculously easy to throw together, no cooking required, and you can customize them a million ways to suit your taste. Honestly, in my kitchen, this is the go-to breakfast when I’m too wiped out to even think about flipping pancakes.
And let’s talk about the texture! When done right, Basic Overnight Oats turn out creamy and dreamy, with just the right chew from the oats. Plus, prepping them the night before feels like a little gift to my future self. Who doesn’t love that?
Ingredients List
Alright, let’s break down what you need for Basic Overnight Oats. I’m all about keeping things simple, so this list is short and sweet. I usually buy my ingredients in bulk because we make Basic Overnight Oats so often at my house, but feel free to grab just what you need.
Here’s everything for a single serving of Basic Overnight Oats (scale up as needed):
- 1/2 cup (45g) old-fashioned rolled oats, because quick oats get too mushy for my liking
- 1/2 cup (120ml) milk, I prefer almond milk for a nutty vibe, but dairy or any plant-based works
- 1 tablespoon (15g) chia seeds, for extra thickness and nutrition
- 1 tablespoon (15ml) maple syrup or honey, adjust to your sweetness level (I’m team maple all the way)
- 1/2 teaspoon vanilla extract, for that warm, cozy flavor
- Pinch of salt, trust me, it brings out the flavors in Basic Overnight Oats
That’s it! You’ve probably got most of this in your pantry already, right? I like to keep a stash of mason jars handy for storing my Basic Overnight Oats—they make portioning a breeze.
Variations
One of the reasons I’m obsessed with Basic Overnight Oats is how easy they are to switch up. I mean, you can make a different version every day of the week and never get bored! I’ve tried a bunch of combos over the years, and my family’s always begging for their faves. Here are some variations of Basic Overnight Oats that I’ve whipped up in my kitchen.
- Peanut Butter Banana: Stir in 1 tablespoon of peanut butter and top with sliced banana for a protein-packed twist. My kids go nuts for this one!
- Berry Blast: Mix in a handful of fresh or frozen berries like blueberries or strawberries. I tried this once and felt like I was eating dessert for breakfast.
- Chocolate Lover’s: Add 1 teaspoon of cocoa powder and a few chocolate chips. It’s my guilty pleasure version of Basic Overnight Oats.
- Apple Cinnamon: Toss in diced apple and a sprinkle of cinnamon for fall vibes. Reminds me of apple pie!
- Tropical Escape: Use coconut milk and top with shredded coconut and pineapple chunks. I made this for a brunch party, and it was a hit.
- Nutty Crunch: Sprinkle in chopped almonds or walnuts for texture. I’m all about that crunch in my Basic Overnight Oats.
- Pumpkin Spice: Add 2 tablespoons of pumpkin puree and a dash of pumpkin pie spice. Perfect for autumn mornings, in my opinion.
- Matcha Magic: Whisk in 1/2 teaspoon of matcha powder for a subtle green tea kick. It’s a bit out there, but I dig it in my Basic Overnight Oats.
Feel free to play around with these ideas or invent your own. What’s your go-to mix-in?
Servings and Timing
Let’s talk numbers for making Basic Overnight Oats. I’ve got this down to a science after countless batches, and in my experience, the timing couldn’t be simpler since there’s no cooking involved. Here’s the breakdown for a standard batch of Basic Overnight Oats.
- Prep Time: 5 minutes
- Rest Time: At least 4 hours, preferably overnight
- Total Time: 4 hours 5 minutes (but really, it’s just 5 minutes of effort)
- Servings: 1 portion per recipe (double or triple as needed)
I usually make a few jars of Basic Overnight Oats at once for the week. It’s a lifesaver on hectic mornings!
Step-by-Step Instructions
Making Basic Overnight Oats is so straightforward, even if you’re a total kitchen newbie. I’m gonna walk you through it like I’m right there with you, sharing my little tricks to make it foolproof. Let’s get started!
Step 1: Gather Your Stuff
First up, grab a small mason jar or any container with a lid. I’ve found that jars keep my Basic Overnight Oats fresh and make them easy to grab-and-go. Also, get all your ingredients measured out—nothing’s worse than realizing mid-mix you’re out of milk (been there!).
Step 2: Mix the Base
Dump the oats, milk, chia seeds, sweetener, vanilla, and that pinch of salt into your jar. Give it a good stir with a spoon to make sure everything’s combined. I’ve learned to really mix well so you don’t end up with dry oat clumps at the bottom of your Basic Overnight Oats.
Step 3: Customize (Optional)
If you’re adding extras like fruit or nut butter for your Basic Overnight Oats, now’s the time. I usually wait to toss on toppings like nuts until morning to keep ‘em crunchy, but stuff like berries can go in now. Stir gently if you’re mixing in.
Step 4: Seal and Chill
Pop the lid on your jar and stick it in the fridge for at least 4 hours, though overnight is best for that perfect texture. I’ve rushed it before, and trust me, the oats need time to soak up the liquid for proper Basic Overnight Oats magic.
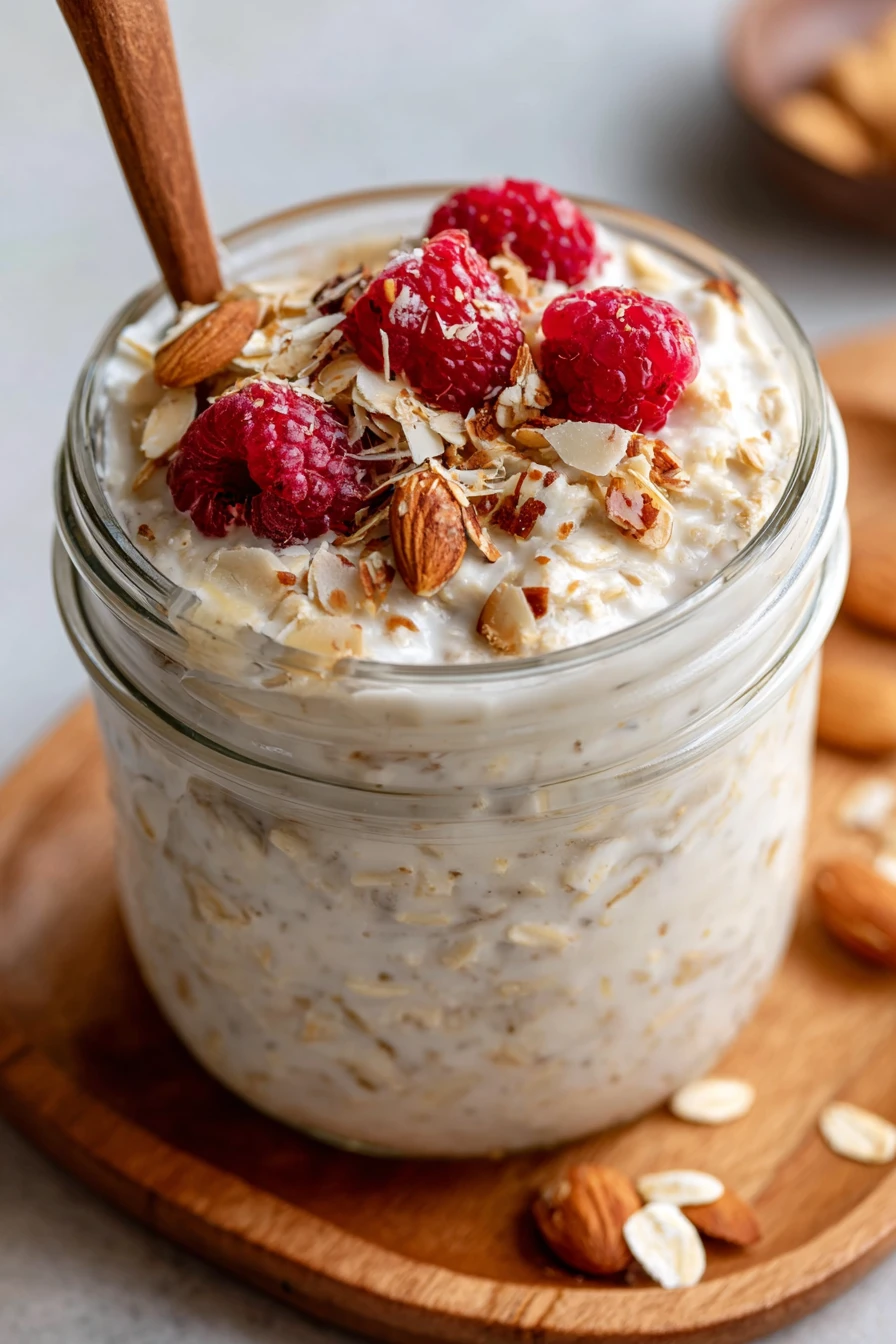
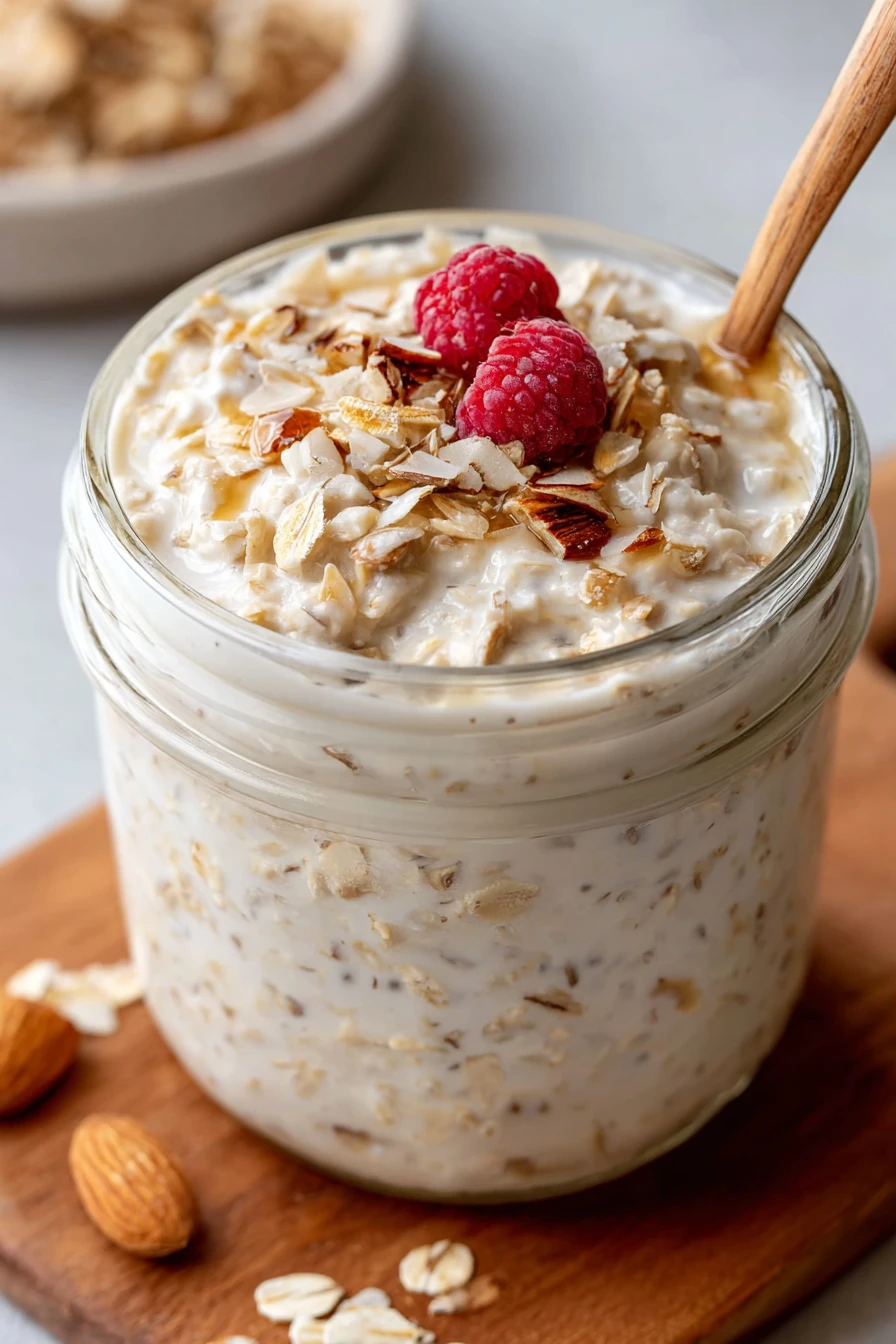
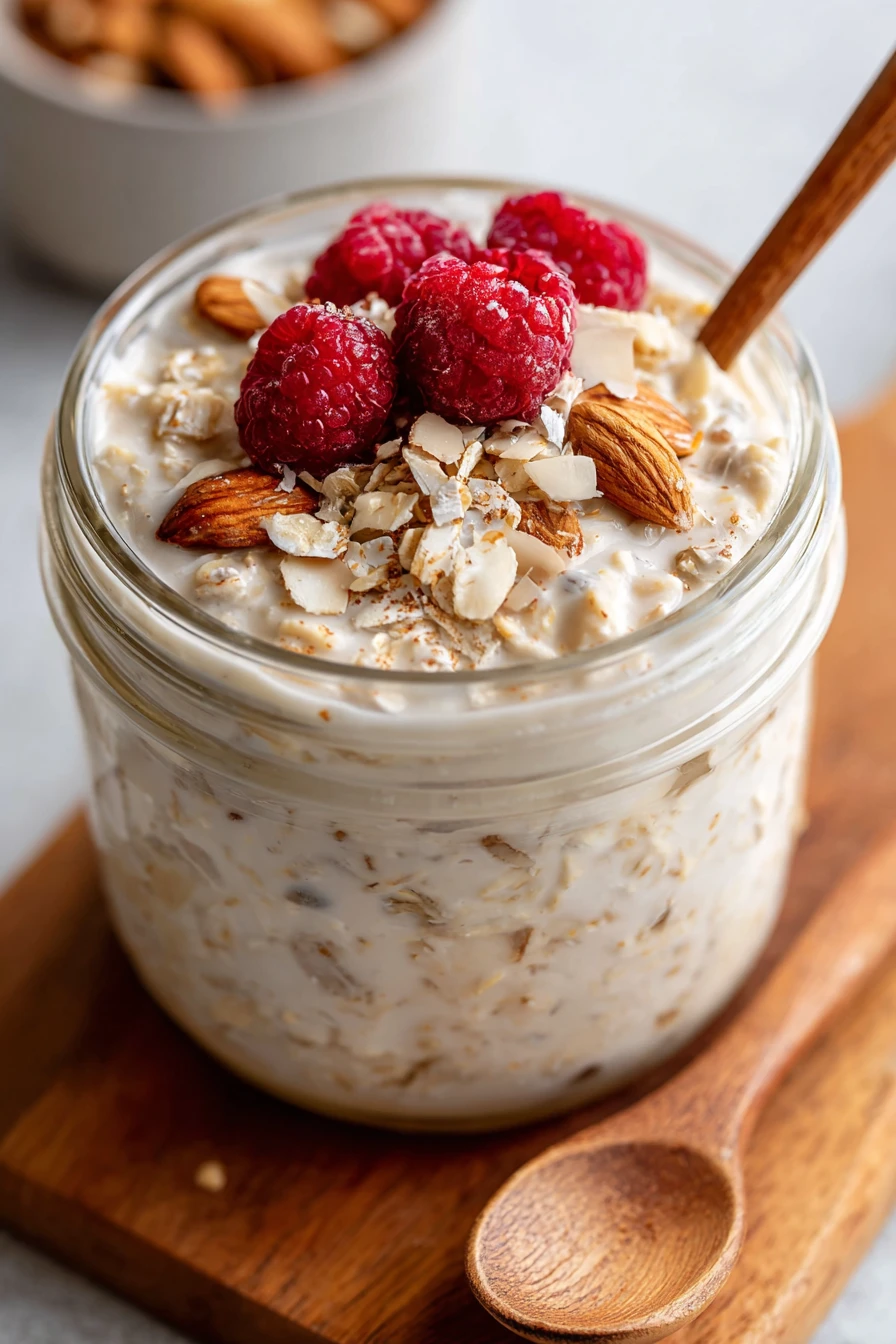
Step 5: Add Toppings and Dig In
In the morning, open up that jar of Basic Overnight Oats and add any last-minute toppings. I’m a sucker for a drizzle of honey or some fresh fruit right before eating. Give it a quick stir if it looks too thick, and enjoy straight from the jar!
Step 6: Savor the Ease
Seriously, isn’t this the easiest breakfast ever? Making Basic Overnight Oats feels like cheating because it’s so low-effort yet tastes like you spent ages on it. I’ve even eaten it on the go while juggling carpool duties!
Nutritional Information
I’m not a dietitian, but I’ve looked into the basics of what’s in Basic Overnight Oats because I like knowing what I’m eating. Here’s the rough breakdown for a single serving of Basic Overnight Oats using almond milk and maple syrup. Keep in mind, this can vary based on your add-ins.
- Calories: 200 per serving
- Fat: 5g
- Protein: 6g
- Carbohydrates: 34g
- Fiber: 5g
I think Basic Overnight Oats are a solid choice for a balanced breakfast, especially with the fiber from oats and chia keeping you full. Add some nuts or fruit, and you’ve got even more nutrients!
Healthier Alternatives
If you’re looking to lighten up your Basic Overnight Oats, I’ve got some swaps I’ve tried that work like a charm. I’m all about balance, so I tweak things when I’m watching my sugar or fat intake. Here are a few ideas for healthier Basic Overnight Oats.
- Lower Sugar: Skip the maple syrup and use mashed banana for natural sweetness. It’s my go-to when I’m cutting back.
- Non-Dairy Boost: Stick with unsweetened plant-based milk like oat or almond to cut calories. I’ve swapped this in my Basic Overnight Oats without missing dairy.
- Extra Protein: Add a scoop of plain Greek yogurt or protein powder. I’ve done this for post-workout Basic Overnight Oats, and it’s super filling.
- Less Fat: Omit chia seeds if you’re cutting fat, though you’ll lose some thickness. I’ve tried it, and it’s still tasty enough!
Play with these to suit your needs. What’s your fave healthy twist?
Serving Suggestions
I love how versatile Basic Overnight Oats are when it comes to serving. Whether it’s a quick bite or a fancy brunch, I’ve got ideas to make your Basic Overnight Oats shine. Here are some ways I’ve dished them up.
- Classic Breakfast: Top with fresh berries and a sprinkle of granola for crunch. It’s my everyday style!
- Decadent Treat: Drizzle with a bit of melted chocolate and chopped nuts. I did this for a special morning, and wow!
- On-the-Go Snack: Keep it plain in a jar for an easy grab during a busy day. Basic Overnight Oats save me constantly like this.
- Brunch Wow: Layer in a glass with yogurt and fruit for a parfait look. I served Basic Overnight Oats this way at a get-together, and everyone raved.
How do you like to eat yours? I’m always up for new ideas!
Common Mistakes to Avoid
I’ve made my fair share of blunders with Basic Overnight Oats over the years, so let me save you the hassle. Trust me on this one, these are pitfalls I learned the hard way when starting out with Basic Overnight Oats. Avoid these slip-ups for the best results.
- Wrong Oat Type: Don’t use instant oats—they turn to mush. I made this mistake once, and it was like eating glue.
- Not Enough Liquid: Skimping on milk leaves dry, sad oats. I’ve had to salvage Basic Overnight Oats by adding more in the morning.
- Forgetting to Stir: If you don’t mix well, you’ll get uneven texture. Been there, and it’s annoying!
- Over-Sweetening: Go easy on sweeteners at first; you can always add more. I overdid it early on with Basic Overnight Oats, and it was way too cloying.
Take it from me, a little attention goes a long way. What mistakes have you run into?
Storing Tips
Storing Basic Overnight Oats is a breeze, which is why I make big batches. In my experience, they hold up great if you follow a couple of simple rules. Here’s how I keep my Basic Overnight Oats fresh.
- Refrigerator: Store in an airtight container or jar for up to 5 days. I’ve found they taste best within the first 3, though.
- Freezer: I don’t recommend freezing Basic Overnight Oats; the texture gets weird. Stick to the fridge!
I usually prep enough for the week and keep ‘em chilled. How do you store yours?
Frequently Asked Questions
I get a lot of questions about Basic Overnight Oats, so I’ve rounded up the most common ones. Let’s tackle these head-on with what I’ve learned making Basic Overnight Oats over and over. Here we go!
Can I use quick oats for Basic Overnight Oats?
Eh, I wouldn’t. Quick oats get too soggy and lose that nice chew. Stick with rolled oats for the best texture in Basic Overnight Oats, at least in my opinion.
How long do they need to sit?
At least 4 hours in the fridge, but overnight is ideal. I’ve found the longer they chill, the creamier they get.
Can I heat them up?
Sure thing! Pop your Basic Overnight Oats in the microwave for 30-60 seconds if you want a warm breakfast. I do this on chilly mornings.
Are they gluten-free?
They can be if you use certified gluten-free oats. I’ve made them for gluten-sensitive friends this way with no issues.
Can I make a big batch?
Absolutely, I do it all the time. Just multiply the recipe and store in separate jars. Makes mornings a snap!
What if they’re too thick?
Just stir in a splash of milk before eating. I’ve had to thin out my Basic Overnight Oats plenty of times, no biggie.
Can I skip the sweetener?
Yup, especially if you’re adding sweet fruit. I’ve skipped it before, and it’s still tasty as heck.
Do chia seeds make a difference?
They add thickness and nutrition, but you can leave ‘em out. I prefer Basic Overnight Oats with chia for that pudding-like vibe, though.
Conclusion
There you have it, everything I’ve learned about making Basic Overnight Oats the easy, delicious way. I hope you’re as excited as I am to whip up a jar (or five!) of Basic Overnight Oats for your next breakfast. Drop a comment if you try it or have a cool variation—I’d love to hear about it. Happy prepping, friends!
Conclusion
I hope you enjoyed this recipe for Basic Overnight Oats! It’s truly one of my favorites, and I’m confident you’ll love it too.
Remember to follow the steps carefully for the best results. Don’t hesitate to experiment with your own variations and make this recipe your own. Happy cooking!