
There’s a certain magic that happens when you combine a no-fuss method with the iconic peanut butter-chocolate crunch of a Butterfinger. This isn’t just another dessert; it’s your secret weapon for potlucks, birthday parties, or those nights when only a seriously satisfying sweet will do. As a chef who has plated thousands of desserts, I can tell you that the best ones often have layers—not just of flavor and texture, but of make-ahead ease.
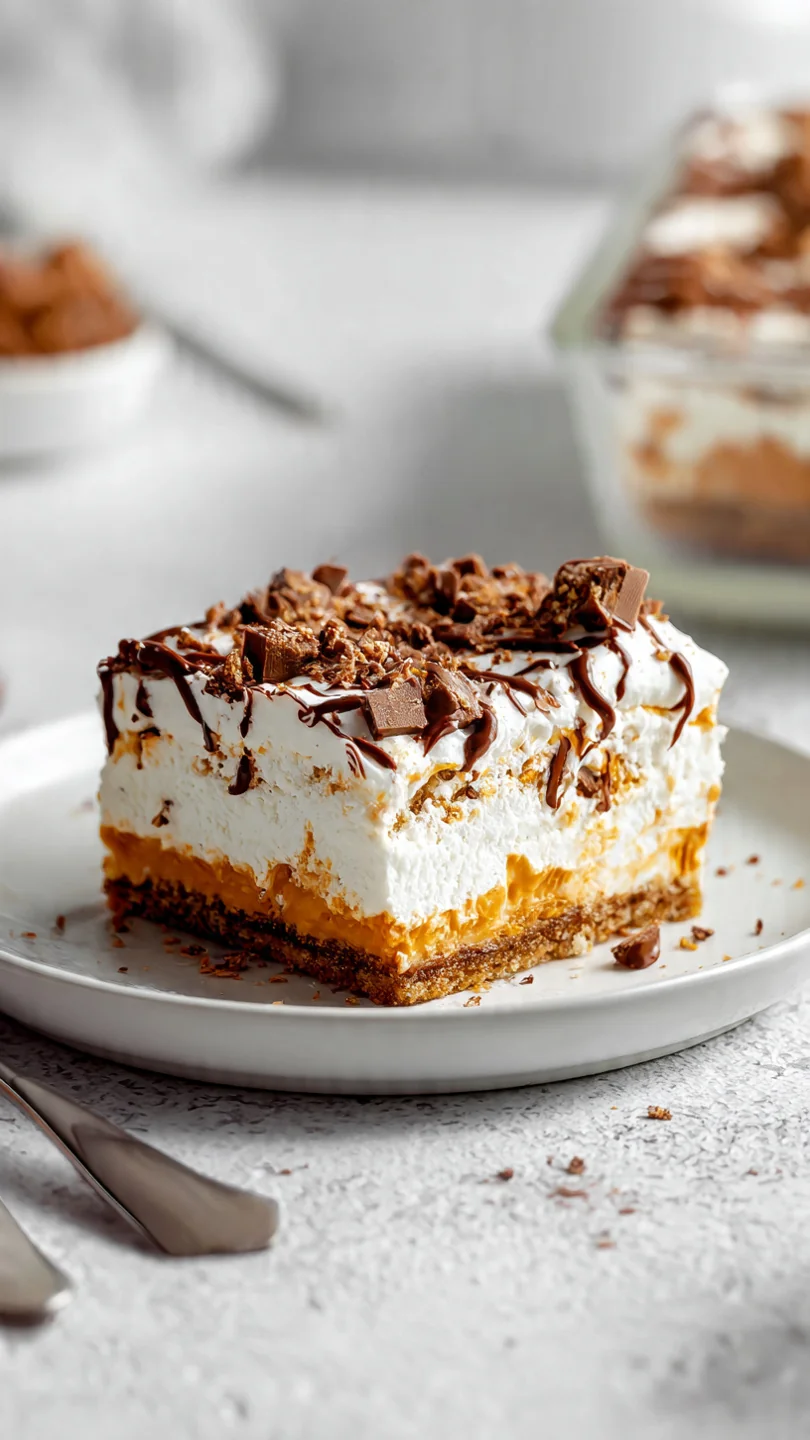
This Butterfinger Poke Cake delivers exactly that: a rich chocolate cookie crust, a luxuriously creamy and sweet filling speckled with candy, and a final crunch on top. It requires zero baking, sets up in the fridge, and consistently earns rave reviews. Let’s make a dessert that looks impressive but is deceptively simple to create.
This recipe is designed for success and enjoyment from start to finish.
- No-Bake Convenience: Perfect for hot days or when you don’t want to turn on the oven. All the work is done on the countertop.
- Make-Ahead Dream: It must chill for hours, meaning you can prepare it a full day before your event, reducing day-of stress.
- Kid-Friendly Fun: The process of crushing candy and poking holes is a great activity to share with helpers of all ages.
- Crowd-Pleasing Flavor: The combination of chocolate, peanut butter, and caramel-like crunch is universally loved.
- Foolproof Texture: The condensed milk and cream cheese base sets up firm yet creamy, ensuring every slice holds its shape beautifully.
- Endlessly Customizable: The base recipe is a perfect canvas for other candy bar variations, which I’ll detail later.
Ingredients You’ll Need
- Let’s gather our ingredients—this is where simple components come together to create something truly special. Using quality staples here makes a noticeable difference. For the chocolate crust, I insist on using the whole cookie, filling included. It adds a hint of extra sweetness and helps bind the crust without being overly dry. The sweetened condensed milk is the key to the lush, sweet body of the filling, while the room-temperature cream cheese is non-negotiable for a lump-free, silky texture. For the star ingredient, classic Butterfinger bars provide that unique, flaky crunch. If you want to amplify the peanut butter note, the optional drizzle at the end is a pro move.
Kitchen Equipment Needed
You likely have most of these tools already. The essential item is a 9×13 inch baking dish—a glass or ceramic dish works perfectly. A food processor makes quick work of the cookie crust, but if you don’t have one, placing the cookies in a sturdy zip-top bag and crushing them with a rolling pin works just fine.
An electric hand mixer or stand mixer is highly recommended for achieving a perfectly smooth cream cheese mixture. You’ll also need a large mixing bowl, a rubber spatula for folding, and an offset spatula for neatly spreading the filling. A simple wooden spoon handle is the perfect tool for poking the holes.
How to Make Butterfinger Poke Cake Recipe
Step 1: Create the Chocolate Cookie Crust
Start by preparing your pan; a light coating of butter or a parchment sling ensures easy serving later. Trust me, taking this 30-second step saves frustration. Process the entire package of cookies into fine, even crumbs.
Pour in the melted butter and pulse until the mixture looks like damp sand. Tip from me: Press this mixture very firmly into the pan using the bottom of a flat measuring cup. A well-compacted crust won’t crumble when you slice the cake.
Pop it into the fridge to chill and firm up while you mix the filling.
Step 2: Whip the Creamy Filling Base
This step is all about texture. In your large bowl, beat the softened cream cheese on medium speed until it’s completely smooth and pliable—about two full minutes. Any small lumps now will remain in your final cake.
Believe me, room-temperature cream cheese is the secret here. Once smooth, reduce the mixer speed to low and gradually pour in the sweetened condensed milk. Increase the speed to medium-high and beat for 2-3 minutes.
You’re looking for a homogenous, slightly thickened, and creamy mixture. Scrape down the sides of the bowl halfway through to ensure everything is incorporated.
Step 3: Fold in the Fluff and Crunch
Now, we add volume and our signature candy. Add the thawed whipped topping to the bowl. Using a large rubber spatula, gently fold it in.
Use a broad, sweeping motion from the bottom of the bowl up and over to maintain as much air as possible. Meanwhile, place 5 of the Butterfinger bars in a zip-top bag and crush them into small pieces using a rolling pin. You want a mix of fine bits and some slightly larger pieces for texture.
Fold about 1 1/2 cups of this crushed candy into the filling, saving the rest for the glorious topping.
Step 4: Assemble and Add the Final Touch
Retrieve your chilled crust from the refrigerator. Pour the creamy filling over it and use an offset spatula to spread it into a perfectly even layer. Here comes the fun part that gives this dessert its name: take the handle of a wooden spoon and poke holes all over the surface of the filling.
Poke down until you just touch the crust, but don’t go through it. This simple act helps the layers bond. Now, shower the top with the remaining crushed Butterfinger, creating a generous, crunchy blanket.
Cover the dish tightly.
Step 5: Chill, Garnish, and Serve
Patience is your final ingredient. You must refrigerate the cake for at least 4 hours, but overnight is truly ideal. This chilling time allows the crust to become firm and the flavors to marry beautifully.
When you’re ready to serve, you can elevate it with an optional drizzle of warm peanut butter. For picture-perfect slices, dip your knife in hot water and wipe it dry before each cut. Step back and admire your creation—a stunning, layered dessert that promises and delivers maximum deliciousness with minimal effort.
A few chef-driven insights will guarantee your cake is perfect every time.
- Cream Cheese Temperature: This is the most common pitfall. Cold cream cheese will not blend smoothly. Let it soften on the counter for 45-60 minutes until it yields gently to pressure.
- Crushing the Candy: For the best texture, avoid turning the Butterfingers into dust. Aim for small, ragged pieces that will provide a satisfying crunch in every bite.
- The Chill is Mandatory: Do not shortcut the refrigeration time. The filling needs these hours to set properly so it can be sliced neatly. Think of it as inactive, but essential, cook time.
- Poking Technique: Use a tool with a round end, like a spoon handle. Avoid sharp objects like a knife, which can create tears instead of clean holes.
- Serving Suggestion: For an extra cold and firm slice that holds its shape on a buffet, you can place the entire cake in the freezer for 20-30 minutes before serving.
Recipe Variations
- The basic formula of this cake is wonderfully adaptable. Here are some tested variations to try.
- Snickers Poke Cake: Substitute chopped Snickers bars for the Butterfinger. The nougat, caramel, and peanut blend creates a richer, chewier texture.
- Cookies and Cream: Use crushed Oreos in the filling instead of candy bars and sprinkle more on top. Omit the peanut butter drizzle for a pure chocolate experience.
- Salted Caramel Twist: Use Heath or Skor toffee bits. After adding the topping, drizzle the cake with a generous amount of store-bought salted caramel sauce.
- Peanut Butter Lover’s: Add 1/2 cup of creamy peanut butter to the cream cheese mixture before adding the condensed milk. Use Reese’s Peanut Butter Cups as your topping candy.
- Mocha Version: Add 1-2 tablespoons of instant espresso powder to the cookie crumbs for the crust. The coffee depth beautifully complements the chocolate and sweet filling.
- Gluten-Free Adaptation: Use your favorite gluten-free chocolate sandwich cookies for the crust and ensure your candy bars are certified gluten-free.
What to Serve With This Recipe
This Butterfinger Poke Cake is a rich, celebratory dessert that stands confidently on its own. For a casual gathering, serve it with a pot of strong coffee or tall glasses of cold milk to balance the sweetness. If you’re building a dessert table, pair it with lighter, fruit-forward options like a fresh berry salad or lemon sorbet to provide a palate-cleansing contrast.
It’s the perfect finale for a barbecue menu featuring pulled pork or grilled chicken, as the cool, creamy dessert is a refreshing contrast to smoky flavors. It’s also a guaranteed hit at birthday parties, potlucks, and holiday gatherings where a make-ahead, feed-a-crowd dessert is essential.
Storage & Make-Ahead Instructions
- This cake’s make-ahead nature is one of its best features.
- Refrigeration: Keep the cake covered tightly with plastic wrap or in an airtight container in the refrigerator. It will maintain optimal texture and flavor for up to 4 days.
- Freezing: For longer storage, you can freeze the entire cake or individual slices. Wrap tightly in plastic wrap and then a layer of aluminum foil. Freeze for up to 2 months. Thaw overnight in the refrigerator before serving.
- Make-Ahead Strategy: You can prepare the entire cake 1-2 days in advance. In fact, the flavor improves with a 24-hour chill. Simply add any final garnishes, like a peanut butter drizzle, just before serving.
- Avoiding Sogginess: The crust may soften slightly after 3-4 days but will remain delicious. Do not store at room temperature.
Frequently Asked Questions
Q: Can I use homemade whipped cream instead of frozen whipped topping?
A: You can, but the texture will be different. Frozen whipped topping (like Cool Whip) is stabilized and will hold its shape for days in the fridge. Fresh whipped cream will soften more quickly and may make the filling a bit looser.
If substituting, whip 2 cups of heavy cream with 1/4 cup of powdered sugar to stiff peaks.
Q: My cream cheese filling is lumpy. What did I do wrong and can I fix it?
A: This almost always means your cream cheese was too cold. To salvage it, you can try beating the mixture for several more minutes on high speed. If lumps persist, press the entire filling through a fine-mesh sieve—it’s a bit of work but will give you a smooth texture.
Q: How do I know when the cake is properly set and ready to slice?
A: The top should look firm and not jiggle when you gently shake the pan. After the minimum 4-hour chill, press the surface lightly with a fingertip; it should feel firm and not leave an indent. Overnight chilling is the most reliable method.
Q: Can I make this in a different pan size?
A: Yes, but adjustments are needed. For a 9×9 inch square pan, halve the recipe. The layers will be thicker, so increase the chill time.
For a springform pan, you can create a taller, more layered presentation—just be sure to wrap the bottom in foil in case of any leakage.
Q: Is there a substitute for sweetened condensed milk?
A: There is no perfect 1:1 substitute that provides the same thick, sweet, creamy consistency. Evaporated milk with added sugar will not set the same way. I strongly recommend using the canned sweetened condensed milk for this recipe’s success.
Q: Can I use reduced-fat or fat-free ingredients?
A: You can use reduced-fat cream cheese, but avoid fat-free as it doesn’t melt and blend properly. Low-fat or fat-free whipped topping will work. The texture may be slightly less rich, but the cake will still set.
Q: The Butterfingers got soft after a day. Is that normal?
A: Yes, this is expected. The candy topping will slowly absorb moisture from the creamy layer and lose its brittle crunch, becoming more chewy and caramel-like. It’s still delicious!
For maximum crunch, add an extra handful of fresh crushed candy right before serving.
Final Thoughts
This Butterfinger Poke Cake embodies what I love most about recipe development: taking iconic, beloved flavors and presenting them in a format that’s both impressive and incredibly approachable. It’s a dessert that respects your time without compromising on taste or visual appeal. The layers of chocolate, creamy sweetness, and that signature peanut butter crunch create a symphony in every bite.
I’ve served this to everyone from seasoned food critics to picky toddlers, and the empty pan is always the consistent result.
I encourage you to make this recipe your own. Try one of the variations, or stick to the classic—it’s a guaranteed winner. If you do make it, I’d love to hear how it turned out!
Share your creation online and tag me. And if you’re looking for more no-bake dessert inspiration, explore the other recipes on the site. Happy cooking, and enjoy every delicious, crunchy, creamy slice
Butterfinger Poke Cake
Equipment
- 9×13 inch baking dish
- Food processor or zip-top bag and rolling pin
- Electric hand mixer or stand mixer
- Large mixing bowl
- Rubber spatula and offset spatula
Ingredients
- 1 (14.3 ounce) package chocolate sandwich cookies (like Oreos) Do not remove the cream filling
- 6 tablespoons unsalted butter melted
- 1 (14 ounce) can sweetened condensed milk
- 1 (8 ounce) package cream cheese softened to room temperature
- 1 (12 ounce) container frozen whipped topping (like Cool Whip) thawed in the refrigerator
- 8 full-size Butterfinger candy bars divided (about 2 cups crushed)
- 1/2 cup creamy peanut butter optional, for drizzling
Instructions
- Prepare a 9×13 inch baking dish by lightly greasing it or lining it with parchment paper for easier removal. In a food processor, pulse the entire package of chocolate sandwich cookies (with filling) into fine crumbs. Pour in the melted butter and pulse until the mixture resembles wet sand. Press this mixture firmly and evenly into the bottom of the prepared dish to form the crust. Use the bottom of a measuring cup to compact it well. Place in the refrigerator to set while you prepare the filling.
- In a large mixing bowl, use an electric hand mixer on medium speed to beat the softened cream cheese until completely smooth and lump-free, about 2 minutes. This step is crucial for a silky texture. With the mixer on low, slowly pour in the entire can of sweetened condensed milk. Beat on medium-high for 2-3 minutes until the mixture is homogenous, creamy, and slightly thickened. Scrape down the sides of the bowl as needed.
- Gently fold the thawed whipped topping into the cream cheese mixture using a large rubber spatula. Use a folding motion (scoop from the bottom and turn over) until no white streaks remain. Be careful not to deflate the mixture. Take 5 of the Butterfinger bars and crush them into small pieces (I place them in a zip-top bag and crush with a rolling pin). Fold about 1 1/2 cups of the crushed candy into the creamy filling, reserving the rest for the top.
- Remove the chilled crust from the refrigerator. Pour the creamy filling over the crust and spread it into an even layer with an offset spatula. Now, use the end of a wooden spoon or a chopstick to poke holes all over the surface of the filling, going down to—but not through—the crust. This allows flavors to meld. Sprinkle the remaining crushed Butterfinger evenly over the top. Cover the dish with plastic wrap or a lid.
- Refrigerate the cake for at least 4 hours, but ideally overnight. This chilling time is non-negotiable as it allows the crust to firm up perfectly and the flavors to fully develop. Before serving, if desired, gently warm the peanut butter for 15 seconds in the microwave and drizzle it over the top. Slice, serve cold, and enjoy the incredible layers of chocolate, peanut butter, and crunch.