
There’s something deeply satisfying about creating a box of beautiful, decadent chocolates in your own kitchen. It feels like a secret skill, but I’m here to let you in on the truth: making professional-quality chocolate candy is surprisingly simple. Forget tempering and complex sugar work.
This recipe distills the essence of a chocolate truffle down to its purest, most foolproof form. With just three core ingredients and a few minutes of active time, you can create a batch of rich, creamy, melt-in-your-mouth candies that rival any boutique confection. They are the perfect project for a rainy afternoon, a heartfelt homemade gift, or a guaranteed crowd-pleaser at your next gathering.
This recipe is designed for success, whether you’re a seasoned cook or a first-time candy maker.
- Incredibly Simple: With only three essential ingredients and no special equipment, this recipe removes all intimidation from candy making.
- Endlessly Customizable: This creamy chocolate ganache base is a blank canvas. Once you master it, you can infuse, flavor, and coat it in countless ways to create a whole assortment.
- Superior Texture: The addition of butter (a classic chef’s trick) gives these candies an unbelievably smooth, creamy mouthfeel with a perfect set—firm yet yielding.
- Impressive Results: Homemade candy feels like a luxurious treat. These look and taste far more sophisticated than the effort required to make them.
- Perfect for Gifting: Package these in a small box or tin for a personal, thoughtful gift that shows you care.
- Diet-Flexible Base: The core recipe is naturally gluten-free. With simple swaps, it can easily be made dairy-free or vegan.
Ingredients You’ll Need
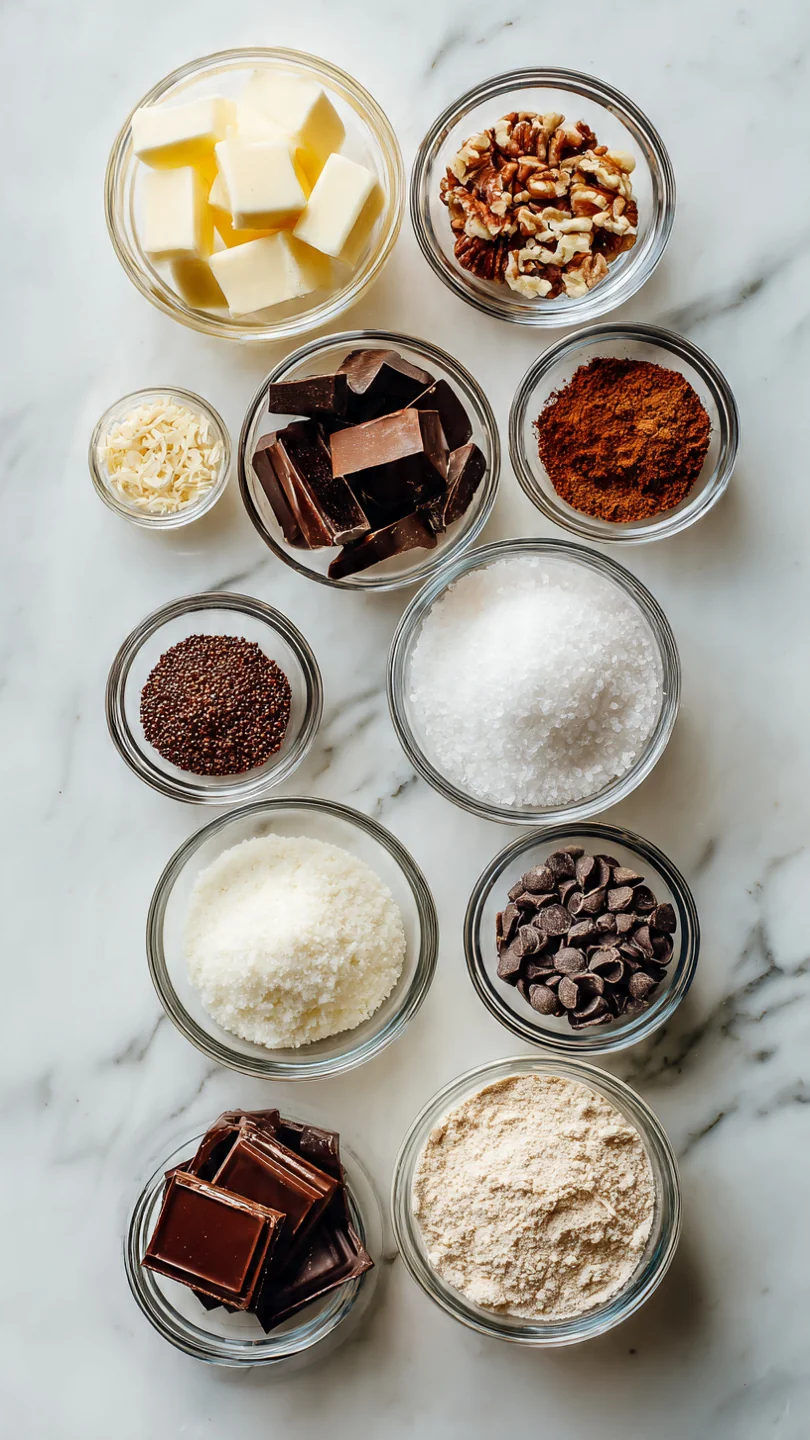
- Let’s gather our ingredients—this is where quality truly matters. Using good chocolate is non-negotiable for a stellar result, as it makes up the majority of the candy’s flavor.
- Semi-sweet chocolate: Use a bar of high-quality baking chocolate (between 55-70% cocoa works best) and chop it finely. This ensures even melting. A good brand like Ghirardelli, Callebaut, or Valrhona is ideal. You can use high-quality chocolate chips in a pinch, but bars often contain less stabilizers and melt more smoothly.
- Heavy whipping cream: Also called double cream or heavy cream, with a fat content of at least 36%. This richness is what creates the luxurious ganache. Lower-fat alternatives like milk or half-and-half will not set properly.
- Unsalted butter: Room temperature, cut into small pieces. This is my professional secret for adding shine, a velvety texture, and helping the candies hold their shape at room temperature longer.
- Cocoa powder, powdered sugar, or sprinkles: For the classic finish. Dutch-processed cocoa powder gives a deep, dark color and less acidic flavor, while natural cocoa powder is more bitter. Powdered sugar is sweet and pretty, and sprinkles add a festive touch.
Note: You’ll find the complete list of ingredients, along with their exact measurements, in the printable recipe card at the bottom of this post.
Kitchen Equipment Needed
You likely have everything you need already. The key is using a dry, clean bowl for melting the chocolate, as even a drop of water can cause the chocolate to seize.
- Medium heatproof bowl (glass or metal)
- Small saucepan
- Rubber spatula (ideal for folding and scraping)
- Baking sheet or shallow dish lined with parchment paper
- Small cookie scoop (1-inch) or a teaspoon for even portioning
- Airtight container for storing the finished candies
How to Make Chocolate Candy Recipe
Step 1: Heat the Cream and Melt the Chocolate
Place your finely chopped chocolate in a clean, dry bowl. In your small saucepan, heat the heavy cream over medium heat. Watch it closely—you want it to just come to a simmer, with small bubbles forming around the edges.
The moment it simmers, immediately pour it over the chopped chocolate. Trust me, do not walk away or let it boil, as boiling can alter the cream’s fat structure. Now, walk away again!
Let the bowl sit untouched for a full 3 minutes. This allows the hot cream to gently melt the chocolate from the outside in.
Step 2: Create the Smooth Ganache Base
After the 3-minute rest, take your rubber spatula and begin to stir. Start in the center of the bowl with small circles, gradually incorporating more of the chocolate and cream from the edges. You’ll see it transform from separated ingredients into a thick, glossy, homogenous mixture.
This is your ganache. If you find a few stubborn bits of unmelted chocolate, you can set the bowl over a pot of barely simmering water (a double boiler) for just 10-15 seconds to finish the job. Avoid overheating, as it can make the ganache grainy.
Step 3: Enrich with Butter for Perfect Texture
Once your ganache is smooth and unified, add the small pieces of room-temperature butter. The residual heat from the ganache will melt it. Stir gently until the butter is completely incorporated and the mixture becomes even silkier.
This step is what separates a good homemade candy from a great one. The butter enriches the flavor, adds a beautiful sheen, and fundamentally improves the texture, giving it that professional “snap” followed by a creamy melt.
Step 4: Chill Until Firm
Pour your luxurious ganache onto a parchment-lined baking sheet or into a shallow dish. Spread it into an even layer, about 1/2-inch thick. Now, here’s a critical tip from my kitchen: press a layer of plastic wrap directly onto the surface of the ganache.
This prevents a rubbery skin from forming as it chills. Refrigerate for at least 2 hours until it’s very firm. You should be able to scoop it cleanly.
For a quicker set, the freezer works for about 45 minutes.
Step 5: Shape, Coat, and Serve
This is the fun, hands-on part. Use a small scoop or spoon to portion the firm ganache. Quickly roll each piece between your palms—your body heat will soften it, so work with purpose.
Immediately drop each rolled ball into a small bowl of your chosen coating (cocoa powder, powdered sugar, etc.) and roll to coat. Tip from me: use one hand for rolling the sticky balls and your other, dry hand for tossing them in the coating to keep things tidy. Place the finished candies in a single layer in your container.
Let them sit at room temperature for 10 minutes before serving to allow the flavors to bloom fully.
A few chef-level insights will guarantee perfect results every single time.
- Chocolate Quality is Key: Since chocolate is the star, use the best you can afford. The flavor notes of the chocolate will shine through directly in your candy.
- Avoiding Seized Chocolate: Ensure all your equipment is completely dry. Even a drop of water can cause the chocolate to become grainy and stiff. If this happens, whisk in a tablespoon of warm cream to rescue it.
- Testing for Set: The ganache is ready to scoop when you can press it with a finger and it holds an indentation without feeling sticky or soft.
- For Perfectly Round Candies: If your rolled balls are too soft, pop the baking sheet of scooped portions back into the fridge for 10 minutes before rolling.
- Temperature Control: If your kitchen is very warm, work in small batches, keeping the main ganache in the fridge as you shape.
Recipe Variations
- This basic ganache is your playground. Here are some of my favorite tested variations.
- Peppermint Crunch: Add 1/2 teaspoon of peppermint extract to the warm ganache and roll the finished candies in crushed candy canes or peppermint baking bits.
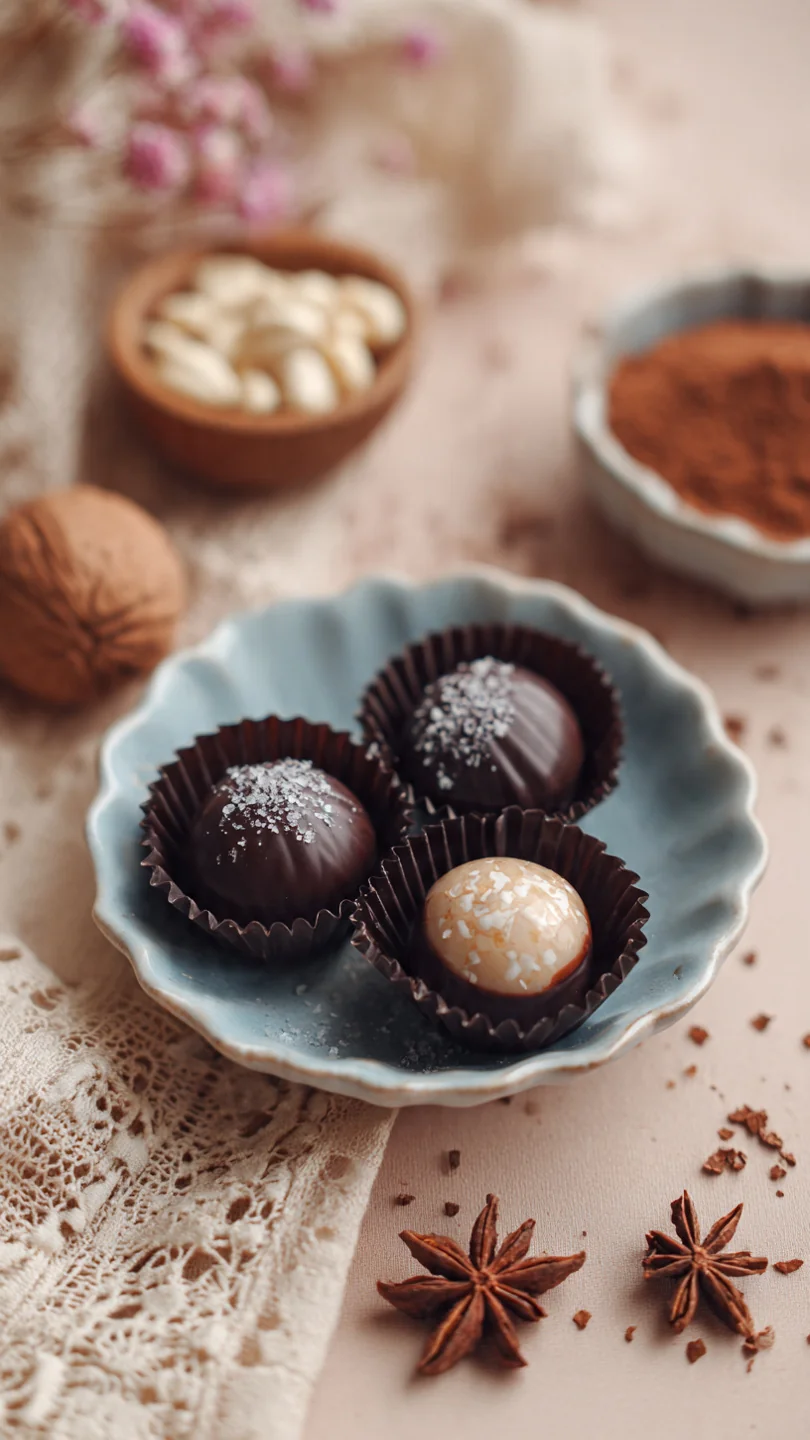
- Salted Caramel: Press a small piece of soft caramel into the center of each ganache ball before rolling. Finish with a flake of sea salt on top.
- Orange Zest: Add the finely grated zest of one large orange to the cream as it heats, then strain it out before pouring over the chocolate. Roll in cocoa powder mixed with a pinch of orange zest.
- Espresso: Dissolve 2 teaspoons of instant espresso powder in the hot cream before pouring it over the chocolate for a deep mocha flavor.
- Nutty Delight: Roll the shaped candies in finely chopped toasted hazelnuts, almonds, or pecans for a wonderful crunch.
- Vegan/Dairy-Free: Use full-fat coconut cream and vegan butter. Choose a high-quality dairy-free dark chocolate bar.
What to Serve With This Recipe
These chocolates are a complete treat on their own, but they can be the elegant finishing touch to a larger dessert spread.
Serve a small assortment on a pretty plate after a dinner party with coffee, espresso, or a glass of port. They pair beautifully with fresh berries like raspberries or strawberries, which cut through the richness. For a festive touch, include them on a dessert charcuterie board with dried fruits, nuts, and other small cookies.
They are also the perfect homemade addition to a holiday cookie box or as a sweet surprise tucked into a lunchbox.
Storage & Make-Ahead Instructions
- Proper storage is easy and ensures your candies stay delicious.
- Refrigerator: Store in a single layer in an airtight container, separated by parchment paper, for up to 2 weeks. The flavors actually improve after a day or two.
- Freezer: For longer storage, freeze the uncoated, shaped balls on a parchment-lined tray until solid, then transfer to a freezer bag. They will keep for 2-3 months. Thaw in the refrigerator overnight, then roll in your coating before serving.
- Room Temperature: These candies can sit out for a few hours for serving, but for best texture and food safety, I recommend storing them in the refrigerator due to the dairy content.
- Make-Ahead: The ganache base can be made up to 3 days in advance and kept covered in the refrigerator until you’re ready to shape and coat. This makes party prep a breeze.
Frequently Asked Questions
Q: Can I use milk chocolate instead of semi-sweet?
A: Absolutely. Milk chocolate will make a sweeter, softer candy. Because it contains more sugar and dairy, you may need to reduce the cream slightly (try 1/3 cup) to help it set firmly.
Test a small batch first.
Q: Why did my ganache turn out oily or grainy?
A: Oily ganache usually means the cream was too hot or the chocolate was overheated, causing the fats to separate. Graininess often means a drop of water got into the chocolate, causing it to “seize.” You can often save it by whisking in a tablespoon of warm cream.
Q: How can I make these candies look more professional?
A: After coating in cocoa powder, use a soft pastry brush to dust off the excess for a clean, elegant look. For a glossy finish, you can dip the set ganache balls in tempered chocolate instead of rolling them in powder.
Q: Can I flavor the cream with something like vanilla bean?
A: Yes, this is a fantastic technique. Split a vanilla bean and scrape the seeds into the cream as it heats, or add other whole spices like a cinnamon stick. Always strain the cream before pouring it over the chocolate to remove solids.
Q: My ganache is too soft to roll. What should I do?
A: Simply chill it longer. If it’s still soft after several hours, your cream-to-chocolate ratio might be off, or your kitchen may be very warm. You can rescue it by re-melting it gently and adding a bit more chopped chocolate.
Q: Are these suitable for gifting and shipping?
A: They are wonderful for gifting! Pack them in a single layer in a small, rigid box with parchment between layers. For shipping, avoid coatings that melt (like powdered sugar) and choose cocoa powder or chopped nuts.
Ship with a cold pack if weather is warm.
Q: Can I use a microwave to heat the cream and melt the chocolate?
A: You can, but I find the stovetop method gives more control. If using a microwave, heat the cream in a microwave-safe jug until steaming (about 45-60 seconds), then pour over the chocolate. Do not microwave the chocolate directly.
Final Thoughts
This simple chocolate candy recipe is a testament to the magic that can happen with just a few quality ingredients and a bit of know-how. It demystifies the process of candy making and puts a world of delicious creativity at your fingertips. The rich, creamy result is deeply satisfying, both to make and to eat.
I encourage you to master this basic formula first—get a feel for the smooth ganache, the firm set, the joy of rolling your own creations. Then, start experimenting with the variations. Make a batch for your friends, your family, or just for yourself.
I promise, the pride and pleasure of saying “I made these” is almost as sweet as the candy itself. If you try this recipe, I’d love to hear how it went! Share your creations and variations with me.
Happy candy making

Simple 3-Ingredient Chocolate Candy
Equipment
- Medium heatproof bowl (glass or metal)
- Small saucepan
- Rubber spatula
- Baking sheet or shallow dish
- Parchment paper
- Small cookie scoop or teaspoon
- Airtight container for storage
Ingredients
- 8 oz Semi-sweet chocolate High-quality baking chocolate, chopped (or high-quality chocolate chips)
- 1/2 cup Heavy whipping cream Also called double cream; must be at least 36% fat
- 2 tbsp Unsalted butter Cut into small pieces, at room temperature
- 1/4 cup Cocoa powder, powdered sugar, or sprinkles For coating the finished candies
Instructions
- Place the finely chopped chocolate in a medium, heatproof bowl. In a small saucepan, heat the heavy cream over medium heat until it just begins to simmer—you’ll see small bubbles forming around the edges. Do not let it boil. Immediately pour the hot cream over the chopped chocolate. Let it sit undisturbed for 3 minutes to allow the chocolate to melt.
- After 3 minutes, begin stirring the mixture gently with a rubber spatula, starting from the center and working your way outwards. Continue stirring until the chocolate is completely melted and the mixture is smooth and glossy. This is your ganache base. If you see any unmelted bits, you can place the bowl over a pot of barely simmering water (double boiler) for 10-15 seconds to finish melting, but avoid overheating.
- Add the room-temperature butter pieces to the warm ganache. Stir until the butter is fully incorporated and the mixture is silky and uniform. This butter addition is my pro secret—it adds a luxurious mouthfeel and helps the candies set with a perfect, snappy-yet-creamy texture. Pour the ganache into a shallow dish or onto a small baking sheet lined with parchment paper. Spread it to about a 1/2-inch thickness.
- Cover the dish tightly with plastic wrap, pressing the wrap directly onto the surface of the ganache to prevent a skin from forming. This step is crucial for a smooth texture. Refrigerate for at least 2 hours, or until the ganache is very firm and scoopable. For faster setting, you can place it in the freezer for 45 minutes.
- Once firm, use a small cookie scoop or a teaspoon to portion the ganache. Roll each portion quickly between your palms to form a rough ball. The heat from your hands will soften it slightly, so work swiftly. Immediately roll each ball in your chosen coating—cocoa powder for a classic, bittersweet finish, powdered sugar for sweetness, or sprinkles for fun. Place the finished candies in a single layer in an airtight container.