
Why You’ll Love This Recipe
- Easy to Make: With simple ingredients and no baking required, these treats are perfect for all skill levels.
- Fun and Festive: The Frankenstein theme adds a spooky touch that’s ideal for Halloween parties or family fun.
- Kid-Friendly: Kids love helping to decorate these treats, making it a great activity for the whole family.
- Customizable: You can easily adjust the decorations to suit your creativity or dietary needs.
- Delicious Taste: The classic Rice Krispie Treat flavor with a fun twist is sure to be a hit.
- No-Bake Convenience: Perfect for hot days or when you want a quick dessert without turning on the oven.
Ingredients & Preparation Notes
- Rice Krispies cereal: Use fresh cereal for the best crunch. If you’re looking for a gluten-free option, check for gluten-free Rice Krispies or similar products.
- Mini marshmallows: Fresh marshmallows will give you the best texture. If you prefer, you can use large marshmallows, but they’ll take longer to melt.
- Butter: Unsalted butter allows you to control the saltiness of the treats. If you only have salted butter, reduce the amount used slightly.
- Green food coloring: Gel food coloring works best as it provides vibrant color without altering the taste or texture of the treats.
- Candy eyes: These are available at most grocery stores during Halloween, but you can also use chocolate chips or icing to create eyes if needed.
- Black licorice: For the hair and mouth, but you can substitute with chocolate or other candies if preferred.
- White chocolate chips: For the bolts, but you can use any white candy or icing.
Professional Tips & Techniques
- Melting Marshmallows: Melt the marshmallows slowly over low heat to prevent burning. Stir constantly for a smooth, even melt.
- Coloring the Mixture: Add the food coloring after the marshmallows have melted to ensure even distribution. Start with a small amount and add more as needed to achieve the desired color.
- Pressing the Mixture: Use a lightly greased spatula or your hands to press the mixture into the pan. Press gently to avoid compacting the treats too much, which can make them hard.
- Cutting the Treats: Use a sharp knife to cut the treats cleanly. Dip the knife in hot water and wipe it clean between cuts for the best results.
- Decorating: Assemble all your decorations before you start cutting the treats. This makes the process quicker and more efficient.
Recipe Variations
- Monster Mash: Add different colored food coloring to create a variety of monster-themed treats. Use blue, purple, or even red for a fun mix.
- Chocolate Frankenstein: Mix in some cocoa powder with the melted marshmallows for a chocolatey twist on the classic treat.
- Gluten-Free: Use gluten-free Rice Krispies or a similar cereal to make this treat suitable for those with gluten sensitivities.
- Vegan Option: Substitute vegan marshmallows and a plant-based butter to create a vegan-friendly version of these treats.
- Nutty Frankenstein: Add chopped nuts like almonds or peanuts to the mixture for added texture and flavor.
- Fruit Frankenstein: Mix in dried fruit like cranberries or raisins for a fruity twist on the classic treat.
- Peanut Butter Frankenstein: Add a few tablespoons of peanut butter to the melted marshmallows for a rich, nutty flavor.
- Seasonal Adaptations: Use different colored food coloring and decorations to match other holidays or seasons, like red and green for Christmas or pastels for Easter.
Serving Suggestions
- Halloween Party: Serve these treats at a Halloween party alongside other spooky snacks like ghost-shaped cookies or witch’s brew punch.
- Kids’ Treat: Pack these treats in lunchboxes for a fun surprise or serve them as an after-school snack.
- Dessert Platter: Arrange the Frankenstein treats on a platter with other Halloween-themed desserts for a festive display.
- Gift Idea: Package these treats in clear bags tied with ribbon for a fun and edible Halloween gift.
- Presentation Tips: Use a black or green serving tray to enhance the spooky theme. Arrange the treats in rows or a monster-like pattern for added effect.
- Pairing Suggestions: Serve with hot apple cider or pumpkin spice lattes for a cozy Halloween treat.
Storage & Make-Ahead Tips
- Storage: Store the treats in an airtight container at room temperature for up to 3 days. Keep them away from direct sunlight and heat.
- Make-Ahead: You can make the base of the treats up to 2 days in advance. Store them in an airtight container and decorate just before serving for the freshest presentation.
- Freezing: While you can freeze the base of the treats, it’s best to decorate them after thawing to maintain the best texture and appearance.
- Reheating: If the treats become hard, you can microwave them for a few seconds to soften them, but be careful not to overheat.
Frequently Asked Questions
Q: Can I make these treats ahead of time?
A: Yes, you can make the base up to 2 days in advance. Decorate them just before serving for the best results.
Q: How can I make these treats gluten-free?
A: Use gluten-free Rice Krispies or a similar cereal to make these treats suitable for those with gluten sensitivities.
Q: Can I use a different type of cereal?
A: Yes, you can experiment with different cereals like Cocoa Krispies or even Chex for a different flavor and texture.
Q: How do I prevent the treats from sticking to the pan?
A: Grease the pan with butter or cooking spray before pressing in the mixture to prevent sticking.
Q: Can I use natural food coloring?
A: Yes, you can use natural food coloring, but keep in mind that the color may not be as vibrant as with gel food coloring.
Q: What if I don’t have candy eyes?
A: You can use chocolate chips or icing to create eyes if you don’t have candy eyes on hand.
Q: How long do these treats last?
A: Stored in an airtight container at room temperature, these treats will last up to 3 days.
Q: Can I make these treats vegan?
A: Yes, use vegan marshmallows and a plant-based butter to create a vegan-friendly version of these treats.
Conclusion
These Frankenstein Rice Krispie Treats are a fun and easy way to celebrate Halloween. With their no-bake simplicity and customizable decorations, they’re perfect for parties, family fun, or a spooky snack. Give them a try and share your creations on social media.
We’d love to see your Frankenstein treats in action! Enjoy the delicious taste and the fun of making these treats with your loved ones.
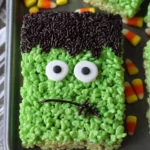
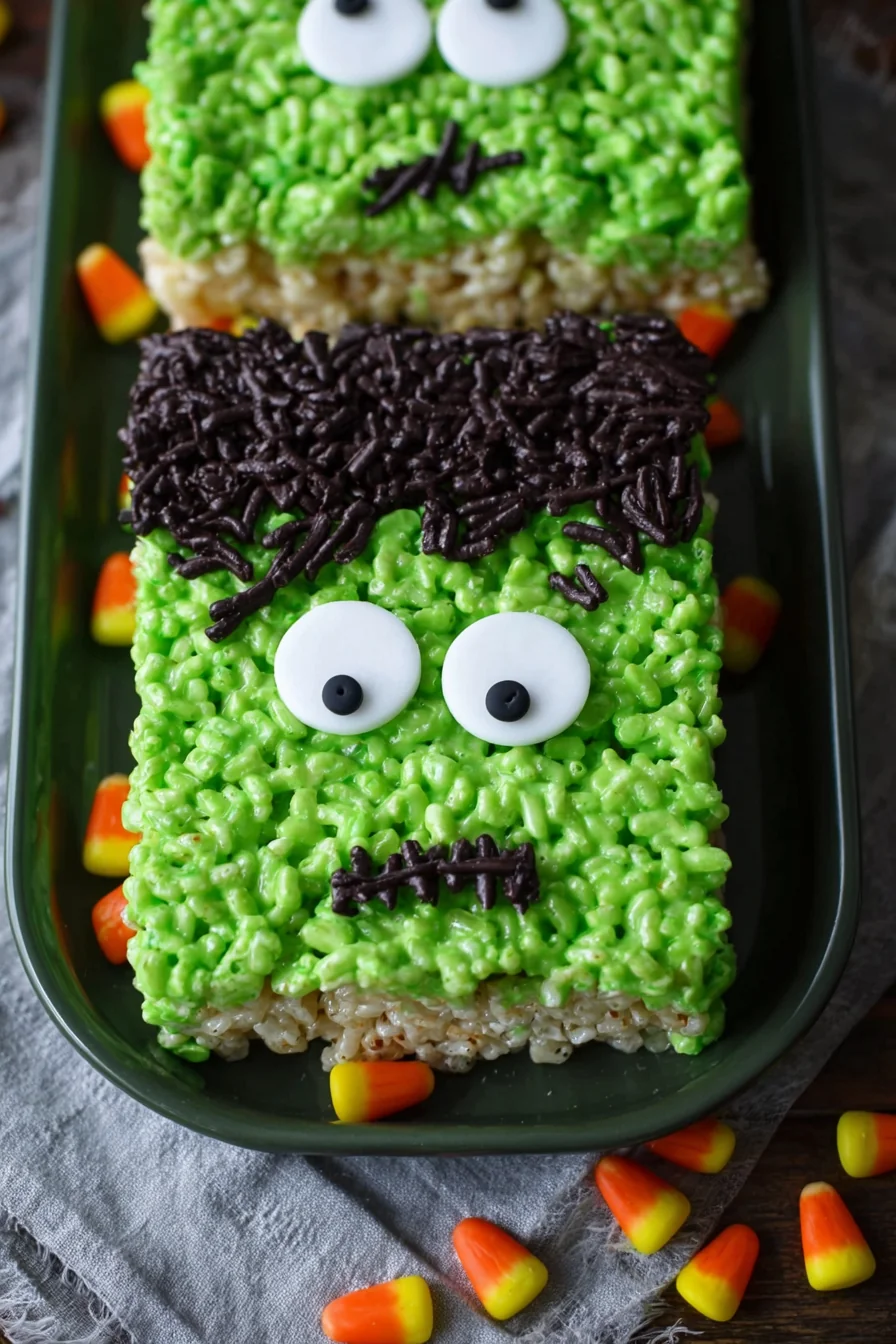
Frankenstein Rice Krispie Treats
Equipment
- Large saucepan
- 9x13 inch baking pan
- Spatula or wooden spoon
- Knife
Ingredients
- 6 cups Rice Krispies cereal
- 1 bag mini marshmallows 10 oz
- 3 tbsp butter unsalted
- Green food coloring gel preferred
- 12 candy eyes
- Black licorice for hair and mouth
- White chocolate chips for bolts
Instructions
- In a large saucepan, melt the butter over low heat. Once melted, add the mini marshmallows and stir until completely melted and smooth.
- Remove the saucepan from heat and add green food coloring, stirring until you achieve the desired Frankenstein green color.
- Pour in the Rice Krispies cereal and mix until the cereal is evenly coated with the marshmallow mixture.
- Press the mixture into a greased 9x13 inch pan. Let it cool for about 20 minutes.
- Once cooled, cut the treats into 12 rectangles. Use candy eyes, licorice, and white chocolate chips to decorate each treat to resemble Frankenstein's face.