
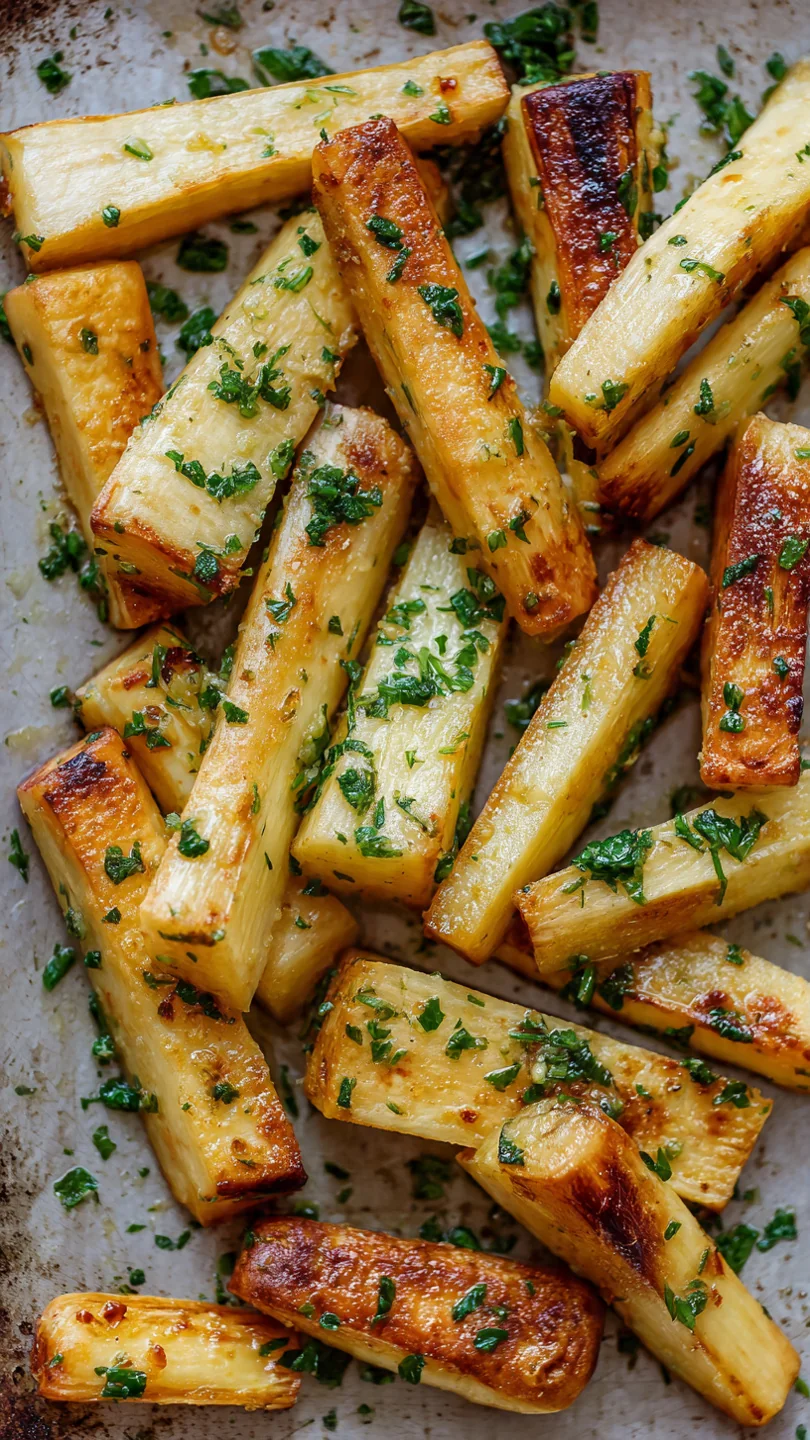
There’s a quiet magic that happens when a humble root vegetable meets high heat and good fat. Parsnips, with their sweet, earthy essence, are transformed in the oven. They become tender within, develop crispy, caramelized edges, and soak up the rich, aromatic flavor of garlic butter in a way that feels both rustic and elegant.
This isn’t just a side dish; it’s a lesson in how simple ingredients, treated with a bit of know-how, can become the star of the table. Whether you’re looking for an easy weeknight vegetable or a show-stopping addition to your holiday spread, these Garlic Butter Roasted Parsnips deliver every time.
This recipe earns its place in your regular rotation for several compelling reasons. It’s the kind of dish that makes cooking feel rewarding without being complicated.
- One-pan convenience: Everything comes together on a single baking sheet, meaning minimal cleanup and maximum flavor.
- Big flavor, fast: In just over 30 minutes, you go from basic ingredients to a deeply caramelized, restaurant-quality side.
- Diet-flexible: Naturally gluten-free, vegetarian, and nut-free, it fits seamlessly into many dietary needs without any special adjustments.
- Versatile pairing: Its sweet and savory profile complements virtually any protein, from a simple baked chicken breast to a festive prime rib.
- Forgiving nature: Parsnips are sturdy. A few extra minutes in the oven won’t ruin them; it often just makes them more deliciously caramelized.
- Cost-effective: Parsnips are typically an affordable vegetable, especially in fall and winter, making this a budget-friendly way to eat well.
Ingredients You’ll Need
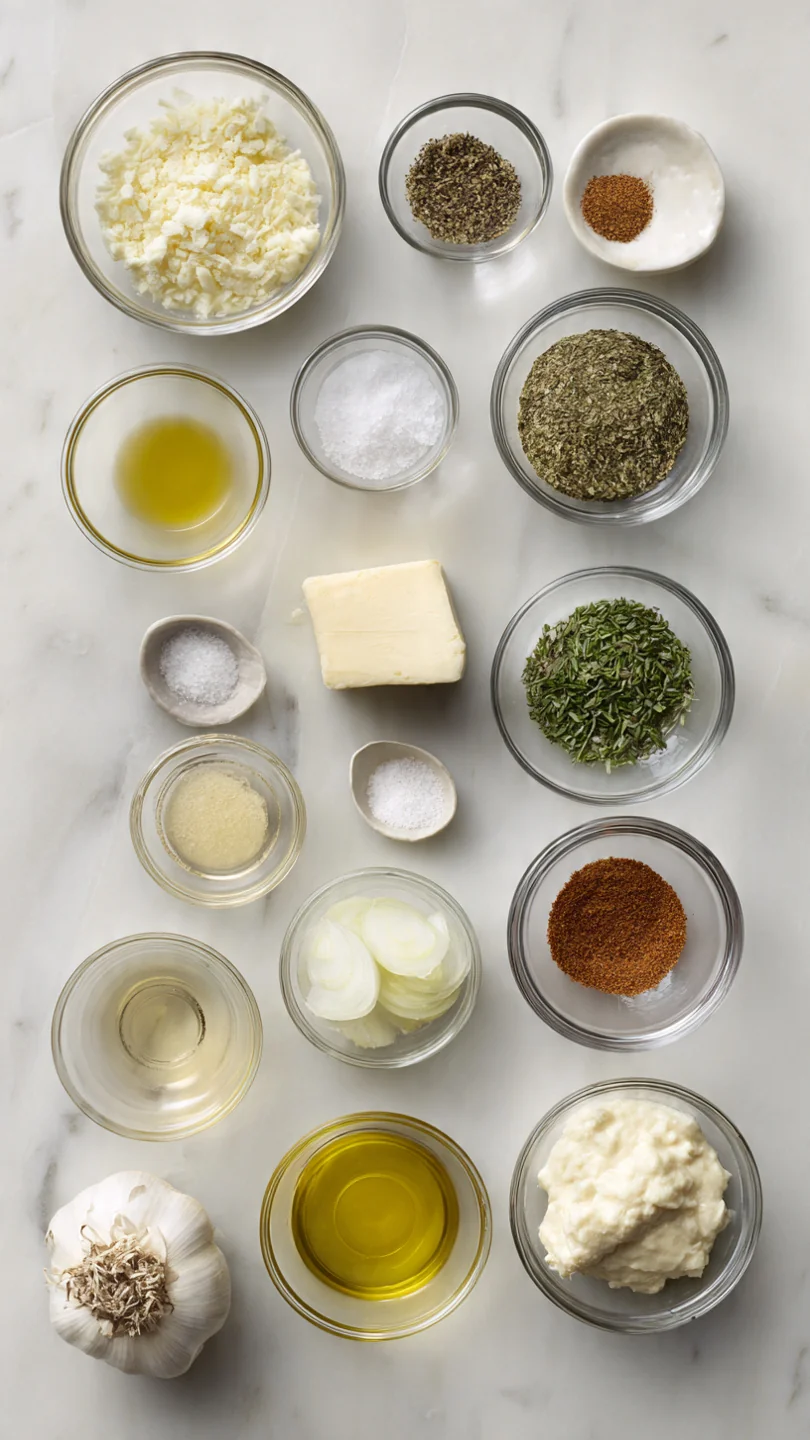
- Let’s gather our ingredients—this short list is a perfect example of how a few pantry staples can create something truly special. The quality of each component directly influences the final dish, so here’s what to look for.
- Parsnips: Choose firm, medium-sized parsnips without soft spots or excessive branching. Larger parsnips can have a woody core, which you may want to trim out after peeling.
- Unsalted butter: Using unsalted butter allows you to control the seasoning perfectly. The butter is the carrier for our garlic and herbs, so its quality shines through.
- Fresh garlic: Freshly minced garlic is non-negotiable for the best flavor. The gentle infusion into the warm butter mellows its sharpness and distributes its aroma evenly.
- Fresh thyme: The earthy, slightly floral notes of thyme are a classic pairing with root vegetables. If using dried, the flavor is more concentrated, so use one-third the amount.
- Kosher salt & black pepper: Kosher salt adheres well to the vegetable surfaces. Freshly cracked black pepper adds a gentle heat that balances the sweetness.
- Fresh parsley: This isn’t just for color. The bright, fresh flavor of parsley added at the end lifts the entire dish and cuts through the richness of the butter.
Note: You’ll find the complete list of ingredients, along with their exact measurements, in the printable recipe card at the bottom of this post.
Kitchen Equipment Needed
You likely have everything you need already. This recipe is beautifully low-tech, relying on fundamental tools.
- A large, rimmed baking sheet: Often called a half-sheet pan (approximately 18×13 inches). The rim prevents any butter from dripping into your oven, and the large surface area is key for allowing space between the parsnips so they roast instead of steam.
- A sharp chef’s knife and sturdy cutting board: For safely and efficiently peeling and cutting the parsnips into even batons.
- A small saucepan or microwave-safe bowl: For melting and infusing the butter.
- A mixing spoon or spatula: For tossing the parsnips in the glorious garlic butter.
How to Make Garlic Butter Roasted Parsnips Recipe
Step 1: Prep the Oven and Parsnips
Start by getting your oven nice and hot—425°F (220°C) is our target. This high temperature is the engine of caramelization. While it heats, focus on the parsnips.
Give them a good peel to remove the outer skin, then cut them into batons. Aim for pieces about 3 inches long and 1/2-inch thick. Consistency in size is your friend here; it ensures every piece finishes cooking at the same time.
Believe me, taking an extra minute to cut them evenly pays off with perfectly cooked results, with no underdone or burnt pieces.
Step 2: Create the Garlic Butter Glaze
In a small saucepan, melt the butter gently over low heat. You just want it liquid, not sizzling or browning. Once melted, take it off the heat immediately.
Now, stir in the minced garlic, thyme, salt, and pepper. Let this mixture sit for a full 5 minutes. This off-heat steeping is a small step with a big impact.
It tames the raw bite of the garlic and allows its flavor to perfume the butter deeply, creating a flavor base that’s aromatic rather than harsh. This is your secret weapon.
Step 3: Coat and Arrange on the Pan
Pile your parsnip batons onto your rimmed baking sheet. Pour that fragrant garlic butter all over them. Now, get your hands in there (or use a spoon) and toss, toss, toss until every single surface is glistening.
Arrange the pieces in a single layer, making sure they aren’t piled on top of each other. Crowding is the enemy of browning. If they look too snug, use a second pan.
This space allows hot air to circulate, giving us those coveted crispy, caramelized edges instead of steamed vegetables.
Step 4: Roast to Caramelized Perfection
Slide the pan onto the center rack of your hot oven. Here’s a key tip: resist the urge to stir or shake the pan for the first 15 minutes. This undisturbed time lets the sides touching the hot metal develop a deep, golden-brown crust.
After 15 minutes, you can give them a quick flip or stir to color the other sides. Roast for another 5-10 minutes, until the parsnips are fork-tender and beautifully spotted with brown. The natural sugars will have caramelized, filling your kitchen with an incredible aroma.
Step 5: Garnish and Serve
Pull the pan from the oven. See those sticky, browned, buttery bits clinging to the pan? That’s liquid gold.
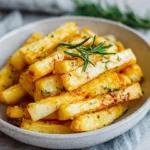
As you transfer the parsnips to a serving dish, be sure to scrape all those delicious pan drippings over them. This is where so much concentrated flavor lives. Finish with a generous sprinkle of chopped fresh parsley.
The green pop of color and herby freshness is the perfect final touch. Serve them immediately, hot and glorious.
A few insights from the kitchen can elevate this simple dish from great to exceptional.
- Choosing your parsnips: Go for parsnips that are firm, smooth, and on the smaller to medium side. Very large, old parsnips can develop a tough, woody core that’s best removed with a paring knife after peeling.
- The single-layer rule: This is the most important tip for perfect roasting. If the parsnips are crowded, they’ll steam in their own moisture. If your pan is small, roast in two batches or use two pans. Proper spacing is non-negotiable for caramelization.
- Don’t skip the steeping: Letting the garlic sit in the warm (not hot) butter is a chef’s trick. It gently cooks the garlic just enough to remove its raw edge and infuse the fat with flavor, preventing any bitter, burnt garlic taste in the final roast.
- Testing for doneness: Doneness is two-fold: the parsnip should be easily pierced with the tip of a knife or a fork (indicating tenderness), and the edges should show significant browning (indicating caramelization of sugars).
- The garnish matters: Adding the fresh parsley at the very end isn’t just decorative. Its bright, clean flavor provides a necessary contrast to the rich, sweet, savory notes of the dish, balancing each bite.
Recipe Variations
- This recipe is a wonderful canvas for creativity. Once you’ve mastered the basic method, try these tested variations to match your menu or mood.
- Herb Garden: Swap the thyme for other hardy herbs. Rosemary (use half the amount, it’s potent) or sage work beautifully. For a brighter finish, toss the roasted parsnips with chopped fresh dill or chives after baking.
- Sweet & Spicy: Add 1 tablespoon of maple syrup or honey to the garlic butter glaze, along with 1/4 teaspoon of crushed red pepper flakes. The sweetness enhances caramelization, and the pepper flakes provide a gentle, warming heat.
- Parmesan Crusted: Five minutes before the parsnips are done, sprinkle them generously with 1/4 cup of finely grated Parmesan cheese. Return to the oven to let the cheese melt and form crispy, savory bits.
- Vegan/Dairy-Free: Substitute the butter with an equal amount of high-quality extra-virgin olive oil or vegan butter. The olive oil will give a fruitier, different-but-delicious flavor profile.
- Citrus Zest: Add the finely grated zest of one lemon or orange to the garlic butter. The citrus oils brighten the entire dish and cut through the richness in a delightful way.
- Umami Boost: Add 1 teaspoon of soy sauce or Worcestershire sauce to the butter mixture. It adds a deep, savory complexity that makes the parsnips incredibly moreish.
What to Serve With This Recipe
Garlic Butter Roasted Parsnips are the ultimate utility player on your dinner table. Their sweet-savory profile makes them incredibly versatile.
For a classic Sunday roast dinner, pair them with Herb-Roasted Chicken or a standing rib roast, some creamy mashed potatoes, and a simple green salad. They are a stellar addition to any holiday spread, sitting comfortably next to turkey, glazed ham, or beef tenderloin. For a lighter meal, they make a satisfying companion to a pan-seared salmon fillet or some simply grilled pork chops.
Vegetarians can serve them atop a bowl of creamy polenta or alongside a hearty lentil stew. The robust flavor even stands up to being chopped and tossed into a grain bowl with some bitter greens and a tangy vinaigrette for lunch the next day.
Storage & Make-Ahead Instructions
- While best served fresh from the oven, leftovers are still delicious with proper handling.
- Refrigeration: Store cooled leftovers in an airtight container in the refrigerator for up to 4 days.
- Reheating: To restore crispness, reheat in a 375°F oven or toaster oven for 10-15 minutes until hot. Avoid the microwave, as it will make them soggy.
- Freezing: I don’t recommend freezing fully cooked roasted parsnips, as the texture becomes mushy and watery upon thawing.
- Make-Ahead: You can peel and cut the parsnips 1 day in advance. Store them submerged in cold water in the refrigerator to prevent browning. Drain and pat them very dry before tossing with the butter and roasting. The garlic butter glaze can also be made a day ahead and gently rewarmed before using.
Frequently Asked Questions
Q: Can I use pre-cut or baby parsnips?
A: Absolutely. If using baby parsnips, you can often roast them whole or just halved. Adjust the cooking time down by 5-10 minutes, as they’ll cook faster.
For pre-cut pieces, ensure they are of relatively uniform size for even cooking.
Q: My parsnips aren’t browning. What did I do wrong?
A: The most common culprit is overcrowding the pan, which causes steaming. Ensure they are in a single layer with space. Also, verify your oven temperature with an oven thermometer—an oven running cool won’t promote good caramelization.
Q: Can I make this with other root vegetables?
A: Yes! This method works wonderfully for carrots, sweet potatoes, turnips, or a mix. Just be aware that cooking times may vary slightly depending on the density and sugar content of the vegetable.
Q: Is it necessary to peel the parsnips?
A: For the best texture and appearance, yes. The skin can be a bit tough and fibrous. A good vegetable peeler makes quick work of it.
Q: Can I use garlic powder instead of fresh garlic?
A: You can in a pinch, but the flavor will be different—more one-dimensional and less aromatic. Use 1 teaspoon of garlic powder stirred directly into the melted butter.
Q: How do I know when the parsnips are cooked through?
A: The best test is to pierce the thickest piece with a fork or the tip of a sharp knife. It should slide in with little to no resistance. Visually, they should be tender and have plenty of browned, caramelized spots.
Q: Are parsnips spicy?
A: Raw parsnips can have a slight peppery, earthy note, but roasting completely transforms them, bringing out a dominant sweetness that is reminiscent of carrots but more complex and nutty.
Final Thoughts
This recipe for Garlic Butter Roasted Parsnips embodies what I love most about cooking: transforming accessible, wholesome ingredients into something truly special with just a bit of technique and care. It’s a testament to the power of high-heat roasting and the magic of garlic butter. I’ve served this dish in professional kitchens and at my own family table, and it never fails to impress with its depth of flavor and elegant simplicity.
I encourage you to give it a try, whether you’re a parsnip novice or a longtime fan. Pay attention to those key steps—the garlic infusion, the single-layer roast—and you’ll be rewarded with a side dish that might just steal the show. Once you experience how good they are, you’ll find yourself reaching for parsnips at the market again and again.
I’d love to hear how it turns out for you. Share your results, your variations, or any questions in the comments below. Happy roasting
Garlic Butter Roasted Parsnips
Equipment
- Large rimmed baking sheet (half-sheet pan)
- Sharp chef’s knife and cutting board
- Small saucepan or microwave-safe bowl
- Mixing spoon
Ingredients
- 2 lbs parsnips peeled and cut into 3-inch batons
- 4 tbsp unsalted butter melted
- 4 cloves garlic minced
- 1 tbsp fresh thyme leaves or 1 tsp dried thyme
- 1 tsp kosher salt plus more to taste
- 1/2 tsp black pepper freshly ground
- 1 tbsp fresh parsley chopped, for garnish
Instructions
- Preheat your oven to 425°F (220°C). Position a rack in the center. This high heat is crucial for achieving caramelization without steaming the vegetables. While the oven heats, peel the parsnips and cut them into uniform 3-inch long batons, about 1/2-inch thick. Try to cut pieces of similar size so they roast evenly.
- In a small saucepan or microwave-safe bowl, melt the butter over low heat. Once melted, remove from heat and stir in the minced garlic, thyme, salt, and pepper. Let this mixture sit for 5 minutes. This gentle infusion allows the garlic flavor to bloom into the butter without burning, which creates a deeper, more aromatic base for our glaze.
- Place the prepared parsnip batons on a large, rimmed baking sheet. Pour the garlic butter mixture over them. Using your hands or a large spoon, toss everything together until every piece is thoroughly and evenly coated. Trust me, this hands-on method ensures the best coverage. Arrange the parsnips in a single layer with a bit of space between them.
- Roast in the preheated oven for 20-25 minutes. Do not stir for the first 15 minutes—this allows the surfaces in contact with the hot pan to develop a beautiful, deep golden-brown crust. After 15 minutes, you can give them a quick flip or stir to promote even coloring. They are done when tender when pierced with a fork and caramelized at the edges.
- Remove the baking sheet from the oven. Transfer the roasted parsnips to a serving platter. Tip from me: Scrape up all those delicious, sticky, browned butter bits from the pan and drizzle them over the top. Garnish generously with the chopped fresh parsley for a pop of color and freshness. Serve immediately while hot and enjoy the sweet, savory, buttery magic.