
There’s something deeply satisfying about a perfect pancake. That golden-brown exterior giving way to a cloud-like, tender interior is a weekend ritual worth perfecting. But what if your pancakes could be not just delicious, but also more satisfying and nutritious?
After years of testing in professional kitchens and my own home, I’ve found the secret ingredient that elevates the humble pancake: Greek yogurt. This recipe produces pancakes that are astonishingly light, fluffy, and packed with a subtle tang that balances the sweetness perfectly. They cook up tall and proud, with a texture that stays moist for hours.
Let’s make a breakfast that will have everyone asking for seconds.
- Unbeatable Fluffiness: The combination of Greek yogurt, baking powder, and a rested batter creates an incredibly light and airy texture that’s hard to achieve with standard recipes.
- Protein-Powered Start: Greek yogurt adds a significant protein boost, making these pancakes more filling and sustaining than traditional versions, perfect for powering through your morning.
- Simple Pantry Ingredients: You likely have everything you need already. No special trips to the store are required for this crowd-pleasing breakfast.
- Kid-Friendly & Customizable: Mildly tangy and perfectly sweet, these are a hit with all ages. The batter is a perfect canvas for adding chocolate chips, blueberries, or spices.
- Meal-Prep Friendly: The batter keeps well, and cooked pancakes freeze beautifully, making busy weekday mornings a breeze.
- Consistently Perfect Results: This recipe has been tested multiple times to ensure reliable, restaurant-quality results in your own kitchen every single time.
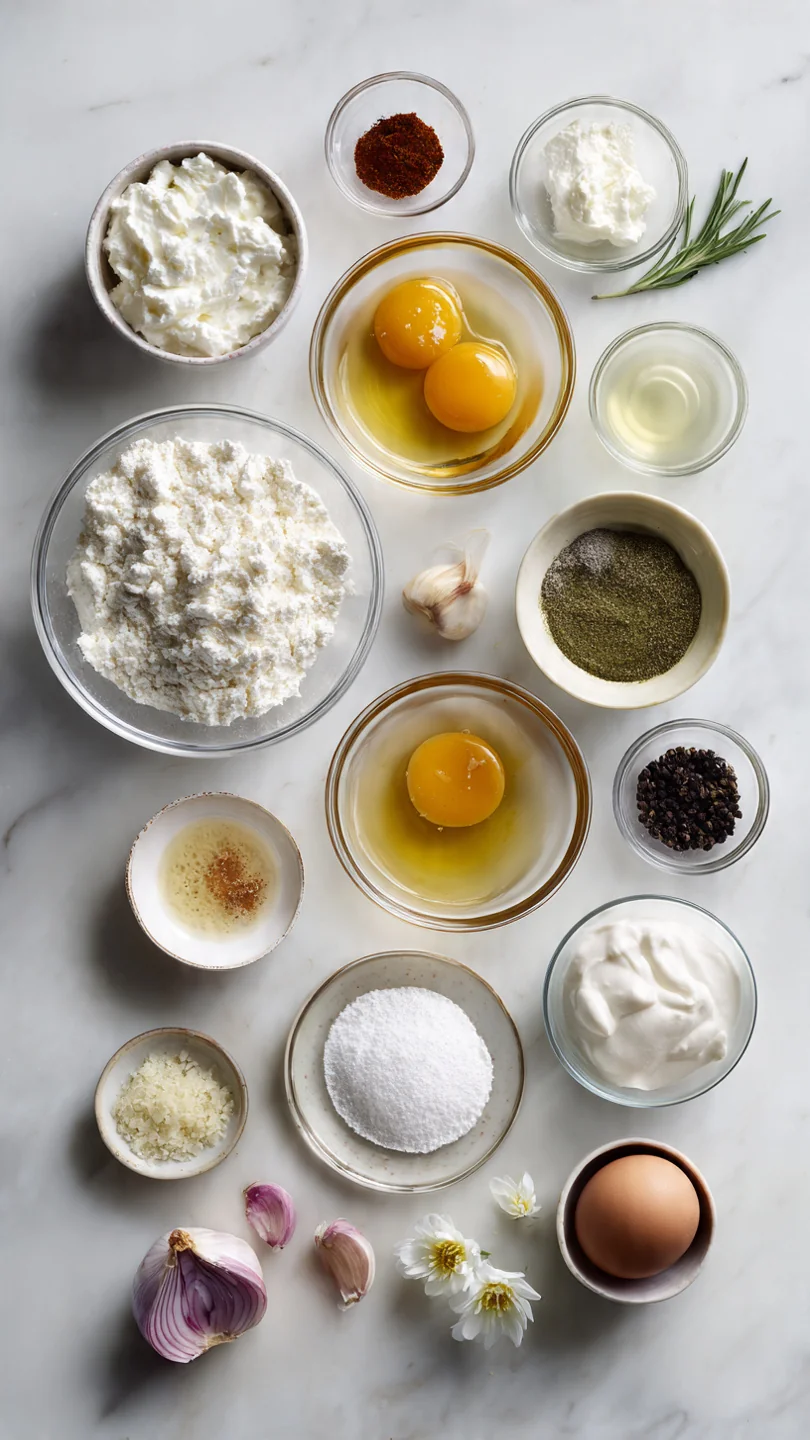
Ingredients You’ll Need
Let’s gather our ingredients—this is where simple pantry staples combine to create something truly special. The magic of this recipe lies in the Greek yogurt. It introduces moisture, protein, and a slight acidity that reacts beautifully with the leavening agents for incredible lift.
Trust me, once you try pancakes made this way, you might not go back.
- All-purpose flour: This is the structural backbone. I recommend spooning the flour into your measuring cup and leveling it off for accuracy. Packing the cup can lead to dense pancakes.
- Granulated sugar: Just enough to balance the tang of the yogurt and promote a beautiful golden-brown color as the pancakes cook.
- Baking powder & baking soda: Our leavening dream team. The baking powder provides the initial lift, while the baking soda reacts with the acidic yogurt for a second rise, ensuring maximum fluffiness.
- Fine sea salt: Never underestimate salt in baking; it enhances all the other flavors.
- Plain Greek yogurt: The star! I recommend full-fat or 2% for the richest texture and flavor, but any variety will work. Avoid flavored yogurts with added sugar.
- Milk: This loosens the thick batter to the perfect consistency. Any milk you have on hand works.
- Eggs: They bind the batter and contribute to the structure. Room-temperature eggs incorporate more easily.
- Unsalted butter: Melted butter adds richness and flavor. Using unsalted allows you to control the total salt in the recipe.
- Pure vanilla extract: The finishing touch that adds a warm, comforting aroma.
Note: You’ll find the complete list of ingredients, along with their exact measurements, in the printable recipe card at the bottom of this post.
Kitchen Equipment Needed
You don’t need any fancy gadgets for perfect pancakes. A good non-stick skillet or griddle is your best friend here. An electric griddle is fantastic for cooking many pancakes at once and maintaining a perfectly even temperature.
You’ll also want two mixing bowls, a whisk for combining the wet ingredients smoothly, and a flexible rubber spatula for gently folding the batter. A 1/4-cup measure is ideal for consistently sized pancakes, and a thin metal spatula makes flipping effortless. If you’re serving a crowd, preheat your oven to 200°F to keep finished pancakes warm on a baking sheet.
How to Make Greek Yogurt Pancakes Recipe
Step 1: Combine the Dry Ingredients
In your large bowl, whisk together the flour, sugar, baking powder, baking soda, and salt. Whisking well here is crucial—it evenly distributes the leavening agents so every bite rises perfectly. I always give it a good 30-second whisk to ensure no clumps of baking powder remain.
This is the foundation of your batter, so take a moment to do it right.
Step 2: Whisk the Wet Ingredients
In your separate medium bowl, combine the Greek yogurt, milk, eggs, slightly cooled melted butter, and vanilla. Trust me, using a whisk here is non-negotiable. You want to break down the thick yogurt completely until the mixture is smooth and homogenous.
A few tiny lumps are okay, but aim for smoothness to prevent uneven pockets in your cooked pancakes.
Step 3: Gently Fold the Batter Together
Now, pour the wet ingredients into the dry. Take your rubber spatula and begin folding—gently scooping from the bottom of the bowl up and over the top. Believe me, this is the most critical step for tender pancakes.
Mix only until the last streaks of flour disappear. A slightly lumpy batter is perfect; overmixing develops gluten and leads to toughness.
Step 4: Rest and Preheat
Let the batter sit on the counter for 5 to 10 minutes. This rest period is a professional secret for height. It allows the flour to fully hydrate and the baking powder to begin its work.
Meanwhile, heat your skillet or griddle over medium-low heat. You want it properly hot but not smoking—a drop of water should skitter and evaporate quickly.
Step 5: Cook to Golden Perfection
Add a small pat of butter to the hot surface. Once it melts and sizzles, use your 1/4-cup measure to pour the batter. Don’t spread it out; let it settle naturally.
Cook for 2-3 minutes. You’ll know it’s time to flip when the edges look dry, the surface is covered in bubbles that have started to pop, and the bottom is a lovely golden brown.
Step 6: Flip, Finish, and Serve
Slide your thin spatula underneath and confidently flip the pancake. It should feel light. Cook for another 1-2 minutes on the second side until equally golden.
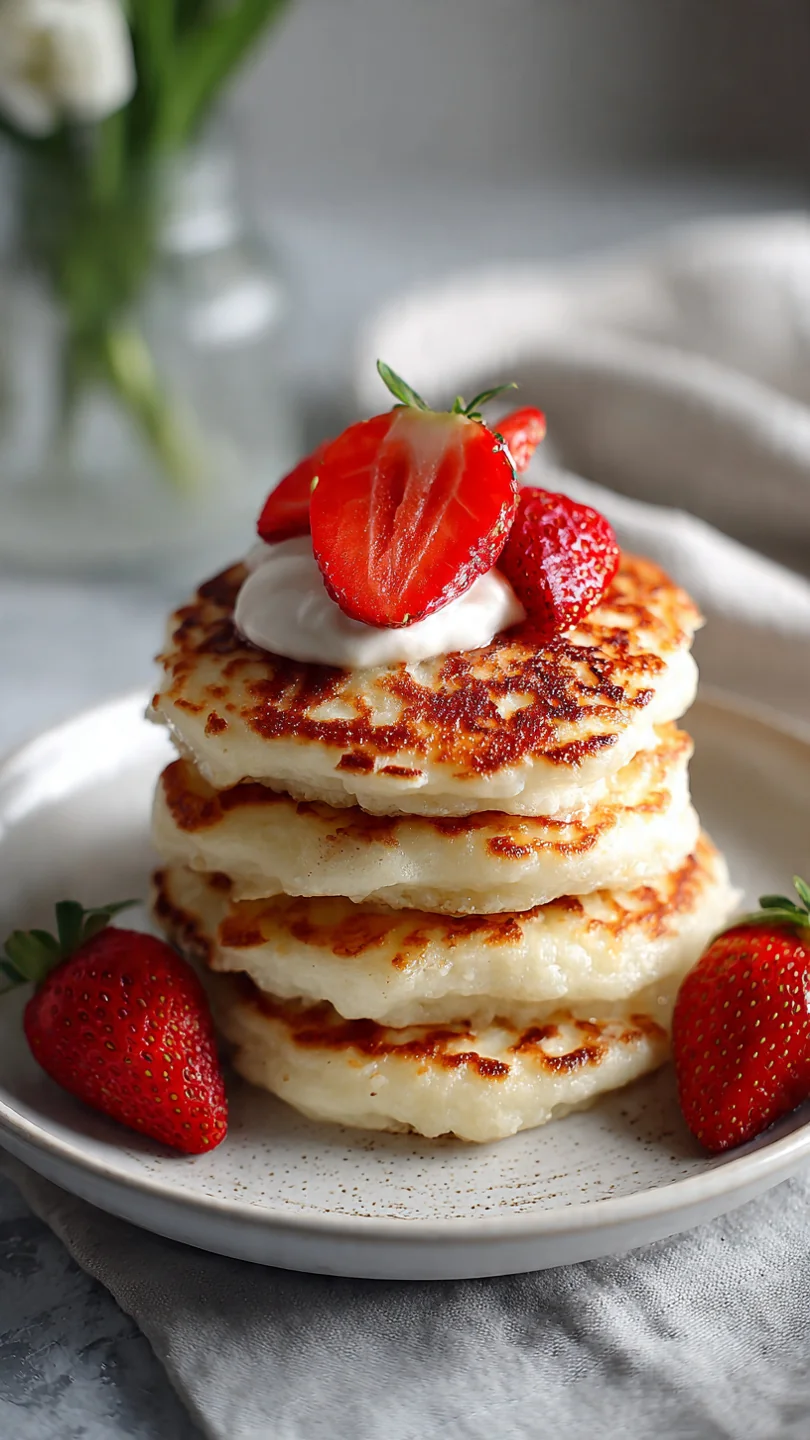
Tip from me: The second side always cooks faster. Transfer to your warm oven and repeat with the remaining batter. Now, stack them high, add your favorite toppings, and enjoy the fluffiest pancakes you’ve ever made!
- Batter Consistency is Key: Your batter should be thick but pourable. If it seems too thick after resting, add a single tablespoon of milk to loosen it. A thin batter will spread too much and produce flat pancakes.
- Control the Heat: Medium-low is your friend. If your pancakes are browning too quickly on the outside but remaining raw inside, your heat is too high. Conversely, if they take forever to cook and don’t brown, nudge the heat up slightly.
- The First Pancake Rule: The first pancake is often a test for the pan’s temperature and butter amount. Don’t be discouraged if it’s not perfect; use it to adjust for the rest of the batch.
- Avoid Pressing: Never press down on cooking pancakes with your spatula. You’ll squeeze out the precious air bubbles we worked so hard to create, resulting in dense disks.
- Butter vs. Oil: I prefer butter for its flavor, but it burns more easily than oil. For a more forgiving cooking fat, use a neutral oil like avocado or grapeseed, or a mix of both.
Recipe Variations
- Lemon Blueberry: Add the zest of one lemon to the wet ingredients and gently fold 1 cup of fresh or frozen blueberries into the finished batter. The lemon brightens the yogurt’s tang beautifully.
- Chocolate Chip: A classic for a reason. Fold 3/4 cup of semi-sweet or dark chocolate chips into the batter. Use mini chips for better distribution in every bite.
- Whole Wheat: Substitute up to half of the all-purpose flour with whole wheat flour for added fiber and a nuttier flavor. You may need an extra tablespoon of milk.
- Banana Nut: Mash one very ripe banana into the wet ingredients and fold in 1/2 cup of chopped toasted walnuts or pecans. The banana adds natural sweetness.
- Spiced: Warm up your batter with 1 teaspoon of ground cinnamon, 1/4 teaspoon of nutmeg, and a pinch of ground ginger. Perfect for fall mornings.
- Gluten-Free: Use a 1:1 gluten-free all-purpose flour blend. Let the batter rest for a full 10 minutes to allow the alternative flours to hydrate properly.
What to Serve With This Recipe
These pancakes are a complete meal on their own, but they shine as part of a larger brunch spread. For a classic pairing, serve with crispy bacon or breakfast sausage links. Fresh fruit is a must—a mixed berry compote or simply sliced strawberries and bananas cut through the richness.
For a truly decadent treat, offer a side of whipped cream or a drizzle of warm Nutella. Beverage-wise, a strong pot of coffee, fresh orange juice, or a pot of tea are perfect companions. If you’re planning a special occasion brunch, consider starting with a simple fruit salad or a savory frittata to balance the sweet main event.
Storage & Make-Ahead Instructions
- Refrigerating Batter: You can prepare the batter, cover the bowl tightly, and refrigerate it for up to 24 hours. You may need to add a splash of milk to loosen it after chilling.
- Storing Cooked Pancakes: Let pancakes cool completely on a wire rack. Store in a single layer in an airtight container in the refrigerator for up to 3 days.
- Freezing for Later: This is the best meal-prep trick. Place cooled pancakes in a single layer on a baking sheet and freeze until solid (about 1 hour). Then, transfer them to a freezer-safe bag or container, separating layers with parchment paper. They will keep for up to 2 months.
- Reheating: To revive their just-made texture, reheat from frozen or refrigerated in a toaster, toaster oven, or a 350°F oven for 5-10 minutes until warm. Avoid the microwave, as it can make them soggy.
Frequently Asked Questions
Q: Can I use regular yogurt instead of Greek yogurt?
A: Yes, but the results will differ. Regular yogurt is thinner, so your batter will be looser and the pancakes may be slightly less fluffy. Use the same amount but consider reducing the milk by a tablespoon or two.
Q: My pancakes are dense. What went wrong?
A: The most common culprits are overmixing the batter (which develops gluten) or using expired baking powder. Always mix until just combined and check your leavener’s freshness.
Q: Can I make these pancakes dairy-free?
A: Absolutely. Use a plain, unsweetened dairy-free yogurt (like coconut or almond-based) and a non-dairy milk. The flavor will vary slightly, but the method remains the same.
Q: How do I know when to flip the pancake?
A: Wait for the classic signs: bubbles covering the surface that have begun to pop, and the edges looking set and slightly dry. Peek underneath to check for a golden-brown color.
Q: Can I make the batter the night before?
A: I don’t recommend leaving the complete batter overnight, as the baking powder can lose its potency. Instead, mix the dry and wet ingredients separately, store them in the fridge, and combine them in the morning just before cooking.
Q: Why let the batter rest?
A: Resting allows the flour particles to fully absorb the liquid, leading to a more cohesive batter and tender pancakes. It also gives the baking powder a head start, creating those lovely air pockets.
Q: Can I use this recipe for waffles?
A: This batter is a bit thick for standard waffle irons. For waffles, I’d recommend adding an extra 1/4 cup of milk to thin it out slightly for proper spreading in the iron.
Final Thoughts
Mastering the perfect pancake is a simple joy that pays off every single time you make them. This Greek yogurt version has become my absolute go-to because it consistently delivers incredible texture, satisfying nutrition, and that “special breakfast” feeling with minimal effort. The techniques here—gentle folding, patient resting, and controlled heat—are the same principles we use in professional kitchens to achieve reliability.
I encourage you to try this recipe as written first, then have fun with the variations. Whether it’s a lazy Sunday or a hurried Tuesday, these pancakes are a guaranteed way to start the day right. I’d love to hear how they turn out for you—share your stacks and tag me!
Now, go enjoy your fluffy, protein-packed creation.

Fluffy Greek Yogurt Pancakes
Equipment
- Large non-stick skillet or electric griddle
- Two mixing bowls (one large, one medium)
- Whisk
- Rubber spatula
- 1/4-cup measuring cup or ladle
- Thin, flexible spatula for flipping
Ingredients
- 1 1/2 cups all-purpose flour Spooned and leveled for accuracy
- 2 tbsp granulated sugar
- 2 tsp baking powder Make sure it’s fresh for maximum lift
- 1/2 tsp baking soda
- 1/2 tsp fine sea salt
- 1 cup plain Greek yogurt Full-fat or 2% recommended for best texture
- 3/4 cup milk Any kind; I use whole milk
- 2 large eggs Room temperature
- 3 tbsp unsalted butter Melted and cooled slightly, plus more for cooking
- 1 tsp pure vanilla extract
Instructions
- In a large bowl, whisk together the flour, sugar, baking powder, baking soda, and salt. In a separate medium bowl, whisk the Greek yogurt, milk, eggs, melted butter, and vanilla until completely smooth. Tip from me: A few small lumps of yogurt are fine, but try to get it as smooth as possible for even mixing.
- Pour the wet ingredients into the dry ingredients. Using a rubber spatula, gently fold the mixture together until just combined. Believe me, it’s crucial to stop mixing when you still see a few streaks of flour. Overmixing develops gluten, which leads to tough, dense pancakes.
- Let the batter rest for 5-10 minutes. This allows the flour to hydrate and the baking powder to activate, which is the secret to those tall, fluffy pancakes. Meanwhile, heat a large non-stick skillet or griddle over medium-low heat.
- Add a small pat of butter to the hot skillet. Once melted and bubbling, use a 1/4-cup measuring cup to portion the batter. Cook for 2-3 minutes, until the edges look set and bubbles form on the surface and begin to pop.
- Carefully flip the pancakes with a thin spatula. Cook for another 1-2 minutes on the second side until golden brown and cooked through. Transfer to a wire rack or a warm oven (200°F) while you cook the remaining batter, adding more butter to the pan as needed.
- Serve immediately with your favorite toppings. Step back and admire that beautiful stack! Classic maple syrup and butter are perfect, or try fresh berries, a dollop of yogurt, or a sprinkle of powdered sugar.