
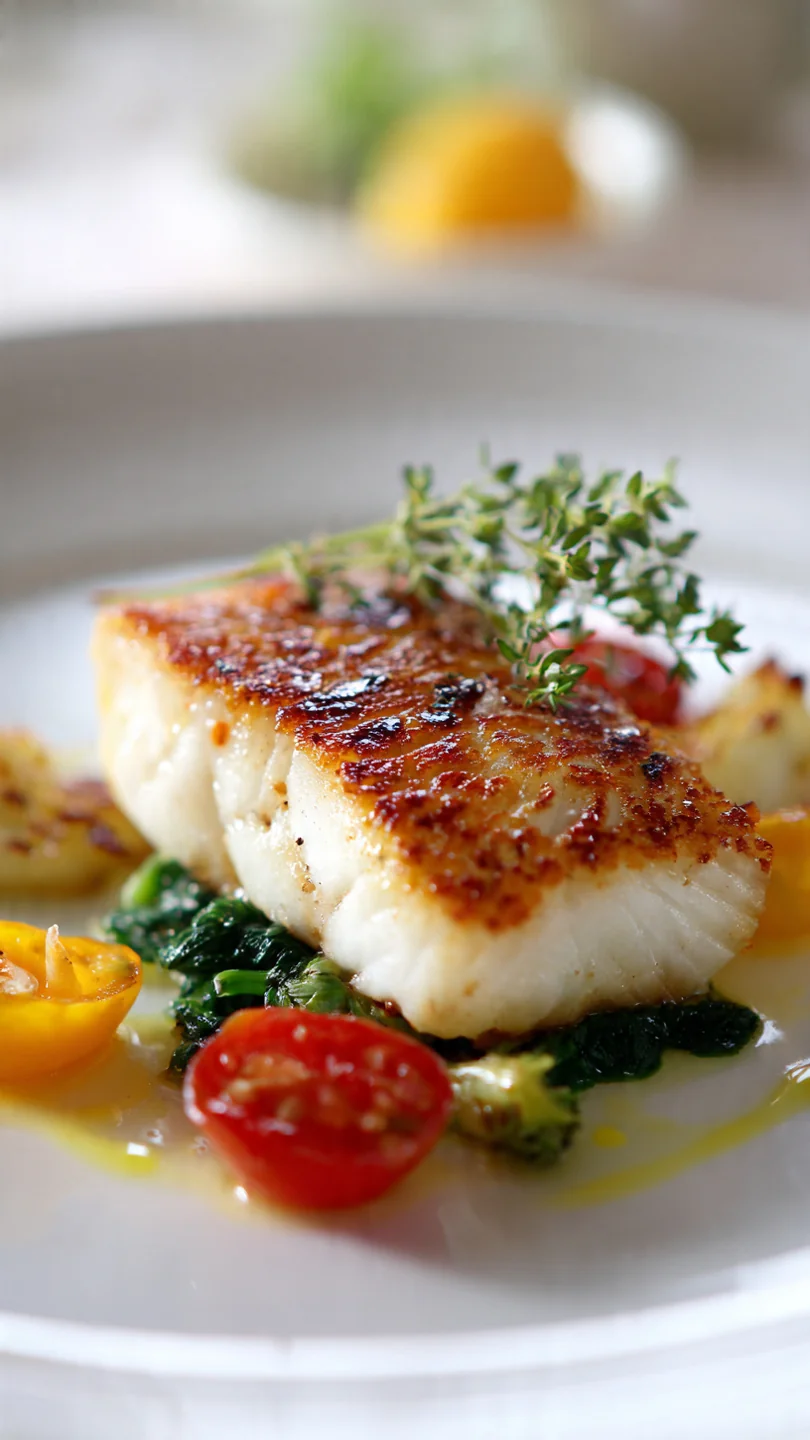
There’s something deeply satisfying about transforming a simple piece of fish into a restaurant-worthy dinner in under 15 minutes. Pan-fried cod is that kind of magic—a humble fillet that, with the right technique, develops a shatteringly crisp, golden crust giving way to tender, snow-white flakes. It’s the ultimate weeknight hero, but impressive enough for company.
After testing this method countless times in professional kitchens and home stoves alike, I’ve distilled it down to a foolproof process where the only real work is patting the fish dry. Let’s get that skillet hot.
This recipe is designed for guaranteed success and maximum flavor with minimal fuss.
- 15-Minute Wonder: From fridge to plate in the time it takes to set the table. It’s the definition of a quick, healthy dinner.
- Foolproof Crispy Crust: The simple dry-pat and thin-dredge technique is the secret to that irresistible golden exterior without a heavy, gummy coating.
- Restaurant Technique at Home: Learn the professional chef’s trick of butter-basting, which infuses the fish with rich flavor and creates a beautiful sheen.
- Clean & Simple Ingredients: You likely have everything you need in your pantry right now—flour, salt, pepper, oil, and butter.
- Diet-Flexible Foundation: Naturally high-protein and low-carb, this base recipe is easily adapted for gluten-free, dairy-free, or Whole30 diets.
- Endlessly Customizable: The basic method is a perfect canvas for your favorite herbs, spices, and sauces.
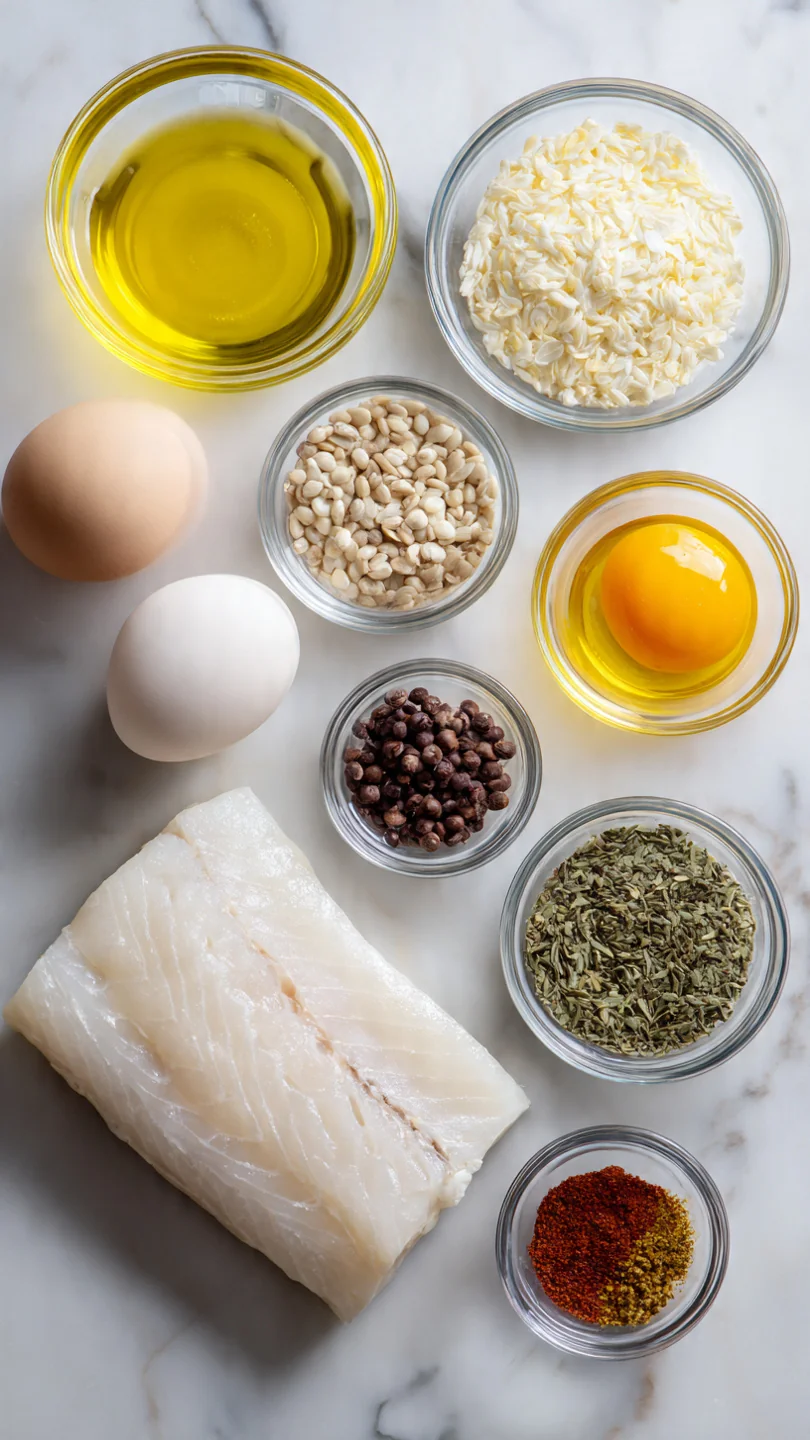
Ingredients You’ll Need
- Let’s gather our ingredients. This short list is all about quality and technique. The magic isn’t in a long ingredient list, but in how we handle these few key players.
- Cod Fillets: Look for thick, even-cut fillets (about 1-inch thick) from a sustainable source. Thicker cuts are more forgiving and stay juicier. Skinless is best for even cooking and crispiness on all sides.
- All-Purpose Flour: This creates the initial crisp layer. A light, even coating is key—too much flour leads to a pasty crust. For a gluten-free version, almond flour or a 1:1 GF blend works beautifully.
- Kosher Salt & Black Pepper: I specify kosher salt because its larger crystals season more evenly. Freshly ground pepper makes a noticeable difference.
- Paprika: Sweet or smoked paprika adds a subtle depth of flavor and beautiful color to the crust. It’s a small touch with big impact.
- Neutral Oil: You need an oil with a high smoke point, like avocado, grapeseed, or refined canola, to get the pan properly hot without burning.
- Unsalted Butter: Added after flipping, the butter browns and foams, creating the luxurious base for basting that gives the fish its final flavor boost.
- Lemon & Parsley: The classic, non-negotiable finish. The bright acid cuts the richness, and the fresh herbs add a pop of color and flavor.
Note: You’ll find the complete list of ingredients, along with their exact measurements, in the printable recipe card at the bottom of this post.
Kitchen Equipment Needed
You don’t need specialty gear, but the right tools make the process seamless.
- A Heavy-Bottomed Skillet (10-12 inch): This is non-negotiable. Cast iron or tri-ply stainless steel retains and distributes heat evenly, preventing hot spots that can burn the coating before the fish cooks through. Non-stick pans won’t develop the same deep browning.
- Thin, Flexible Metal Spatula: Essential for getting under the delicate crust without tearing it. A fish spatula is ideal, but any thin, sturdy turner will work.
- Paper Towels: For thoroughly drying the fish—your first and most critical step.
- Instant-Read Thermometer (Highly Recommended): Takes the guesswork out of doneness. Cod is perfectly cooked at 145°F internally.
How to Make Pan-Fried Cod Recipe
Step 1: Dry and Dredge
Pat the cod fillets completely dry with paper towels. This is the single most important step for achieving a crisp crust. Any surface moisture will instantly create steam, preventing browning.
In a shallow dish, combine the flour, most of the salt and pepper, and the paprika. Dredge each fillet lightly in the flour mixture, shaking off any excess. Trust me, a thin, even coating is what you want—it should look like a faint dusting, not a batter.
Step 2: Heat the Pan and Sear
Heat your heavy skillet over medium-high heat for a full 2 minutes. You want it properly hot. Add the oil and swirl to coat.
The oil should shimmer but not smoke. Carefully place the dredged fillets in the hot pan. They should sizzle immediately.
This sound is your assurance that searing is happening. Now, the hardest part: do not move them for 4 minutes. This allows a sturdy, golden crust to form.
Step 3: Flip and Baste
After 4 minutes, peek at the edges. The bottom should be a deep, golden brown. Slide your thin spatula underneath and flip with confidence.
If they resist, give them another 30 seconds. Immediately add the butter to the pan. Tip from me: tilt the pan slightly and use a spoon to continuously baste the tops of the fillets with the foaming, nutty-brown butter for about 1 minute.
This cooks the top side while infusing incredible flavor.
Step 4: Finish Cooking
Cook on the second side for 3-4 minutes. The fish is done when it’s opaque throughout and flakes easily with gentle pressure from a fork. For absolute precision, an instant-read thermometer inserted into the thickest part should read 145°F.
Transfer the cod to a warm plate immediately to stop the cooking. Sprinkle with the remaining salt and pepper.
Step 5: Garnish and Serve
Now for the final touches. Squeeze fresh lemon juice over the hot fillets—the steam will carry that citrus aroma beautifully. Scatter with chopped parsley.
Step back and admire that beautiful, crispy crust. Serve it right away while the contrast between the crunchy exterior and tender, flaky interior is at its peak.
A few insights from the pro kitchen will elevate your results from good to exceptional.
- The Dryness Doctrine: I can’t stress this enough. Moisture is the enemy of crispness. Pat the fish aggressively with paper towels, even pressing gently to extract moisture from the surface.
- The Pan Must Be Pre-Heated: A properly hot pan ensures the fish sears instantly, sealing in juices and setting the crust. If the fish doesn’t sizzle upon contact, your pan isn’t hot enough.
- The Art of Not Crowding: Give each fillet plenty of space. Overcrowding the pan drops the temperature and causes the fish to steam, resulting in a pale, soft coating. Cook in batches if necessary.
- Butter Timing is Everything: Add the butter only after you flip. If added at the beginning with the oil, its milk solids will burn at the high heat needed for searing. Post-flip, it perfectly flavors and finishes the dish.
- Let it Rest: Allow the cooked fish to rest on the plate for 2 minutes before serving. This lets the internal juices redistribute, ensuring every bite is moist.
Recipe Variations
- This master recipe is your starting point for endless delicious possibilities.
- Lemon-Herb Crust: Add 1 tablespoon of finely chopped fresh herbs (like dill, tarragon, or chives) to the flour dredge.
- Cajun-Spiced: Replace the paprika with 1 teaspoon of your favorite Cajun or Creole seasoning for a spicy kick.
- Panko-Crusted: For extra crunch, after the flour dredge, dip the fillet in beaten egg, then press into panko breadcrumbs before frying.
- Gluten-Free & Keto: Substitute the all-purpose flour with an equal amount of finely ground almond flour or coconut flour.
- Piccata-Style: After removing the fish, add 1/4 cup white wine, 2 tablespoons of lemon juice, and 2 tablespoons of capers to the pan. Simmer for 2 minutes, then stir in 2 more tablespoons of cold butter off the heat to create a quick, bright sauce to pour over the fish.
- Garlic & Herb Butter Baste: Add 2 crushed garlic cloves and a sprig of thyme or rosemary to the pan with the butter for an aromatic baste.
What to Serve With This Recipe
Pan-fried cod is a versatile centerpiece that pairs beautifully with a wide range of sides.
For a light and healthy meal, serve it alongside a simple arugula salad with a lemon vinaigrette, or a pile of sautéed spinach or garlicky green beans. For something more substantial, creamy mashed potatoes, buttered orzo, or crispy roasted potatoes are classic, comforting choices. For a low-carb plate, try cauliflower mash or a medley of roasted vegetables like asparagus, zucchini, and cherry tomatoes.
A glass of crisp Sauvignon Blanc, Pinot Grigio, or a light-bodied Pinot Noir complements the dish perfectly. This meal fits any occasion, from a busy Tuesday to a casual Friday night dinner with friends.
Storage & Make-Ahead Instructions
- This dish is best enjoyed immediately, but leftovers can be handled properly.
- Refrigeration: Store cooled leftovers in an airtight container in the refrigerator for up to 2 days.
- Reheating: To preserve crispness, reheat in a 350°F oven or toaster oven on a baking sheet for 8-10 minutes, until warmed through. Avoid the microwave, as it will make the crust soggy.
- Freezing: I do not recommend freezing cooked pan-fried cod, as the texture of the flaky fish and the crisp coating will suffer significantly upon thawing and reheating.
- Make-Ahead Prep: You can pat the fish dry and prepare the flour seasoning mix up to a day in advance. Keep them separate in the fridge and dredge just before cooking.
Frequently Asked Questions
Q: How do I know when the cod is cooked through without a thermometer?
The fish is done when it turns opaque white throughout and flakes easily with a fork. Gently press the top; it should feel firm but still yield slightly, not hard or rubbery.
Q: Can I use frozen cod fillets?
Yes, but they must be fully thawed in the refrigerator overnight first. Then, pat them even more diligently to remove all the excess moisture that thawing releases.
Q: My coating is burning before the fish cooks. What am I doing wrong?
Your heat is too high. While the pan needs to be hot, if you see the crust darkening too quickly (in under 3 minutes), reduce the heat to medium after the initial sear. Thicker fillets also help.
Q: What’s a good dairy-free substitute for the butter?
Simply omit the butter-basting step. You can finish with a drizzle of high-quality extra virgin olive oil and lemon juice for flavor. Alternatively, use a plant-based butter that browns well.
Q: Can I use this method for other types of fish?
Absolutely! This technique works wonderfully for other firm, flaky white fish like haddock, halibut, or sea bass. Adjust cooking time slightly based on thickness.
Q: Why is my fish sticking to the pan?
The fish will naturally release once a proper crust has formed. If you try to flip it too early, it will stick. Ensure your pan is properly pre-heated and you’ve waited the full 4 minutes before attempting to move it.
Q: Is the flour dredge necessary?
For the classic crispy crust, yes. The thin layer of flour dehydrates the immediate surface further and creates the perfect base for browning. Skipping it will result in a less crispy, though still tasty, piece of fish.
Final Thoughts
Mastering pan-fried cod is about embracing a few simple, non-negotiable techniques: dry fish, a hot pan, and the patience to let a beautiful crust form. It’s a fundamental skill that unlocks countless easy, healthy, and impressive dinners. This recipe is my tested-and-perfected version, designed to deliver consistent, restaurant-quality results in your own kitchen every single time.
I encourage you to try it exactly as written first, then have fun with the variations. That moment you cut into a perfectly cooked fillet with a crisp, golden exterior and tender, steaming flakes inside is truly rewarding. I’d love to hear how it turns out for you!
Share your results, tag me, or leave a comment with your favorite variation. Now, go preheat that skillet—dinner is 15 minutes away.
Perfect Pan-Fried Cod
Equipment
- Large heavy-bottomed skillet (10-12 inch cast iron or stainless steel)
- Thin, flexible metal spatula
- Paper towels
- Shallow dish for dredging
- Instant-read thermometer (recommended)
Ingredients
- 2 6-8 oz cod fillets skinless, about 1-inch thick, patted very dry
- 3 tbsp all-purpose flour
- 1 tsp kosher salt divided
- 1/2 tsp black pepper freshly ground, divided
- 1 tsp paprika sweet or smoked
- 3 tbsp neutral oil like avocado, grapeseed, or canola
- 2 tbsp unsalted butter
- 2 lemon wedges for serving
- 2 tbsp fresh parsley chopped, for garnish
Instructions
- Pat the cod fillets completely dry with paper towels. This is the single most important step for achieving a crisp crust. In a shallow dish, combine the flour, 3/4 teaspoon of the salt, 1/4 teaspoon of the pepper, and the paprika. Dredge each fillet lightly in the flour mixture, shaking off any excess. Trust me, a thin, even coating is what you want.
- Heat a large, heavy-bottomed skillet (cast iron or stainless steel works best) over medium-high heat for 2 minutes. Add the oil and swirl to coat. The oil should shimmer but not smoke. Carefully place the dredged fillets in the hot pan. They should sizzle immediately. Do not move them for 4 minutes.
- After 4 minutes, check the edges. The bottom should be a deep, golden brown. Using a thin, flexible spatula, gently flip the fillets. If they resist, give them another 30 seconds. Add the butter to the pan. Tip from me: tilt the pan slightly and use a spoon to baste the tops of the fillets with the foaming butter for 1 minute.
- Cook on the second side for 3-4 minutes, or until the fish is opaque throughout and flakes easily with a fork. An instant-read thermometer inserted into the thickest part should read 145°F. Transfer the cod to a warm plate. Sprinkle with the remaining salt and pepper.
- Squeeze fresh lemon juice over the hot fillets and garnish with chopped parsley. Step back and admire that beautiful, crispy crust. Serve immediately with your favorite sides for a restaurant-quality meal at your own table.