
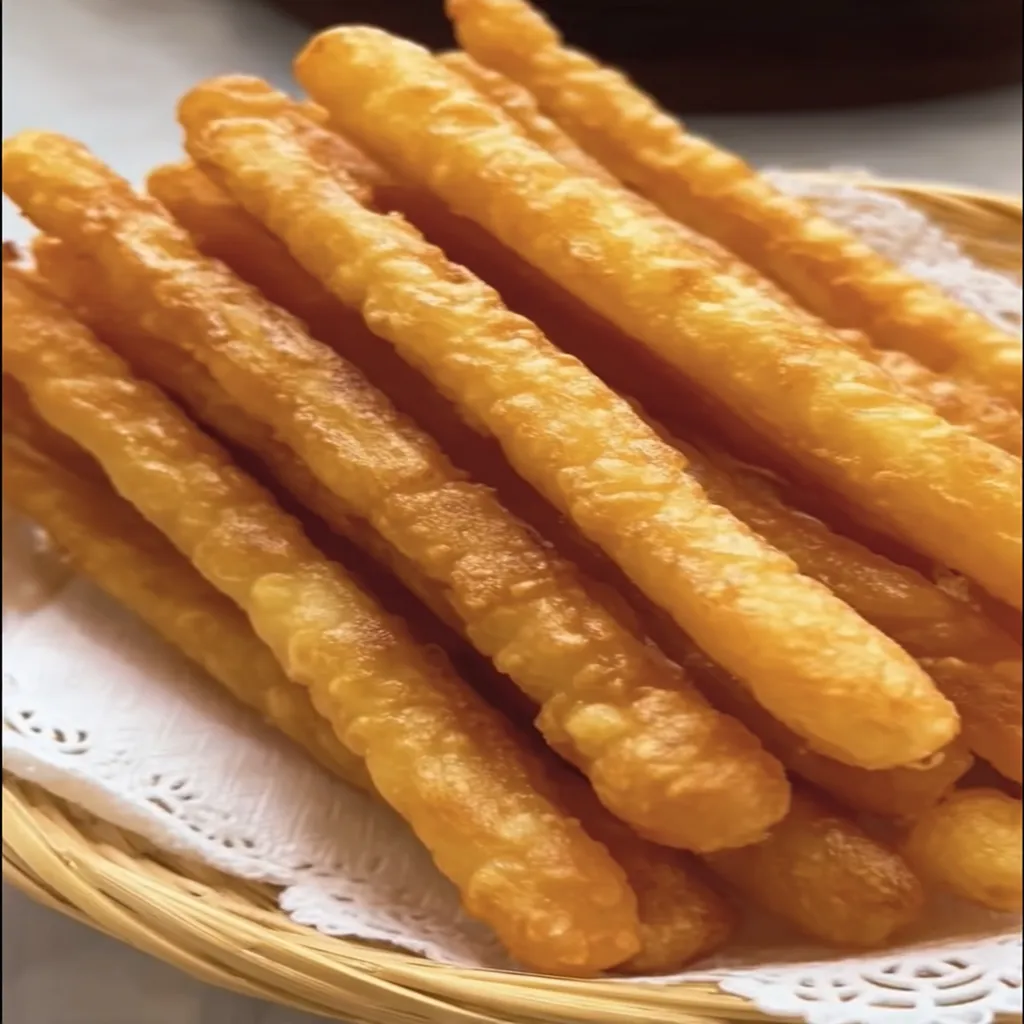
Hey there, friends! I’m so excited to chat about one of my all-time favorite snacks today: Potato Finger Sticks. I stumbled upon this recipe a few years back when I was trying to whip up something quick for a game night with buddies, and let me tell you, these crispy little delights were an instant hit.
My family can’t get enough of them, and honestly, I’ve lost count of how many times I’ve made Potato Finger Sticks since then!
It all started with a simple idea: turn humble spuds into something dippable and delicious. I remember the first batch of Potato Finger Sticks being a bit of a mess (soggy, uneven cuts—yikes!), but with a few tweaks, I’ve got it down to a science. So, stick with me, and I’ll share everything I’ve learned about making perfect Potato Finger Sticks at home.
If you’re craving a snack that’s easy, affordable, and downright addictive, you’re in the right place. Let’s dive into why these Potato Finger Sticks are about to become your new go-to!
Why You’ll Love This Recipe
I’ve found that Potato Finger Sticks are a total crowd-pleaser, no matter who’s at the table. They’re crispy on the outside, fluffy on the inside, and super customizable—whether you’re dunking them in ketchup or getting fancy with a garlic aioli. In my kitchen, these little sticks are the ultimate comfort food, especially on a cozy Friday night. My friend at baked radicchio and sweet potato side dish has a similar recipe that you might enjoy.
Plus, they’re a cinch to make with stuff you’ve probably already got on hand. I mean, who doesn’t have a few potatoes lying around? Trust me, once you try making Potato Finger Sticks, you’ll wonder why you didn’t sooner!
Ingredients List
Alright, let’s talk about what you’ll need to make these tasty Potato Finger Sticks. I’m all about keeping things simple, so this list isn’t gonna break the bank or send you on a wild grocery hunt. I prefer using fresh, medium-sized potatoes for the best texture, but honestly, whatever you’ve got works as long as you cut them evenly.
Here’s the breakdown for a batch of Potato Finger Sticks that serves about 4-6 snackers:
- 4 medium russet potatoes (about 2 lbs or 900g), washed and peeled for that classic look (though I sometimes leave the skin on for extra crunch)
- 3 tablespoons (45ml) olive oil, for that golden crispiness—I usually go with extra virgin for flavor
- 1 teaspoon (5g) sea salt, or to taste, for a nice salty bite
- 1/2 teaspoon (2.5g) black pepper, freshly ground if you’ve got it
- 1/2 teaspoon (2.5g) paprika, for a smoky touch—I love smoked paprika here
- 1/2 teaspoon (2.5g) garlic powder, for a little zing that pairs so well with Potato Finger Sticks
And that’s it! Grab these basics, and you’re on your way to snack heaven. (Pro tip: I usually buy my spices in bulk to save a few bucks.)
Variations
You might also want to try creamy potato bacon soup.
One thing I adore about Potato Finger Sticks is how versatile they are. You can switch things up based on your mood, what’s in your pantry, or who you’re feeding. I’ve tried a bunch of twists over the years, and my family’s got their favorites. Here are some variations of Potato Finger Sticks that I keep coming back to. If you love this recipe, you’ll also enjoy sweet potato fry dipping sauce.
- Spicy Kick: Toss in 1/2 teaspoon of cayenne pepper or chili powder with the seasoning mix for a fiery punch. I tried this once for a Super Bowl party, and wow, they disappeared in minutes!
- Cheesy Bliss: Sprinkle 1/4 cup of grated Parmesan over the Potato Finger Sticks in the last 5 minutes of baking for a melty, savory crust. My kids always beg for this version.
- Herb Garden: Mix in 1 tablespoon of chopped fresh rosemary or thyme before baking. It’s so fragrant, and I feel a bit fancy serving these.
- Truffle Touch: Drizzle with a tiny bit of truffle oil after they’re out of the oven. I did this for a date night, and it felt like a gourmet treat!
- Sweet Swap: Use sweet potatoes instead of russets for a slightly sweeter take on Potato Finger Sticks. I’m obsessed with this for fall dinners.
- Garlic Overload: Add an extra 1/2 teaspoon of garlic powder or toss with minced fresh garlic post-bake. My husband swears by this one.
- Ranch Seasoning: Sprinkle 1 tablespoon of ranch seasoning mix for that tangy, herby vibe. It’s a hit with the teens in my house.
I’ve got a soft spot for experimenting, so don’t be afraid to play around with your Potato Finger Sticks. What’s your go-to flavor combo? Let me know!
Servings and Timing
Let’s get into the nitty-gritty of how much time and how many folks you can feed with these Potato Finger Sticks. In my experience, this recipe comes together pretty quick, even on a busy weeknight. Here’s what you’re looking at for a standard batch of Potato Finger Sticks.
- Prep Time: 15 minutes
- Cook Time: 25-30 minutes
- Total Time: About 40-45 minutes
- Servings: 4-6 portions, depending on how hungry everyone is
I usually double the recipe if I’ve got extra mouths to feed, ‘cause trust me, these disappear fast!
Step-by-Step Instructions
Making Potato Finger Sticks is a breeze once you get the hang of it. I’ve been at this for a while, so I’ve got a few tricks up my sleeve to share. Let’s walk through it together, step by step, like I’m right there in the kitchen with you. If you enjoyed this recipe, you might like roasted sweet potato rounds with herbed ricotta walnuts and cranberries.
Step 1: Prep the Potatoes
First off, preheat your oven to 425°F (220°C) and line a baking sheet with parchment paper for easy cleanup. Wash and peel your potatoes (or don’t—I sometimes skip peeling for a rustic vibe), then cut them into thin, fry-like sticks, about 1/4 inch thick. I’ve learned that consistency is key here for even cooking with Potato Finger Sticks, so take your time with the slicing.
Step 2: Soak for Crispiness
This is my secret weapon! Soak those sticks in cold water for 10-15 minutes to remove excess starch—it’s a game-changer for crispy Potato Finger Sticks. After soaking, pat them dry with a clean kitchen towel. Don’t skip this, or you’ll end up with sad, soggy sticks like I did the first time.
Step 3: Season and Oil
If you love this recipe, you’ll also enjoy severed finger cupcakes for halloween.
Toss the dried sticks in a big bowl with olive oil, salt, pepper, paprika, and garlic powder until they’re nicely coated. I like to use my hands for this—kinda messy, but it gets the job done. Spread them out in a single layer on your baking sheet for the best results with Potato Finger Sticks.
Step 4: Bake to Golden Glory
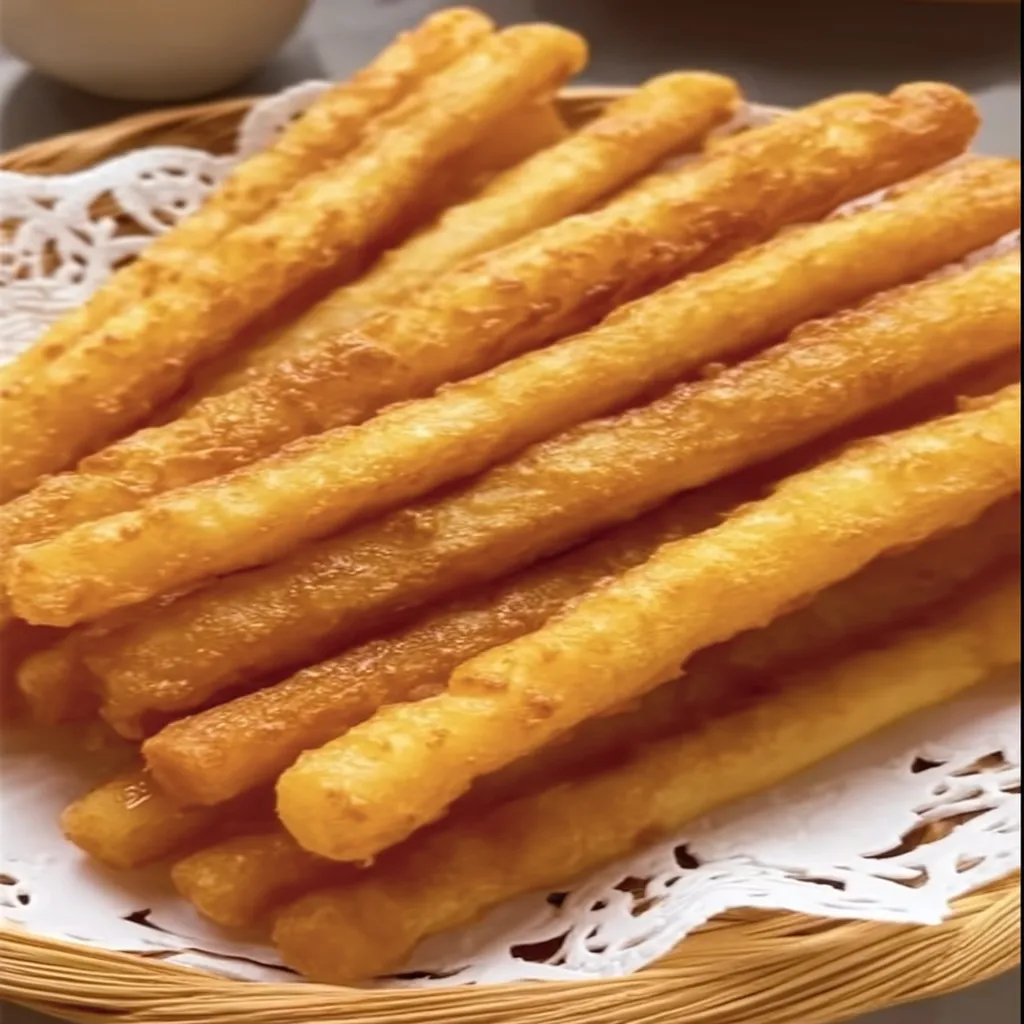
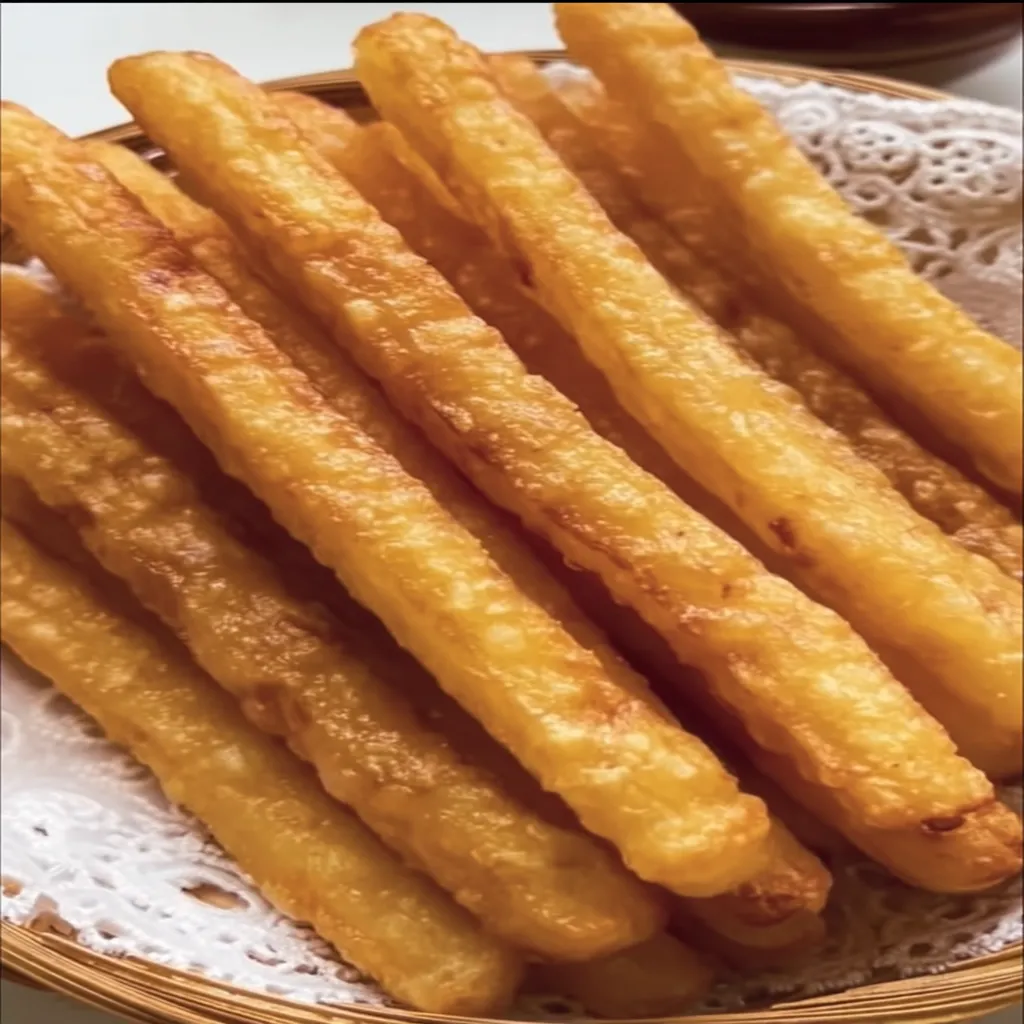
Pop them in the oven for 25-30 minutes, flipping halfway through to ensure they crisp up evenly. Keep an eye on them toward the end—nothing’s worse than burnt Potato Finger Sticks! They should be golden brown and crunchy when done.
Step 5: Serve Hot
Pull those Potato Finger Sticks out and let them cool for just a minute before digging in. I usually can’t resist sneaking one straight from the tray (ouch, hot!). Serve them up with your favorite dip, and watch them vanish.
Nutritional Information
My friend at potato easter egg decorating has a similar recipe that you might enjoy.
I’m no dietitian, but I like to keep tabs on what I’m munching, especially with something as snackable as Potato Finger Sticks. Here’s a rough breakdown per serving for these tasty bites, based on a batch split into 6 portions. Keep in mind, this can vary depending on how much oil you use for your Potato Finger Sticks.
- Calories: 180 per serving
- Fat: 7g
- Protein: 2g
- Carbohydrates: 26g
- Sodium: 400mg
Not too shabby for a treat, right? Just don’t eat the whole tray in one go like I’ve been tempted to!
Healthier Alternatives
If you’re looking to lighten up your Potato Finger Sticks, I’ve got some swaps I’ve tried that still keep the flavor on point. I’m all about balance, so when I’m watching my intake, these tweaks help me enjoy my favorite snack guilt-free. Here are a few ideas for healthier Potato Finger Sticks.
- Oil Reduction: Cut back to just 1.5 tablespoons of olive oil or use a cooking spray to coat your Potato Finger Sticks. It still crisps up decently, in my experience.
- Sweet Potato Switch: Use sweet potatoes for added nutrients like vitamin A. I’ve swapped these in plenty of times, and they’re just as tasty.
- Baking Over Frying: Stick to baking instead of deep-frying to slash calories. I’ve tried frying, but baking is my go-to for lighter Potato Finger Sticks.
- Seasoning Smarts: Use low-sodium salt or skip it altogether and lean on herbs for flavor. I’ve done this when I’m cutting back on salt.
Serving Suggestions
I love getting creative with how I plate up my Potato Finger Sticks. They’re so versatile, and honestly, they steal the show no matter how you serve them. Here are a few of my favorite ways to enjoy Potato Finger Sticks that I’ve picked up over countless batches.
- Classic Dip: Pair with good ol’ ketchup or mayo for a timeless snack. It’s how I first fell for Potato Finger Sticks!
- Game Day Spread: Serve alongside sliders and wings for a crowd-pleasing lineup. My friends rave about this combo.
- Fancy Appetizer: Offer with a garlic aioli or spicy sriracha dip at a dinner party. I did this once, and everyone thought I was a pro chef!
- Kid-Friendly Meal: Add to a plate with nuggets or hot dogs for a fun family dinner. My little ones gobble up Potato Finger Sticks this way.
Common Mistakes to Avoid
I’ve had my fair share of kitchen flops while perfecting Potato Finger Sticks, so let me save you some trouble. Trust me on this one, these are pitfalls I learned the hard way. Avoid these common slip-ups when making your batch of Potato Finger Sticks.
- Skipping the Soak: Don’t skip soaking the sticks in water—it’s crucial for crispiness. I ignored this once, and my Potato Finger Sticks were a soggy disaster.
- Overcrowding the Tray: Give them space on the baking sheet, or they’ll steam instead of crisp. Been there, done that!
- Uneven Cuts: Cut them as evenly as possible for uniform cooking. My first batch of Potato Finger Sticks was a mess of undercooked and overdone pieces.
- Low Temp Baking: Don’t lower the oven temp thinking it’ll cook gentler—they’ll just get mushy. I’ve ruined a tray this way, sadly.
Storing Tips
If by some miracle you’ve got leftovers of your Potato Finger Sticks, I’ve got you covered on keeping them fresh. In my experience, they don’t last long in my house, but when they do, here’s how I store them. These tips will help your Potato Finger Sticks stay tasty for a bit longer.
- Refrigerator: Store in an airtight container for up to 3 days. Reheat in the oven for best results.
- Freezer: Freeze cooked sticks for up to 2 months in a freezer bag. Pop them straight into the oven to reheat.
- Reheating: Avoid the microwave—it’ll make them soggy. I’ve found an oven or air fryer works best.
Frequently Asked Questions
I get a ton of questions about making Potato Finger Sticks, so I’ve rounded up the most common ones. Let’s tackle these head-on with answers straight from my kitchen experiments. Here’s everything you might be wondering about Potato Finger Sticks.
Can I make Potato Finger Sticks ahead of time?
You might also want to try easy french toast sticks recipe for breakfast.
Absolutely! You can cut and soak the potatoes a few hours ahead, then store them in cold water in the fridge. Just dry them well before baking.
Can I use an air fryer?
For another great variation, check out non creamy potato leek soup recipe.
Yep, I’ve done it tons of times! Cook at 400°F for about 15-20 minutes, shaking the basket halfway. They come out super crispy.
Do I have to peel the potatoes?
Nah, it’s totally up to you. I sometimes leave the skin on for extra texture and nutrients. It’s a personal choice!
Why are my Potato Finger Sticks soggy?
Probably ‘cause you skipped soaking or didn’t dry them well. Also, don’t overcrowd the tray. I’ve made this mistake before, and it’s a bummer.
Can I fry them instead of baking?
Sure thing, though I prefer baking for less mess. Fry in hot oil at 350°F for 3-4 minutes until golden.
What dips go best with them?
Oh, so many options! I love ketchup, ranch, or a spicy mayo. Get creative—whatever you’re into works.
Can I use other potato types?
Definitely. Yukon Golds work great for a creamier texture, though russets are my go-to for classic Potato Finger Sticks.
How do I get them extra crispy?
Soak longer, dry thoroughly, and don’t skimp on oil. Crank the oven to 425°F or higher for the last few minutes too!
Conclusion
Well, there you have it, folks—everything I know about making killer Potato Finger Sticks! I hope you’re as pumped as I am to whip up a batch of these crispy goodies. Whether it’s for a quick snack or a party platter, Potato Finger Sticks never let me down, and I’m betting they’ll win you over too. So, grab those spuds, crank up the oven, and let me know how it goes—I’d love to hear!