
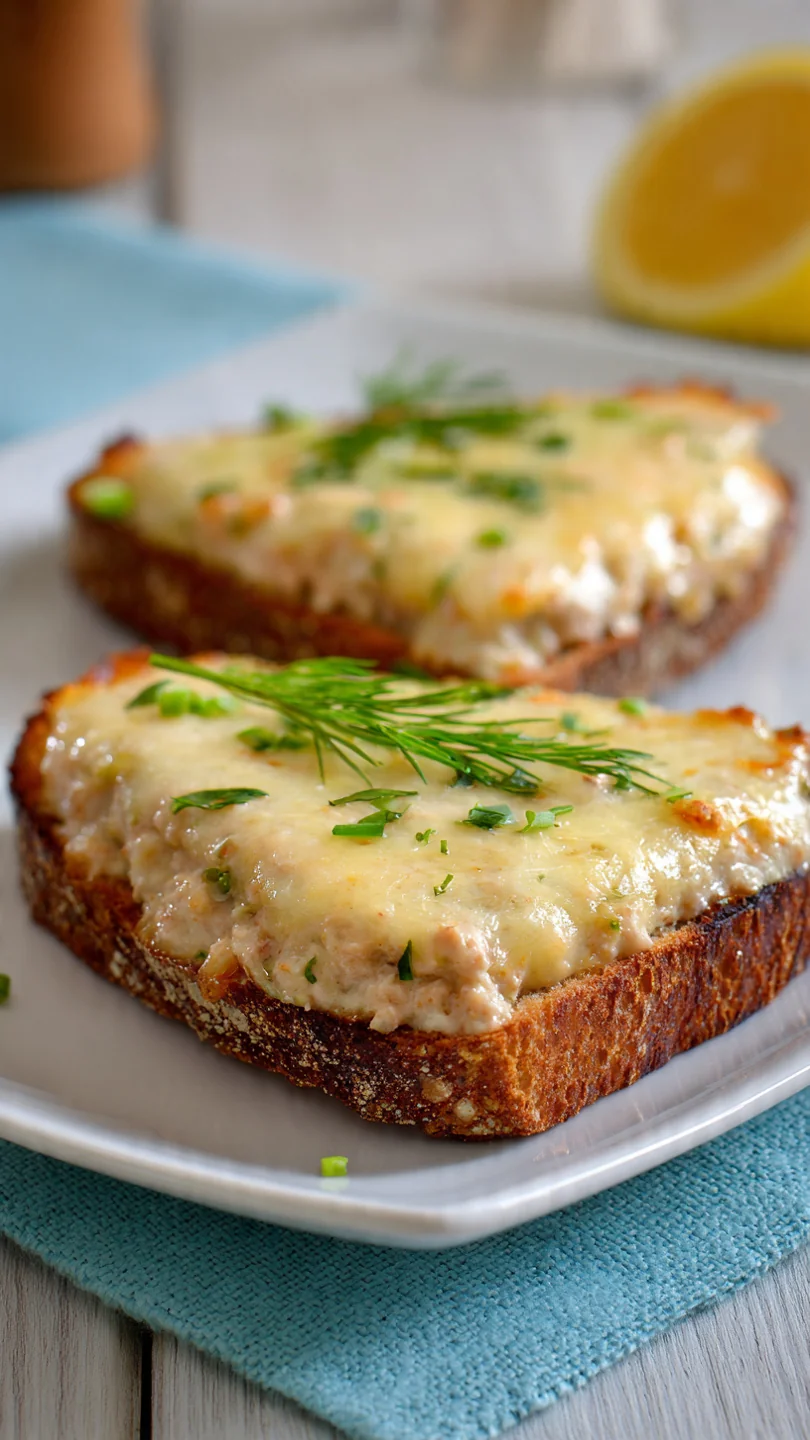
There’s something deeply comforting about the perfect tuna melt. It’s the nostalgic lunch counter classic, reimagined in your own kitchen. The goal is simple but specific: a shatteringly crisp, buttery exterior giving way to a warm, creamy, and tangy tuna salad, all bound together by perfectly melted, sharp cheese.
After testing this formula multiple times in my professional kitchen, I’ve landed on the ideal balance of ingredients and technique. This recipe cuts through the mediocre, soggy versions to deliver a sandwich that’s truly worthy of the title “best ever.” Let’s make a lunch that will have everyone asking for seconds.
This recipe transforms simple pantry staples into a spectacular meal. Here’s what makes it stand out:
- Perfect Texture Contrast: We achieve a shatteringly crisp, golden-brown crust thanks to a specific buttering and cooking technique, while the interior stays creamy and moist.
- Big Flavor, Fast: With a few smart additions like Dijon and fresh lemon, the tuna salad is anything but bland, coming together in under 10 minutes of prep.
- Kid-Friendly & Crowd-Pleasing: This is a universally loved classic. It’s an easy win for family lunches, casual dinners, or when you need to feed hungry guests without fuss.
- Highly Customizable: The base recipe is a canvas. I’ll show you how to easily adapt it for different cheeses, breads, and dietary needs, making it your new go-to formula.
- One-Pan Convenience: Everything comes together in a single skillet, meaning minimal cleanup and maximum efficiency on busy days.
- Diet-Flexible: With a few simple swaps, this can easily be made gluten-free, dairy-light, or with added veggies for extra nutrition.
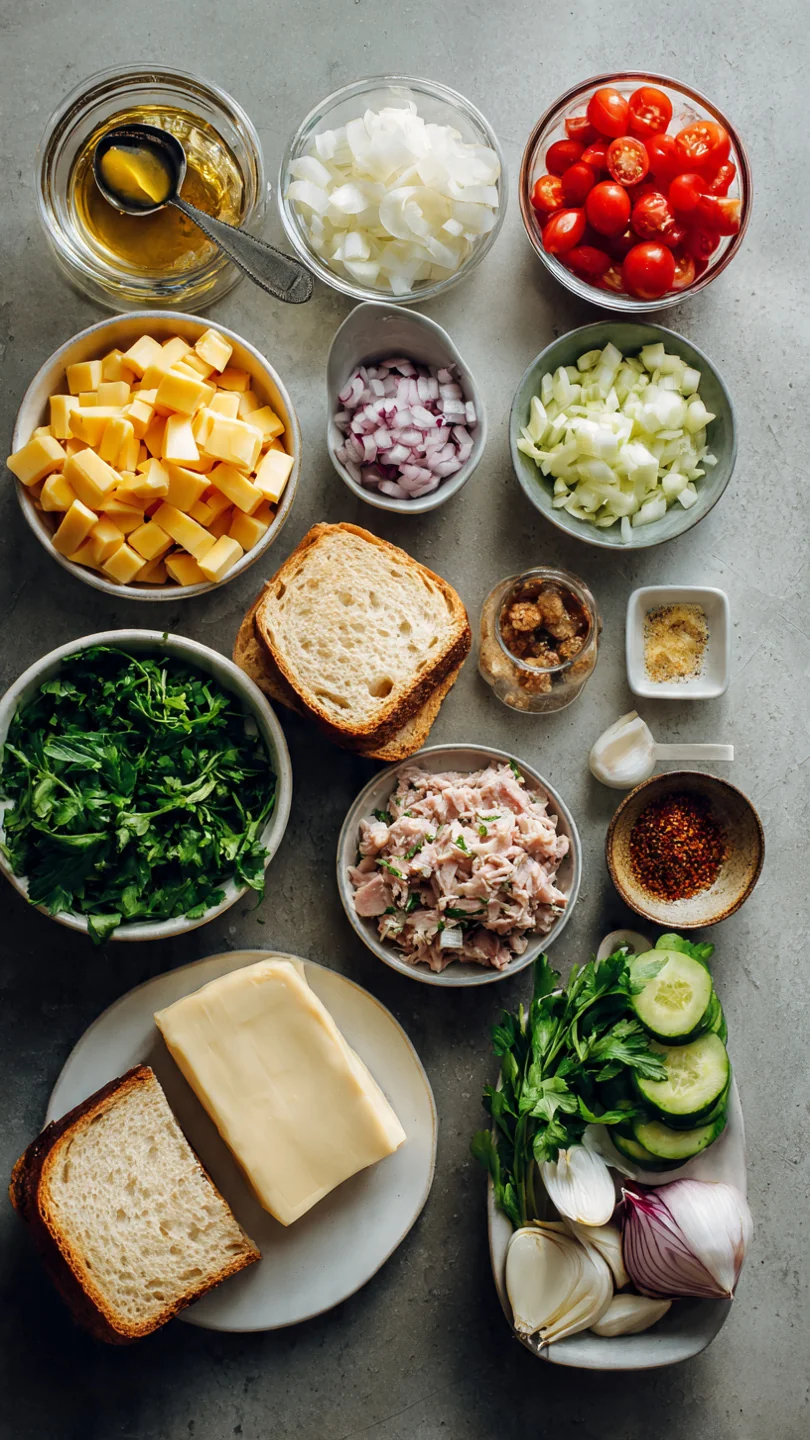
Ingredients You’ll Need
- Let’s gather our ingredients—this is where simple pantry staples create magic together. Quality matters here, but you don’t need anything fancy. For the tuna, I strongly recommend solid white albacore packed in water; it has a cleaner flavor and firmer texture that holds up better in the salad. For the mayonnaise, use a full-fat brand you like—it’s the primary binder and its quality directly impacts the creaminess. The Dijon mustard isn’t just for tang; its emulsifiers help keep the salad cohesive. Fresh celery and red onion provide the essential crunch and aromatic base. Don’t skip the fresh lemon juice—its acidity cuts through the richness and brightens the entire sandwich. For the bread, a sturdy sourdough or a good-quality country loaf is ideal; it needs to stand up to the filling and butter without getting soggy. Finally, a sharp cheddar is my top choice for its excellent melt and bold flavor that complements the tuna without disappearing. You can find all of this at any standard grocery store.
Note: You’ll find the complete list of ingredients, along with their exact measurements, in the printable recipe card at the bottom of this post.
Kitchen Equipment Needed
You don’t need any special gear. A large skillet or griddle (10-12 inches) is essential for cooking both sandwiches at once without crowding. A wide, thin spatula, like a fish spatula, is the best tool for getting under the sandwich and flipping it without disaster.
You’ll need a medium mixing bowl for the tuna salad and basic measuring spoons and cups. While not mandatory, a microplane for zesting the lemon adds a wonderful flavor boost, and a pastry brush can help evenly distribute the softened butter on the bread.
How to Make The Best Ever Tuna Melt Recipe
Step 1: Build the Flavor Foundation
In your mixing bowl, combine the well-drained tuna, mayonnaise, Dijon mustard, diced celery and onion, lemon juice, salt, and pepper. Here’s my pro tip: use a fork to gently flake and fold the ingredients together. You want a cohesive mixture where the tuna still has some texture, not a smooth, pasty spread.
This is the time to taste and adjust. Believe me, that extra pinch of salt or squeeze of lemon makes all the difference. Set this aside while you prepare the bread.
Step 2: Create the Crispy Canvas
Lay out your four slices of bread. Using softened (not melted) butter, generously coat one side of each slice. This buttered side will become the glorious, golden exterior.
The key is an even layer that goes all the way to the edges. Trust me, this step is non-negotiable for achieving that diner-style crispness. If the butter is too cold, it will tear the bread; too warm, and it will be greasy.
Aim for just spreadable.
Step 3: Assemble with Care
Place two slices of bread, buttered-side down, on your cutting board. Divide the tuna salad evenly between them, spreading it to the edges. If you’re using tomato—which adds a lovely juicy contrast—pat the slices dry with a paper towel first to prevent a soggy sandwich.
Now, pile on the cheese. I recommend grating it for even melting, but thin slices work too. Cap each sandwich with the remaining bread, buttered-side facing out.
You now have two ready-to-cook masterpieces.
Step 4: The Golden Brown Transformation
Heat your skillet or griddle over medium-low heat. Yes, medium-low. This is crucial.
We want the bread to turn a deep, even golden brown while the cheese has enough time to melt completely inside without burning the exterior. Carefully place the sandwiches in the pan. Cook undisturbed for 4-5 minutes.
Tip from me: listen for a gentle sizzle and peek at the edge to check the color. It should be a perfect toasted hazelnut brown.
Step 5: The Flip and Melt
Now, the moment of truth. Slide your wide spatula fully under one sandwich and confidently flip it. The first side should be beautifully crisp.
Cook the second side for 3-4 minutes. If the bread is browning too fast, simply reduce the heat. If the cheese isn’t melting, cover the pan for the last minute to trap the heat.
You’re looking for that same deep golden brown on side two and visible melted cheese oozing slightly from the edges.
Step 6: The Final Rest and Serve
Transfer your perfect tuna melts to a cutting board. This is important: let them rest for just 1-2 minutes. This allows the filling to set slightly, making a clean cut possible without everything squishing out.
Slice them in half diagonally—it just tastes better that way. Step back and admire your work, then serve immediately while they’re hot, crisp, and utterly irresistible.
A few insights from my years in professional kitchens will guarantee your success every time.
- The Draining Rule: Press the drained tuna in the can with the lid to remove every last drop of water. A wet tuna salad is the enemy of a crisp sandwich and will make the filling slide out.
- Temperature Control: Cooking over medium-low heat is the single most important technique here. It gives the cheese time to melt while the butter toasts the bread to a deep, even brown without burning.
- The Bread Factor: Slightly stale, day-old bread is actually ideal. It’s less moist and will crisp up more effectively than super-fresh bread, which can steam and become soggy.
- The No-Press Promise: Resist the urge to press down on the sandwich with your spatula while it cooks. You’ll only succeed in compressing the bread and squeezing the delicious filling out the sides.
- Cheese Choices: While sharp cheddar is classic, cheeses that melt well are key. Gruyère, Monterey Jack, or even a good American cheese are all fantastic alternatives. Avoid pre-shredded cheese if possible, as it contains anti-caking agents that can hinder melting.
Recipe Variations & Customizations
- This recipe is wonderfully adaptable. Here are some of my favorite tested variations.
- The Gourmet Deli: Add 2 tablespoons of chopped cornichons or dill pickles and 1 tablespoon of capers to the tuna salad for a briny, complex twist.
- Spicy Southwest: Mix 1/4 teaspoon of smoked paprika and a finely diced jalapeño (seeds removed) into the tuna salad. Use pepper jack cheese instead of cheddar.
- Mediterranean Twist: Replace the celery with chopped Kalamata olives and add 1 teaspoon of dried oregano. Use provolone or feta cheese (though feta won’t melt the same way).
- Apple & Walnut Crunch: Add 1/4 cup of finely diced crisp apple (like Honeycrisp) and 2 tablespoons of toasted, chopped walnuts to the salad for sweet and crunchy contrast.
- Lightened-Up Version: Use Greek yogurt in place of half the mayonnaise, and swap the butter for a light brushing of olive oil on the bread before toasting.
- Open-Faced & Broiled: Skip the top slice of bread, pile the tuna and cheese on buttered bread, and broil for 2-3 minutes until bubbly and spotted brown.
- Gluten-Free/Dairy-Free: Use your favorite gluten-free bread and a vegan cheese that melts well. For the tuna salad, ensure your mayo and mustard are compliant.
What to Serve With This Recipe
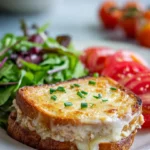
A perfect tuna melt deserves the right accompaniments. For a classic diner experience, serve it with kosher dill pickle spears and a handful of ridged potato chips—the salt and vinegar cut the richness beautifully. For a more rounded meal, a simple side salad with a sharp vinaigrette is ideal; try arugula with lemon and Parmesan.
In the summer, chilled tomato soup is the ultimate companion for dipping. For beverages, an iced tea, a crisp lager or pilsner, or a dry hard cider all pair wonderfully. This sandwich is perfect for weeknight dinners, weekend lunches, or whenever you need a quick, satisfying, and comforting meal.
Storage & Make-Ahead Instructions
- Tuna melts are truly best served immediately. However, you can prepare components ahead of time.
- Tuna Salad Storage: The prepared tuna salad can be stored in an airtight container in the refrigerator for up to 2 days. The flavors actually improve as they meld.
- Assembled & Uncooked: You can assemble the sandwiches (without cooking) up to 2 hours in advance. Wrap them tightly in plastic wrap and refrigerate. Let them sit at room temperature for 10 minutes before cooking to ensure even heating.
- Leftover Cooked Sandwiches: If you have leftovers, let them cool completely, then wrap individually in foil. Refrigerate for up to 2 days.
- Reheating: To revive leftovers, reheat in a toaster oven or regular oven at 350°F for 10-12 minutes until warm and re-crisped. Avoid the microwave, as it will make the bread soggy.
- Freezing: I do not recommend freezing assembled or cooked tuna melts, as the texture of the bread and filling will suffer significantly.
Frequently Asked Questions
Q: Can I use tuna packed in oil?
A: You can, but drain it very well and be aware it will have a stronger, more distinct flavor. I prefer water-packed for a cleaner taste that lets the other ingredients shine.
Q: My bread is browning before the cheese melts. What did I do wrong?
A: Your heat is too high. Next time, start with medium-low heat. To salvage this batch, simply reduce the heat to low and cover the pan with a lid for a minute to trap steam and melt the cheese.
Q: Can I make this in an air fryer or panini press?
A: Absolutely. For an air fryer, cook at 370°F for 6-8 minutes, flipping halfway. A panini press will give you great grill marks—just butter the outside of the bread and press until golden.
Q: What’s the best way to get a really crispy exterior?
A: The combination of softened butter (not melted or cold) spread to the edges, using sturdy bread, and the patience to cook over medium-low heat is the holy trinity of crispiness.
Q: Can I add other ingredients to the tuna salad, like hard-boiled egg or relish?
A: Of course! A finely chopped hard-boiled egg adds richness. Sweet pickle relish is a classic addition—if you use it, reduce the amount of mayonnaise slightly as relish adds moisture.
Q: Is it safe to reheat a tuna melt?
A: Yes, if it was refrigerated promptly after cooling. Reheat in an oven or toaster oven to restore crispness. Consume within 2 days.
Q: Can I make this recipe gluten-free?
A: Yes, easily. Use your favorite gluten-free bread. Ensure your mayonnaise and mustard are certified gluten-free, as some brands may contain trace gluten.
Final Thoughts
This recipe proves that a humble tuna melt can be a culinary triumph. It’s all about respecting the ingredients and mastering a few simple techniques: the gentle fold of the salad, the generous buttering, and the patient, medium-low heat toast. The result is a sandwich with undeniable textural pleasure and layered flavor that far surpasses the sum of its parts.
It’s the kind of reliable, satisfying recipe that earns a permanent spot in your weekly rotation. I’ve tested this method rigorously to ensure your success, so you can cook with confidence. Give it a try this week, and I’m certain it will become your new gold standard for the perfect tuna melt.
I’d love to hear how it turns out for you—share your creations and any fun variations you try. Now, go make a fantastic lunch
The Best Ever Tuna Melt
Equipment
- Large skillet or griddle (10-12 inch)
- Wide spatula (fish spatula works great)
- Medium mixing bowl
- Measuring spoons and cups
Ingredients
- 2 cans solid white albacore tuna in water 5 oz cans, well-drained
- 3 tbsp mayonnaise full-fat recommended for best texture
- 1 tbsp Dijon mustard or whole grain mustard
- 1/4 cup finely diced celery about 1 rib
- 2 tbsp finely diced red onion or 1 tbsp minced shallot
- 1 tbsp fresh lemon juice plus zest for extra brightness
- 1/4 tsp kosher salt plus more to taste
- 1/4 tsp freshly ground black pepper
- 2 tbsp unsalted butter softened, for spreading
- 4 slices good quality sourdough or country bread about 1/2-inch thick
- 4 oz sharp cheddar cheese thinly sliced or grated
- 4 slices ripe tomato optional, patted dry
Instructions
- Make the tuna salad. In a medium bowl, combine the drained tuna, mayonnaise, Dijon mustard, diced celery, red onion, lemon juice, salt, and pepper. Use a fork to flake and mix everything together until well combined but not pasty. Taste and adjust seasoning with more salt, pepper, or lemon juice. Set aside.
- Butter the bread. Lay out your four slices of bread. Using softened butter, generously spread it on one side of each slice. This buttered side will go face-down in the pan, creating that essential golden, crispy crust. Trust me, don’t skimp here—it’s the key to texture.
- Assemble the sandwiches. Place two slices of bread, buttered-side down, on your work surface. Divide the tuna salad evenly between them, spreading it to the edges. If using, add two slices of tomato per sandwich (pat them dry first to prevent sogginess). Top each with a generous layer of sharp cheddar cheese. Cap with the remaining bread slices, buttered-side facing out.
- Cook to golden perfection. Heat a large skillet or griddle over medium-low heat. Carefully place the assembled sandwiches in the pan. Cook for 4-5 minutes, until the bottom is deeply golden brown and crisp. Tip from me: Resist the urge to press down with a spatula—you’ll squeeze out the filling. Just let it be.
- Flip and finish cooking. Using a wide spatula, carefully flip each sandwich. Continue cooking for another 3-4 minutes, until the second side is golden brown and the cheese is fully melted. If the bread is browning too quickly before the cheese melts, reduce the heat slightly and cover the pan for a minute to trap heat.
- Rest and serve. Transfer the cooked tuna melts to a cutting board and let them rest for 1-2 minutes. This allows the filling to set slightly, making them easier to cut. Slice in half diagonally and serve immediately with pickle spears, potato chips, or a simple side salad.