
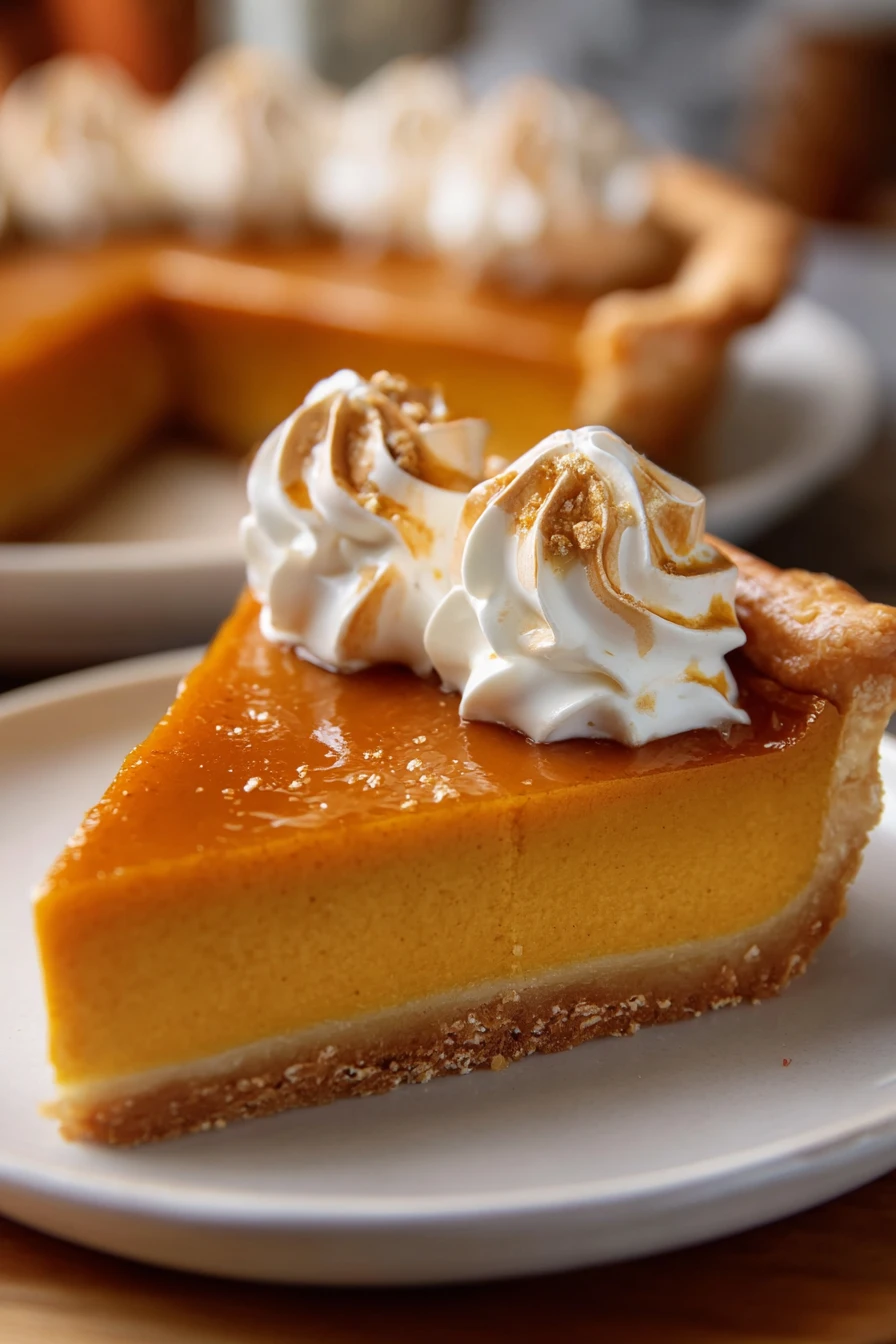
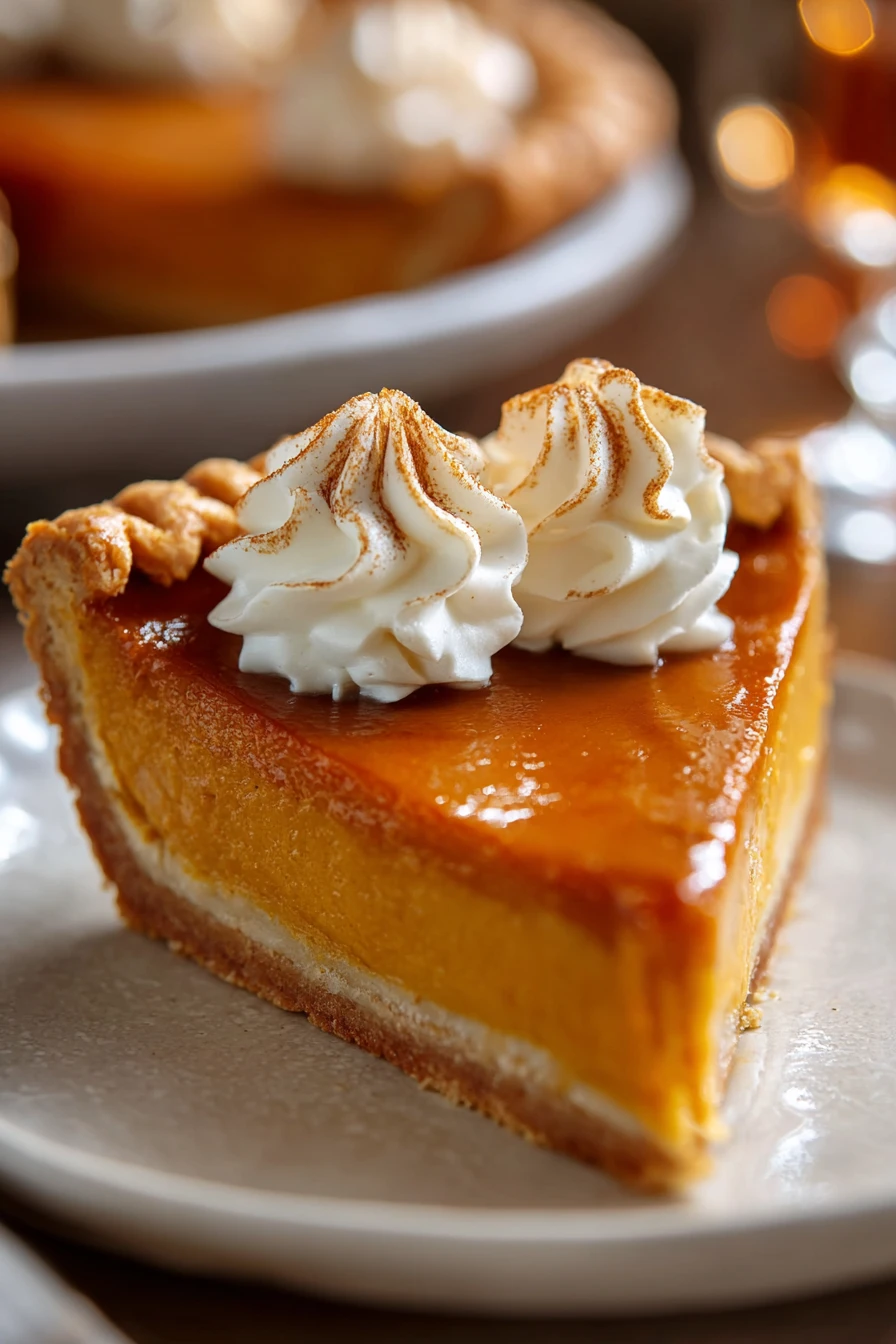
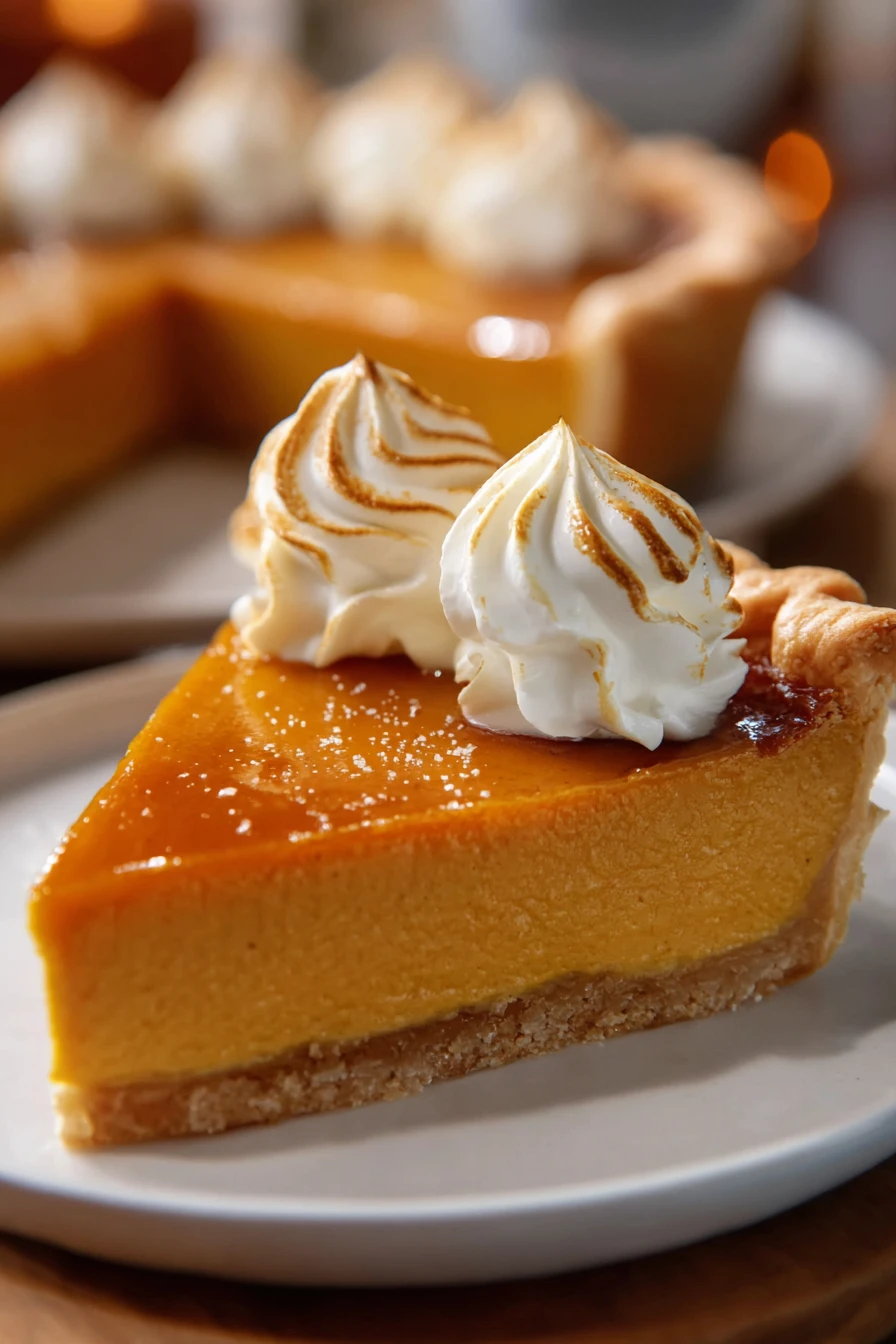
Hey there, fellow food lovers! I’ve gotta share something that’s become a spooky season staple in my house: The Ultimate Halloween Pumpkin Pie. I discovered this gem of a recipe a few years back while scrambling to whip up something festive for a last-minute Halloween party, and let me tell you, it was a hit!
My family loves how it captures all the cozy, autumn vibes with a little extra flair that makes it perfect for the holiday.
Seriously, crafting The Ultimate Halloween Pumpkin Pie has turned into a yearly tradition for us. I still remember the first time I made it, nervously watching my kids’ faces as they took their first bites. Their eyes lit up, and I knew I’d stumbled onto something special.
Now, I’m thrilled to pass this recipe on to you! If you’re looking for a dessert that screams Halloween while still being easy enough for a busy home cook, The Ultimate Halloween Pumpkin Pie is your answer. Stick with me, and I’ll walk you through every step.
Why You’ll Love This Recipe
I’ve found that The Ultimate Halloween Pumpkin Pie isn’t just another dessert; it’s a showstopper that brings people together. In my kitchen, this pie has been the centerpiece of many a Halloween gathering, with its rich, spiced filling and that perfect flaky crust. It’s got this nostalgic charm that reminds everyone of fall, plus a little extra magic with some fun decorating tricks I’ll share.
And honestly, who doesn’t love a recipe that’s forgiving? Even if you’re not a baking pro, The Ultimate Halloween Pumpkin Pie comes out amazing with just a bit of patience. I’ve tweaked it over the years to make sure it’s foolproof, so you’ll feel like a rockstar pulling it out of the oven.
Ingredients List
Let’s dive into what you’ll need for The Ultimate Halloween Pumpkin Pie. I’m all about keeping things simple, but I do have my preferences for certain ingredients to make sure this pie packs a punch. I usually buy organic pumpkin puree for that extra depth of flavor, but hey, use what you’ve got!
Here’s the full rundown for both the crust and filling of The Ultimate Halloween Pumpkin Pie. I’ve made this so many times, I’ve got the measurements down to a science.
For the Crust
- 1 1/2 cups (190g) all-purpose flour, sifted for lightness
- 1/2 teaspoon (3g) salt, to balance the sweetness
- 1/2 cup (115g) unsalted butter, cold and cubed for flakiness
- 4-6 tablespoons (60-90ml) ice water, just enough to bring it together
For the Filling
- 1 can (15oz/425g) pumpkin puree, pure for the best texture
- 3 large eggs, at room temperature for smoothness
- 1 cup (200g) brown sugar, packed for that caramel-y note
- 1 teaspoon (5g) ground cinnamon, for warm spice
- 1/2 teaspoon (2.5g) ground nutmeg, for depth
- 1/4 teaspoon (1g) ground cloves, just a hint for complexity
- 1 cup (240ml) heavy cream, for richness
- 1 teaspoon (5ml) vanilla extract, to tie it all together
I’ve gotta say, using fresh spices makes a world of difference in The Ultimate Halloween Pumpkin Pie. If your nutmeg’s been sitting in the cupboard for ages, maybe grab a new jar. Trust me, it’s worth it.
Variations
One of the things I adore about The Ultimate Halloween Pumpkin Pie is how easy it is to play around with. Over the years, I’ve tried a bunch of twists depending on my mood or what’s in the pantry. Here are some variations that have worked wonders in my kitchen for The Ultimate Halloween Pumpkin Pie.
- Chocolate Swirl: Melt 1/2 cup dark chocolate and swirl it into the filling before baking for a decadent touch. I tried this once and my husband couldn’t stop raving!
- Maple Madness: Swap half the brown sugar for maple syrup to get that deep, autumnal sweetness. My kids always ask for this one.
- Nutty Crunch: Sprinkle 1/2 cup chopped pecans on top before baking for a bit of texture. It’s a game-changer.
- Ginger Kick: Add 1/2 teaspoon ground ginger to the spice mix for a little zing. I love how it perks things up.
- Coconut Cream: Replace heavy cream with coconut milk for a tropical twist. I did this for a friend with dairy issues, and it was still so creamy.
- Spooky Topping: Cut out pie dough shapes like ghosts or bats to decorate the top before baking. It’s a fun way to make The Ultimate Halloween Pumpkin Pie extra festive.
- Bourbon Boost: Stir in 1 tablespoon of bourbon for a grown-up flavor. (Only if the kiddos aren’t sneaking slices!)
Honestly, experimenting with The Ultimate Halloween Pumpkin Pie is half the fun. What twist will you try? I’m always tinkering, so let me know if you’ve got a cool idea!
Servings and Timing
Let’s talk about how much time you’ll need to whip up The Ultimate Halloween Pumpkin Pie. In my experience, it’s pretty straightforward, though I always pad a little extra time for chilling the dough. Here’s the breakdown for making The Ultimate Halloween Pumpkin Pie:
- Prep Time: 30 minutes
- Cook Time: 55 minutes
- Total Time: About 1 hour 25 minutes (plus cooling)
- Servings: 8-10 slices
I usually make this in the morning so it has time to cool before our Halloween bash. It’s plenty for a small crowd, and trust me, there won’t be leftovers!
Step-by-Step Instructions
Alright, let’s get to the nitty-gritty of baking The Ultimate Halloween Pumpkin Pie. I’ve broken this down into easy steps based on how I do it in my own kitchen. Follow along, and you’ll have a pie that’ll wow everyone.
Step 1: Make the Crust
Start by mixing your flour and salt in a big bowl. Cut in that cold butter until it’s like coarse crumbs—don’t overwork it, or you’ll lose that flaky magic. Add ice water bit by bit until the dough just holds together, then wrap it up and chill it for at least an hour. I’ve learned that patience here pays off big time for The Ultimate Halloween Pumpkin Pie.
Step 2: Roll and Shape
Once chilled, roll out the dough on a floured surface to fit a 9-inch pie dish. I like to roll from the center out to keep it even. Transfer it to the dish, trim the edges, and crimp ‘em with a fork or your fingers for that classic look. Pop it back in the fridge while you prep the filling for The Ultimate Halloween Pumpkin Pie.
Step 3: Whip Up the Filling
In a bowl, whisk together the pumpkin puree, eggs, brown sugar, spices, cream, and vanilla. I always give it a taste to adjust the spices—sometimes I sneak in a pinch more cinnamon. It should be smooth as silk when you’re done. This is the heart of The Ultimate Halloween Pumpkin Pie, so don’t rush it!
Step 4: Assemble and Bake
Pour the filling into your chilled crust. Bake at 375°F (190°C) for about 50-55 minutes, until the center is just set but still a tiny bit wobbly. I always cover the edges with foil halfway through to avoid a burnt crust. This step’s key for nailing The Ultimate Halloween Pumpkin Pie.
Step 5: Cool and Decorate
Let the pie cool completely on a wire rack for at least 2 hours. If you’re feeling festive, whip up some cream or add spooky cutouts like I mentioned earlier. I’ve botched the cooling before and cut in too soon—don’t do it! Patience makes The Ultimate Halloween Pumpkin Pie perfect.
Nutritional Information
I’m not gonna lie, The Ultimate Halloween Pumpkin Pie isn’t exactly diet food, but it’s worth every bite for a special occasion. I’ve crunched the numbers per slice (assuming 8 servings), and here’s what you’re looking at. It’s a treat, so enjoy The Ultimate Halloween Pumpkin Pie without guilt!
- Calories: 380 per slice
- Fat: 22g
- Protein: 5g
- Carbohydrates: 42g
- Sodium: 200mg
Healthier Alternatives
If you’re trying to lighten up The Ultimate Halloween Pumpkin Pie, I’ve got some swaps that I’ve tested myself. I’m all for indulgence, but sometimes I tweak things when I’m watching my waistline. Here are a few ways to make The Ultimate Halloween Pumpkin Pie a bit kinder to your health goals without losing that wow factor.
- Lower Sugar: Cut the brown sugar to 3/4 cup and add a touch of stevia or monk fruit sweetener. I’ve done this, and it still tastes great.
- Dairy-Free: Swap heavy cream for coconut cream. I’ve made this for friends, and they couldn’t tell the difference!
- Whole Wheat Crust: Use whole wheat flour instead of all-purpose for extra fiber. It’s a bit denser, but I kinda like the nutty vibe in The Ultimate Halloween Pumpkin Pie.
Serving Suggestions
I’ve got some go-to ways to serve The Ultimate Halloween Pumpkin Pie that’ll make your guests swoon. These are straight from my own table, tried and true. Whether it’s a party or just a cozy night in, here’s how I love to dish up The Ultimate Halloween Pumpkin Pie.
- Classic Touch: Add a dollop of whipped cream with a sprinkle of cinnamon on top. It’s simple but so good!
- Halloween Flair: Serve with candy corn or gummy worms on the side for a creepy-cute vibe. My kids go nuts for this.
- Warm and Cozy: Heat a slice slightly and pair with vanilla ice cream for a melty contrast. I’m obsessed with this combo for The Ultimate Halloween Pumpkin Pie.
- Party Platter: Cut into mini wedges and display with other fall desserts for a buffet. I did this at my last gathering, and it was a hit!
Common Mistakes to Avoid
I’ve made plenty of oopsies while perfecting The Ultimate Halloween Pumpkin Pie, so let me save you the headache. Trust me on this one, I’ve learned the hard way! Here are the pitfalls to dodge when baking The Ultimate Halloween Pumpkin Pie.
- Skipping the Chill: Don’t rush the dough chilling step, or your crust will shrink. I’ve had sad, uneven pies because of this.
- Overbaking: Pull it out when the center still jiggles a tad; it sets as it cools. I’ve overdone it before, and it got rubbery.
- Wrong Pumpkin: Don’t use pumpkin pie filling instead of puree—it’s already spiced and sweetened. Been there, messed that up!
- Skipping Foil: Protect those crust edges midway through baking, or they’ll burn. I’ve ruined a gorgeous The Ultimate Halloween Pumpkin Pie by forgetting this.
Storing Tips
I’ve found that The Ultimate Halloween Pumpkin Pie keeps pretty well if you store it right. In my experience, it’s best to plan ahead so it stays fresh. Here’s how I handle leftovers for The Ultimate Halloween Pumpkin Pie.
- Refrigerator: Store in an airtight container or covered with plastic wrap for 3-4 days.
- Freezer: Freeze individual slices wrapped in plastic and foil for up to 2 months. I’ve thawed these for a quick treat, and they’re still tasty!
Frequently Asked Questions
I’ve gotten a bunch of questions over the years about The Ultimate Halloween Pumpkin Pie. Here are the most common ones I hear, answered straight from my kitchen. Let’s clear up any doubts about making The Ultimate Halloween Pumpkin Pie!
Can I make this ahead of time?
Absolutely! I often bake The Ultimate Halloween Pumpkin Pie a day or two before Halloween. Just store it in the fridge, and it’ll be good to go. Bring it to room temp before serving for the best flavor.
Can I use fresh pumpkin instead of canned?
You bet! I’ve roasted my own pumpkin before, pureed it, and used about 1 3/4 cups. It’s a bit more work, but the taste is amazing.
What if my crust gets soggy?
Been there! Blind bake the crust for 10 minutes at 375°F before adding the filling. It’s a little trick I picked up.
Can I make it gluten-free?
Yup, swap the flour for a 1:1 gluten-free blend. I’ve done this for a friend, and it held up fine.
How do I know when it’s done?
Look for a slight jiggle in the center. If a toothpick comes out mostly clean, you’re golden. That’s my go-to test.
Can I skip the heavy cream?
Sure, try evaporated milk or coconut milk instead. I’ve subbed both with good results.
What’s the best way to decorate it?
I love using pie dough cutouts like bats or pumpkins on top. Whipped cream swirls work too for a quick spooky vibe!
Why did my pie crack?
That usually happens from overbaking or cooling too fast. I’ve had cracks before—cover ‘em with whipped cream, and no one’s the wiser!
Conclusion
Well, there you have it, folks—everything you need to bake The Ultimate Halloween Pumpkin Pie and steal the show this spooky season. I’m so excited for you to give it a try and make it your own. If you’ve got stories or tweaks, drop ‘em in the comments; I’d love to hear!
Here’s to creating sweet memories with The Ultimate Halloween Pumpkin Pie. Happy baking!
Conclusion
I hope you enjoyed this recipe for The Ultimate Halloween Pumpkin Pie! It’s truly one of my favorites, and I’m confident you’ll love it too. Remember to follow the steps carefully for the best results.
Don’t hesitate to experiment with your own variations and make this recipe your own. Happy cooking!