

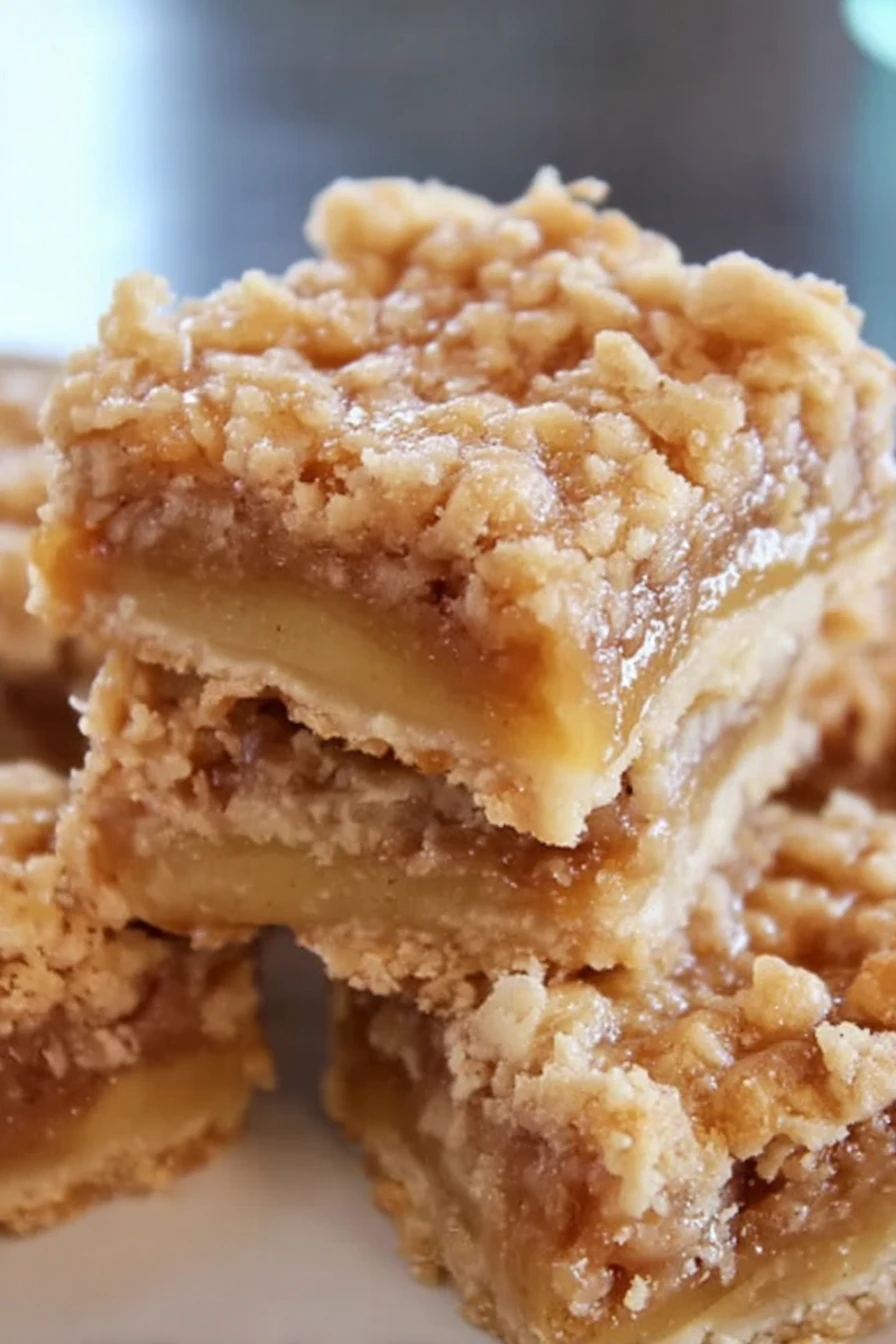
Hey there, friends! I’ve got a real treat for you today with a recipe that’s been a game-changer in my kitchen: Apple Crisp Bars. Honestly, I stumbled upon the idea for these Apple Crisp Bars one fall afternoon when I had a surplus of apples after a family orchard trip, and I just couldn’t bear to let them go to waste.
My family loves anything apple-related, so I figured, why not whip up something sweet and cozy that captures the essence of autumn in every bite?
I remember that first batch of Apple Crisp Bars like it was yesterday. I was a bit nervous about getting the crumbly topping just right, but oh man, when they came out of the oven, the smell was pure heaven. Now, these bars are a staple at our house, and I’m thrilled to share my go-to recipe with you all!
Why You’ll Love This Recipe
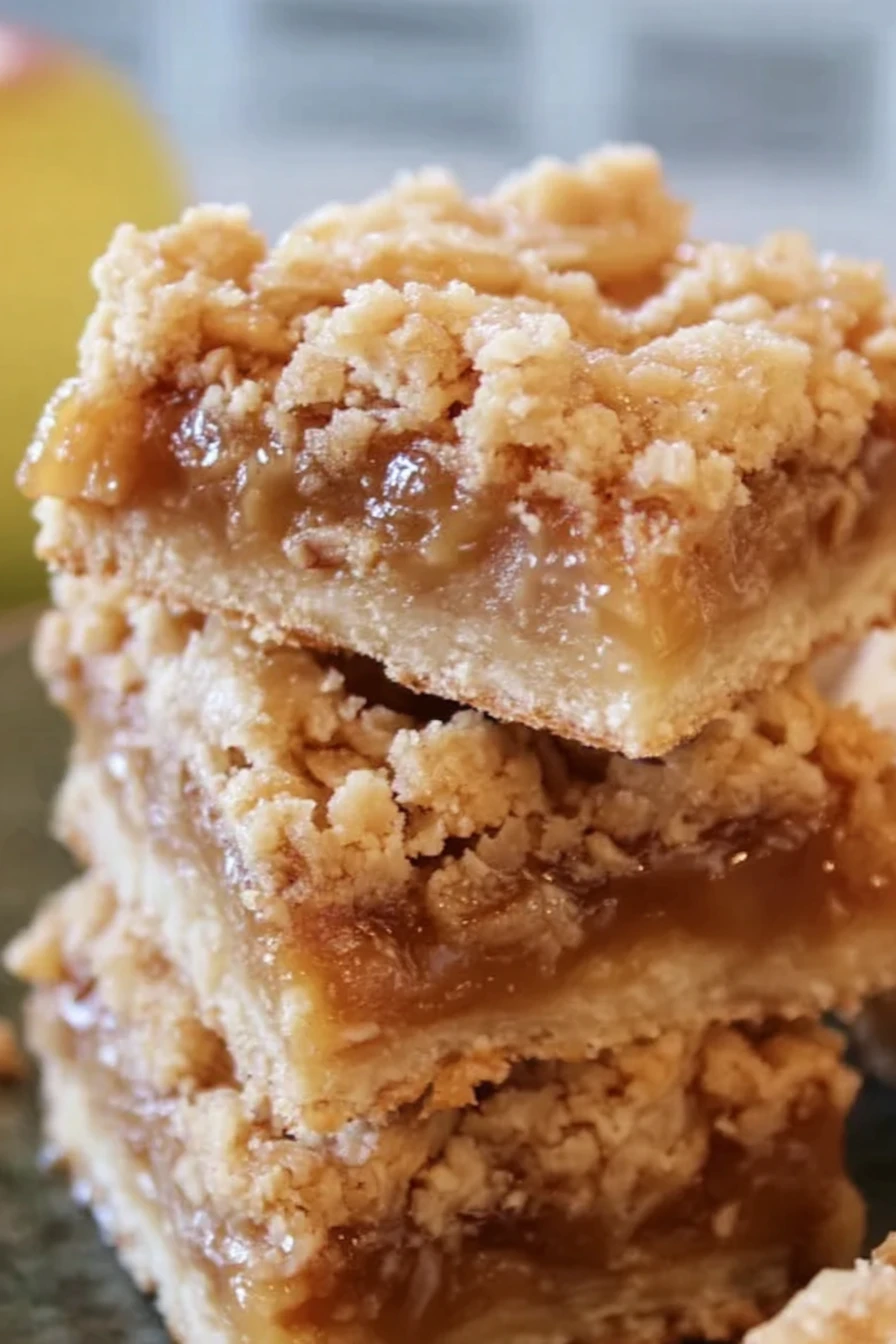
I’ve found that Apple Crisp Bars are the perfect mix of nostalgia and convenience. They’ve got all the flavors of a classic apple crisp—think cinnamon-spiced apples and a buttery, oat-y topping—but in a handheld form that’s way easier to share (or hoard, no judgment). In my kitchen, these bars disappear faster than I can bake them, especially during holiday gatherings or lazy weekend brunches.
What really sets these Apple Crisp Bars apart is how simple they are to make. You don’t need to be a baking pro to nail this recipe, and I’m speaking from experience as someone who’s had plenty of baking flops. Trust me, if I can do it, so can you!
Ingredients List
Alright, let’s talk about what you’ll need to make these scrumptious Apple Crisp Bars. I’ve tweaked this list over time to get the balance just right, and I’m pretty picky about my ingredients. I usually buy fresh, local apples when I can, because they make a world of difference in flavor.
Here’s everything you’ll need, split into the base, filling, and topping. I’ve included exact measurements because, in my experience, precision matters with baking.
For the Base
- 1 cup (125g) all-purpose flour, for structure
- 1/2 cup (100g) granulated sugar, to sweeten things up
- 1/2 cup (115g) unsalted butter, cold and cubed for that flaky texture
- 1/4 teaspoon salt, to balance the sweetness
For the Apple Filling
- 4 medium apples (about 600g), peeled and diced—I prefer Granny Smith for their tartness
- 1/3 cup (65g) brown sugar, for a caramel-like depth
- 1 tablespoon (15ml) lemon juice, to keep the apples fresh
- 1 teaspoon ground cinnamon, because apples and cinnamon are soulmates
- 1 tablespoon (8g) cornstarch, to thicken the juices
For the Crisp Topping
- 3/4 cup (90g) all-purpose flour, for the base of the crumble
- 1/2 cup (45g) rolled oats, for that classic crisp texture
- 1/3 cup (65g) brown sugar, for sweetness
- 1/2 teaspoon ground cinnamon, for warmth
- 1/2 cup (115g) unsalted butter, cold and cubed, to make it nice and crumbly
These ingredients come together to create Apple Crisp Bars that are downright irresistible. If you’re feeling fancy, you can swap in your favorite apple variety—Honeycrisp works great too!
Variations
One thing I love about Apple Crisp Bars is how versatile they are. I’ve played around with this recipe more times than I can count, and I’m always surprised at how a little tweak here or there can totally change the vibe. Here are some variations I’ve tried (and loved) over the years to keep things fresh.
- Nutty Crunch: Toss in 1/2 cup of chopped pecans or walnuts into the crisp topping for extra texture. I tried this once for a potluck, and folks couldn’t stop raving about the added crunch.
- Caramel Drizzle: After baking, drizzle some store-bought or homemade caramel sauce over your Apple Crisp Bars. It’s a game-changer, trust me!
- Spiced Up: Add a pinch of nutmeg or allspice to the apple filling for a deeper, holiday-esque flavor. My kids always ask for this version around Christmas.
- Mixed Fruit: Swap out half the apples for pears or even cranberries for a tart twist. I did this last Thanksgiving, and it was a hit.
- Gluten-Free: Use a 1:1 gluten-free flour blend instead of regular flour. I’ve made this for a friend with dietary restrictions, and you’d never know the difference.
- Vegan Vibes: Replace the butter with a plant-based alternative like coconut oil. It works like a charm, in my experience.
- Extra Sweet: Sprinkle a handful of white chocolate chips over the apple layer before adding the topping. My sweet-toothed husband begs for this every time I make Apple Crisp Bars.
These little tweaks let you customize your Apple Crisp Bars to fit any mood or occasion. Don’t be afraid to experiment—I sure have!
Servings and Timing
Let’s break down the nitty-gritty of how long it’ll take to whip up these Apple Crisp Bars and how many folks you can feed. In my experience, timing can vary a bit based on your oven and how fast you chop those apples, but here’s what I’ve found works best.
- Prep Time: 20 minutes
- Cook Time: 40 minutes
- Total Time: About 1 hour
- Servings: 12-16 bars, depending on how generous you’re feeling
I usually cut these Apple Crisp Bars into 16 smaller pieces if I’m serving a crowd, but if it’s just my family, we go for bigger slabs. You do you!
Step-by-Step Instructions
Alright, let’s get down to business and make some killer Apple Crisp Bars. I’m gonna walk you through this like I’m right there in your kitchen, sharing all my little tricks to make it a breeze. I’ve made these dozens of times, so I’ve got the process down pat.
Step 1: Preheat and Prep
First things first, crank your oven to 350°F (175°C) and line an 8×8-inch baking pan with parchment paper. I’ve skipped the parchment before, and let me tell ya, getting those Apple Crisp Bars out was a nightmare. So, save yourself the hassle and line that pan.
Step 2: Make the Base
In a medium bowl, mix the flour, sugar, and salt for the base. Cut in the cold butter with a pastry cutter or your fingers until it looks like coarse crumbs—I’m a fingers gal myself, it’s therapeutic! Press this mixture into the bottom of your pan and bake for 15 minutes until it’s just starting to turn golden.
Step 3: Prepare the Apple Filling
While the base bakes, toss your diced apples with brown sugar, lemon juice, cinnamon, and cornstarch. I like to taste-test an apple piece here to make sure the spice level is on point for my Apple Crisp Bars. Spread this mixture over the pre-baked base once it’s out of the oven.
Step 4: Whip Up the Crisp Topping
For the topping, combine flour, oats, brown sugar, and cinnamon in a bowl. Cut in the cold butter until you’ve got pea-sized crumbs—don’t overwork it, or you’ll lose that crisp magic in your Apple Crisp Bars. Sprinkle this evenly over the apple layer.
Step 5: Bake to Perfection
Pop the whole thing back in the oven for about 25-30 minutes, or until the top is golden and the apples are bubbly. I always peek through the oven door because I’m impatient, but try to resist cutting into your Apple Crisp Bars until they’ve cooled a bit. It’s torture, I know!
Step 6: Cool and Slice
Let the pan cool on a wire rack for at least 30 minutes before slicing into bars. This waiting game is the hardest part for me, but it ensures your Apple Crisp Bars hold together. Dig in and enjoy!
Nutritional Information
I’m not gonna lie, Apple Crisp Bars aren’t exactly health food, but they’re worth every calorie in my book. I’ve run the numbers for you so you’ve got a clear idea of what you’re indulging in. Here’s the breakdown per serving, based on cutting into 12 pieces.
- Calories: 280 per bar
- Fat: 14g
- Protein: 2g
- Carbohydrates: 38g
- Sodium: 100mg
These Apple Crisp Bars are a treat, so I don’t stress too much about the stats. Life’s too short, right?
Healthier Alternatives
If you’re looking to lighten up your Apple Crisp Bars a bit, I’ve got some swaps I’ve tried that don’t skimp on flavor. When I’m watching my sugar or fat intake, these tweaks keep me satisfied without the guilt. Here are a few ideas to play with.
- Less Sugar: Cut the granulated sugar in the base by half and use a natural sweetener like honey in the filling. It’s still plenty sweet, I promise.
- Lower Fat: Replace half the butter in the base and topping with unsweetened applesauce. I’ve done this for my Apple Crisp Bars, and they’re still delish.
- Whole Grain: Swap all-purpose flour for whole wheat flour to add some fiber. It gives the bars a heartier texture that I kinda love.
- Reduced Topping: Use less of the crisp topping mixture to cut down on calories. My Apple Crisp Bars still taste amazing with a thinner layer.
Serving Suggestions
I’ve got some fun ideas for serving up your Apple Crisp Bars that’ll make them even more irresistible. I love playing around with how I present these, depending on the occasion. Here are a few of my go-to pairings.
- For Dessert: Top your Apple Crisp Bars with a scoop of vanilla ice cream while they’re still warm. It’s pure bliss.
- With Coffee: Pair a bar with your morning brew for a cozy breakfast treat. I do this way too often!
- Party Style: Dust with powdered sugar for a pretty touch at gatherings. My friends always ooh and ahh over my Apple Crisp Bars this way.
- Kid-Friendly: Serve with a drizzle of honey for a sticky, sweet snack. My little ones gobble up Apple Crisp Bars like this.
Common Mistakes to Avoid
I’ve made my fair share of boo-boos while perfecting Apple Crisp Bars, so let me save you some grief with a few pitfalls to dodge. Trust me on this one, I’ve learned the hard way. Here’s what to watch out for.
- Overbaking the Base: Don’t let the base get too dark before adding the filling, or it’ll be tough. I’ve ruined a batch of Apple Crisp Bars this way.
- Skipping the Cool: Cutting into them too soon makes a crumbly mess. Been there, done that with my Apple Crisp Bars!
- Too Much Liquid: Don’t skip the cornstarch in the filling, or you’ll have soggy bars. I forgot once, and it was a disaster.
- Uneven Topping: Spread the crumble evenly, or some Apple Crisp Bars will be topping-less. I’ve made this rookie mistake before.
Storing Tips
Let’s talk about keeping your Apple Crisp Bars fresh, because you’ll want to savor every last bite. I’ve found these store pretty well if you do it right. Here’s how I keep mine.
- Room Temperature: Store in an airtight container for up to 2 days.
- Refrigerator: Keep Apple Crisp Bars in the fridge for 5-7 days if you want them to last longer.
- Freezer: Freeze individual Apple Crisp Bars for up to 2 months—just thaw before eating.
Frequently Asked Questions
I get a bunch of questions about making Apple Crisp Bars, so I’ve rounded up the most common ones. Here’s the scoop, straight from my kitchen to yours.
Can I use different apples for Apple Crisp Bars?
Absolutely! I usually go for Granny Smith because of their tartness, but Honeycrisp or Fuji work great too. Just pick something firm so your bars don’t get mushy.
Can I make these ahead of time?
Yep, you can bake Apple Crisp Bars a day or two ahead. Store them in the fridge, and they’ll still taste amazing. I’ve done this for parties with zero complaints.
Do I need to peel the apples?
I always peel mine for a smoother texture, but it’s up to you. If you’re in a rush, skip it—the skins won’t ruin your bars.
Can I double the recipe?
For sure! Use a 9×13 pan and double all ingredients. It works like a charm for feeding a crowd.
How do I know when they’re done?
Look for a golden topping and bubbly apple filling. That’s the sweet spot, in my opinion.
Can I make them gluten-free?
Yes, swap in a gluten-free flour blend. I’ve tried it, and it’s just as tasty.
What if my topping isn’t crispy?
If it’s not crisp, your butter might’ve been too warm. Chill it next time before mixing.
Can kids help make these?
Totally! My kiddos love mixing the topping and layering the apples. It’s a fun family project.
Conclusion
Well, there you have it, my tried-and-true recipe for Apple Crisp Bars that’ll warm your heart and your belly. I hope you’ll give these a shot and make some sweet memories in your kitchen, just like I have with my family. If you’ve got questions or wanna share how your Apple Crisp Bars turned out, drop me a note—I’d love to hear about it!
Conclusion
I hope you enjoyed this recipe for Apple Crisp Bars! It’s truly one of my favorites, and I’m confident you’ll love it too. Remember to follow the steps carefully for the best results. Don’t hesitate to experiment with your own variations and make this recipe your own.
Happy cooking!
Does the recipe call for old-fashioned oats or quick cooking oats?
I made these bars and after 30 minutes my cubed apples were nowhere near ready. They were still very crunchy. I had to bake it at least 15 minutes later. I used the 8×8 pan and followed instructions. Not sure if anyone else had this problem.