
There’s something undeniably magical about the sizzle of dough hitting hot oil, especially when that dough is laced with tart apples and the gentle tang of sourdough. These aren’t your average apple fritters. By incorporating sourdough discard, we’re adding a layer of complex flavor and achieving an incredibly light, airy interior that contrasts perfectly with the craggy, crisp exterior.
This recipe transforms a simple treat into a bakery-worthy masterpiece, and it’s the perfect, satisfying project for a cozy fall morning.
This recipe stands out for several practical and delicious reasons that make it worth the effort.
- Tangy & Complex Flavor: The sourdough discard adds a subtle, pleasant tang that cuts through the sweetness, making these fritters far more interesting than standard versions.
- Incredible Texture: The combination of baking powder, soda, and active sourdough creates an exceptionally light and fluffy crumb inside a shatteringly crisp shell.
- Zero Waste Baking: This is a brilliant, delicious way to use your sourdough starter discard instead of throwing it away.
- Customizable: Easily adapt the spice level, apple variety, or topping to suit your taste.
- Deeply Satisfying: The process of frying these at home fills your kitchen with an irresistible aroma and yields a treat that’s profoundly rewarding to eat.
Ingredients You’ll Need
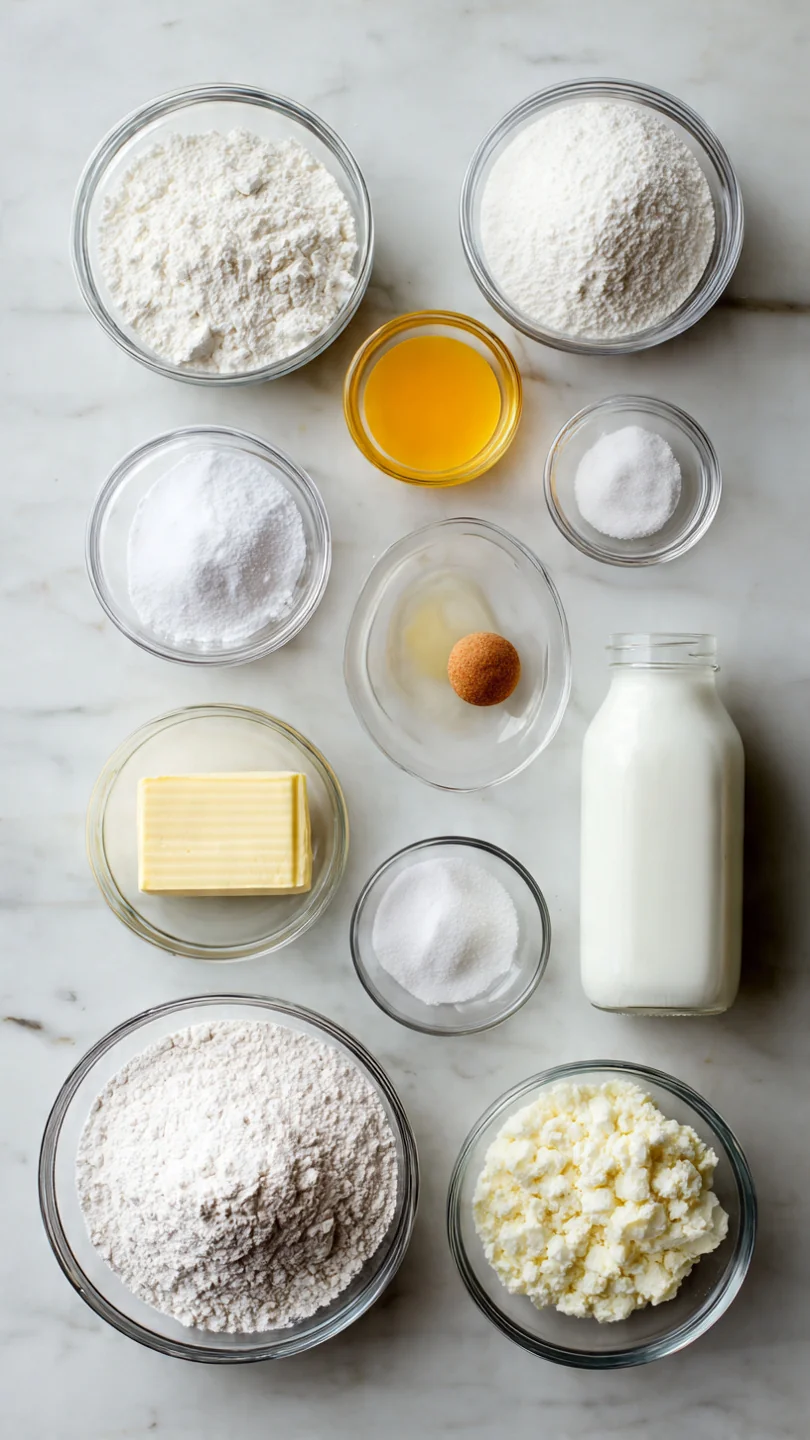
- Let’s gather our ingredients. This recipe uses simple components, but each plays a specific role in creating the perfect fritter. The sourdough discard isn’t just for novelty—its acidity tenderizes the gluten and reacts with the baking soda for extra lift.
For the Fritter Dough:
- Sourdough starter discard: Use it straight from the fridge. Its consistency adds liquid and flavor.
- Egg: Provides structure and richness.
- Granulated sugar: Sweetens the dough and promotes browning.
- Unsalted butter: Adds flavor and tenderness.
- Vanilla extract: A classic flavor enhancer.
- All-purpose flour: The foundation. I don’t recommend whole wheat here, as it can make the fritters dense.
- Baking powder & baking soda: Our primary leavening agents for that essential puff.
- Ground cinnamon: The warm spice that pairs perfectly with apple.
- Fine sea salt: Balances all the sweetness.
- Apples: I prefer a mix for complexity—Granny Smith for tartness and structure, Honeycrisp for sweetness. Peel them for the best texture.
For Frying & Glaze:
- Neutral oil: Choose one with a high smoke point like vegetable, canola, or peanut oil.
- Powdered sugar, milk/cream, vanilla, salt: For a simple, shiny glaze that sets beautifully.
Note: You’ll find the complete list of ingredients, along with their exact measurements, in the printable recipe card at the bottom of this post.
Kitchen Equipment Needed
You don’t need specialized restaurant gear, but a few key tools will make the process smoother and safer. A heavy-bottomed pot (like a Dutch oven) maintains a steady temperature, which is crucial for even frying. A deep-fry or candy thermometer is non-negotiable for success—guessing the oil temperature leads to greasy or burnt fritters.
A spider strainer or slotted spoon is ideal for safely lowering and retrieving the fritters. Finally, a wire cooling rack set over a baking sheet is better than paper towels alone, as it prevents the bottoms from getting soggy.
How to Make Sourdough Apple Fritters Recipe
Step 1: Mix the Dough & Let it Rest
In a large bowl, you’ll combine the wet ingredients: the sourdough discard, egg, sugar, melted butter, and vanilla. Whisk these until they’re smooth and homogenous. In a separate bowl, whisk together all the dry ingredients—this ensures the baking powder and soda are evenly distributed.
Gently fold the dry mix into the wet ingredients. Believe me, it’s crucial to stop mixing when just combined; overmixing develops gluten and leads to tough fritters. Finally, fold in the apples.
The dough will look shaggy and very sticky. Cover it and let it rest for 10 minutes. This short rest allows the flour to fully hydrate and the chemical leaveners to begin activating, which is key for a light texture.
Step 2: Heat the Oil & Shape the Dritters
While the dough rests, pour your oil into your heavy pot. You want it about 1.5 inches deep. Attach your thermometer and heat over medium to 365°F (185°C).
This is the ideal frying temperature. Line a baking sheet with a wire rack. Now, flour your hands and a clean surface generously.
Tip from me: Wetting your hands slightly can also help. Turn the rested dough out and pat it—don’t roll it—into a rough rectangle about 3/4-inch thick. The uneven surface is what creates those wonderful nooks and crannies.
Step 3: Cut and Prepare for Frying
Using a bench scraper or a sharp knife, cut the dough into roughly 12 pieces. They don’t need to be perfect squares; irregular shapes are part of the charm. Carefully lift each piece, gently shaping it into a loose ball or patty in your hands, and place it on a floured tray.
Trust me, a light touch here preserves the air bubbles we’ve created. Have all your fritters shaped before you start frying so you can work quickly and consistently.
Step 4: Fry to Golden Perfection
Once your oil is steady at 365°F, it’s showtime. Carefully lower 3-4 fritters into the oil using your spider strainer. Do not crowd the pot, or the temperature will plummet and you’ll get greasy results.
They will sink initially, then float. Fry for 2-3 minutes, then gently flip them. They should be a deep, golden brown.
The total fry time is usually 4-6 minutes. If they’re browning too fast, your oil is too hot; too slow, and it’s too cool. Transfer the finished fritters to the wire rack and let the oil come back to temperature before adding the next batch.
Step 5: Glaze and Serve
While the fritters drain and cool slightly, make the glaze. Simply whisk the powdered sugar, milk or cream, vanilla, and a pinch of salt until smooth. It should be thick but pourable.
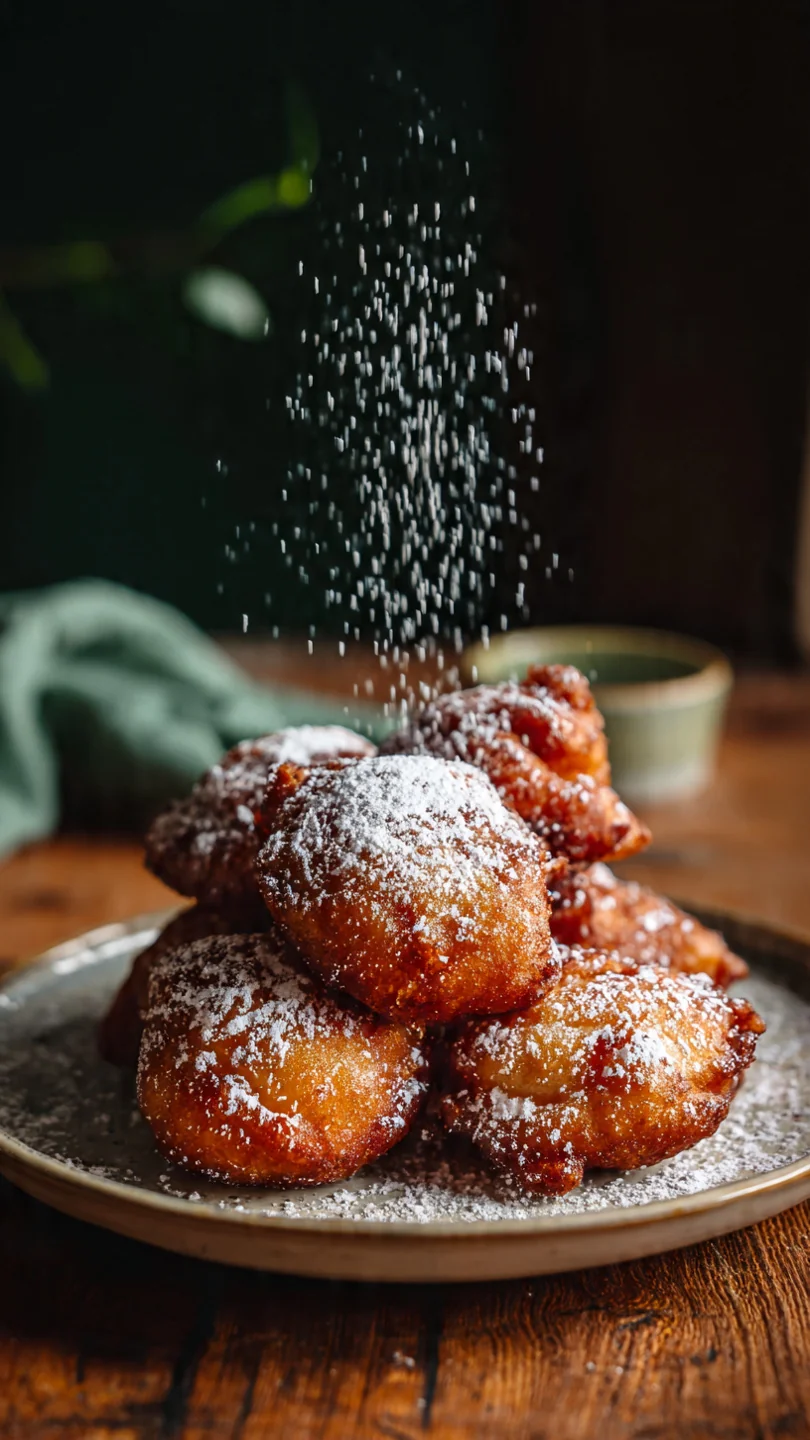
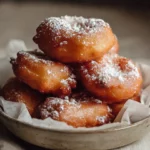
Now for the best part: dip the warm (not scalding hot) top of each fritter into the glaze, let the excess drip off, and return it to the rack. The residual heat will help the glaze set into a beautiful, crackly shell. Step back and admire your work, then serve them warm.
The contrast of the crisp glaze, tender interior, and soft apple is pure bliss.
A few chef-level insights will guarantee your fritters are perfect every time.
- Oil Temperature is King: This is the most critical factor. Use a thermometer. At 365°F, the exterior sets quickly, sealing the interior so it steams and cooks without absorbing excess oil. If the oil is too cool, the fritters become greasy; too hot, and they burn outside while staying raw inside.
- Handle the Dough with Care: This is a sticky, wet dough by design. Embrace it. Use floured or wet hands and a light touch when shaping. Over-handling will deflate the tiny air bubbles created by the leaveners and sourdough, resulting in dense fritters.
- The Right Apple: Choose firm apples that hold their shape when cooked. Granny Smith is my top pick for its tartness and texture. For a sweeter fritter, use Honeycrisp or Fuji. Always peel them—the skin can separate during frying and create unpleasant strands.
- Drain on a Rack, Not Towels: Placing fried goods directly on paper towels traps steam and makes the bottom soggy. A wire rack allows air to circulate, keeping the entire fritter crisp.
- Test a Mini Fritter: If you’re unsure about your oil temperature or dough consistency, fry a tiny teaspoon-sized piece first. It will give you a preview of cooking time, color, and flavor.
Recipe Variations & Customizations
- This recipe is a wonderful canvas for your creativity. Here are some tested variations that work beautifully.
- Cinnamon Sugar Coating: For a simpler, less sweet option, skip the glaze. While the fritters are still hot from the oil, toss them gently in a bowl of cinnamon sugar (mix 1/2 cup sugar with 1 tbsp cinnamon).
- Spiced Apple Cider Glaze: Replace the milk in the glaze with reduced apple cider for a concentrated fall flavor. Simmer 1/2 cup cider until it reduces to about 2 tablespoons, let it cool, then use it in the glaze.
- Add Nuts or Dried Fruit: Fold in 1/3 cup of finely chopped toasted pecans or walnuts, or 1/4 cup of plumped raisins or dried cranberries along with the apples.
- Pumpkin Spice Twist: Replace the ground cinnamon with 1 1/2 teaspoons of pumpkin pie spice for a full autumnal flavor profile.
- Gluten-Free Adaptation: Substitute the all-purpose flour with a 1:1 gluten-free baking blend that contains xanthan gum. The texture will be slightly more delicate but still delicious.
- Dairy-Free Version: Use a neutral oil (like avocado) in place of the butter, and use water or a non-dairy milk in the glaze.
What to Serve With This Recipe
These fritters are a star all on their own, but they can be the centerpiece of a fantastic spread. For a decadent weekend brunch, serve them alongside crispy bacon or breakfast sausages to balance the sweetness. A pot of strong, hot coffee or a glass of cold milk is the classic beverage pairing.
For a dessert presentation, warm the fritters slightly and serve with a scoop of vanilla bean ice cream and a drizzle of salted caramel sauce. They’re perfect for Halloween morning, Thanksgiving weekend, or any crisp autumn day where you want your kitchen to smell amazing.
Storage & Make-Ahead Instructions
- Let’s be honest: fritters are truly at their peak within an hour of frying. However, you can still enjoy them later with the right techniques.
- Short-Term Storage: Once completely cooled, store glazed fritters in a single layer in an airtight container at room temperature for up to 1 day. Place parchment paper between layers if stacking is necessary.
- Reheating for Best Texture: To recrisp, place fritters on a wire rack set over a baking sheet and warm in a 350°F oven for 5-8 minutes. Do not use the microwave, as it will make them soft and chewy.
- Freezing (Unglazed): You can freeze the unglazed, cooled fritters. Place them in a single layer on a parchment-lined sheet to freeze solid, then transfer to a freezer bag for up to 2 months. Reheat from frozen in a 350°F oven until hot and crisp, then glaze.
- Make-Ahead Dough: The dough can be mixed, shaped, and placed on a floured baking sheet, then covered and refrigerated for up to 2 hours before frying. Let them sit at room temperature for 10 minutes before frying.
Frequently Asked Questions
Q: Can I use active, bubbly sourdough starter instead of discard?
A: Absolutely. Active starter will work just fine and may provide a slightly more pronounced tang. The recipe does not rely on the starter for natural leavening (we use baking powder/soda), so either state is acceptable.
Q: My dough is impossibly sticky. Did I do something wrong?
A: No, you’re right on track! This is a high-hydration, sticky dough by design, which is what contributes to the open, airy interior. Use well-floured or slightly wet hands and a bench scraper to handle it.
Don’t be tempted to add more flour, or the fritters will become dense.
Q: How do I dispose of the used frying oil safely?
A: Let the oil cool completely in the pot. Once cool, strain it through a fine-mesh sieve lined with a coffee filter into its original container or a sealable jar, and dispose of it in your household trash. Never pour hot or warm oil down the drain.
Q: Can I bake these instead of frying them?
A: While frying is essential for the classic crispy texture, you can bake them at 375°F on a parchment-lined sheet for 18-22 minutes, flipping halfway. They will be more like muffin-top shaped baked goods—still tasty, but not a true fritter.
Q: Why did my fritters absorb so much oil and taste greasy?
A: This is almost always due to oil temperature being too low. The dough needs that instant sear at 365°F to form a crust. If the oil isn’t hot enough, the dough sits in it and soaks it up.
Always use a thermometer and allow the temperature to recover between batches.
Q: What’s the best way to dice the apples?
A: Peel the apples, then cut them into small, 1/4-inch cubes. This ensures they cook through and become tender inside the fritter during the brief frying time. Larger chunks may remain too firm.
Q: Can I make the dough the night before?
A: I don’t recommend it. The baking powder and soda will lose their potency overnight, resulting in flat, dense fritters. For best results, mix and fry on the same day.
Final Thoughts
These Sourdough Apple Fritters represent the beautiful intersection of traditional technique and creative ingredient use. They take a humble treat and elevate it with the complex flavor and fantastic texture that sourdough provides. Yes, frying requires a bit of attention, but the reward—a pile of warm, glazed, impossibly light fritters that you made yourself—is worth every second.
This recipe is a celebration of fall, a solution for your discard, and a guaranteed way to make your kitchen the happiest place in the house. I hope you give them a try and discover just how magical homemade fritters can be. Don’t forget to share your results and tag me—I love seeing your creations!
The Best Sourdough Apple Fritters
Equipment
- Heavy-bottomed pot or Dutch oven (3-4 quart)
- Deep-fry/candy thermometer (ESSENTIAL)
- Spider strainer or slotted spoon
- Wire cooling rack
- Large mixing bowls
- Bench scraper or sharp knife
Ingredients
- 1 cup sourdough starter discard Unfed, straight from the fridge is fine. It adds tang and lift.
- 1 large egg room temperature
- 1/4 cup granulated sugar
- 2 tbsp unsalted butter melted and slightly cooled
- 1 tsp vanilla extract
- 1 cup all-purpose flour plus more for dusting
- 1 tsp baking powder
- 1/2 tsp baking soda
- 1 tsp ground cinnamon
- 1/4 tsp fine sea salt
- 1 1/2 cups finely diced apples about 2 medium apples, peeled (I prefer Granny Smith or Honeycrisp)
- 4 cups neutral oil for frying (like vegetable, canola, or peanut oil)
- 1 cup powdered sugar
- 2-3 tbsp whole milk or heavy cream
- 1/2 tsp vanilla extract
- 1 pinch salt
Instructions
- In a large mixing bowl, whisk together the sourdough discard, egg, granulated sugar, melted butter, and vanilla extract until smooth. In a separate bowl, whisk the flour, baking powder, baking soda, cinnamon, and salt. Gently fold the dry ingredients into the wet ingredients until just combined—a few streaks of flour are okay. Fold in the diced apples. The dough will be thick, sticky, and shaggy. Cover the bowl and let it rest for 10 minutes; this allows the flour to hydrate and the baking agents to start working.
- While the dough rests, pour oil into a heavy-bottomed pot or Dutch oven to a depth of about 1.5 inches. Attach a deep-fry or candy thermometer and heat over medium heat to 365°F (185°C). Line a baking sheet with a wire rack or paper towels. Lightly flour your hands and a work surface. Turn the rested dough out and pat it into a rough rectangle, about 3/4-inch thick. Don’t overwork it.
- Using a bench scraper or sharp knife, cut the dough into approximately 12 rough squares or rectangles. Don’t worry about perfect shapes—rustic is good! Carefully lift each piece, gently shaping it into a loose ball or patty, and place it on a floured tray. Trust me, the irregular edges create wonderful crispy bits.
- Once the oil is at 365°F, carefully add 3-4 fritters, ensuring not to crowd the pot. Fry for 2-3 minutes per side, using a spider strainer or slotted spoon to flip them, until they are a deep, golden brown. The internal temperature should reach about 200°F. Transfer to the wire rack to drain and cool slightly. Tip from me: Let the oil return to temperature between batches for even cooking.
- For the glaze, whisk the powdered sugar, 2 tablespoons of milk or cream, vanilla, and salt until smooth. It should be thick but pourable; add more liquid a teaspoon at a time if needed. While the fritters are still warm (not piping hot), dip the top of each one into the glaze, let the excess drip off, and return to the rack. The glaze will set as they cool. Serve warm.